Blog

  • Wedding Arrangements: A Ceremony-to-Reception Plan

    Wedding Arrangements: A Ceremony-to-Reception Plan

    Wedding arrangements need to work in the room where you say your vows and, sometimes, in a second room where you celebrate afterward. Those are two different design jobs. A floral arch that frames an outdoor ceremony may be too large for a reception entrance. A pair of aisle arrangements may look complete at the altar, yet feel undersized on a wide stage. The useful question is not simply, “Can we reuse these flowers?” It is, “What arrangement plan fits the space change, and will each piece still look intentional if it moves?”

    Start with the transition your venue actually requires. If you are holding both moments in one room, the flowers may need to remain in place while guests move around them. If the spaces are separate, selected designs might travel while the ceremony area stays undisturbed. If you are changing venues, the schedule, access, and travel time become part of the design decision. This comparison helps you choose a plan before you select individual pieces with your florist.
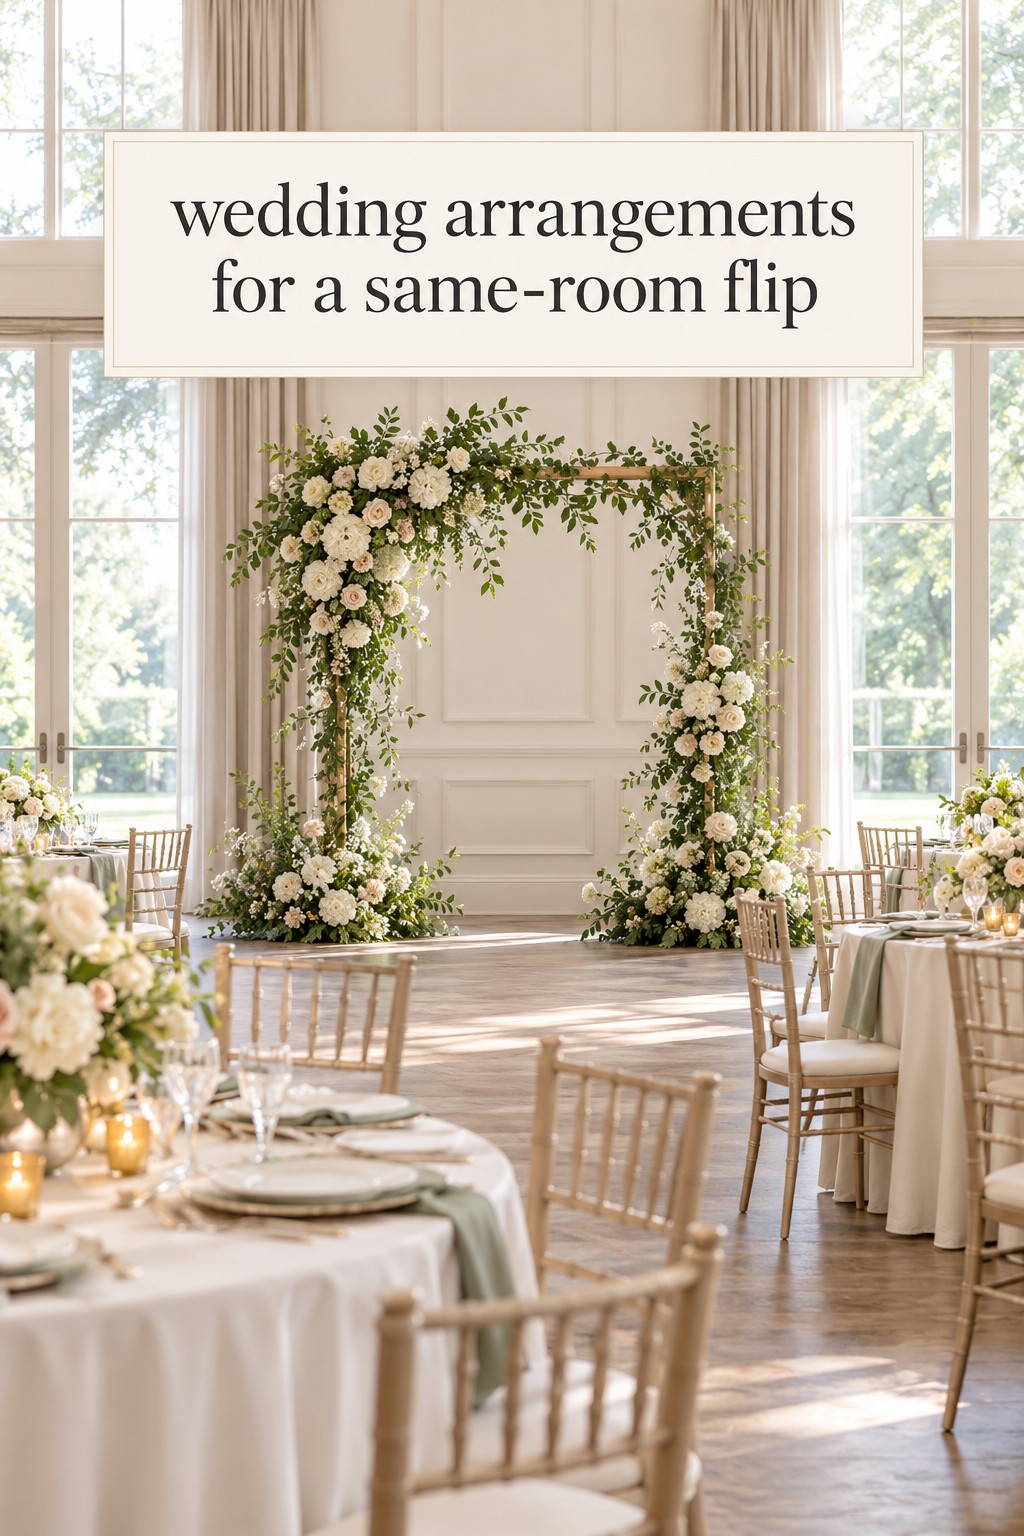
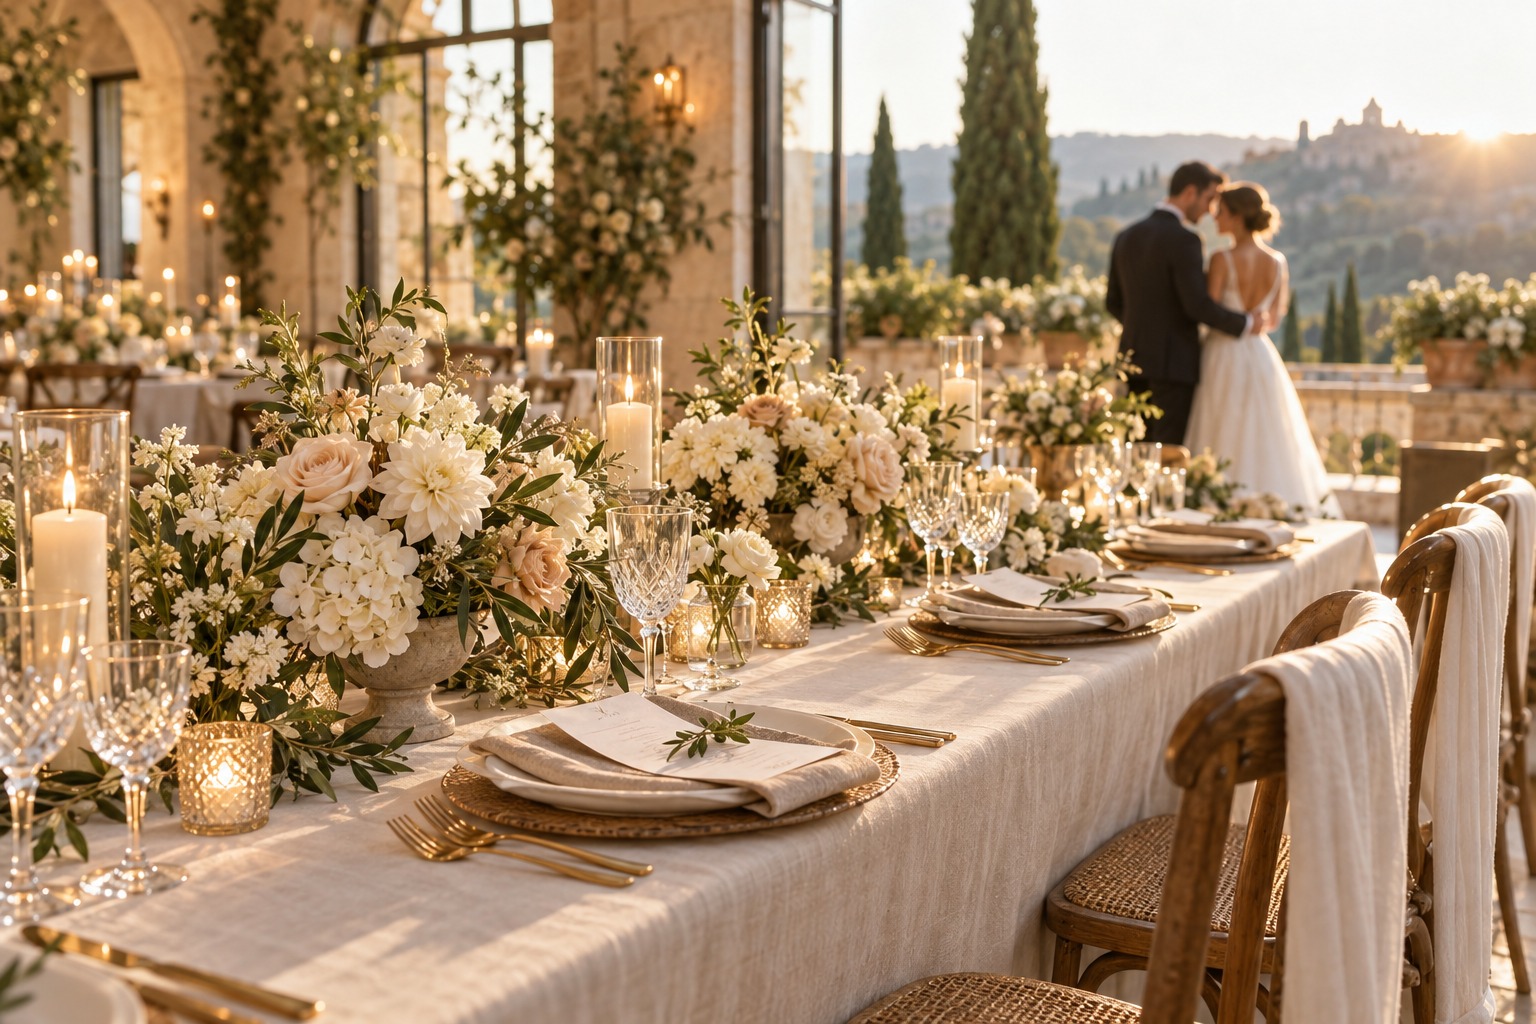
    wedding arrangements framing a ceremony and reception in one room
    A ceremony focal point can remain as the reception backdrop when the room plan allows.

    Keep the Wedding Command Center or your planning notes focused on a few useful decisions: the first setting, the second setting if there is one, the person responsible for each move, and the backup plan. That is enough to carry the design intent into a florist conversation without turning the floral brief into a general wedding checklist.

    Choose a transition model before choosing wedding arrangements

    Before you talk about flower varieties, describe how people and spaces will change between the ceremony and reception. Ask the venue which areas remain open, when the reception room can be accessed, whether guests will be nearby during setup, and who is permitted to move structures. The answers reveal whether your arrangements should stay put, move as complete units, or be designed as separate pieces from the start.

    Think in three patterns. A same-room flip means the ceremony and reception use the same room, so tables or other features change while guests are elsewhere. Separate rooms at one venue means guests travel between ceremony and reception locations within one property. Different venues means the floral plan must account for travel between addresses. Your venue may combine patterns, such as a ceremony on a lawn, cocktails on a terrace, and dinner in a ballroom. In that case, map each change separately.

    This first decision is about constraints, not about limiting the look. It protects the floral design from depending on a room that is still occupied, a structure that cannot fit through a doorway, or a move that has no agreed labor behind it. It also prevents you from paying for duplicate statement pieces when one well-sized design can serve both moments, if the plan truly supports that use.

    Draw a simple venue sequence with the ceremony location, guest route, cocktail area, reception entrance, and dinner room. Add the time each area becomes available and the time guests arrive. You do not need a polished floor plan to start the conversation. A rough diagram helps the florist and venue coordinator spot pinch points and propose arrangements that fit the actual route.

    One distinction matters: moving flowers is not automatically a saving. A design may require extra labor, a second vessel, a change in mechanics, or a separate reception piece to keep the room looking complete while flowers are being relocated. A Mississippi State University Extension guide discusses why floral reuse should be evaluated during consultation rather than treated as an automatic benefit. Ask for the labor and materials to be included in the proposal, then compare the complete plans.
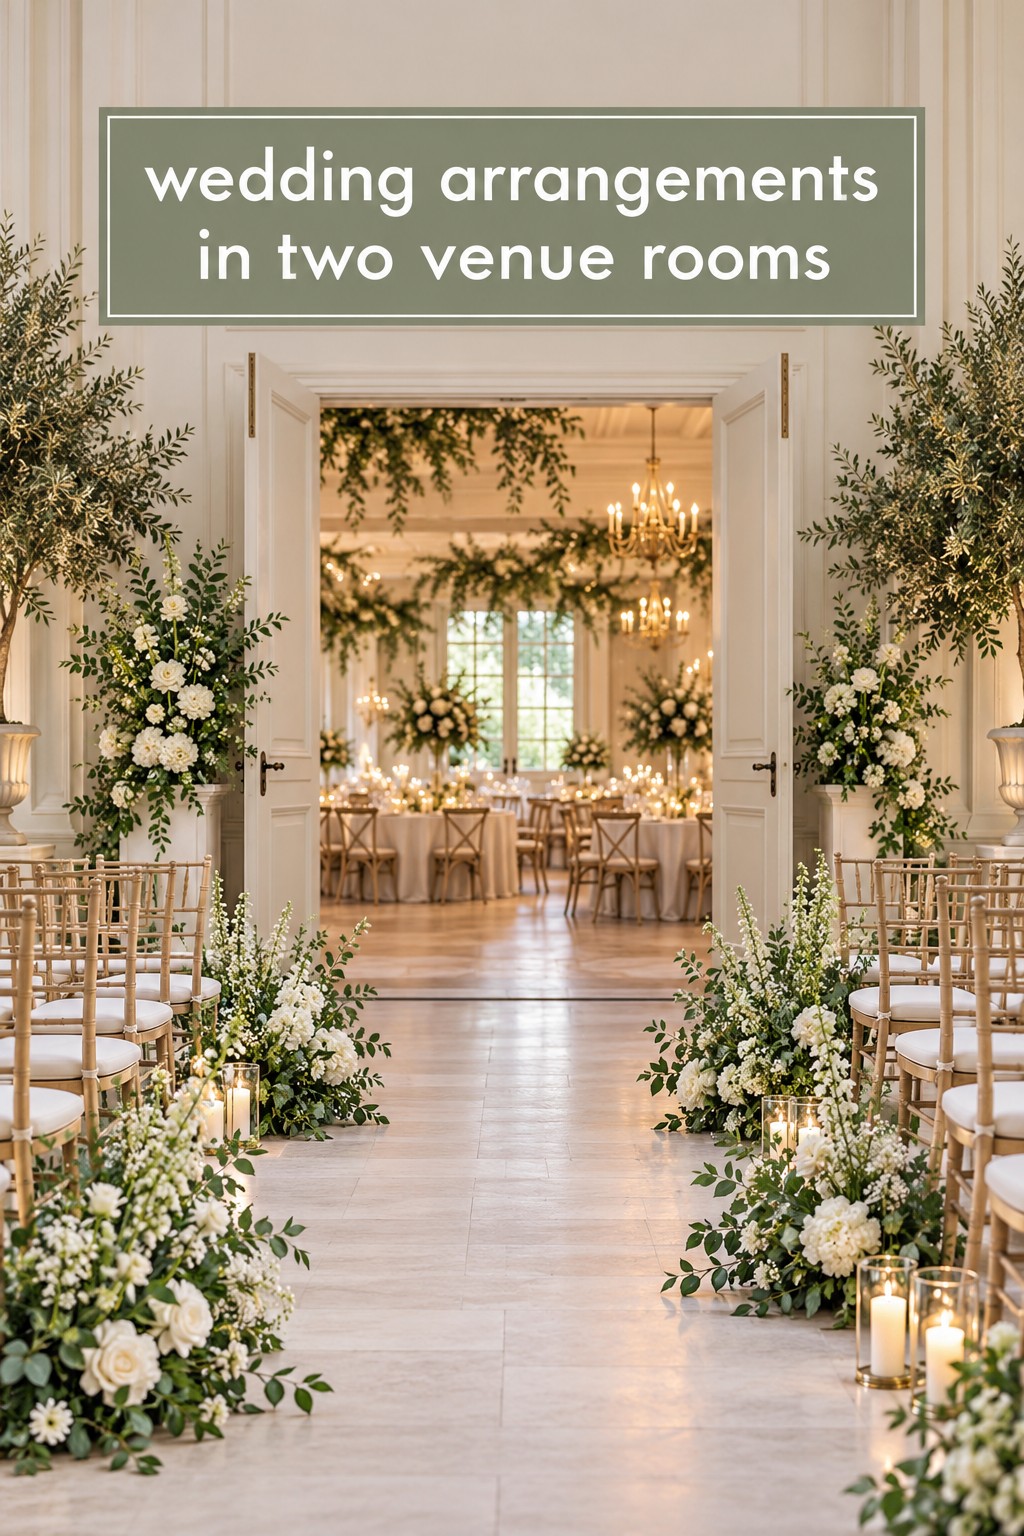
    wedding arrangements connecting two ceremony and reception rooms
    Separate rooms at one venue can share a floral palette and focal point.

    Compare three ceremony-to-reception floral plans

    Plan A: Keep the ceremony flowers in one shared room

    If the ceremony and reception happen in the same room, a room flip may sound efficient, but it can create a narrow window. The room may need new table placement, linens, or service setup while the floral team is also expected to dismantle and rebuild pieces. An alternative is to design the ceremony focal point so it remains part of the reception. A freestanding pair of arrangements at the front can later frame a sweetheart table or stage without a full reconstruction, provided the couple and guests will not need the ceremony area for extended portraits.

    This approach works when the ceremony backdrop has a clear second role and does not block service, guest sightlines, or the dance floor. Place it where it will still look balanced after chairs are removed or tables shift. The ceremony arrangement may have a “front” facing the aisle, so ask whether it will also be viewed from the sides or rear during dinner. A small turn or change in spacing may be enough, but it should be planned rather than improvised.

    The tradeoff is that the room continues to carry the ceremony focal point into the evening. That creates continuity, but it may not suit a reception design that needs a different visual center. If the room must be cleared quickly or the flowers occupy the only practical route for staff, a fixed ceremony piece plus a separate reception centerpiece can be the calmer choice. Ask the venue to confirm whether the space is available for a full flip, and ask the florist what can stay safely in place.

    Plan B: Move selected pieces between separate rooms at one venue

    When the ceremony and reception use different rooms on the same property, you can preserve the first installation and move only the pieces that have a useful destination. For example, two stable arrangements at the ceremony entrance might later frame the reception entrance, or low aisle pieces might become accents near the head table. A modular design, where separate clusters are built as distinct units, gives the florist more options than one large piece attached across a structure.

    This is often the most flexible plan because the ceremony area can remain available for photographs while the reception is prepared elsewhere. Still, “same venue” does not mean “easy move.” Elevators, stairs, long corridors, outdoor paths, restricted freight doors, and guest traffic all affect which pieces can travel. Have the venue identify an approved route and loading access. Have the florist decide whether each piece can be carried in its vessel, needs a support tray, or needs to be taken apart and restyled.

    Design the second placement to suit the arrangement’s scale. A low aisle cluster may be lovely at the foot of a ceremony installation but almost disappear beside a large head table. Conversely, a tall pedestal piece might dominate a small welcome table. If it is moving to guest tables, check the number of pieces, table dimensions, guest sightlines, and available space for place settings. Reuse should solve a design need at the destination rather than merely fill an empty spot.

    The tradeoff is added coordination. The florist may need a crew member to relocate and reset pieces while guests attend cocktail hour. The couple should not be assigned this job, and a family member should not be asked to move a heavy or wired installation without the florist’s approval. A recent guide from Pearson Floral Designs notes that attachment method, access, staffing, guest photo use, and transition time can determine whether a reuse plan is realistic. Bring those exact questions to your own venue and florist.

    Plan C: Use different venues for ceremony and reception

    When the ceremony and reception happen at different addresses, treat the flowers as two coordinated installations unless your florist confirms a specific move is practical. A transfer now includes packing or securing the design, loading, travel, venue access, unloading, and placement. Even if the locations are close, the route and schedule matter. The ceremony team may need to stay for photographs, and reception vendors may be preparing the room at the same time.

    A strong option is to create a visual thread rather than moving every piece. Repeat a flower color, foliage shape, or container style in both locations, while allowing each arrangement to fit its own setting. For instance, the ceremony can have a defined focal installation while the reception uses table arrangements that are designed for dining and conversation. If a portable aisle marker has a clear second use and someone is contracted to move it, include that one transfer in the plan. Do not make the entire reception design depend on a last-minute rebuild.

    The tradeoff is that separate installations may require more flowers or a different allocation of the budget, while a transfer may add labor and transport. Compare the written totals and the expected visual result, not a vague promise that one set can “do double duty.” Ask whether the proposal includes travel, repacking, setup, any second vessel, and the time needed to install at the new address. If these responsibilities are outside the florist’s scope, get a named and capable professional to own them before you commit.

    This plan is especially helpful when the two venues have distinct architecture or lighting. A small garden ceremony and a large indoor reception may call for different scales. Shared colors and shapes can make them feel related without forcing one arrangement into two jobs it was not built to perform.
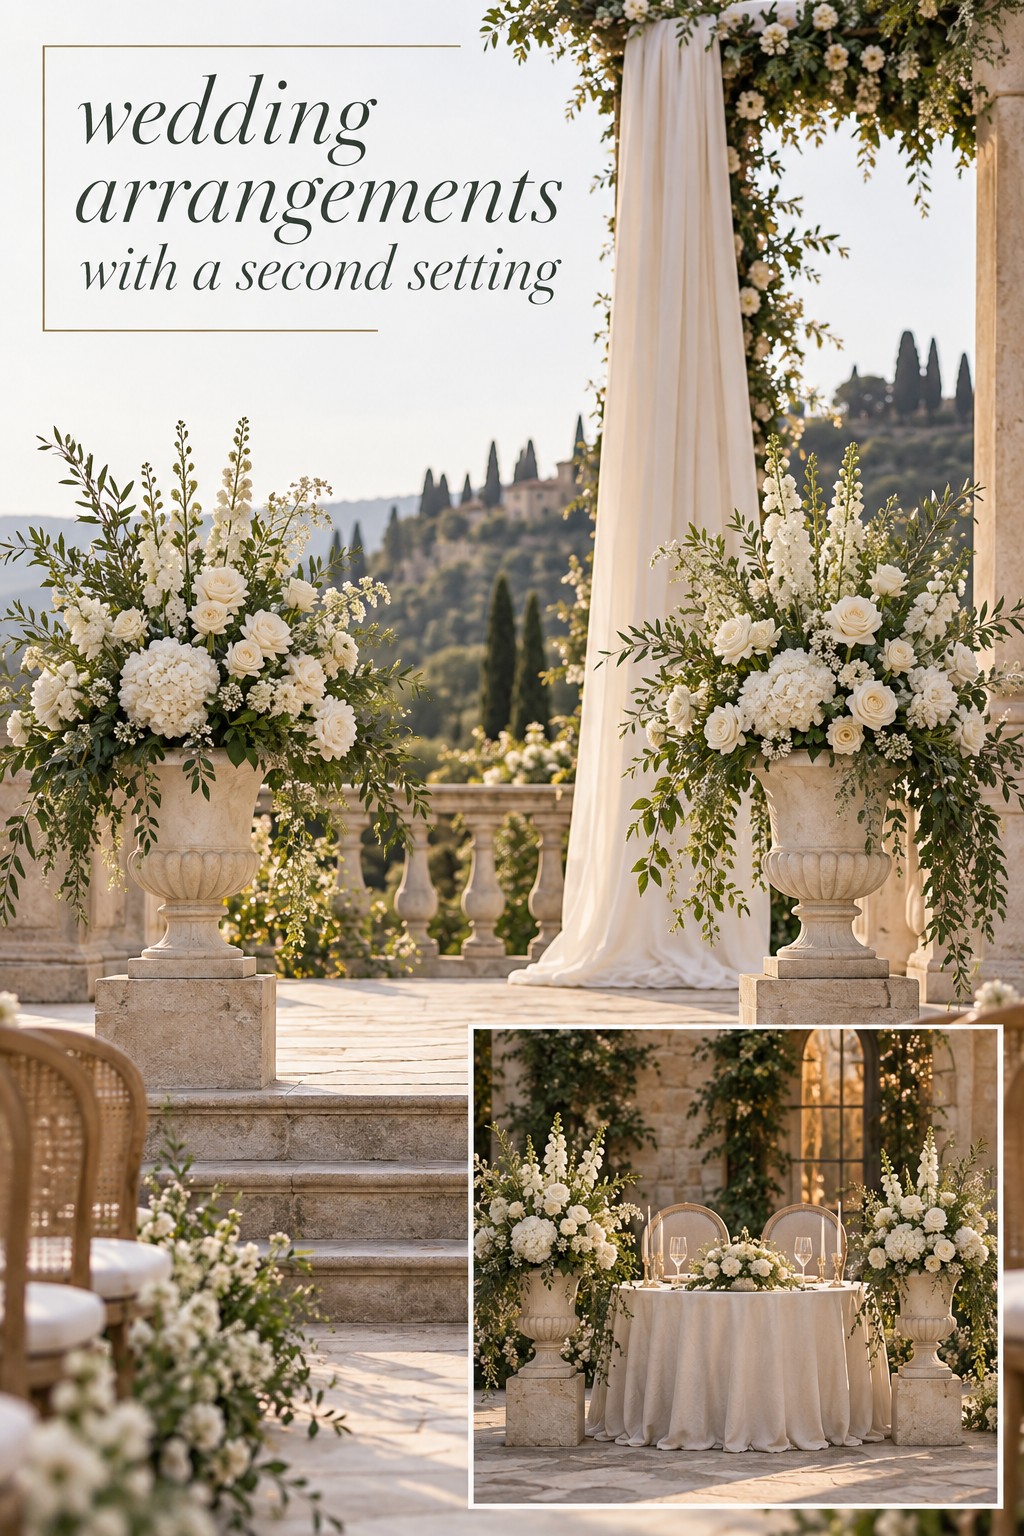
    wedding arrangements with matching ceremony urns and reception table
    A pair of stable urns can be planned for a second focal placement.

    Judge each arrangement in both of its settings

    For every arrangement that may move, ask the florist to describe its first job and its second job. “At the altar” is a location, but it is not a full design brief. Is the piece framing the couple, filling a wide background, softening a doorway, or creating a low border? Its second setting should have a similarly clear purpose, such as marking an entrance or anchoring one end of a long table. If neither role is clear, the piece may not need a second placement.

    Check scale twice. Compare the arrangement with the height and width of each setting, not only with the nearby furniture. A pair of low arrangements can read as a strong focal point in a small ceremony area, then seem scattered against a broad reception backdrop. A large urn may be beautifully proportioned beside a ceremony arch but too imposing beside a narrow doorway. Share photographs or measurements of both spaces so the florist can propose a suitable size.

    Check the viewing direction. Guests may approach from a different side than the ceremony audience. Ask if the arrangement is designed to be seen from all sides or primarily from one. Then confirm the second position offers the intended view. If a piece is against a wall or backdrop for the ceremony, it may need a different orientation or companion piece when used in the center of a reception area.

    Check the mechanics. Ask how the piece is supported, how it will be lifted, whether it travels in one unit, and what must be adjusted after arrival. Freestanding modular clusters, stable vessels, and arrangements built on a moveable tray may be easier to reposition than florals wired directly to a structure. The florist should make the call on handling and safe installation. Do not ask a coordinator or friend to cut ties, remove wiring, or rebuild a piece unless the designer has given specific instructions and agreed that this is within their ability.

    Check guest comfort. At a reception table, flowers should leave room for place settings and allow guests to see and speak to one another. At an entrance or welcome display, the design should not narrow the path. Near a bar or food station, confirm it will not take up needed service space. These are not reasons to avoid statement pieces. They are reasons to choose their placement intentionally.

    Check the visual story. Repeating a floral palette can create continuity, but every table does not need a copy of the ceremony focal piece. Mix one signature arrangement with smaller accents if that better suits the room. If you want the reception to feel distinct, use the same color language with a different silhouette, flower mix, or height. The goal is a considered sequence, not an identical backdrop in every photograph.

    A simple two-column sketch can help. Label one side “ceremony” and one “reception.” For each key design, note its size, viewing direction, intended role, and whether it stays, moves intact, or is rebuilt. Review the sketch with the florist and venue coordinator together if possible. A Wedding Command Center can hold the approved version with the floral proposal and floor plan, so the team refers to the same decision instead of relying on an old inspiration image.
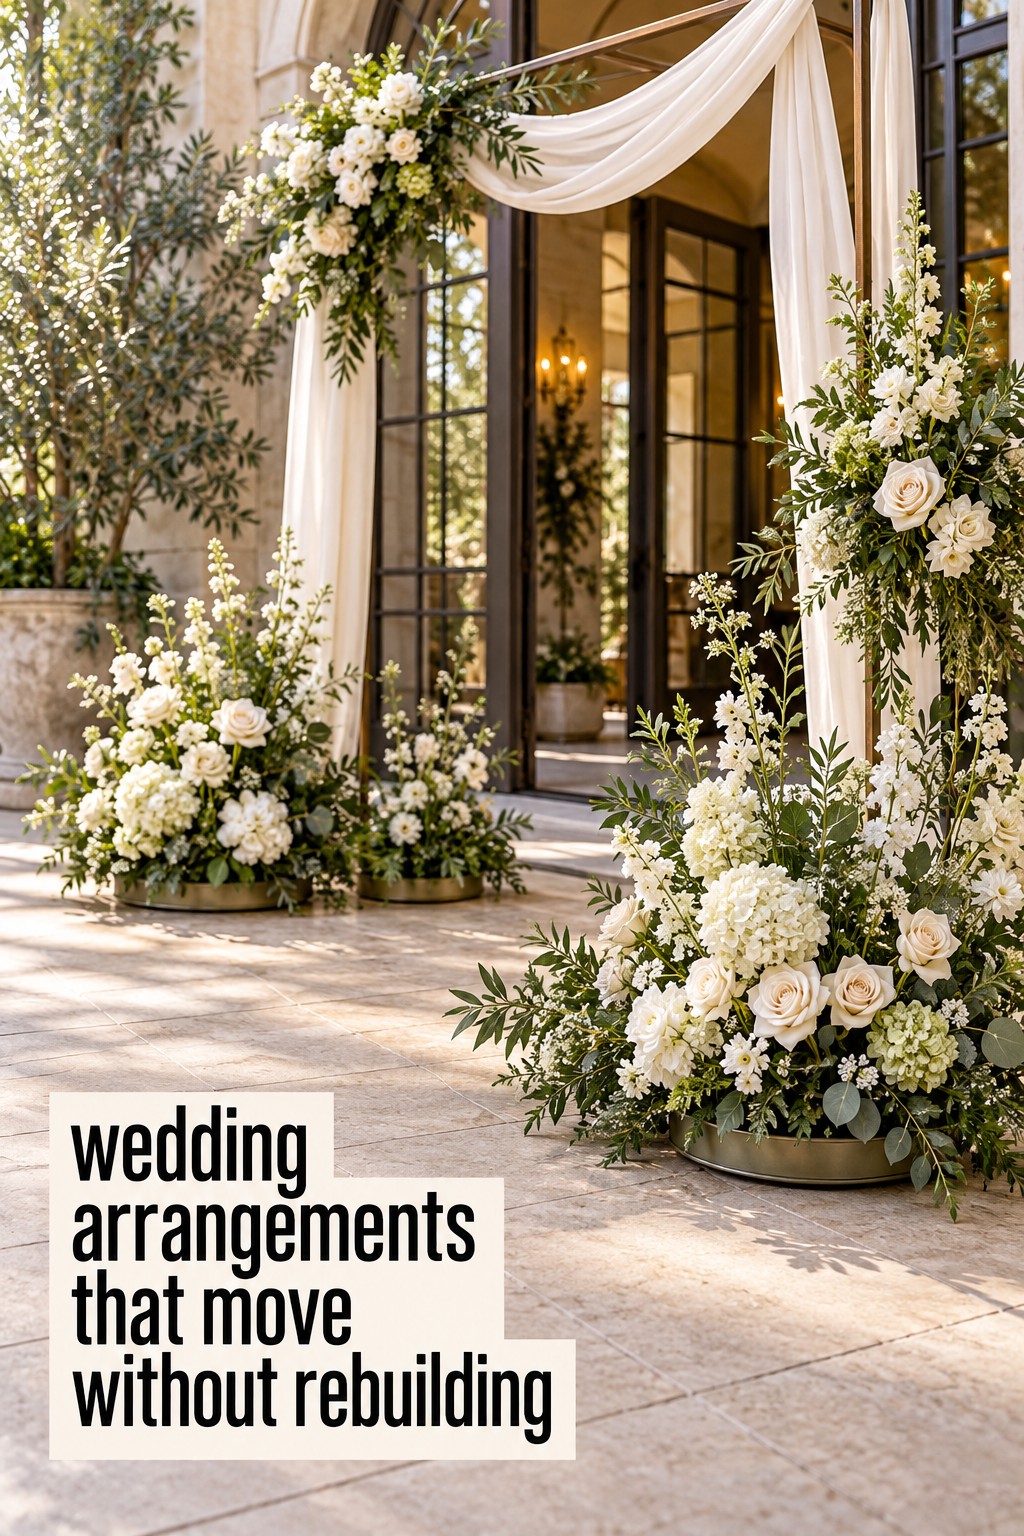
    wedding arrangements in modular pieces ready for a planned move
    Modular floral pieces can travel as designed when the florist approves.

    Give the florist a plan with a clear fallback

    Send a short written brief before finalizing the proposal. Include the venue transition pattern, approximate room sequence, photographs or measurements for both settings, and the floral moments you consider most important. Identify which arrangements should stay, which might move, and which should be designed separately. Ask the florist to flag any idea that depends on a route, access window, installation method, or crew member that is not yet confirmed.

    For each planned move, agree on four details: the arrangement’s second location, who will move and restyle it, the time and route they will use, and the labor or materials included in the proposal. Confirm whether the florist will stay on site, return later, or hand any task to another professional. Contract scope varies, so write down the agreement rather than assuming setup, transfer, or removal is included.

    Choose a fallback that protects the reception design if the transition changes. The ceremony may run late, the room may become available later than expected, weather may move an outdoor event indoors, or a path may be closed. A fallback could be leaving the ceremony arrangement in place and using the reception accents already included in the plan. It could also be a smaller portable piece reserved for the destination. Ask the florist which fallback keeps the look coherent and what it costs before the event.

    Keep the final review practical. Confirm the florist and venue agree on access, the second placements are visible on the floor plan, the arrangements can be handled as designed, and the staffing is included. Revisit the decision if the room layout changes. If you remove a proposed second use, ask whether the floral count or quote should change as well. A clear “stay, move, or build separately” decision is more useful than a broad note to reuse as much as possible.

    Above all, let the flowers serve the experience you want in each space. A reuse plan can extend a focal point and connect two rooms, but it does not have to dictate the entire design. The right plan is the one that looks intentional in the ceremony, fits the reception, and has a realistic way to get from one purpose to the next.

    Sources and methodology

    This guide compares real venue transition patterns using floral-design pages reviewed for mechanics, placement, staffing, and timing. Pearson Floral Designs’ discussion of repurposing ceremony flowers informed the questions about attachment, access, and guest use. The Mississippi State University Extension farmer-florist consultation guide supports discussing labor and reuse as part of the floral proposal. Exact access, contract scope, staffing, and room timing vary by venue and vendor, so confirm them directly. This article does not claim that moving arrangements always saves money or that a particular flip duration is universal.
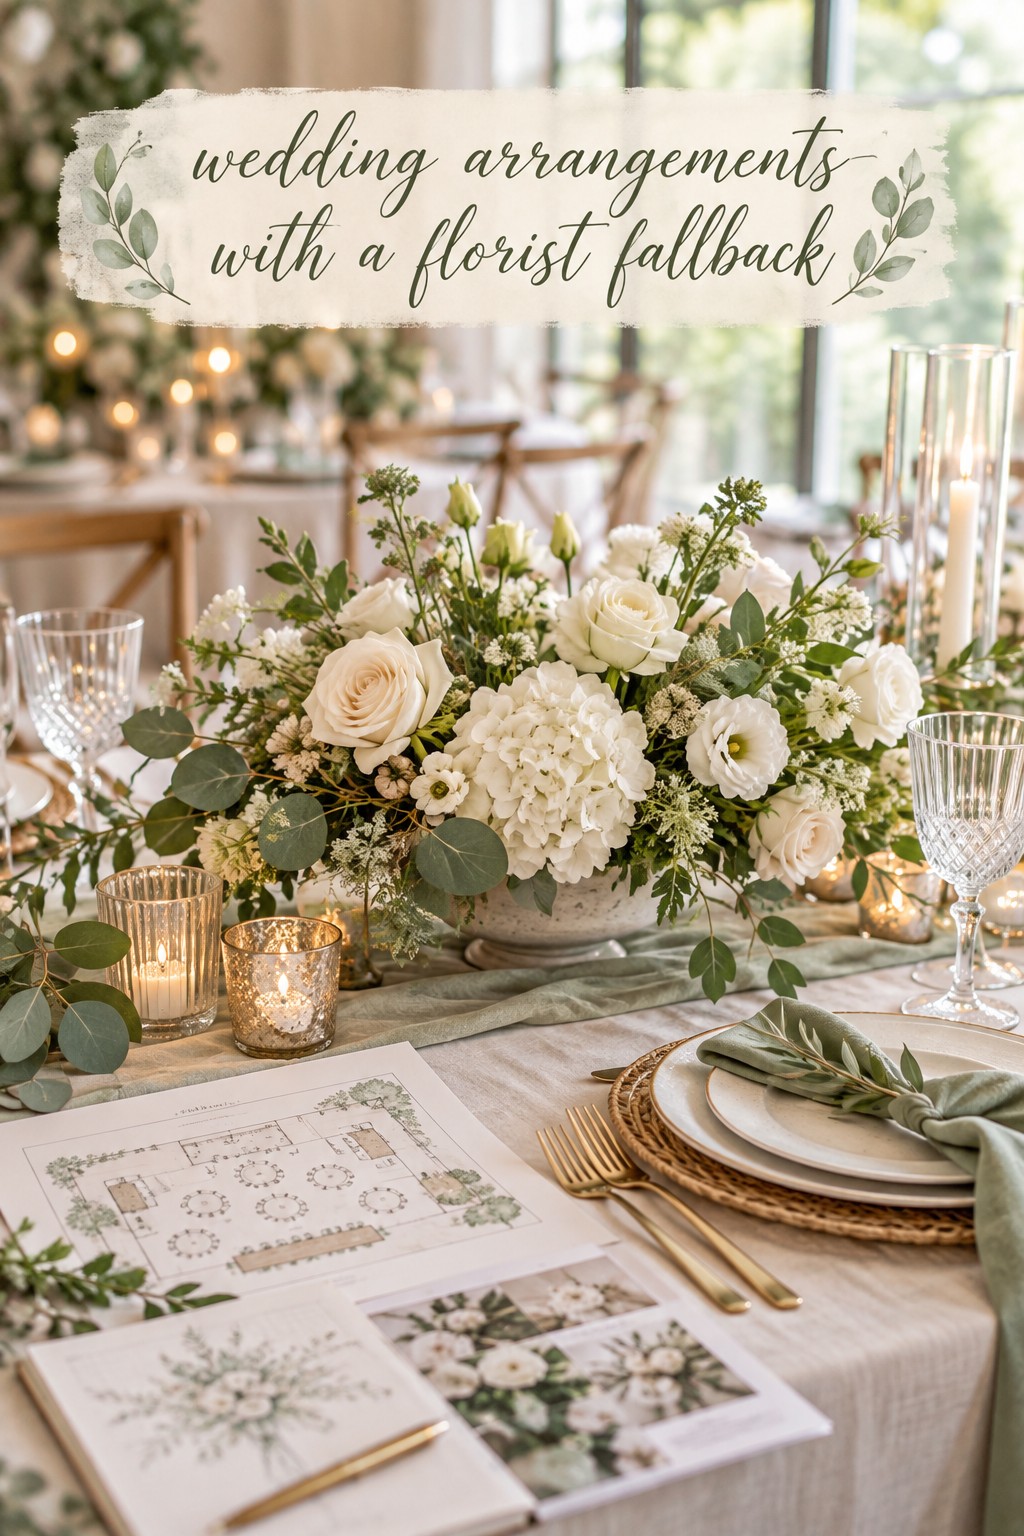
    wedding arrangements and a florist plan with a reception fallback
    A clear fallback protects the reception design if the transition changes.

    FAQ

    What wedding arrangements are easiest to reuse?

    Arrangements designed as stable, separate units are usually easier for a florist to assess for reuse than flowers attached directly to a large structure. Ask the designer how each piece is supported and what its second setting will be. The florist can confirm whether it is appropriate to move.

    Should ceremony flowers always move to the reception?

    No. Some arrangements look best where they were installed, and some transitions do not leave enough time, access, or labor for a move. Compare the design and the complete plan with your florist. A separate reception arrangement may be the better fit.

    Can we reuse flowers if the ceremony and reception are in one room?

    Possibly. A ceremony focal piece might stay in the room and serve as a reception backdrop, or selected arrangements may move during a room flip. Confirm access, guest routes, reset time, and who is responsible before relying on either option.

    What should I ask my florist about moving arrangements?

    Ask where the arrangement will go, how it is supported, whether it can move intact, who will handle it, what labor or materials are included, and what happens if the schedule or room changes. Share the venue route and photographs of both placements.

    Do repurposed wedding arrangements save money?

    They may reduce the need for duplicate pieces, but labor, transport, new vessels, or restyling can change the total. Ask for an itemized comparison of a reuse plan and a separate-installation plan. Decide based on the written scope and visual result, not an assumed saving.

    How do I make wedding flowers feel cohesive at two venues?

    Repeat a color, flower, foliage shape, or container detail while letting each arrangement suit its own room. Cohesion does not require identical centerpieces. Ask the florist to show how the ceremony and reception designs connect in scale and overall mood.

    When should we decide where arrangements will go after the ceremony?

    Discuss the second placement while the florist is planning the designs, before the proposal and installation method are final. The florist and venue can then check size, route, access, staffing, and timing together. Update the plan if the layout changes.
  • Wedding Organization: Track Every Item on the Day

    Wedding Organization: Track Every Item on the Day

    Wedding organization gets much easier when every physical detail has a route. A welcome sign, a family heirloom, a rental table number, and a box of favors may all reach the venue in different ways, belong to different people, and need different plans after the reception. A packing list can remind you to bring them. An item-flow plan goes further: it shows where each item starts, who moves it, where it belongs, and who takes responsibility when the event is over.

    This guide is for the objects that travel to, through, and away from your venue. It covers personal details, decor, rented pieces, deliveries, setup, transfers between spaces, and final collection. You do not need to track every napkin individually. Group items that travel together and have the same destination, then make ownership and handoffs clear enough that the couple does not have to answer questions while getting ready or celebrating.

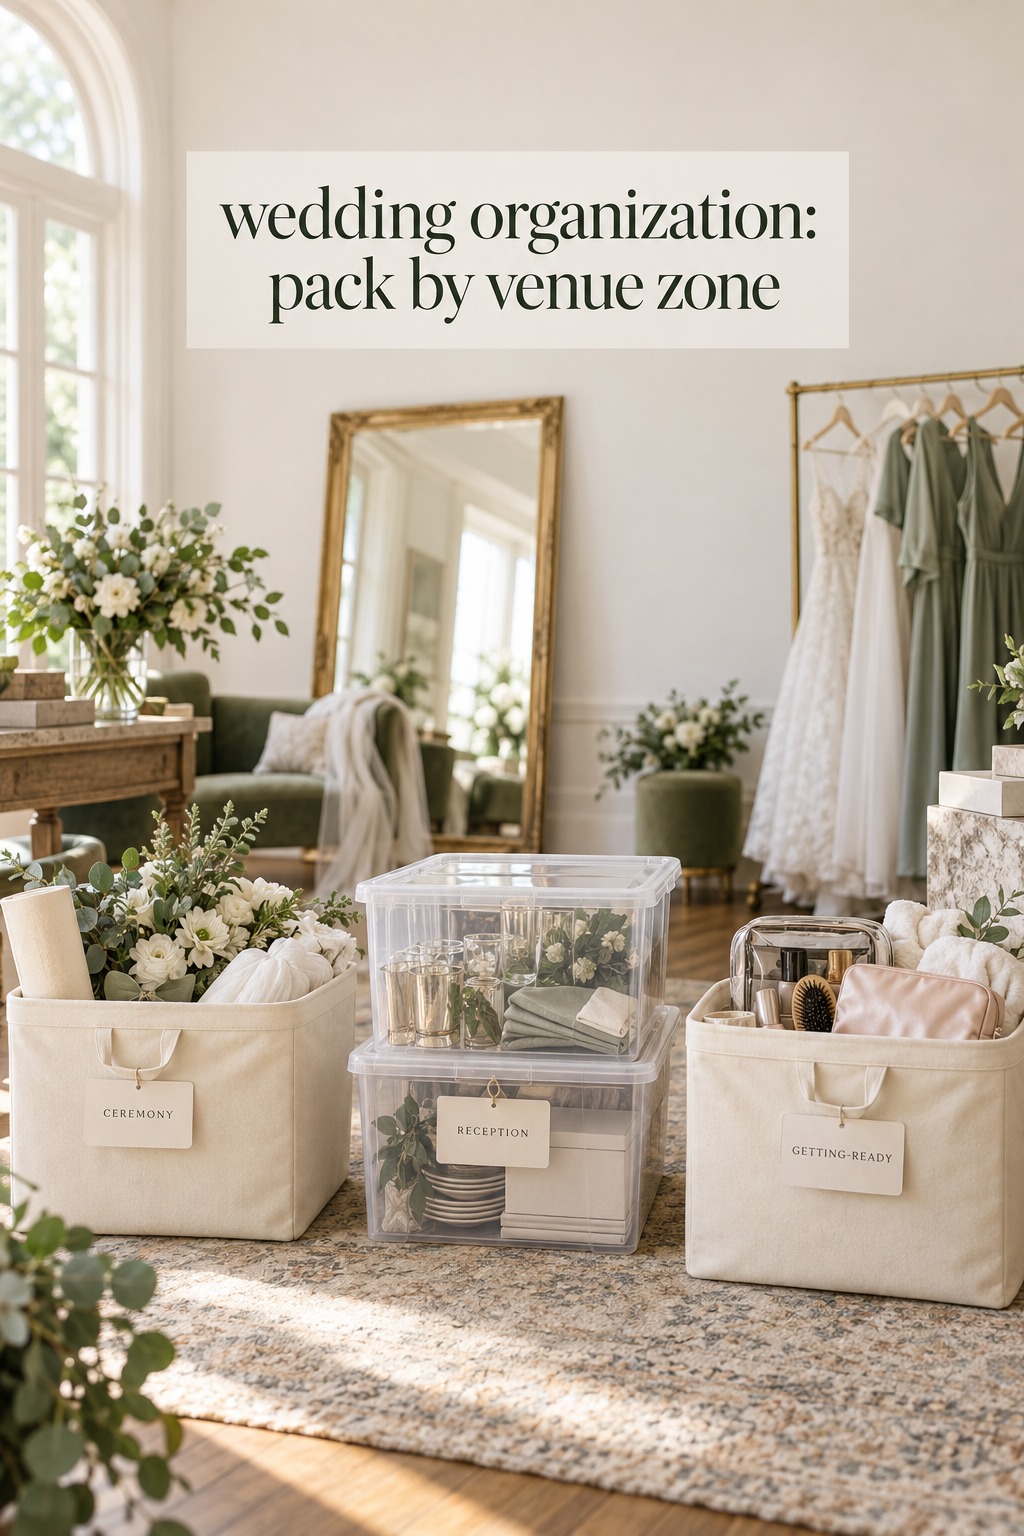
    wedding organization bins grouped for ceremony, reception, and getting ready
    Group wedding essentials by the venue zone where they will be used.

    Start with an item-flow inventory, not a pile of boxes

    Begin with a walk-through of the day in order. Imagine arriving at the ceremony, moving into cocktail hour, entering the reception, and leaving at the end. Note objects that someone must bring, deliver, set out, move, collect, or return. Include things that are easy to forget because they are small or sentimental: vow books, rings, guest-book pens, reserved-seat cards, signage stands, cake tools, card boxes, and family photographs. The goal is not a giant shopping list. It is a list of items whose movement needs an owner.

    Give every row or kit the same basic fields. Record the item or group, its source, quantity, current owner, destination, transport plan, setup owner, setup time or event phase, and final destination. Add a handling note for anything fragile, valuable, refrigerated, unusually large, or needed at a precise moment. For rentals, include the order reference and pickup or return requirements. For personal items, name the person who will bring them and the person who will take them home.

    Use a simple source label so venue property does not get mixed with yours. An item may be couple-owned, family-owned, supplied by a vendor, rented, provided by the venue, consumable, or intended for donation or disposal. Those categories matter at the end of the night. A gold frame might look like decor to everyone, but the venue may expect its own frames to stay in place while a family frame needs to go home with someone.

    For a large order, track the item at the level that matches how it is counted. A rental company may deliver 12 tables as one line item, while place cards may be packed as a labeled box. If a kit contains pieces that will be separated or returned to different people, split it into separate entries. If the pieces always move together, keep them as one kit and state the quantity inside. This makes the inventory useful without turning it into a minute-by-minute record of every object.

    Add one status for the next checkpoint, such as “packed,” “loaded,” “received,” “placed,” “transferred,” “collected,” or “returned.” Keep the words literal. “Done” does not tell the next person whether the box reached the venue or simply left the house. You can print the item-flow sheet for the venue lead and keep a digital master for updates. If you make a late change, update the shared master and replace the printed copy rather than leaving two versions in circulation.

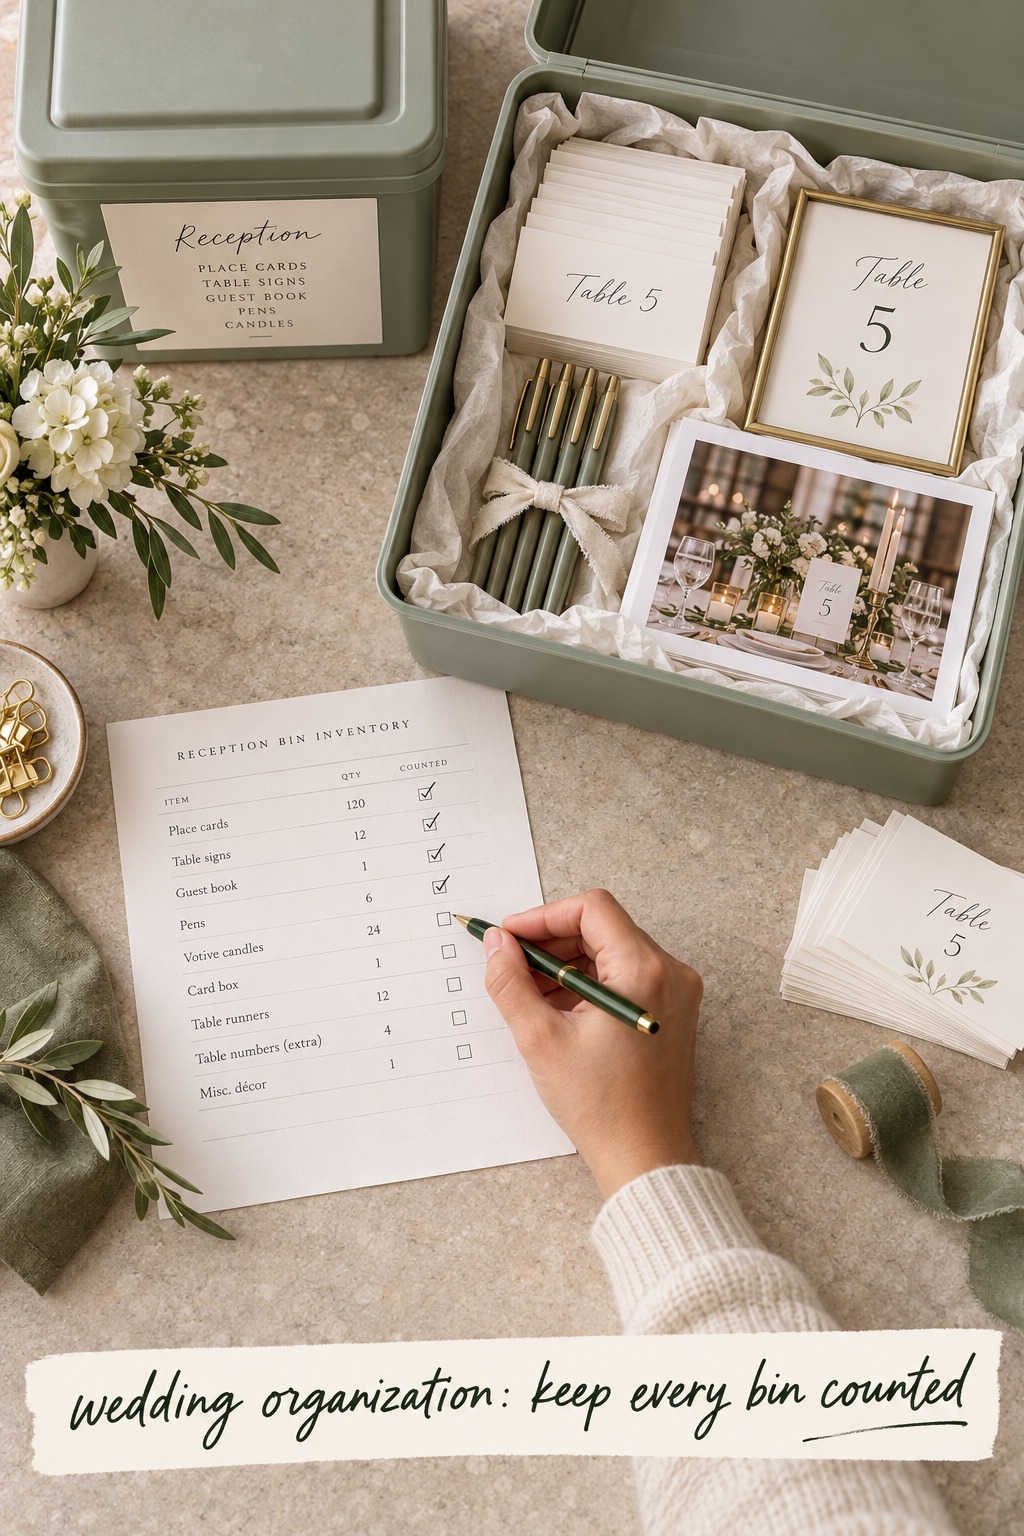
    wedding organization inventory with a labeled reception kit and counted items
    Count the contents of each wedding kit before it leaves home.

    Confirm delivery, access, and setup responsibilities before event week

    Ask the venue where deliveries may arrive, when vendors can enter, where items can be stored, and who can sign for a package. Confirm the actual door, loading area, stairs or elevator, parking instructions, and any limit on box size or quantity. A delivery label with the couple’s names and wedding date can help staff identify a package, but it does not replace a named recipient or an approved delivery window. If the venue will not accept early deliveries, choose another agreed location instead of assuming a box can be left there.

    For every vendor or rental order, confirm what the written agreement includes. Delivery, room placement, assembly, styling, breakdown, and pickup can be separate responsibilities. Ask who moves chairs after the ceremony, who places personal stationery, whether rental pieces need to be gathered in a particular way, and when a collection team will arrive. The answer may differ by company and venue. Put the confirmed scope beside the relevant inventory line so no one has to infer what “delivery” means on the day.

    Build the delivery sequence around the venue’s access window and the order in which spaces must be ready. Large structures or furniture may need to arrive before small tabletop pieces, but follow the venue and vendor’s actual plan. Note which deliveries depend on a room being clear, which teams share a narrow entrance, and whether ceremony objects need to move to the reception afterward. Add a contact for the venue and for each arriving vendor, plus one on-site lead who can direct them to the right place.

    Mark the moments when an item changes hands. If a florist delivers bouquets to the getting-ready room, name who receives them. If a sign travels from the ceremony entrance to the reception, name the person who moves it and the time or event cue for that move. If a family member is taking gifts home, tell the venue lead where they should be collected and who is authorized to release them. These small handoffs are easy to overlook when every person assumes someone else is responsible.

    Keep the movement plan realistic for the people involved. The couple should not be the default delivery contact. A parent who is giving a toast may not be available to oversee teardown. A wedding-party member may be leaving early or riding in a different car. Ask each person before assigning a role, explain the task and timing, and provide a backup for essential items. If no friend or relative can take a collection task, ask the venue, planner, or vendor what paid support is available.

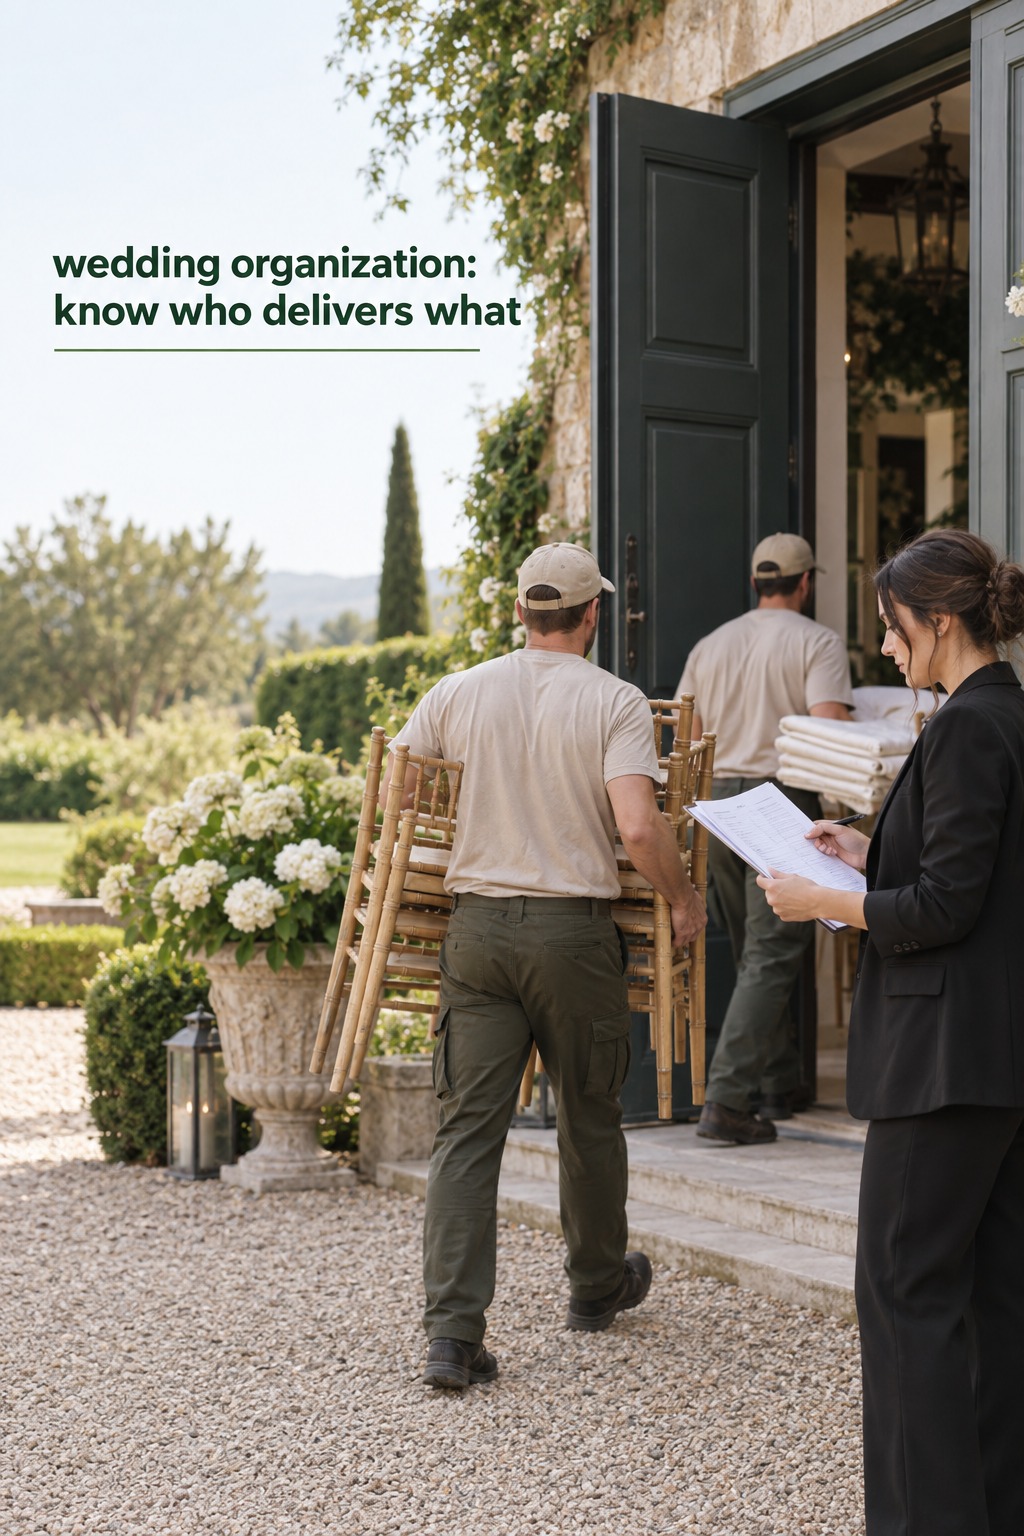
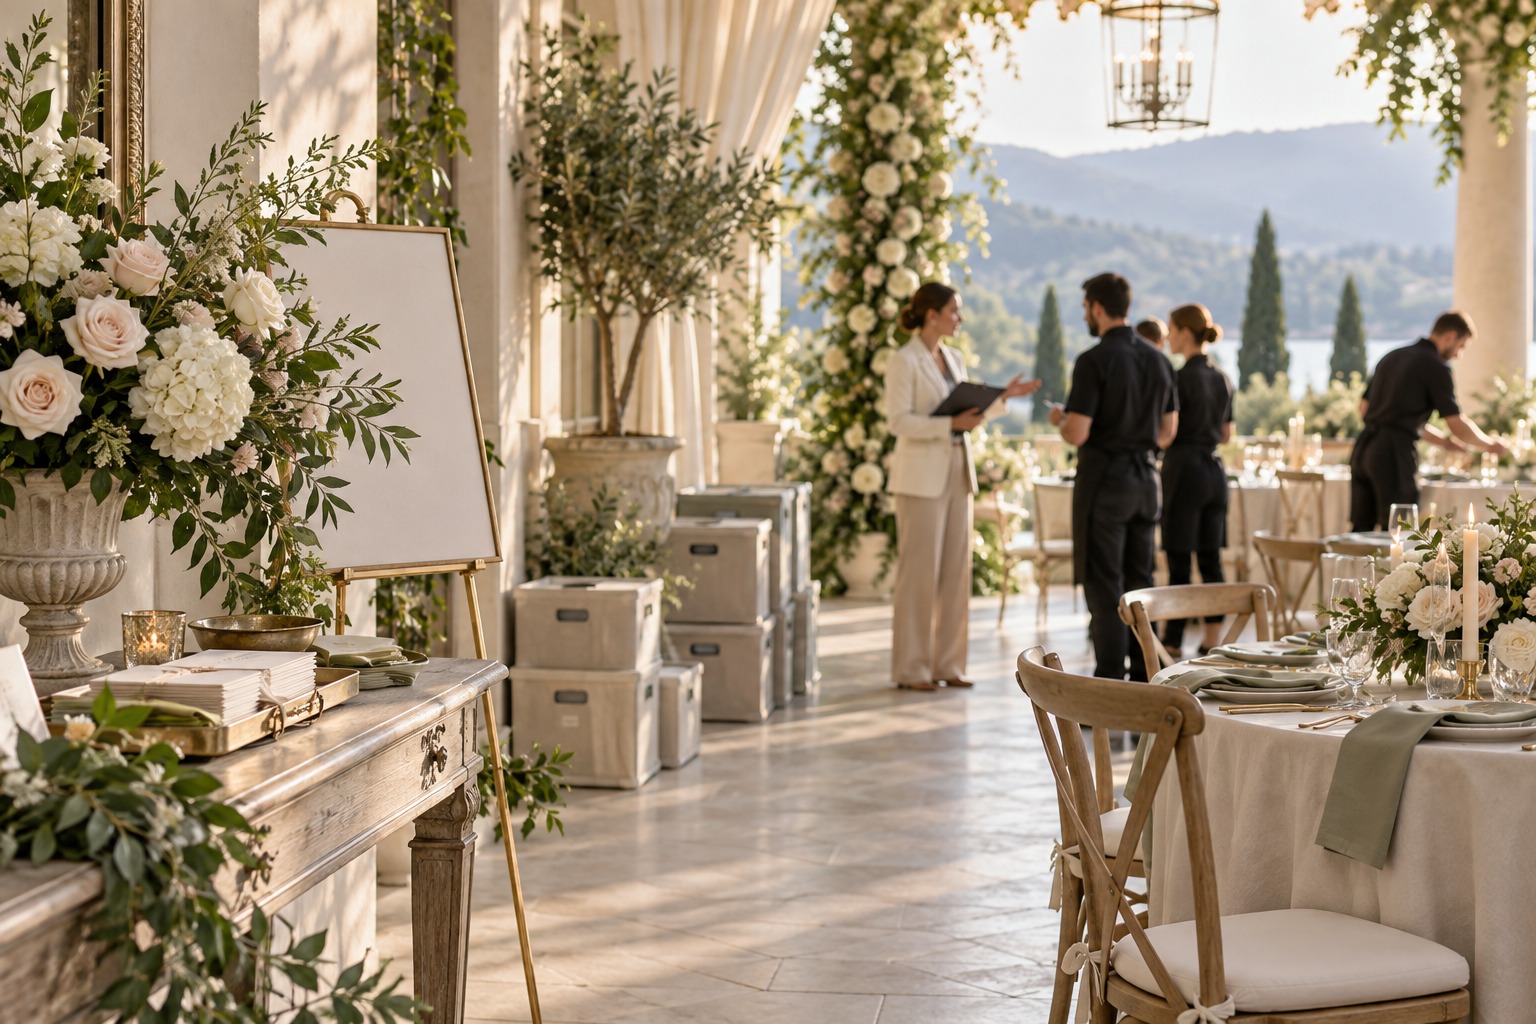
    wedding organization delivery crew arriving at a venue with a coordinator
    Name the person who will meet each delivery at the venue.

    Pack by destination and moment of use

    Sort couple-supplied items by the space or moment where they will be used, not just by product type. A “ceremony entrance” kit might hold the welcome sign, stand hardware, programs, and reserved-seat markers. A “guest-book table” kit might contain the book, pens, a small sign, and any display pieces. A “getting-ready room” bag can hold personal items that should stay with the couple. This grouping means the setup person can take one labeled container to a clear destination instead of opening several boxes and sorting through a mixed pile.

    Put a large readable label on more than one side of each container. Include the wedding date or couple name, destination, contents, total piece count, setup owner, and what happens to the container afterward. A short label could read: “Reception card table, 1 box, place before guest arrival, return box to Alex’s SUV.” Use an item list inside the lid for small pieces. If a specific arrangement matters, attach a printed reference photo and mark which objects in the picture are included.

    Pack in a way that makes the first item needed easy to reach. If a stand requires a base, clamps, or a tool, keep those parts with the sign and name them on the list. Put delicate or irreplaceable objects in a separate, clearly marked container that goes directly to a trusted person rather than into a general decor shipment. Keep legal documents, rings, medications, and personal valuables under direct care. Do not place private or high-value items in a box that will sit unattended in a public loading area.

    Make the setup instruction short enough to scan. State where the item goes, which direction it faces, whether it needs power or an easel, and what should happen to its packaging. A room map with numbered locations can make a large setup easier to understand. Match each number on the map to the label on the bin. The person setting out the item should not need to search through a long planning document or ask the couple which side of the doorway the sign belongs on.

    Before loading, compare the packed containers with the inventory and note what is still outstanding. Take a photo of each open container before closing it if the contents are numerous. Keep the item list in a sleeve or envelope attached to the container, and keep a separate copy with the on-site lead. If a driver or helper collects several boxes, record which ones left and with whom. For an item that cannot be replaced quickly, consider carrying it separately and confirming receipt directly with its named custodian.

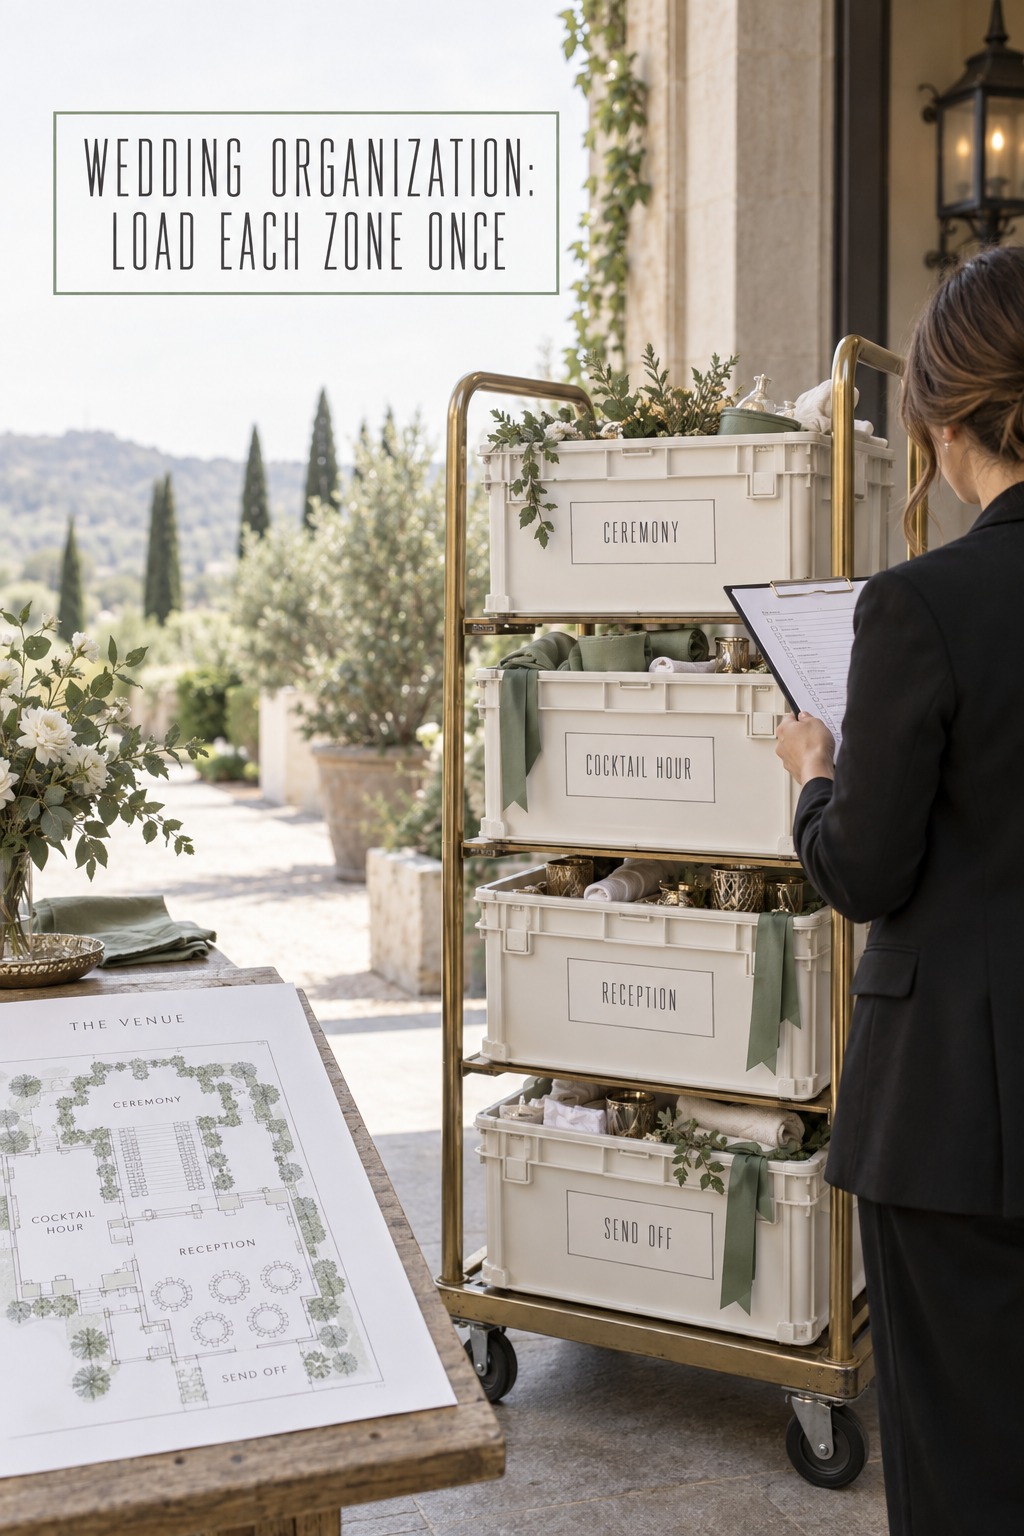
    wedding organization crates arranged by venue zone beside a floor plan
    Load labeled destination kits in the order they will be needed.

    Trace one item through the entire wedding day

    Take a welcome sign as a worked example. The inventory row says it is couple-owned, one sign plus one weighted stand, packed in a specific container, transported by a named driver, and placed at the ceremony entrance by a named setup person before guests arrive. A reference photo shows the intended position. The note says whether the venue has approved the stand and whether it must remain clear of an accessible route. The final destination is listed too, perhaps a family member’s car or the couple’s home.

    On arrival, the on-site lead checks that both the sign and stand are present and marks the kit received. The setup owner takes it to the labeled location, checks it against the photo, and marks it placed. If the sign will move after the ceremony, the next action is explicit: the coordinator or another agreed person takes it to the reception entrance when guests move to cocktail hour. The owner confirms completion on the sheet or by a short message to the lead.

    At the end of the reception, the collection owner checks that the sign and stand are both retrieved and that the sign is not being packed with rental inventory. The pair goes into the named car or storage area, and the responsible person confirms receipt. If the stand is missing or damaged, the lead records the issue while the details are fresh and contacts the appropriate person later. This simple chain shows why “bring the welcome sign” is only one part of the job.

    Use the same pattern for items that change location or purpose. Ceremony flowers may be reused at the reception if the florist and venue agree on timing and handling. Place cards may begin in a labeled box and end on a specific table. A card box may need one person to watch it during the reception and another to take it to a secure location afterward. For each move, write the start point, end point, person, and cue. Do not assume a vendor will move an item unless the service scope says so.

    Before sharing the plan, scan for entries that stop at “at venue.” Add the room, table, storage area, or recipient. Scan for “someone” or “family” in the owner field and replace it with an agreed name. Scan for a blank final destination, especially beside rentals, gifts, signage, personal details, and leftover favors. When a destination is genuinely undecided, name the person who will make the decision and the latest time it must be settled.

    The Wedding Command Center can be a useful planning resource if you are coordinating a lot of wedding details alongside these physical handoffs. Keep the inventory itself tied to the venue’s rules and each vendor’s confirmed responsibilities, so the people on site know exactly what they have agreed to handle.

    Close the loop at teardown and rental return

    Plan the end of the event before the final week. Check the venue’s departure deadline, the rental company’s pickup window, and whether rented items must be gathered, separated, or left in place. Confirm who handles linens, tables, packaging, flowers, personal decor, leftover favors, gifts, and trash. If pickup takes place the next morning, decide where each category can stay securely overnight and who will be there when the vendor returns.

    Divide collection into clear categories: vendor property, venue property, couple or family keepsakes, gifts and cards, items to donate or give away, and items approved for disposal. Use separate staging areas or clearly marked containers when that helps. Never rely on appearance alone to identify ownership. A rented candle holder and a family candle holder may look alike, so use the inventory, labels, or a photo record to keep them apart.

    Assign a named collector to each category and agree on a realistic time. People who are staying through the end can take a teardown role, but do not quietly make guests responsible for heavy or technical work. Keep the couple out of routine packing whenever possible. If a friend will collect the guest book and gifts, tell them where those items will be held, what containers they need, and where they are taking them. Give the on-site lead the authority to check the list and contact the backup if a collector is delayed.

    For rentals, reconcile the delivered quantity with the agreed return process. Follow the rental company’s instructions for stacking, bundling, sorting, or leaving items for pickup. If the team asks you to note visible damage or a shortage, record the item and condition without guessing when it happened. Keep a copy of the final count and any exception note. Do not sign off on a return or discard packaging until the person responsible has checked the order requirements.

    Before the venue is cleared, have the lead check the rooms and storage areas named in the plan. Look at the getting-ready room, ceremony area, reception room, coat or storage space, loading area, and any location used for photographs. Mark each item collected, returned, left securely for a scheduled pickup, donated, or discarded with approval. If an item is still missing, record its last known location and the person following up. A short, accurate exception list is more useful than marking everything complete to end the night sooner.

    Finish with a handoff message to the people who need to act the next day. Include items still at the venue, rental pickup details, who has gifts or keepsakes, and any damage or missing-item follow-up. If responsibilities changed during the event, update the list while everyone remembers what happened. If your celebrations span multiple days or locations, close one inventory before opening the next, then record transfers between events. The plan is complete when each item has a known next destination, not merely when it leaves the reception room.

    Sources and methodology

    This guide focuses on a practical inventory and handoff method. It draws on the categories in The Knot’s wedding packing checklist and the delivery, setup, strike, and pickup distinctions described in Borrowed Charm’s event rental guide. Venue rules and vendor responsibilities vary. Confirm the details that apply to your own venue and signed agreements.

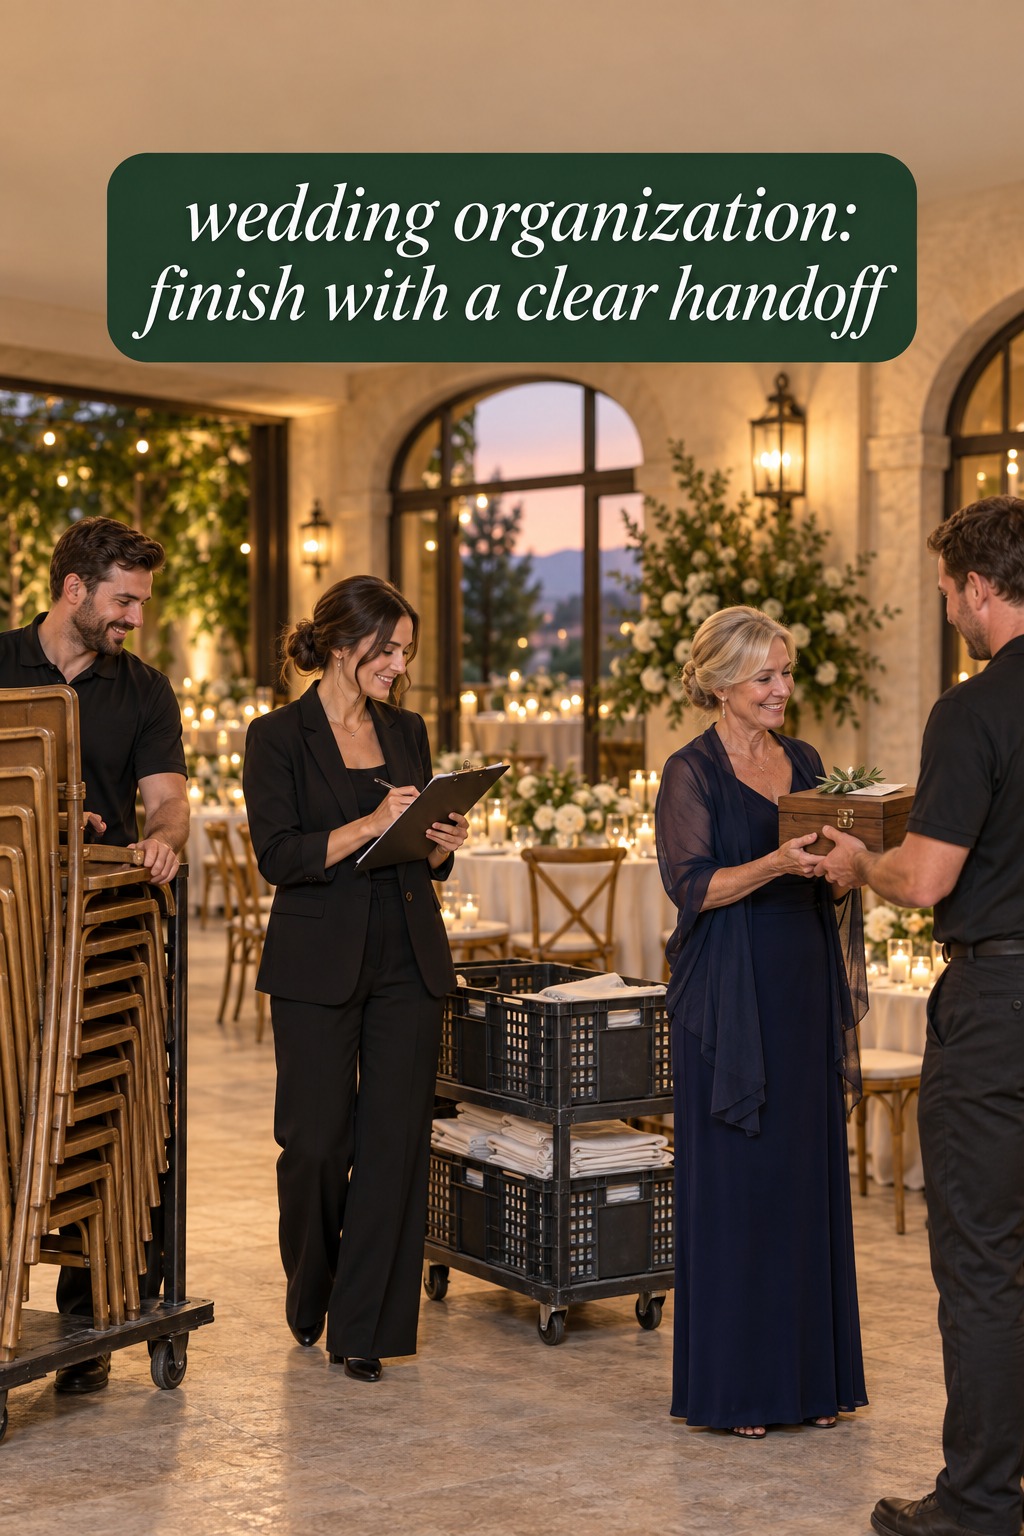
    wedding organization handoff between a venue coordinator and rental lead
    Close the loop on rental returns and personal keepsakes before leaving.

    FAQ

    What is a wedding item-flow plan?

    It is a list that follows physical wedding items from their source through transport, arrival, setup, use, collection, and final return or handoff. Each entry names the person responsible at the relevant step.

    What should I include in a wedding organization inventory?

    Include the item or kit, source or owner, quantity, destination, transport plan, setup person, timing, handling notes, and final destination. For rentals, add the order reference and confirmed pickup instructions.

    How should I pack wedding decor and personal items?

    Group items by the room or event moment where they will be used. Label each container with its destination, contents, setup owner, and end-of-day plan. Keep irreplaceable or private items with a trusted named person.

    Who should be responsible for wedding day items?

    Name one person for each delivery, setup, transfer, and collection task. Confirm the person is available at that time and understands the job. Assign a backup for essential items and avoid making the couple the default contact.

    Does wedding rental delivery include setup and pickup?

    It depends on the rental agreement. Ask the company and venue to confirm delivery, placement, assembly, breakdown, pickup timing, and how items should be prepared for return. Record the agreed scope beside the rental inventory.

    How do I keep rentals from getting mixed up with personal decor?

    Identify ownership in the inventory, use separate labels or collection zones, and tell the teardown lead what belongs to the rental company, venue, couple, and family. Reconcile the count before the rental pickup or return.

    When should I finish the wedding item inventory?

    Start when you know which physical items will be brought, delivered, or rented. Confirm venue access and vendor scope in advance, then update quantities and assignments as plans are finalized. Print or share the current version before event week.

  • Wedding Binder Organization: Find Every Detail Fast

    Wedding Binder Organization: Find Every Detail Fast

    A wedding binder can have every familiar tab and still leave you flipping through pages while a vendor waits for an answer. The frustrating part is rarely that you forgot to create a budget section. It is that a quote, a final decision, and an old draft all look equally current when you need one detail quickly.

    Good wedding binder organization starts with a different question: how will you find and trust the right page when you are in the middle of a call, appointment, or planning conversation? Think of the binder as a reference system. It needs a short route from a question to an answer, a visible way to distinguish current information from old information, and a simple process for handling new paper.

    wedding binder organization with a couple using a clear index to find venue details
    A clear index makes wedding binder details easy to find.

    This approach works with a binder you already own. You do not need to replace it, buy a stack of specialty supplies, or print every worksheet available. Keep the sections you use, then add a one-page map, consistent labels, and a few rules for filing and updating information. The goal is to make the next answer easy to locate and safe to act on.

    Why a Wedding Binder Becomes Hard to Search

    A binder usually becomes difficult to use gradually. One vendor sends a revised quote, a venue tour produces handwritten notes, a family member prints a seating draft, and a payment confirmation gets tucked into the nearest pocket. Each paper makes sense on its own. Together, they create uncertainty about where the current answer lives.

    That uncertainty is different from having too many pages. A thick binder can be easy to use if its navigation is consistent. A slim binder can still be confusing if the same decision appears in several sections or if old pages are mixed with approved ones. Before reorganizing, notice the questions you repeatedly ask: What time is the venue access window? Which quote includes delivery? Who is confirming the final guest count? Where is the approved floor plan?

    Write down five real questions that have slowed you down recently. For each one, note where you looked first, where the answer actually was, and whether you trusted that page. This small audit reveals the weak points in your system. Perhaps vendor information is split between contracts and notes. Perhaps a page has no date. Perhaps a printed budget summary cannot be distinguished from last month’s snapshot.

    Use those observations to define the binder’s job. It should help you retrieve active planning information and understand its status. It does not need to store every source file, duplicate a live guest database, or preserve every abandoned idea. A quote may be useful as a paper reference, while the signed agreement remains in a secure digital folder. The paper version should point to the authoritative record when more detail is needed.

    There is no universal number of sections or pages that makes a binder organized. A couple planning a small dinner may need only a few active categories. A multi-day celebration may create more handoffs and records. Start from the questions you need to answer, then give those answers predictable locations. That keeps the structure tied to your actual planning rather than to a template’s page count.

    wedding binder organization with page codes and labeled tabs
    Consistent page codes connect tabs, notes, and current records.

    Design a Retrieval Map Before Adding Pages

    Make one index page and put it inside the front cover or immediately after it. Keep it short enough to scan. List each tab, the kind of question it answers, and the page range or page code where the current reference begins. For example: “Venue, access and rules, V-01 to V-06” or “Payments, due dates and proof, PAY-01 to PAY-04.” The label should help someone choose where to look, not merely repeat a broad category name.

    Give important pages a stable identity. A simple code can combine a short section label and a number: VEN-01 for venue overview, VEN-02 for access notes, and VEN-03 for the current room layout. VEND-01 might be a vendor contact sheet, while VEND-02 identifies a specific photographer’s quote summary. The code stays the same when you replace a page, so a note can still say “See VEN-02” without relying on a page’s changing position.

    Keep the code system small. If it takes a paragraph to explain, it is too complicated for a planning binder. Use abbreviations you and your partner recognize, avoid assigning a new color to every vendor, and do not build a separate code for every temporary note. The purpose is to reduce search time. A label that looks clever but requires decoding adds one more step.

    Add cross-references when a decision affects more than one area. A venue contract may set the access time, which affects the vendor arrival schedule. Instead of photocopying every page into every tab, add a small note at the relevant locations: “Access window: see VEN-02” and “Vendor arrival plan: see DAY-03.” The main record stays in one home, while related sections point to it.

    For records that change often, use a reference line rather than copying the full data. A printed budget snapshot can show its export date and point to the live budget file. A guest-count summary can name the current source file and its last update. If you keep a digital counterpart, use a matching file name such as “VEN-02 venue access, updated September 28.” A consistent title makes paper and digital records easier to connect.

    Use visible labels for the most common retrieval paths. Put a narrow tab or index flag on the sections you open most often, such as venue, vendors, and payments. If you use color, assign it a meaning that will remain stable, such as one color for decisions waiting on you and another for a page that will be handed to a helper. Color should support the printed label, not replace it.

    Before printing new labels, ask another person to use your index to find two answers. Watch where they hesitate. If they choose the wrong tab, revise the index language. A wedding planner, partner, or trusted helper does not need to learn your private shorthand to use the binder. Clear labels make the system useful to the people who may need it during a busy moment.

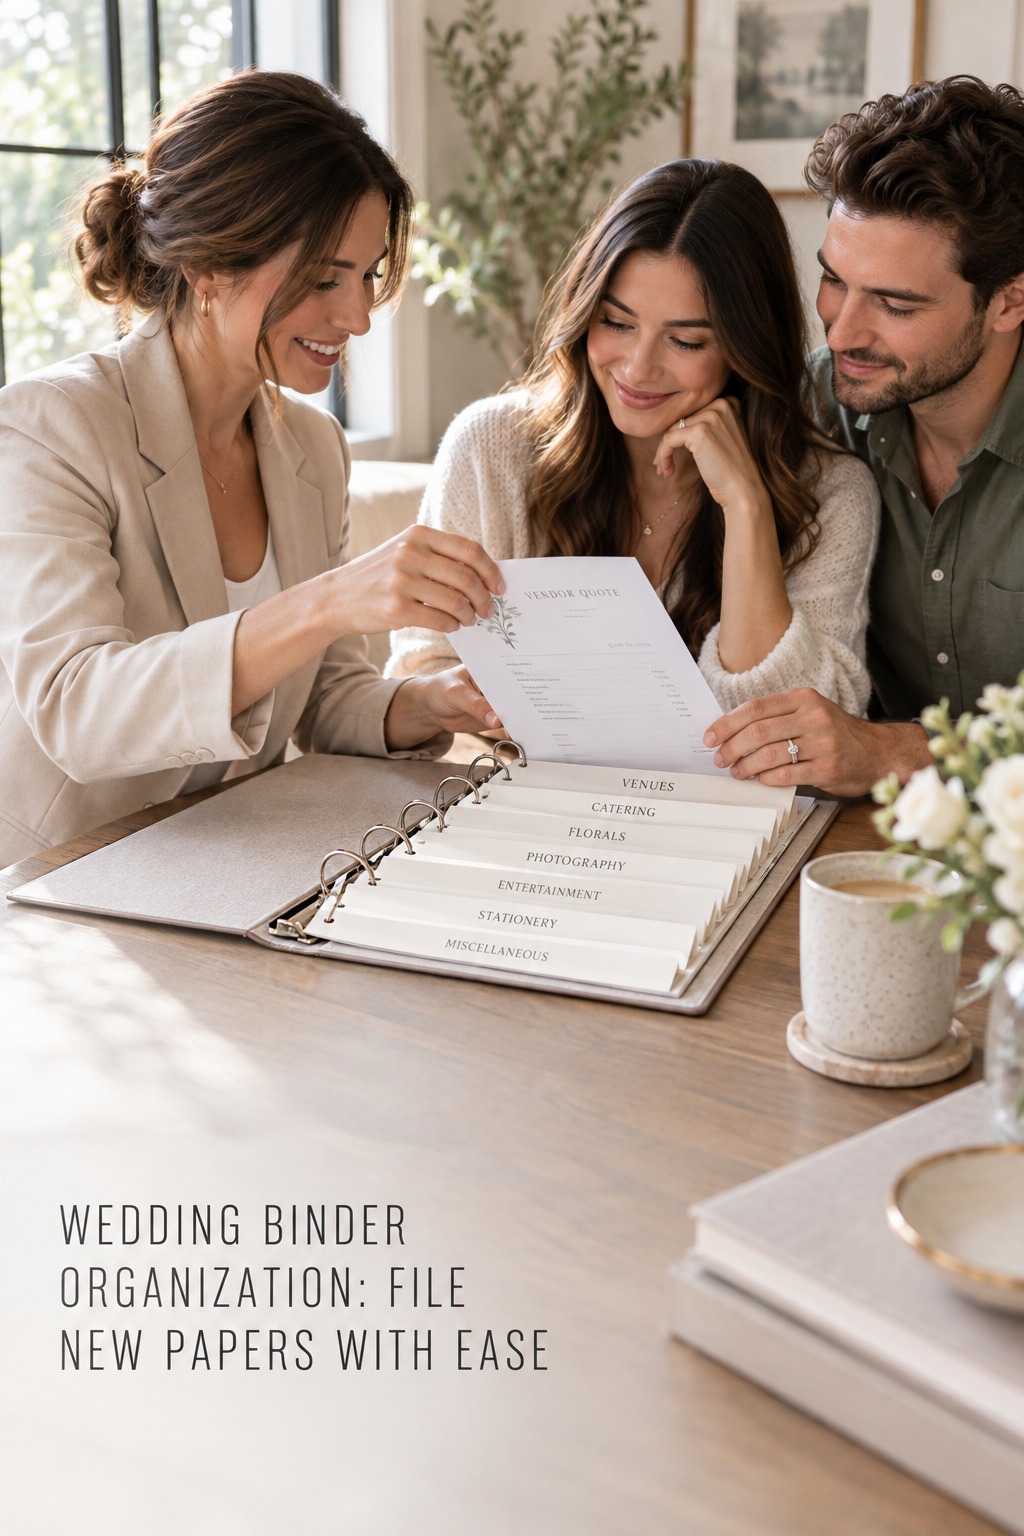
    wedding binder organization as a couple files a new vendor quote
    A simple intake routine gives every new paper a clear next step.

    Route Every New Document Through One Clear Path

    Loose paper tends to accumulate when every new item requires a fresh decision about where it belongs. Create one temporary intake pocket or envelope and use it only for items that have not yet been processed. This is not a permanent miscellaneous section. It is a short holding place for the next review, so a receipt or note does not disappear between a bag, desk, and binder.

    When you review the intake pocket, give each paper one of four outcomes: file it as a current reference, record its information in the authoritative digital source, keep it temporarily while a decision is open, or discard it after confirming that it is not needed. Add a date and a clear owner to open items. If a quote needs a reply, the paper should lead to a next action rather than silently becoming part of the archive.

    Use the same routine for information that begins digitally. If an email contains an important detail, save the original message or attachment in the relevant digital folder, then add a short reference to the binder only if you will need it during a meeting or while away from a screen. A binder should be a useful index and working copy, not a second inbox that requires every email to be printed.

    For a vendor quote, the paper summary can show the vendor name, quote date, total, included services, expiration date if stated, next question, and page code. Keep the full proposal in its source format where you can search the details. When you choose a vendor, mark the summary as “booked” and add a pointer to the signed agreement. When you decline, mark it “closed” or move it to an archive so it cannot be mistaken for a live option.

    For receipts and payment confirmations, capture enough context to identify what was paid, when, by whom, and for which vendor. If the official record is digital, note where it lives and whether the binder copy is only a convenience. Avoid putting full card details, account numbers, or unnecessary personal information in a binder that travels to appointments. Keep sensitive originals or records in a secure place.

    Make filing possible in less than a minute. Keep a pen, a few blank sheets, and one simple label method with the binder. You might write the page code and date at the top when you create a note, then transfer the information to a permanent page during your weekly review. If the process requires elaborate decoration or multiple apps, it will be tempting to postpone it.

    A one-page intake checklist can keep the routine steady: date the item, identify its owner, note its status, choose its permanent home, link related pages, and remove the temporary copy when the permanent record is ready. You can place this list in the inside cover. The same steps work for a printed contract, a floor-plan revision, an appointment note, or a document from a family helper.

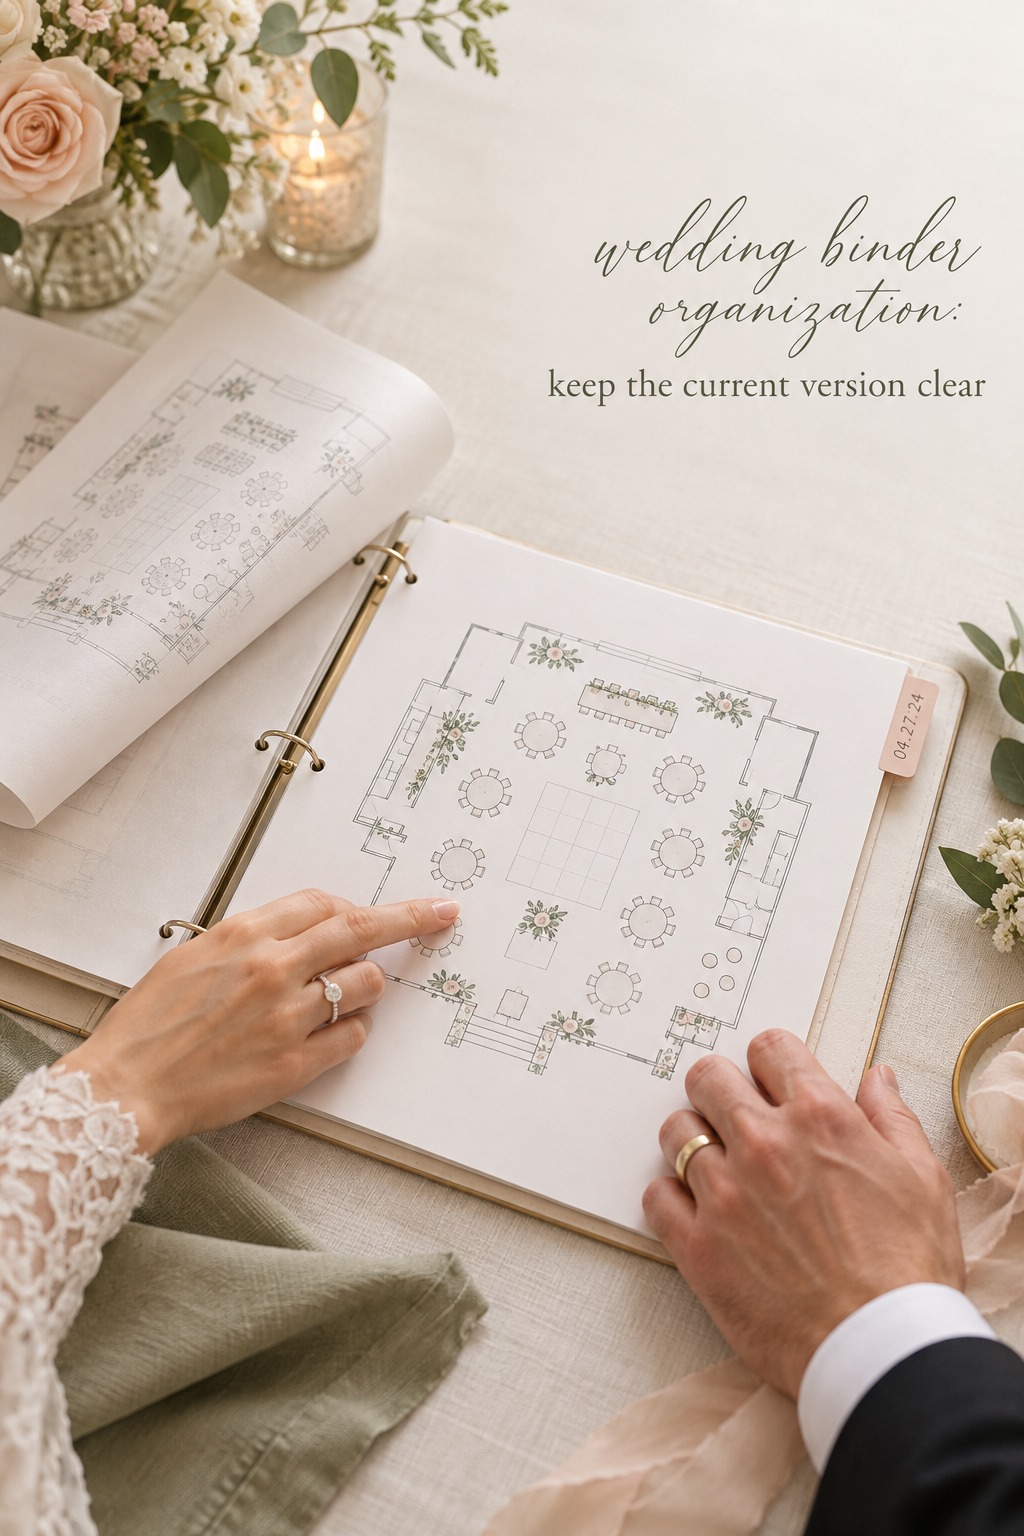
    wedding binder organization showing a clearly marked current floor plan
    A visible date and status help distinguish the approved page.

    Make the Current Version Obvious

    When plans change, do not rely on memory to tell an old page from a current one. Add a small control line to pages that may be revised: status, date updated, and owner. “Draft, September 12, Jamie” and “Approved, September 28, both partners” are more informative than a stack of nearly identical sheets with no context. You can adapt the exact labels to fit your routine.

    Keep a short status vocabulary and use it everywhere. A practical set might be “working,” “waiting,” “approved,” and “superseded.” Working means the page is still being edited. Waiting means someone else needs to respond. Approved means it reflects the current decision. Superseded means another version replaced it. Avoid statuses that overlap or sound final when they are not.

    When a page changes, update the current copy first, then move the previous version to a clearly labeled archive or remove it if there is no reason to retain it. If you keep an old version for context, mark it “superseded” across the top and add the date it stopped being current. Do not leave two active-looking versions next to each other. That is an invitation to use the wrong information.

    For decisions that affect several people, keep a small decision log. Record the date, what was decided, who approved it, the reason if it will help later, and the pages that need updating. A short entry can prevent the same discussion from reopening because someone found an old note. It can also remind you to update a vendor brief, seating draft, and event timeline after one choice changes.

    Agree on one owner for each frequently changing record. One partner may own the guest-count summary while the other maintains vendor questions. Both can contribute, but the owner checks that a confirmed change reaches the current copy. Ownership is not about controlling the plan. It is a practical way to make sure an update has a destination and someone notices when two records disagree.

    Use paper for what paper helps you do: annotate a venue plan, compare options during a meeting, or give a helper a dated reference. Keep detailed spreadsheets, long email threads, and frequently changing lists in a digital home when that is easier to maintain. A printed page should show when it was made and where to verify more detail. This is consistent with the paper and digital distinction discussed in Big Day Binder’s printable planner guide.

    If you want a more structured shared planning resource alongside the paper index, The Wedding Command Center may be worth considering. Keep the binder’s role clear: it is the quick paper reference, and any digital workspace should hold only the information you intend to keep current there. Avoid copying the same full record into several places unless someone is responsible for reconciling them.

    Test the System in Real Planning Moments

    A binder is organized when a person can use it, not when the tabs look attractive. Try a short retrieval drill with questions you are likely to hear: What is the venue’s load-in window? Which vendor still needs a response? What is the latest approved floor plan? When is the next payment due? Give yourself a minute to find each answer and confirm the date or status before acting.

    Notice both the search path and the confidence you have in the answer. If you need to check a pocket, flip between tabs, and compare two versions, add a cross-reference or clarify the status line. If the information is not meant to live on paper, improve the pointer to its digital home. You do not need to print more pages to make a binder easier to search.

    Run the drill before a venue tour or vendor meeting. Put the relevant pages near the front or add a temporary flag that can be removed afterward. Bring a short question list and a blank notes page with its section code already written at the top. After the meeting, transfer decisions to the current record and update any related references. The binder should support the conversation and capture what changed.

    A weekly reset can take ten minutes. Empty the intake pocket, process new documents, check whether any “waiting” items need follow-up, remove superseded copies from active sections, and review the index for changed page locations. Once a month, ask whether the current tabs still match the questions you ask most often. Combine unused sections instead of adding more tabs by default.

    Before sharing the binder with a planner, family member, or day-of helper, make a slim, dated set of pages for that person. Include only what they need, note the page codes that answer likely questions, and state who can approve changes. A planning binder and a handoff packet serve different moments. A small, current extract is easier to use than handing over every draft and note from the engagement.

    Post-it’s wedding planning binder guide offers a basic example of visible section tabs and flags. You can keep that simplicity while making the system more dependable with page identities and version labels. The best design is the one you will use when you have little time, a full inbox, and someone waiting for a clear answer.

    Sources and Methodology

    This guide was developed from a review of US English search results and published wedding binder guides. The source review showed that many pages focus on supplies, section lists, and starter templates. This article narrows the advice to page retrieval, document intake, and keeping one version visibly current. The two linked examples are included for their basic approaches to tabs and paper planning references.

    wedding binder organization helping a couple find vendor details
    A useful binder helps couples answer vendor questions with confidence.

    FAQ

    How do I organize a wedding binder so I can find things quickly?

    Start with a one-page index that says what each tab answers, then add short page codes, dates, and cross-references to related records. Test the index with real planning questions and revise labels when another person hesitates. A predictable route matters more than adding more sections.

    Should I number every page in my wedding binder?

    Number the pages that people may need to reference again, such as vendor summaries, venue rules, payment schedules, and approved layouts. You can leave temporary brainstorming sheets unnumbered. Stable codes by section are often more useful than relying on a page’s physical position, because pages can be moved or replaced.

    How can I stop old wedding planning documents from confusing us?

    Put a status and update date on records that change. When a new version is approved, label the previous one as superseded and move it to an archive or remove it if you do not need it. Keep only one version in the active section and record who owns future updates.

    What information should stay digital instead of going in the binder?

    Keep information digital when it changes often, needs formulas or search, or several people update it. A live guest list, detailed budget, long vendor email thread, or editable task tracker may fit better online. The binder can hold a dated snapshot and a clear reference to the current source.

    Do I need color-coded wedding binder tabs?

    No. Clear words and consistent placement are enough for many couples. If color helps you scan, give each color one stable meaning and keep the written label beside it. Avoid assigning colors to so many topics or people that you need a key every time you open the binder.

    How often should I update a wedding planning binder?

    Process new papers after meetings and set a brief weekly reset for open items, current copies, and the index. You can also review the system before a major appointment or handoff. The right schedule is frequent enough that loose papers do not pile up and the active pages remain trustworthy.

  • Wedding Organization Board: Record Decisions Clearly

    Wedding Organization Board: Record Decisions Clearly

    A wedding organization board can do more than display an attractive plan. Give it one focused job: keep important choices visible, show what each choice depends on, and preserve why you decided. That way, when a venue asks about a date, a parent revisits the guest count, or a vendor sends a revised proposal, you can return to the decision instead of starting the conversation from scratch.

    This is a decision board, not a mood board and not another master checklist. It does not need every address, payment, contract clause, or saved photograph. It needs enough context for the people involved to understand the question, compare realistic options, agree on an outcome, and know where the supporting detail lives. A paper board, shared digital canvas, or simple spreadsheet view can all work if the same information stays easy to find.

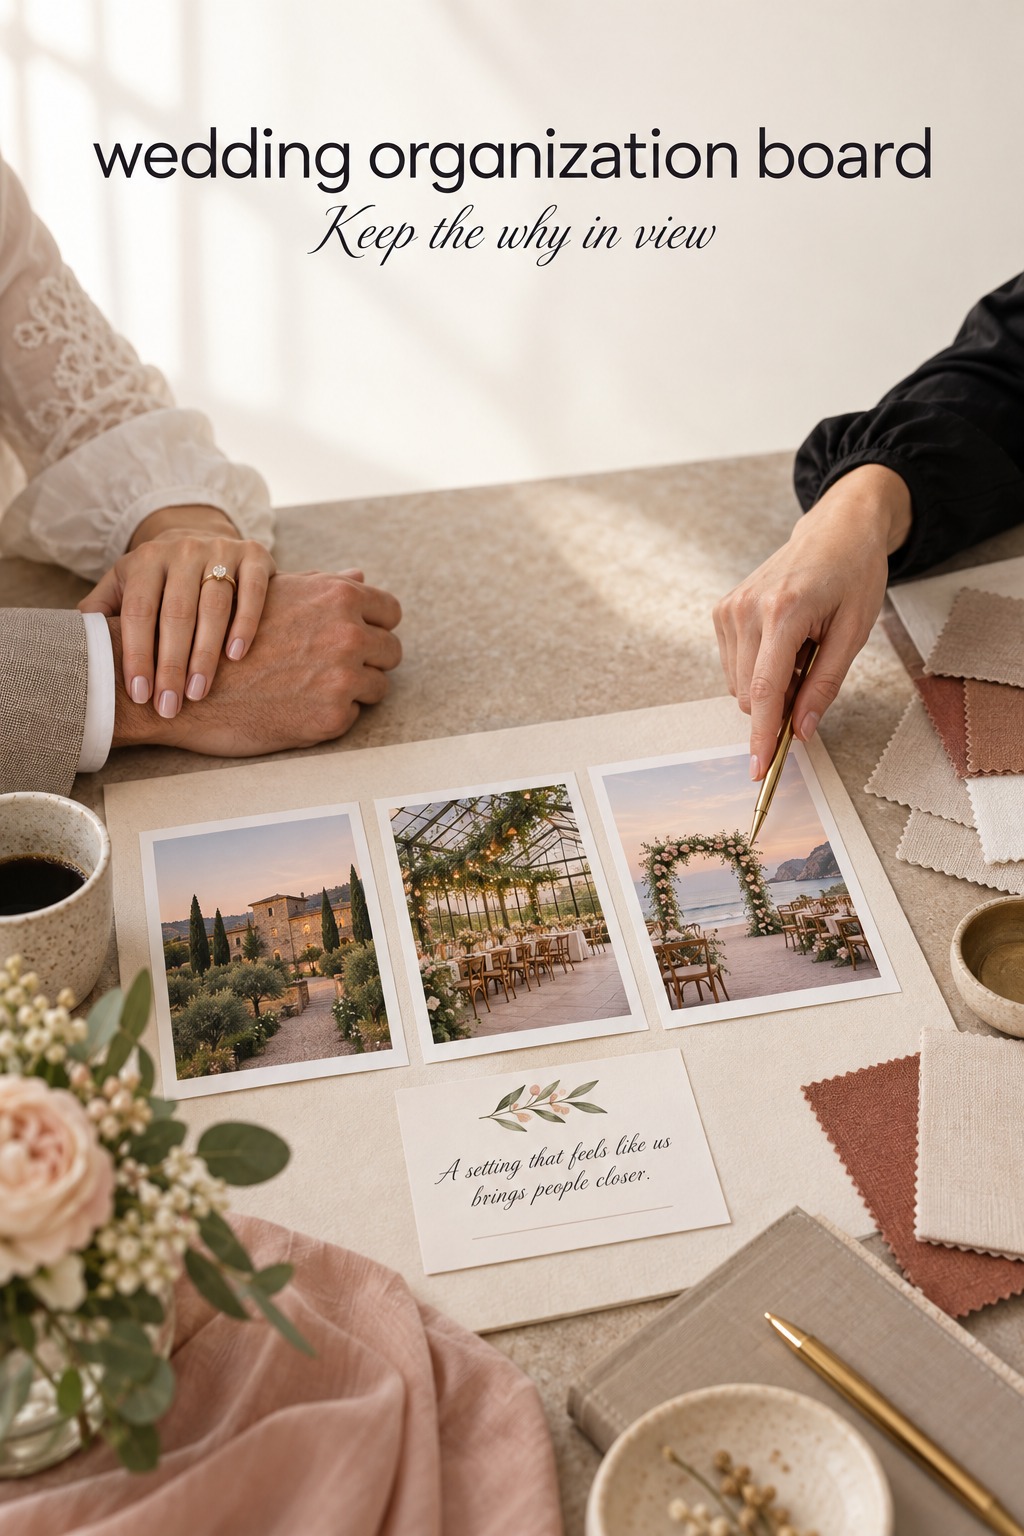
    wedding organization board with a couple reviewing venue decision cards
    Begin with one choice you want to make together.

    Why wedding decisions keep reopening when the reason is missing

    Most planning friction is not caused by forgetting that a decision happened. It is caused by forgetting what the decision was meant to solve. A couple may remember choosing a venue, for example, but not that they accepted a smaller getting-ready room because the ceremony and reception could happen in one location. When a new space looks appealing, the conversation starts over because the trade-off was never made visible.

    Unrecorded choices also invite people to compare different things. One person is thinking about guest comfort, another is focused on the total cost, and someone else is responding to a beautiful photograph. All three can have valid priorities, yet the discussion feels circular when nobody has named the criteria. A decision board puts the question and its constraints in view before opinions multiply.

    There is a useful difference between a task and a decision. “Ask the venue about the rain plan” is a task. “Choose between the indoor ceremony room and the tent option” is a decision. The task can move through a simple status list. The decision needs alternatives, evidence, a person or pair responsible for the call, and a record of the result. Mixing these into one pile can make open questions look like forgotten chores.

    A decision record helps most when a choice has consequences, depends on input from more than one person, or may be questioned again later. That might include the guest-count ceiling, ceremony format, venue, catering approach, or the division of responsibilities with family. It is unnecessary to formalize tiny choices that are easy to reverse. The board should reduce repeat discussion, not make wedding planning feel like office paperwork.

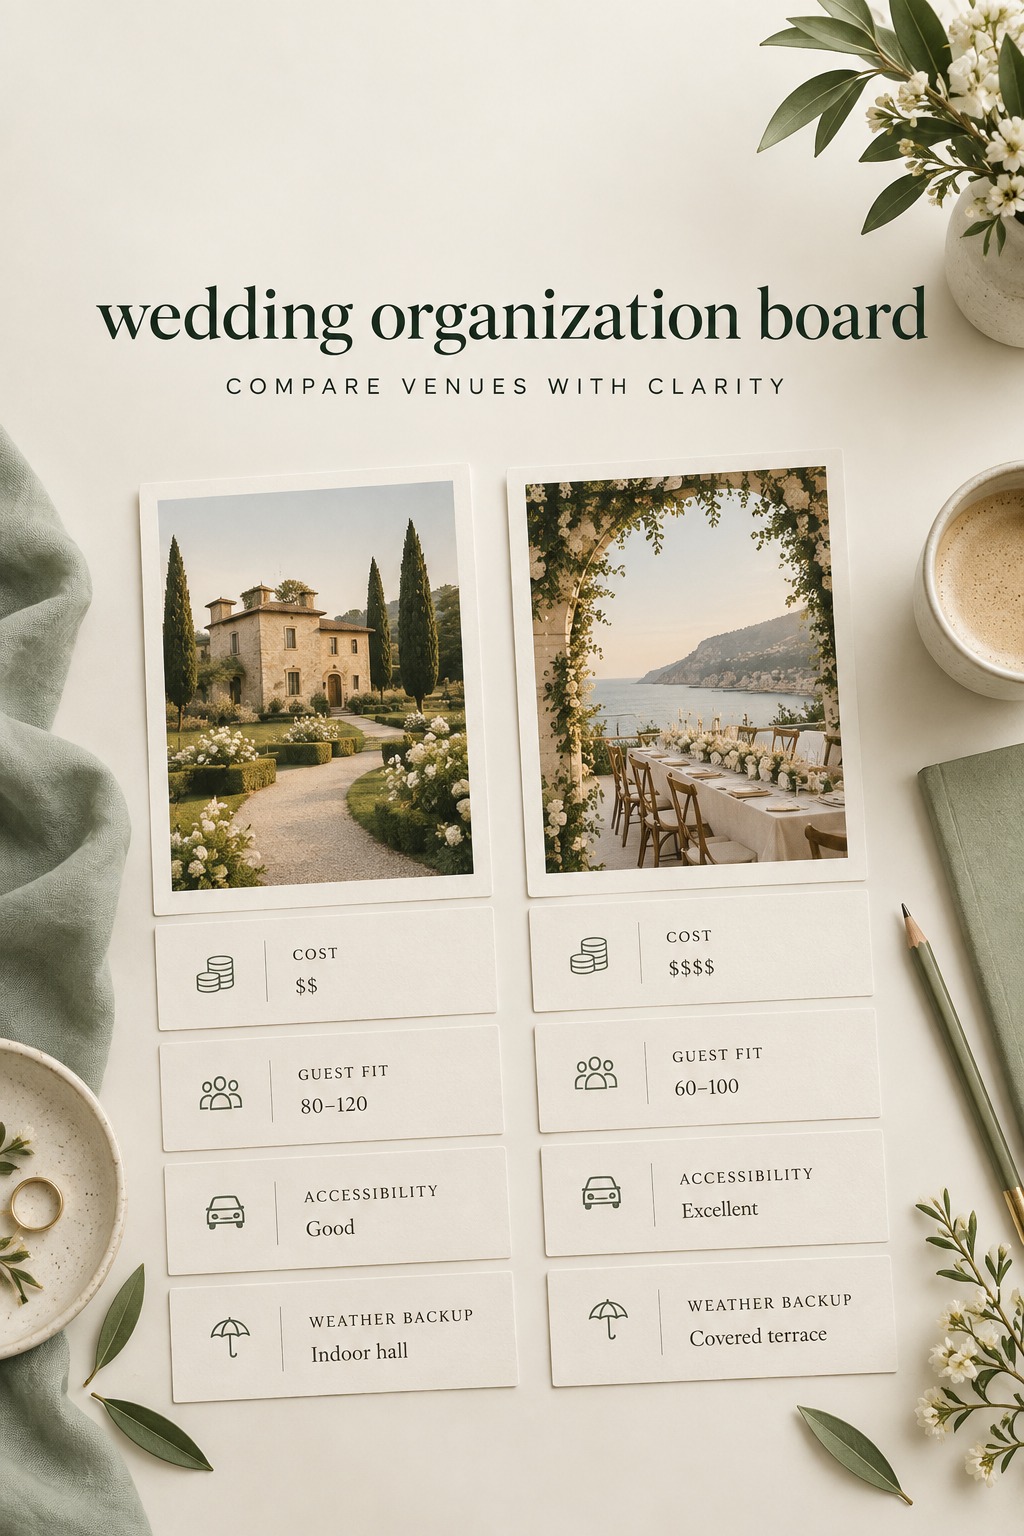
    wedding organization board comparing venue cost guest fit and accessibility
    Compare the same criteria before choosing a venue.

    What belongs on a wedding decision board, and what belongs elsewhere

    Start with a small set of decision cards. Each card should state one question in plain language, such as “Which of these two venues fits our guest needs and budget?” Add a decision owner, a target date, the people whose approval is needed, and a short description of what is already fixed. If a date, accessibility need, travel limit, or guest-count boundary rules out an option, state that up front.

    Give each card a few comparable alternatives. Three options are usually easier to discuss than an open-ended collection, but there is no required number. An option can be “keep the current plan” or “wait for one missing quote,” not only a product or vendor. Include the evidence that matters, such as a proposal link, floor plan, menu, or a note from a site visit. Keep the original document in its proper folder and link to it from the card.

    Choose a short list of criteria before scoring anything. For a venue, a couple might consider the full quoted cost, capacity, travel for guests, accessibility, weather backup, and the amount of setup the venue handles. The right criteria depend on the couple. A numbered score is optional; it can help compare options, but it should not disguise a hard requirement or pretend that two people value everything equally.

    Record the constraints separately from preferences. “Must accommodate our confirmed guest range” is a constraint if the headcount is settled. “We like a garden setting” may be a preference. The distinction makes trade-offs easier to discuss. If a preferred feature conflicts with a fixed budget or a guest need, everyone can see the conflict rather than arguing about which option feels more exciting in isolation.

    The board is an index, not a storage cabinet. Detailed payment schedules belong with the budget record; guest addresses and dietary information belong in the guest record; contract language belongs in the signed agreement. A shared planning spreadsheet can hold those details, while the board points to the relevant row, document, or folder. This approach reflects the structure of common planning workspaces that keep budget, guest, vendor, and timeline information connected, while letting each record serve its own purpose.

    Use privacy judgment when sharing the board. A decision card can link to a restricted contract or private guest record without displaying personal details to every collaborator. Keep access to sensitive records limited to the people who need them, and avoid placing addresses, phone numbers, payment information, or private family context on a broad display board. A wall version can show the question and next step while the supporting files stay in a controlled digital location.

    Build a decision card that another person can understand

    A useful card can be compact. Write the decision question, owner, deadline, alternatives, criteria, constraints, and source links. Leave a space for the outcome and the reason it was selected. Add a next action only when the choice creates one, such as asking for a revised proposal or confirming a hold. Anyone invited into the conversation should be able to tell whether the choice is open, waiting for evidence, ready for approval, or closed.

    Keep statuses simple and meaningful. “Needs definition” means the question is still too broad. “Gathering input” means a missing quote or answer could change the comparison. “Ready to decide” means the alternatives and constraints are clear. “Decided” means the outcome and its rationale have been recorded. “Revisit” should be reserved for a real change in circumstances, not a passing urge to reconsider.

    Agree on the board’s vocabulary before adding many cards. One person may say “pending” to mean the couple has not chosen, while another may mean the vendor has not replied. Those are different states. Use labels that name what is actually happening, and if a decision is waiting on someone outside the couple, write that person or organization and the date of the follow-up. A shared definition keeps the display from becoming ambiguous.

    For a physical board, use one card per decision and reserve a small area for closed decisions. A card should be removable or easy to update, but do not throw it away as soon as a choice is made. The reason and approval may be useful months later during a vendor call or a family conversation. For a digital board, keep the closed card searchable and link to the final contract or confirmed record.

    wedding organization board with venue choices and a written decision rationale
    Keep the reason beside the choice it supports.

    Use the board to compare options without turning every choice into a debate

    Imagine that two venues are under consideration. Before comparing their photographs, write down the actual decision: “Which venue best fits our guest range, total budget, travel needs, and ceremony plan?” Add the confirmed date, an honest guest estimate, and any requirements that must be met. If the guest count is still changing, say so. A comparison built on an uncertain assumption should not be presented as final.

    Next, collect the same kind of information for both venues. Put the quoted total in the budget record and link it. Note what each proposal includes, what remains unclear, and whether the ceremony and reception can use the same site. Link a floor plan or written venue response. If one venue has not answered a question, mark that evidence as missing instead of filling the gap with an assumption.

    Now compare the options against the criteria the couple selected. A venue that looks beautiful may still be a poor fit if the guest route is difficult or the overall quote exceeds the couple’s limit. A less dramatic room may be a stronger choice if it meets the fixed needs and leaves room for priorities elsewhere. The point is not to calculate a mathematically perfect wedding. It is to make the reasoning legible so the couple can decide with the same facts in view.

    When criteria conflict, write the trade-off in a sentence. For example: “We prefer the garden ceremony, but the indoor backup at Venue B makes the weather plan simpler, so we are choosing B.” The sentence need not convince every relative or predict the future. It needs to capture the couple’s priorities at the time of the decision. If the assumptions change, the record will show which part may need another look.

    Before closing the card, state who has authority to decide. Couples may invite opinions from parents, a planner, or the wedding party, but input and approval are not always the same thing. A respectful process can welcome practical advice while making clear who owns the final choice. If a family contribution or shared budget changes that arrangement, discuss the expectation directly and record the agreed boundary in language everyone understands.

    After choosing, update the relevant source record. Confirm the decision in the budget or vendor tracker, save the signed agreement in its folder, and note any resulting task. Then mark the board card decided and add the reason, date, and next action if there is one. That last step connects a conversation to real planning work, rather than leaving the board as a set of opinions detached from the wedding plan.

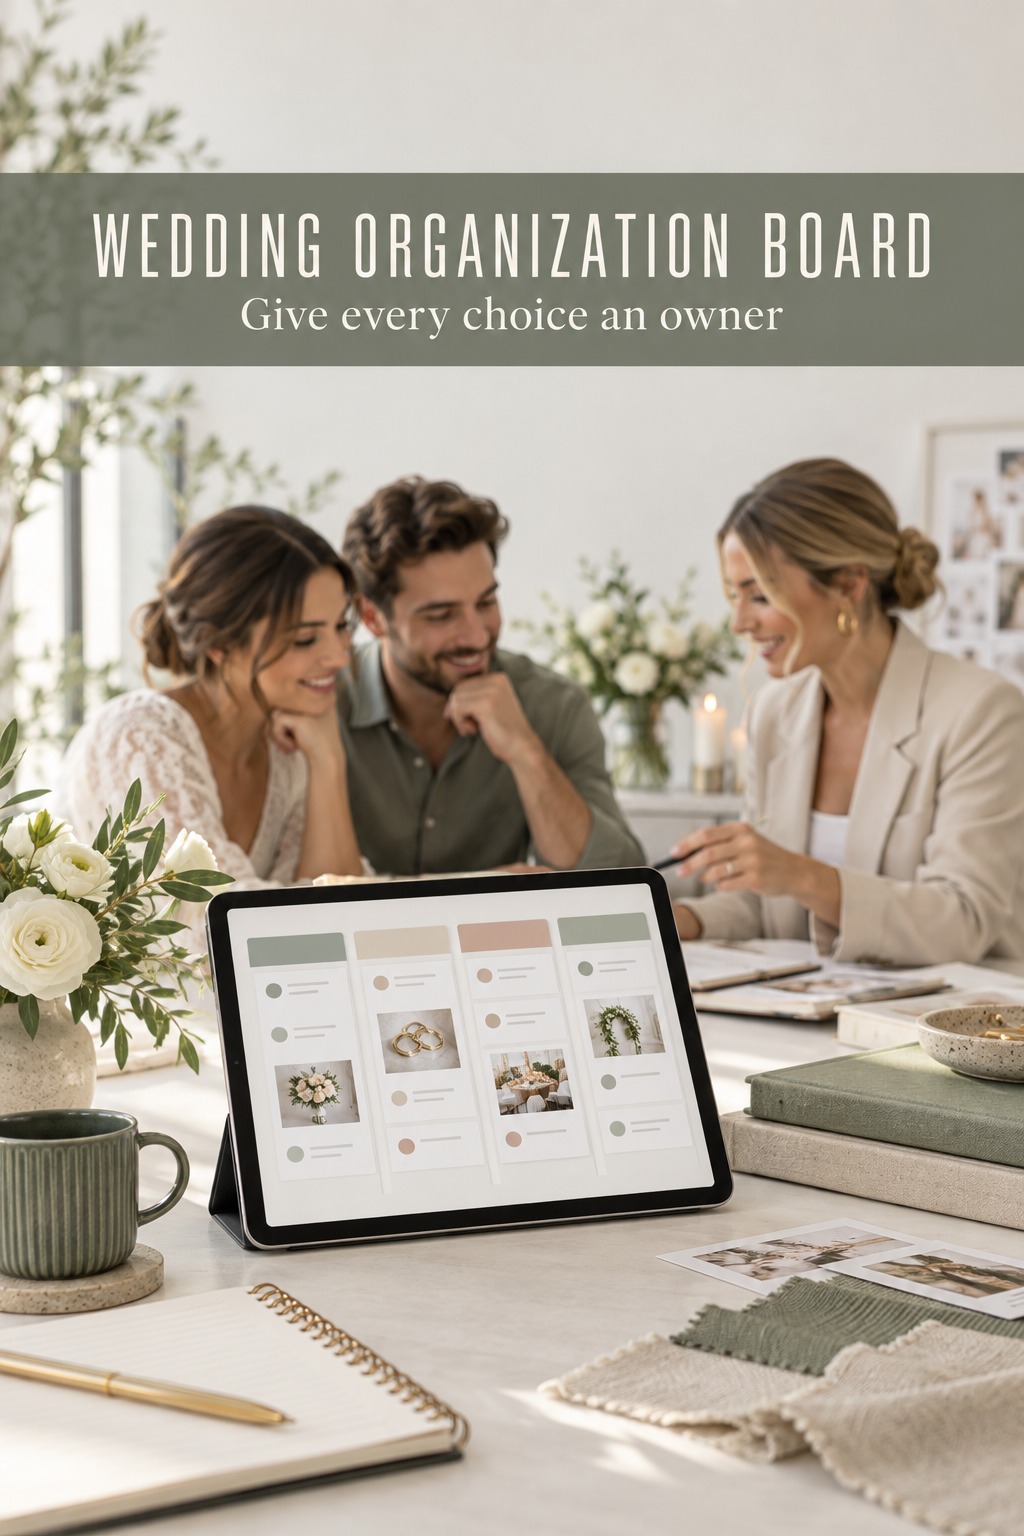
    wedding organization board on a tablet as a couple and planner review decisions
    Make it clear who will bring each choice to a close.

    Keep the decision record useful through planning and handoff

    A board only helps when it is current enough to trust. Set a short review at a time that already works for the couple, perhaps during a weekly planning check-in. Review cards that are ready to decide, identify choices waiting on evidence, and agree on a next step for each open item. Close completed decisions once their linked records are updated. If there is nothing to discuss, the review can be brief.

    Do not treat every open card as urgent. A decision date should come from a real dependency, deadline, or agreed planning rhythm. If the venue choice affects the ceremony plan, guest information, or vendor availability, that connection belongs on the card. If the timing is flexible, avoid inventing pressure. A clear reason for the date helps collaborators understand why a choice is being discussed now.

    Reopen a decided card only when a relevant fact changes. Examples include a vendor withdrawing, a quote changing materially, the guest count moving outside the agreed range, or a requirement that was previously missed. Record what changed and which assumption no longer holds. “We saw another idea online” can be a reason to look, but it is not by itself evidence that a settled choice should be undone.
    When a choice must be reconsidered, preserve the earlier outcome. Add a new note or revision rather than quietly rewriting the card as if the original decision never existed. This history can prevent repeated debates and help the couple explain a change to the people affected. It also makes it easier to see whether the new choice addresses the actual problem or only responds to new pressure.

    Keep the board small enough to scan. Archive closed cards after their details have been transferred to the appropriate source records, but preserve a way to find them again. Group by decision area if that helps, such as venue, guest experience, ceremony, vendors, or design. Avoid adding color labels that do not communicate a clear difference. A visual system should help someone answer “What needs a decision?” at a glance.

    Before handing planning information to a coordinator or trusted helper, review the decided cards that affect the wedding day. Share the final choices, the reason behind any unusual constraint, the current source documents, and the person to contact if an open decision changes. Do not ask the helper to infer which version is current from a trail of old messages. A tidy decision record can sit alongside the schedule and vendor contacts as one part of a useful handoff.

    The board does not need to become another elaborate wedding project. Begin with one live choice that has caused repeat discussion. Create a card, agree on what evidence matters, record who decides, and close it with a reason. If that makes the next planning conversation clearer, use the same pattern for the next consequential choice. If it adds maintenance without improving decisions, simplify the fields until the board earns its place.

    Sources and methodology

    This guide focuses on an editorial planning method. Its board format is a practical synthesis, not a claim that one tool or scoring system is required. Wedding planning platforms describe boards and workspaces that connect tasks, collaboration, and supporting records. See the Jotform wedding planning board template and Aisle’s wedding planning spreadsheet guide for examples of task and record structures. No price, booking-window, or trend claims are made here.

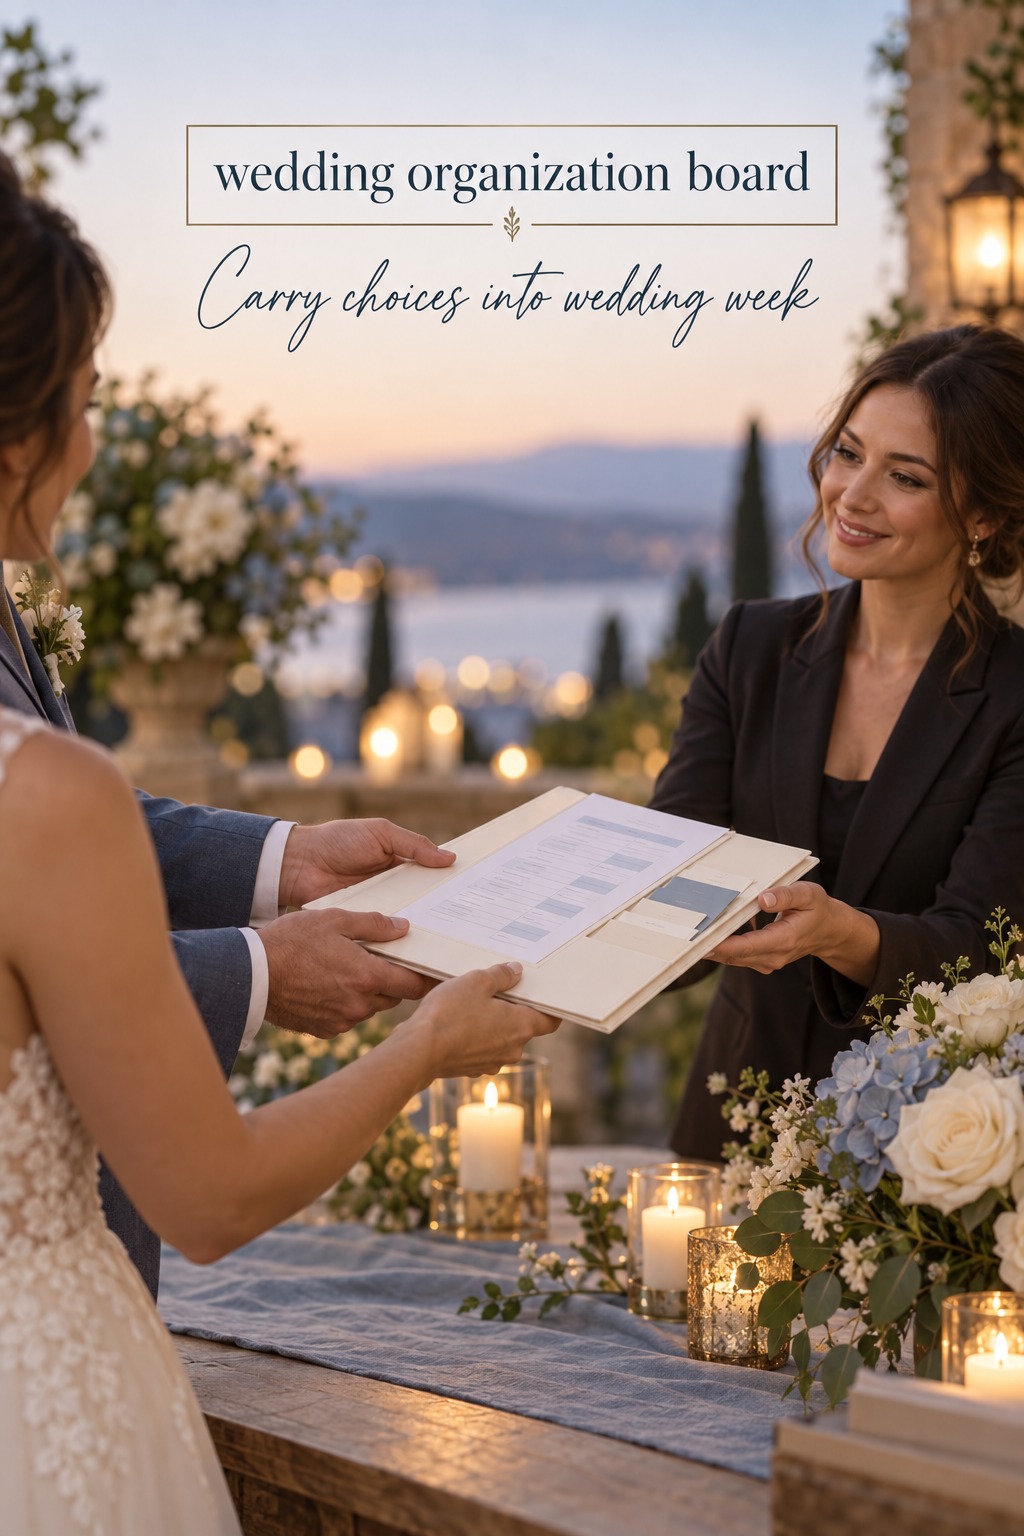
    wedding organization board choices handed to a coordinator for wedding week
    Pass confirmed choices to the person supporting the day.

    FAQ

    What is a wedding organization board?

    In this guide, it is a shared visual index for important wedding choices. It shows the question, options, criteria, owner, deadline, evidence links, and recorded outcome so people can understand what is still open and why a choice was made.

    What should go on a wedding decision board?

    Include consequential choices that involve trade-offs or several people. Give each one a clear question, responsible decision-maker, target date, alternatives, criteria, constraints, source links, and a place to record the outcome and reasoning.

    Is a wedding organization board the same as a mood board?

    No. A mood board collects visual direction, while a decision board records choices and the reasoning behind them. A couple can link a mood board as evidence for a design choice, but visual inspiration alone does not say who approved the choice or what trade-offs it involved.

    Can a wedding organization board replace a checklist?

    It can show decisions that create tasks, but it is not an ideal replacement for every deadline and reminder. Keep the working checklist and calendar in the planning system you already use, then link a decision card to the next task when an outcome needs follow-up.

    How many criteria should we use to compare wedding options?

    Use only the criteria that can meaningfully distinguish the options. A short list of fixed needs and important preferences is easier to discuss than a long scorecard. If a criterion does not change the choice, it may not belong on that decision card.

    When should we reopen a wedding decision?

    Revisit a closed decision when a relevant assumption or fact changes, such as a vendor withdrawing, a material quote change, or a guest count outside the agreed range. Note what changed and preserve the earlier reasoning so the new discussion has a clear starting point.

    Should a wedding organization board be physical or digital?

    Choose the format the people making decisions will actually review. A physical board makes open questions visible at home, while a digital board can link directly to contracts and shared records. Either format needs a clear owner and a simple way to keep choices current.

  • Wedding Planning Sticky Note Board: Build a 90-Minute Setup

    Wedding Planning Sticky Note Board: Build a 90-Minute Setup

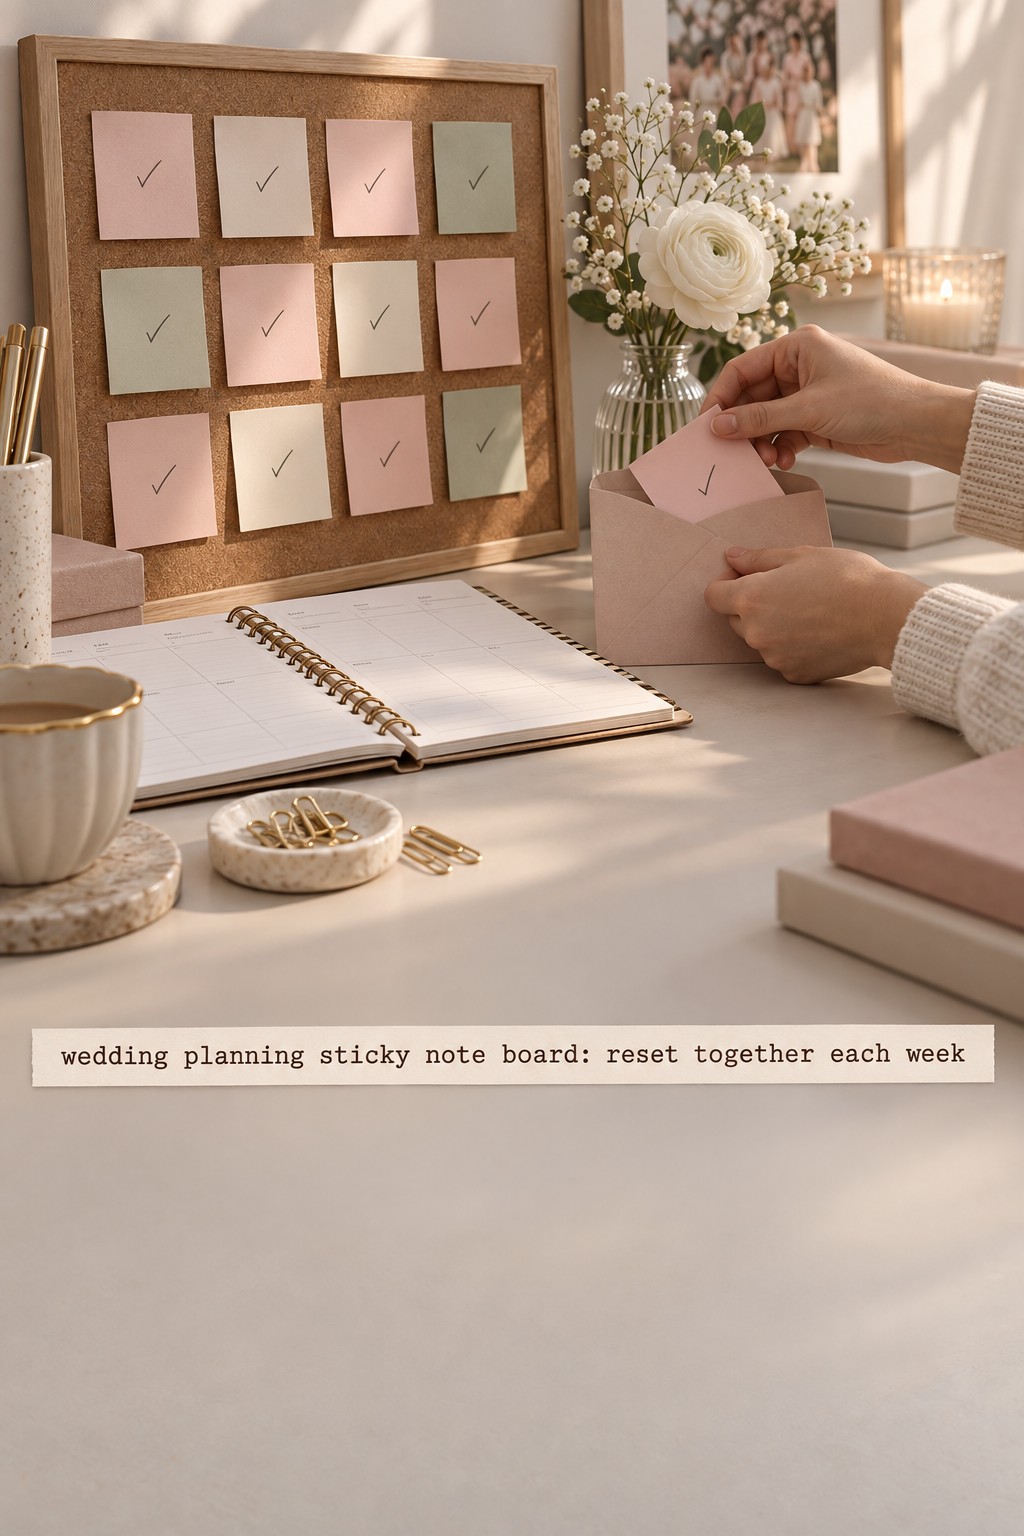
    A wedding planning sticky note board is most useful when it helps you decide what to do next. It does not need to hold every contract, guest address, budget figure, and inspiration photo. Give it one focused job: make the next pieces of work visible, movable, and easy to share.

    This guide shows you how to set up a physical task board in one 90-minute planning session, write notes that lead to real actions, and use a short weekly reset to keep the board current. You will finish with a practical two-week view, not a wall covered in every idea you have ever collected.

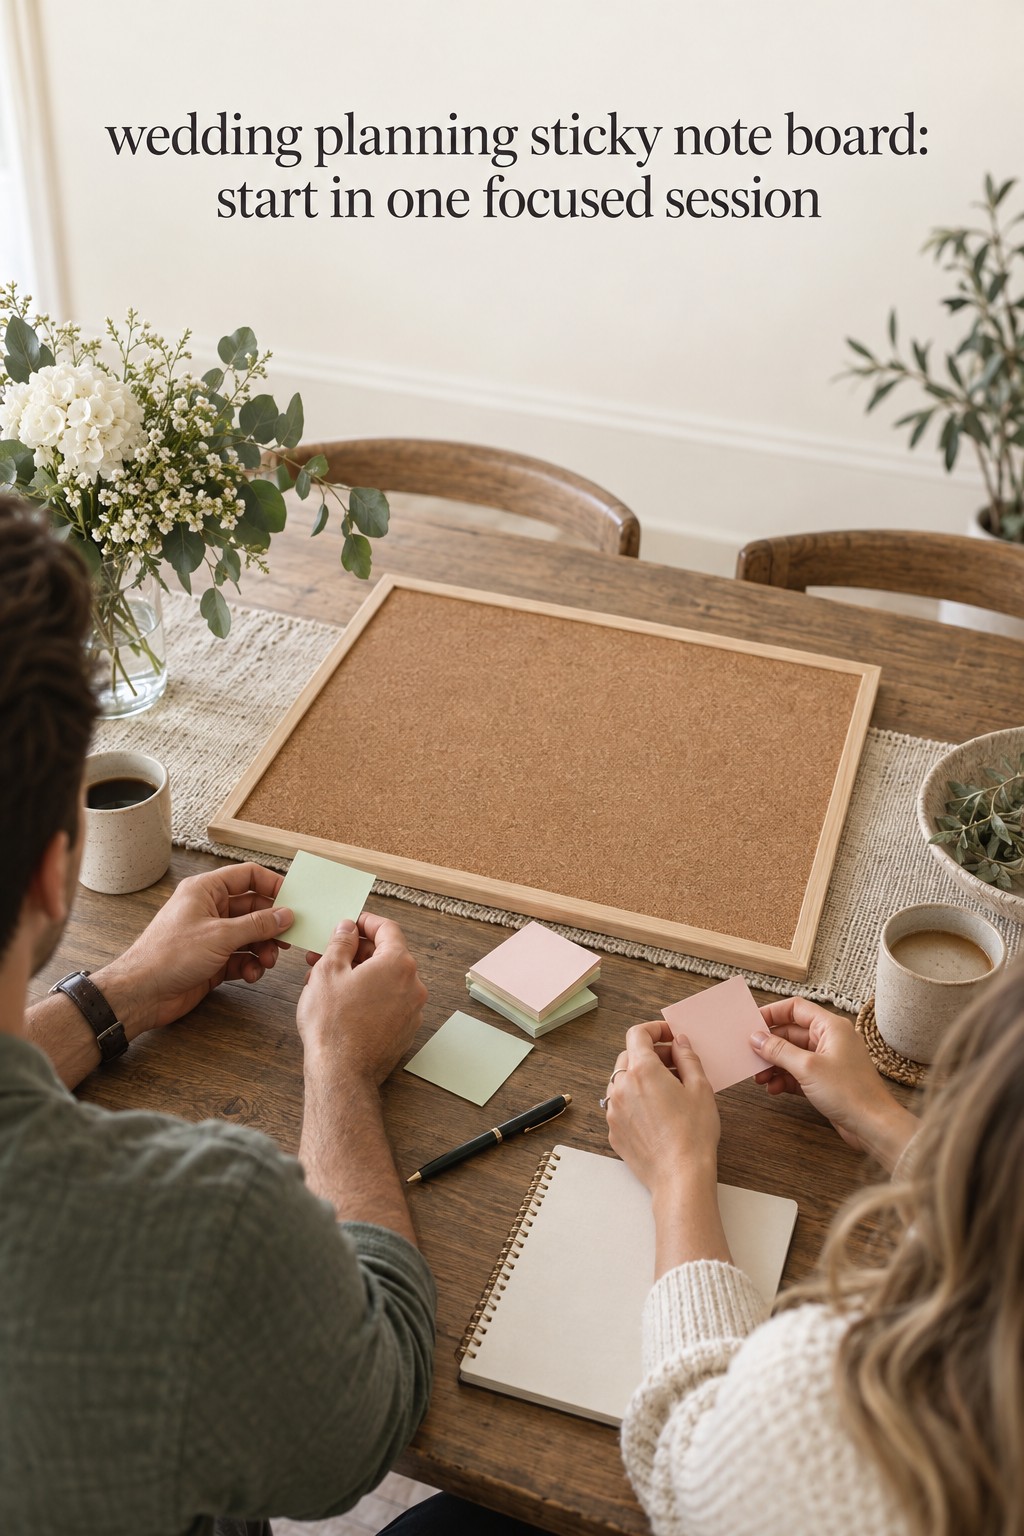
    wedding planning sticky note board with a couple beginning a focused task session
    Begin with a focused session and one clear planning purpose.

    The approach works with a foam board, a magnetic surface, a large sheet of paper, or a wall where removable notes are safe to use. The exact material matters less than agreeing on what each area means and where confirmed information will live after the planning session.

    Set up a wedding planning sticky note board in one focused session

    Before you gather supplies, agree on the problem the board should solve. Perhaps one partner cannot see what has already been decided. Perhaps tasks are scattered across texts and notebooks. Perhaps a venue decision is holding up invitations, rentals, and travel information. Write that problem at the top of your planning page. It will help you decide what belongs on the board and what can stay elsewhere.

    Gather a surface large enough to show a few columns, sticky notes in one or two sizes, a dark pen, removable tape, and a phone for taking a record of the finished session. You can use different note colors, but you do not need one color for every wedding category. Start with a color for ordinary tasks and a second color for items that are waiting on someone else. Add more only if the board remains easy to read.

    Set a timer and use this 90-minute agenda. It keeps the session short enough to finish while giving you time to sort the work before you decorate the board.

    • Minutes 0 to 10: Set the boundary. Name the board’s purpose, choose the next two weeks as the active planning window, and decide who will maintain the notes. Put contracts, payment details, private guest data, and long-term reference material somewhere else.
    • Minutes 10 to 25: Empty your heads. Each partner writes down wedding tasks, questions, and decisions they are currently carrying. Use one note for each separate item. Keep the writing quick and do not debate priorities yet.
    • Minutes 25 to 40: Group similar notes. Place related tasks near one another, such as venue, guests, vendors, attire, ceremony, or reception. Combine duplicates, but keep separate actions separate. A vendor inquiry and a signed contract are different tasks.
    • Minutes 40 to 55: Find the order. Ask what must happen first, what can happen at the same time, and what is waiting on a reply. Mark a dependency with a small arrow or a short note, such as “after venue confirms ceremony time.”
    • Minutes 55 to 70: Draw the board. Create the workflow columns described below. Put unplanned possibilities in a parking area, not in the active work columns.
    • Minutes 70 to 85: Choose the next work. Pick a small number of tasks that fit the next two weeks. Give each one an owner and a realistic timing cue. Move only those notes into the ready column.
    • Minutes 85 to 90: Capture the result. Photograph the board for reference, transfer real appointments to the calendar, and record any confirmed decision in the shared planning file that you use as the source of truth.

    If you are planning with a professional, family members, or a wedding party helper, invite them only for the parts where their perspective or responsibility matters. The couple should still decide who owns the board and which records are official. A crowded kickoff can create more discussion than the board can hold.

    Keep the top of the board simple. Write the wedding date or target season, the active two-week window, and the names or initials of the people using the board. Add a small legend for any symbols or colors. A visitor should be able to understand the layout without asking you to translate it.

    Do not spend the first session choosing decorative lettering or buying a perfect set of supplies. A plain, readable board makes it easier to notice whether the structure works. You can change the layout after a couple of weekly reviews, once you know which kinds of decisions keep getting lost.

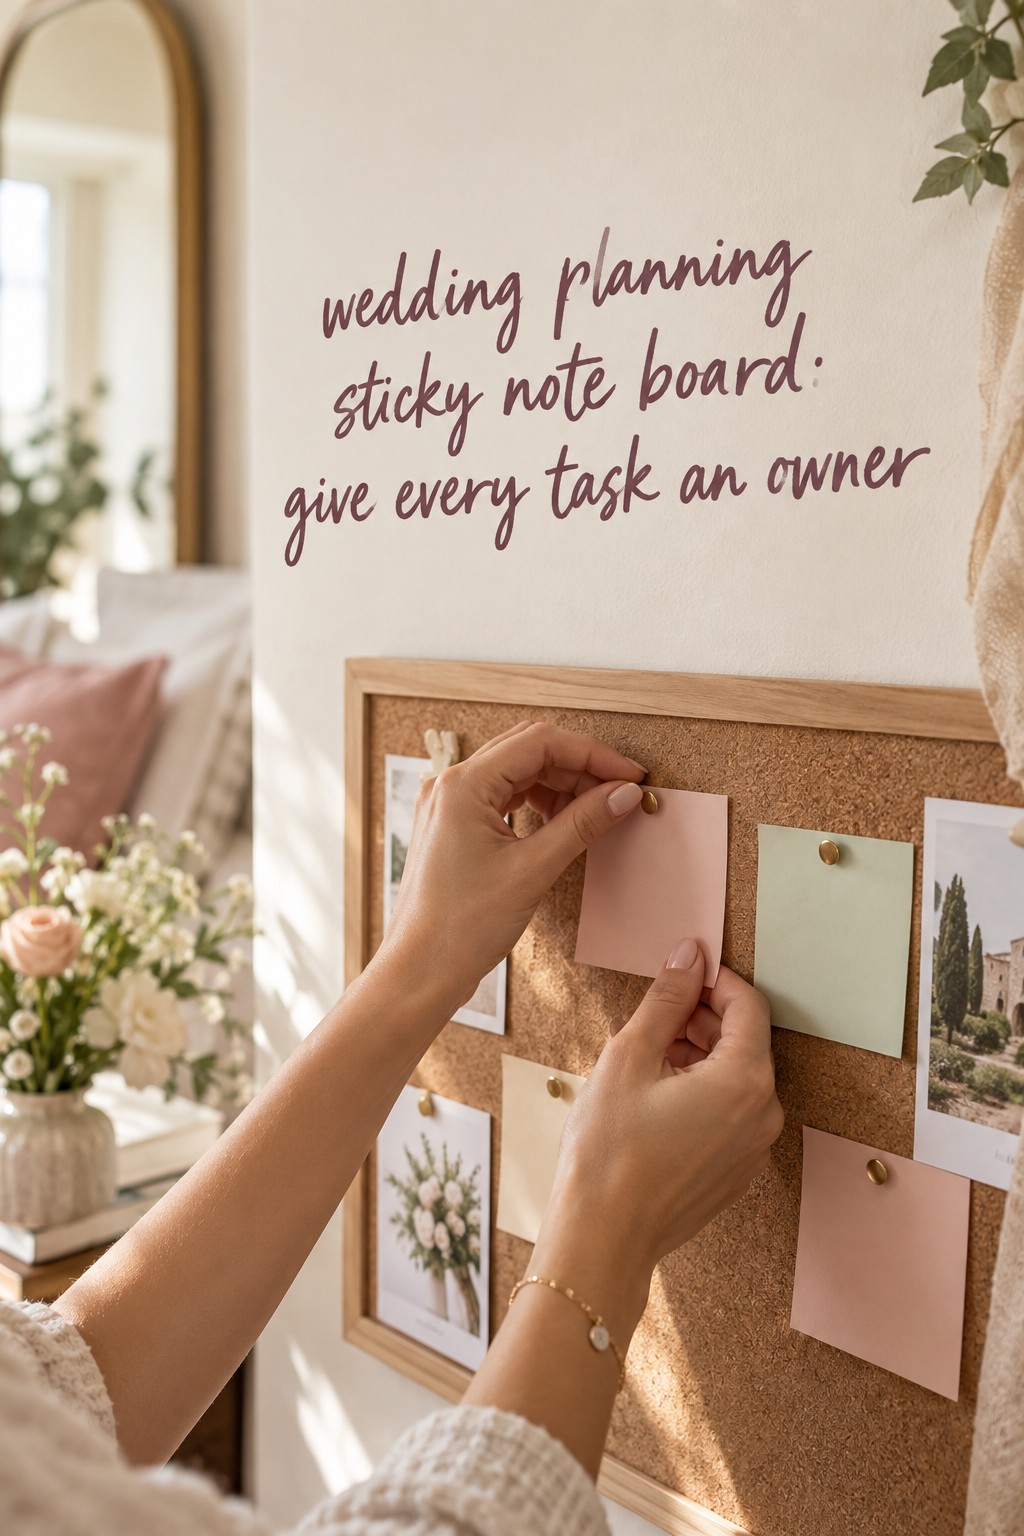
    wedding planning sticky note board with task owner assignments and blank notes
    Give each wedding planning note a clear owner and next step.

    Write sticky notes that lead to a clear next action

    A note should describe one piece of work that someone can start and finish. Begin with a verb, name the outcome, and add an owner. If timing matters, include a due date or a date to review the item. If another choice must happen first, record that dependency in a few words.

    For example, “photographer” is a topic, not a task. “Email three photographers to confirm availability for our date” gives the owner a clear action and a useful result. “Cake” is too vague. “Choose two cake flavor options for the tasting” is specific enough to move. “Figure out invitations” can become “Approve invitation wording after the ceremony time is confirmed.”

    Try this compact formula: verb + outcome | owner | timing | waiting on. You do not need every field on every note. A note for a shared decision may say “Choose ceremony start time | both | Sunday check-in.” A waiting note may say “Confirm rental delivery window | Sam | follow up Friday | venue reply.” Use names, initials, or a small owner key, as long as everyone understands it.

    Make the note small enough to move, but do not cram the explanation onto it. Put supporting details in a planning file and write a short reference on the note, such as “compare tab” or “see venue email.” A sticky note should tell you what to do next, not replace the contract, quote, schedule, or contact record.

    • Too broad: “Plan reception.” More useful: “Ask the venue which table layouts fit 90 guests.”
    • Too broad: “Sort guest list.” More useful: “Ask both families to review their address gaps by next Sunday.”
    • Too broad: “Flowers.” More useful: “Send the florist our approved palette and ceremony priorities.”
    • Too broad: “Marriage license.” More useful: “Check the official county instructions and add the application window to our calendar.”

    Break a task into smaller notes when different people can act independently or when one result unlocks another. “Book the venue” might split into “shortlist three venues,” “ask each about date availability,” “compare total package details,” and “review the agreement together.” Do not split a task so far that the board becomes a record of tiny motions. If the next step is obvious and one person can complete it in one sitting, one note is usually enough.

    A timing cue is not always a hard deadline. Use an actual date when a contract, vendor, guest communication, or appointment requires one. Use “this week” or “next review” when you are setting a planning intention. If you are not sure when something is due, assign someone to verify the date rather than guessing. A board should make uncertainty visible instead of turning it into a false commitment.

    Color can help you scan the board, but color alone is not a reliable label. A partner may not remember that green means vendor and blue means personal. Put the owner’s initials or a short category word on the note too. For accessibility and readability, use strong dark writing and avoid relying on subtle color differences to communicate urgency or responsibility.

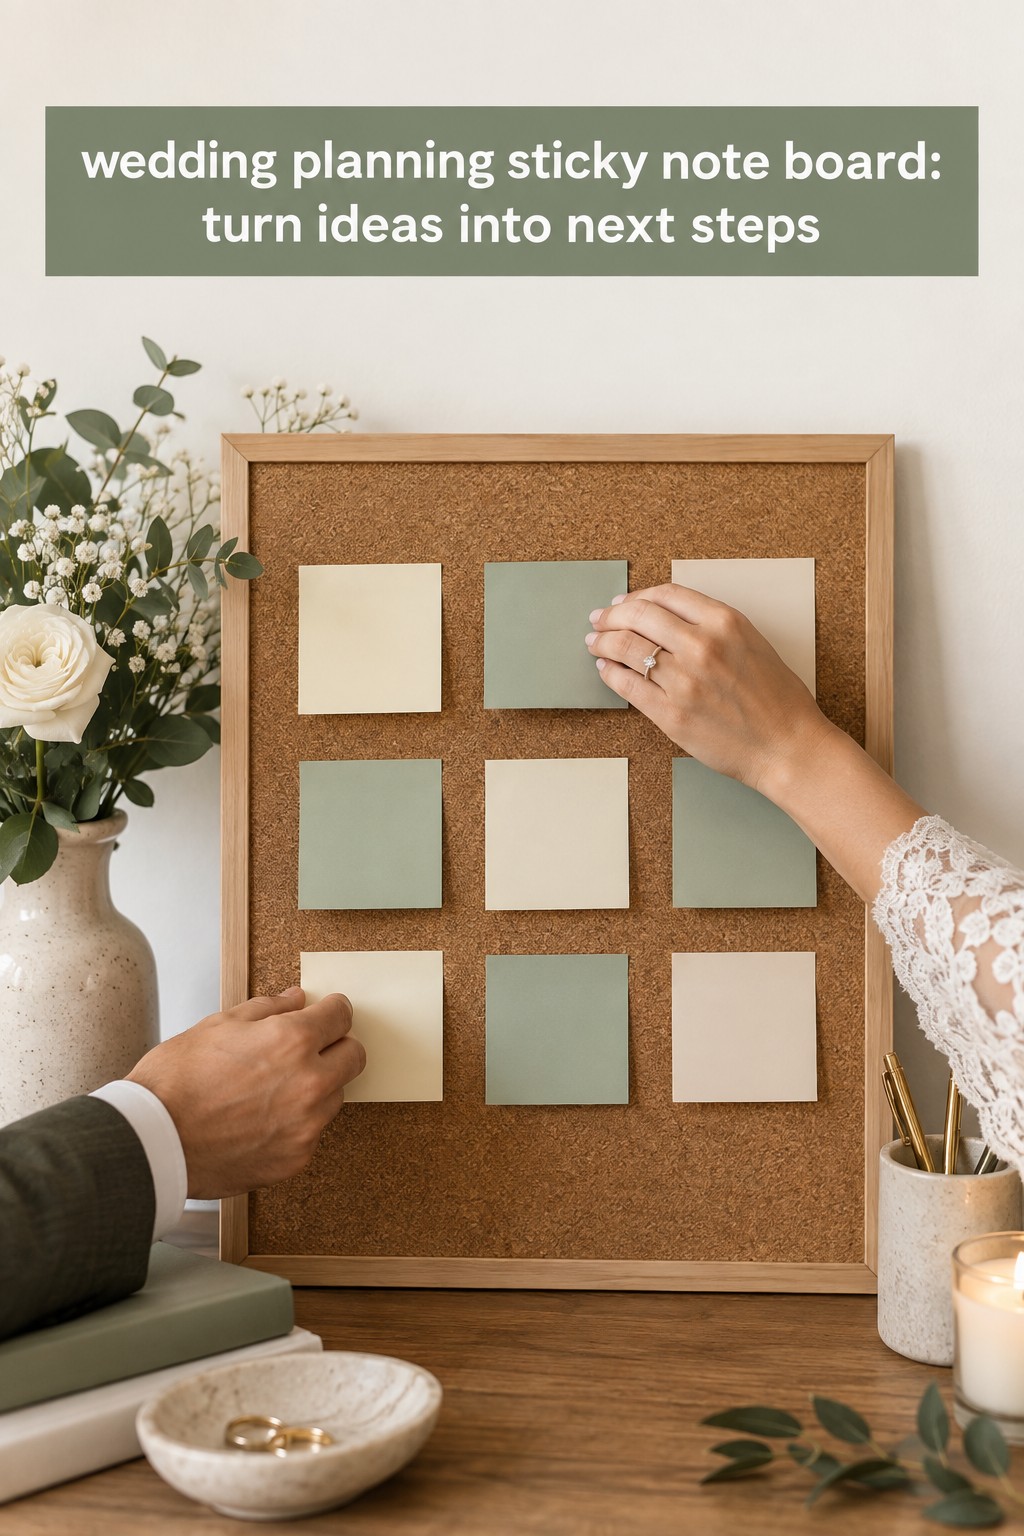
    wedding planning sticky note board turning ideas into clear next steps
    Turn wedding planning ideas into actions you can move.

    Choose columns that show the work moving

    Wedding categories help you find a task, while workflow columns help you see what is happening to it. You can group tasks with small labels such as “venue” or “guests” and still move each note across the same simple process. Try these areas as a starting point:

    • Parking lot: ideas, questions, and future tasks that you have captured but are not committing to this week.
    • Ready: tasks that have enough information, a clear owner, and a next step.
    • In progress: tasks someone has actually started.
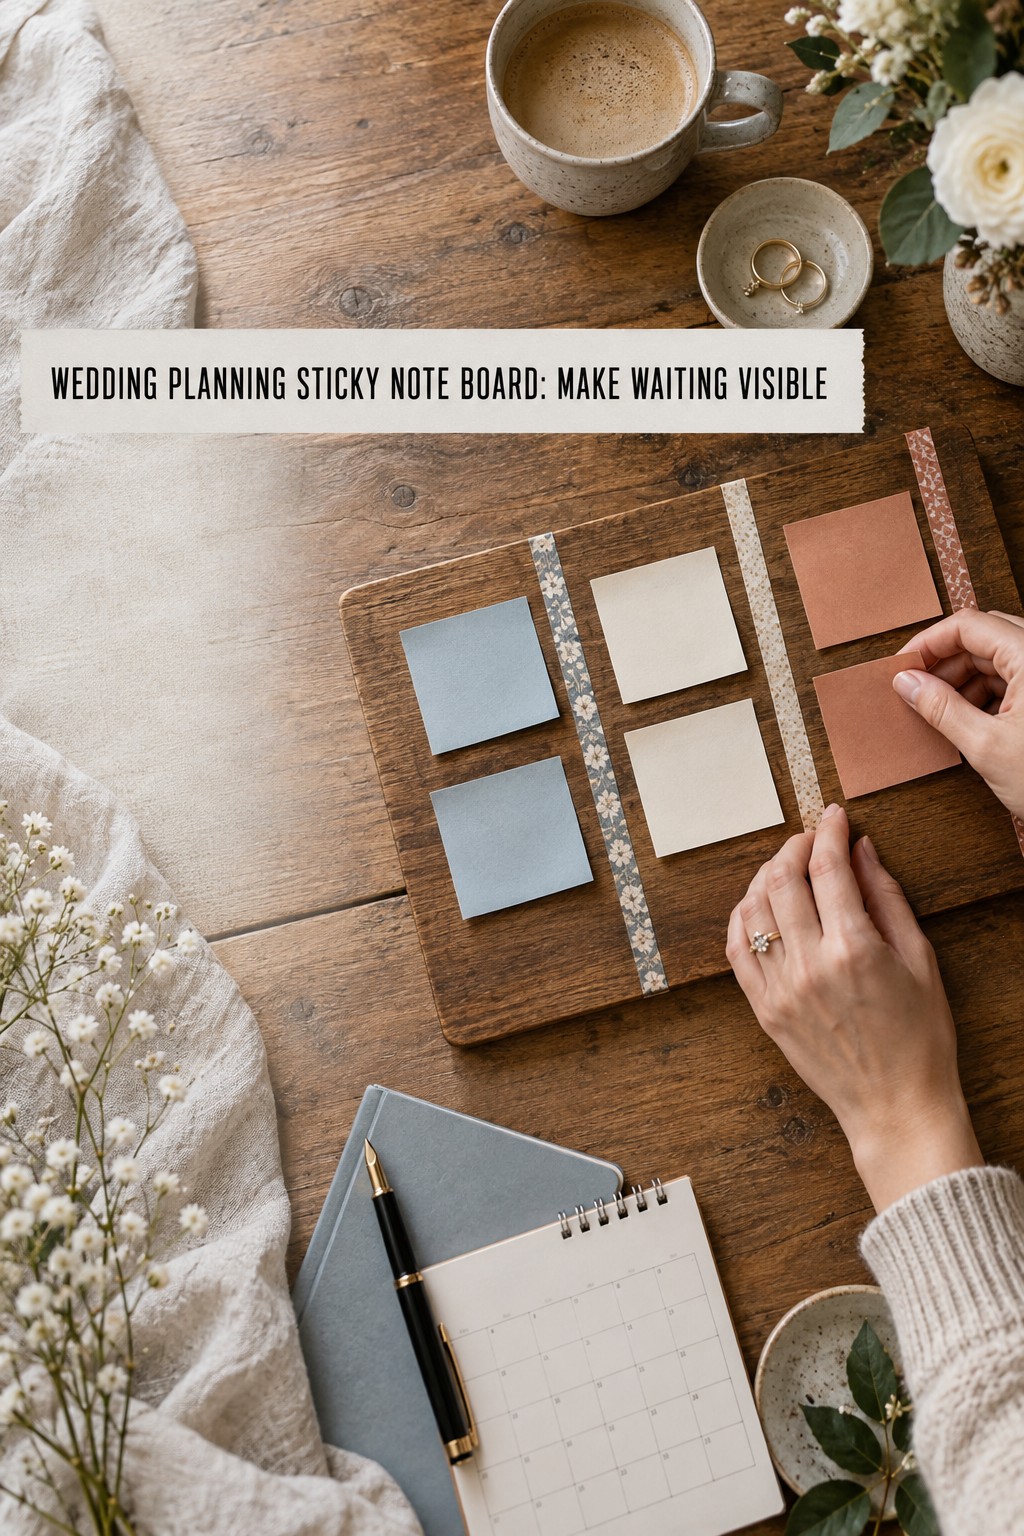
    • Waiting: tasks paused for a reply, approval, document, or earlier decision. Add who or what you are waiting for and when to follow up.
    • Done or decided: completed work and choices that should not be reopened without a reason. Move older notes to an archive or remove them after the result is recorded.

    Keep the “in progress” area small. If every interesting task moves into it, the board stops showing what you can realistically finish. The current Kanban Guide describes workflow states and explicitly controlling work that has started but is not finished. You can apply that idea simply by agreeing how many active notes the couple can carry at once, then selecting another task when one leaves the active area. See the [Kanban Guide’s workflow and work-in-progress practices](https://kanbanguides.org/the-kanban-guide/).

    For two partners with different schedules, begin with a limit of two active notes per person, or choose one active note each. This is a planning agreement, not a universal productivity rule. Adjust it if your tasks are short, if a planner is coordinating work, or if both partners are waiting on outside replies. The important part is that “in progress” means work has started, not that someone is vaguely thinking about it.

    Here is one example for a couple who has booked a venue and is planning the next two weeks. In the parking lot are “look at ceremony programs” and “compare welcome bag ideas.” Ready holds “send guest-count range to the caterer,” assigned to one partner, and “shortlist three photographers,” assigned to the other. In progress holds “review the venue floor plan together.” Waiting holds “ask the venue to confirm when the room is available for setup.” Done holds “sign venue agreement,” with the final agreement stored in the couple’s records.

    That arrangement shows both the work and its constraints. The floor-plan review may help the couple ask better catering or rental questions. The setup window is waiting on the venue, so the board shows why the rental schedule is not yet final. The invitation design does not need to move into active work if the ceremony time and address are still undecided.

    Use arrows only for important dependencies. If one task depends on another, add a short phrase to the note or draw a light line between them. Avoid connecting every note to every other note. For example, “choose ceremony time” may come before “approve invitation wording,” while choosing a cake flavor probably does not need to wait for a final seating chart. When a dependency changes, update the note so people know what has become possible.

    Some couples prefer time bands such as “this week,” “next two weeks,” and “later.” That can work when the main challenge is deciding when to do things rather than tracking status. If you use time bands, keep a separate waiting mark and do not treat “later” as a permanent storage area. Review it regularly and move only a few tasks into the active window.

    The [Post-it wedding planning guide](https://www.post-it.com/3M/en_US/post-it/ideas/articles/wedding-planning/) recommends organizing planning topics and marking decisions that need attention sooner. The board in this guide adapts that basic prioritizing idea into a movable workflow. Keep categories visible when they help, but let the status of the work determine where each note sits.

    wedding planning sticky note board showing tasks that are waiting
    Mark what is waiting and when to follow up.

    Keep the board current without making it the master record

    A physical board is visible and easy to rearrange, but it is not the right place for every kind of information. Use the board to surface actions, ownership, dependencies, and near-term attention. Put changing or sensitive records in the system where they can be updated, protected, and found later.

    • Calendar: appointments, payment dates, vendor deadlines, RSVP dates, and events that require a reminder.
    • Budget file: estimates, actual amounts, deposits, balances, and payment confirmations.
    • Guest record: names, addresses, meal choices, accessibility needs, and RSVP status.
    • Vendor folder: proposals, contact details, contracts, written confirmations, and final versions.
    • Decision log: the confirmed choice, date, people involved, and a short reason when you may need the context later.

    When a task moves to done, record the result before removing its note. “Venue selected” is not enough if you still need the signed agreement, final payment schedule, or setup rules. Add the confirmed information to the right record, then move the note to done or archive it. This simple habit prevents a satisfying board clean-up from erasing a detail the couple will need later.

    Schedule a 15-minute weekly reset. First, move completed notes after recording their outcomes. Second, check every waiting note and set a follow-up date. Third, review the next two weeks of the calendar and add only the tasks that support a real deadline or decision. Fourth, confirm owners and remove tasks that no longer matter. Finally, choose the next small set of ready work.

    If a note has stayed in progress for two reviews, ask what is stopping it. The task may be too large, the owner may not have time, or the couple may be waiting on a decision that has not been written down. Split the task, change the owner by agreement, or move it to waiting with a clear next check-in. Do not leave stale notes in an active column simply because moving them feels like admitting that plans changed.

    At the end of each month, decide whether the board still helps. You might keep it for the final vendor bookings and invitations, reduce it to a short current-actions view, or retire it after the important work moves into a digital or paper system that suits the next phase. If you move to a shared digital planning home, choose one official place for changing tasks and dates. The Wedding Command Center may be a useful planning resource if you want a dedicated home for details after this paper session. Avoid maintaining two competing versions of the same task list.

    Protect the board’s location and what it displays. Do not post full guest addresses, payment numbers, private health details, or contract pages in a public area of the home. A note can say “confirm meal accommodations with guests” without showing anyone’s private information. If you photograph the board, store the image somewhere that only the people who need it can access.

    A useful wedding planning sticky note board should get clearer as decisions are made. The parking lot can stay full of possibilities, but the active columns should remain short enough to review at a glance. If the board becomes a second master checklist, narrow its purpose again. A good reset leaves you knowing what is moving, what is waiting, and where the final details are recorded.

    Sources and methodology

    This guide combines wedding-specific examples of physical boards with a simple workflow structure. The official Post-it wedding-planning article describes organizing topics and flagging urgent decisions. The Kanban Guide explains making workflow states visible and controlling started work. The 90-minute agenda, note formula, and sample couple board are original practical adaptations for wedding planning; they are not presented as tested outcomes or a guaranteed method.

    wedding planning sticky note board beside a calendar during weekly reset
    Review the next two weeks and reset the board together.

    FAQ

    What should go on a wedding planning sticky note board?

    Put near-term tasks, open decisions, owners, dependencies, and items waiting on a reply. Keep contracts, private guest details, payment records, and inspiration archives in their appropriate files. Use the board to make the next action visible rather than to store every wedding detail.

    How do you organize wedding planning sticky notes?

    Use columns that show the work moving, such as Parking Lot, Ready, In Progress, Waiting, and Done. Add small category labels if they help you locate tasks. Write one clear action per note and include an owner plus a timing cue when either will help the task move.

    What should I write on each wedding planning sticky note?

    Start with a verb and a specific outcome, such as “ask the venue to confirm setup access.” Add an owner and a date or review window if useful. If another decision must happen first, write the dependency on the note so nobody mistakes a blocked task for forgotten work.

    How many tasks should be in progress on the board?

    Agree on a small limit that matches the couple’s actual time. One or two active notes per person is a reasonable place to begin, but it is a planning choice rather than a universal rule. If the column fills, finish or unblock current work before moving more tasks into it.

    Should a wedding planning board use colors?

    Colors are optional. A small number can help distinguish owners or waiting tasks, but write a word or initials too so the meaning does not depend on memory or color perception. Clear note wording and a simple legend matter more than a large color system.

    How often should we update a sticky note board?

    Hold a brief weekly reset to move finished work, follow up on waiting items, check the next two weeks of dates, and choose the next ready tasks. Update it sooner when a meaningful decision or deadline changes. Record confirmed information in its official calendar or file before removing the note.

    Can a sticky note board replace a wedding planning spreadsheet?

    A board can make actions and dependencies visible, while a spreadsheet or shared file can hold changing calculations and detailed records. Many couples use the board for near-term coordination and keep the budget, guest list, payment dates, and vendor documents in a separate source of truth. Choose one place for each kind of information.

  • Quick Wedding Planning: A Calm, Clear Plan

    Quick Wedding Planning: A Calm, Clear Plan

    The text arrives while the couple is choosing between a garden and a restaurant. One venue offers an open Friday, a sibling asks about travel, and the photographer needs an answer tomorrow. Quick wedding planning can make every decision feel urgent because some choices really do control the next ones. The solution is not to recreate a year-long plan in a few weeks. Decide what the celebration must include, settle the choices that unlock other work, and give every remaining task one owner and a next step.

    A shorter engagement can still feel personal and considered. You may need to select from available dates, invite fewer people, or skip details that take too long to source. Those are practical tradeoffs, not proof that the day matters less. Protect the experiences you and your guests will notice, and remove work that consumes time without changing the meaning of the celebration. This guide offers a focused system for setting priorities, maintaining momentum, and sharing clear information.

    quick wedding planning with a couple choosing what matters most
    Start quick wedding planning with a shared list of what matters most.

    Start with the clock, not a perfect wedding vision

    Write down the date range, location, budget ceiling, likely guest count, and any legal or family requirements. Mark each as fixed, flexible, or undecided. A relocation may fix the month but leave the weekday open. A small ceremony may be essential while the reception format can change. This first pass keeps you from comparing options that were never realistic. Share the list with everyone whose approval is genuinely required, then move forward with decisions you can control. Keep the notes factual and short so they can guide actual vendor inquiries.

    Agree on two or three must-haves before browsing more inspiration. Make each specific enough to guide a choice. “A relaxed day” might mean fewer than fifty guests, a seated meal, and no long gap between ceremony and dinner. “Photos we love” could mean booking one photographer whose style feels right, even if that means choosing simpler flowers. Must-haves help you judge options when availability forces a compromise. If a venue fits the budget and guest limit but conflicts with a true priority, reject it without reopening every other decision.

    Create a short “not now” list beside your must-haves. Custom favors, multiple outfit changes, elaborate printed stationery, and extra events can be lovely, but they add sourcing, approvals, deliveries, and payments. Putting them aside is not a judgment about whether they matter. It keeps them from competing with choices that unlock the event. Revisit the list only after the essential bookings and guest information are under control. If an optional idea still fits the budget and schedule then, add it with a clear view of the work involved.

    Use different decision speeds for different risks. Reversible choices, such as a welcome sign color, can be made quickly. For a large payment or a contract that is difficult to change, take time to read what is included, when money is due, and what happens if plans change. Fast planning should remove needless indecision, not skip basic review. If you cannot tell whether a choice deserves more time, ask what it affects, what it costs to change, and whether waiting one day will close a useful option.

    quick wedding planning with a couple and planner choosing a venue
    Compare available wedding spaces against your guest count and priorities.

    Use the first 72 hours to unlock the plan

    Set one focused conversation with your partner and anyone whose financial approval is required. Begin with a budget ceiling you can fund, not an optimistic number based on hoped-for contributions. Include a reserve for taxes, service charges, delivery, alterations, and other items that appear in full proposals. If relatives are contributing, agree on an amount and conditions before counting it as available. Write the figure in a shared record. A clear ceiling makes vendor conversations faster and prevents a low starting quote from quietly becoming an unaffordable commitment.

    Draft the guest list in circles. First name the people whose presence matters most, then add the next group only if the venue and budget allow it. You do not need every address immediately, but you do need a credible maximum before comparing spaces. Guest count affects capacity, food, seating, transportation, invitations, and the feel of the ceremony. Assign one person to maintain the list. If family expectations could change the number, write down the question and who will have that conversation instead of treating the count as settled.

    Choose several acceptable dates or time windows, not one ideal Saturday. Check the availability of the people who must attend, then contact venues and officiants. If your first choice is unavailable, decide what can flex: weekday, season, start time, guest number, or event format. Flexibility works best with boundaries. “Any date is fine” creates another debate, while “Friday or Sunday during this six-week window, with a ceremony before five” gives suppliers something concrete to answer. This conversation makes priorities visible before a deposit is involved.

    End the first conversation with a one-page decision brief: date range, location, guest ceiling, budget ceiling, must-haves, and who can approve a contract. Add the next three actions, each with an owner and deadline. One partner can request venue availability while the other confirms guest addresses and checks the officiant’s process. This page is the starting point for the plan. It lets you send accurate inquiries right away and catches assumptions before they spread to a vendor, guest, or family member.

    Check the marriage-license process for the jurisdiction where the ceremony will take place. Requirements, appointment availability, waiting periods, and documents differ by location, so confirm them with the relevant government office or officiant. Put the responsible person and a date to verify details on your board. Do not rely on a generic checklist or a friend’s experience in another state. The task may be quick to confirm, but it deserves a firm place in the plan because a missed requirement can affect the ceremony itself.

    quick wedding planning as a couple reviews a budget and vendor options
    Use a clear budget and vendor comparison to make timely choices.

    Book the choices that control the rest

    Date and venue usually depend on each other. Begin with spaces that fit your guest ceiling, budget, location, and must-haves. Ask for available dates and a written list of inclusions. Tables, chairs, food service, staffing, setup, and cleanup affect how many separate decisions remain. A package can save coordination, but “all-inclusive” does not automatically cover your needs. Ask about access hours, restrictions, overtime, weather arrangements when relevant, and costs excluded from the quote. Compare the complete written offer rather than choosing from photographs or a headline price.

    After identifying a viable date and place, contact the vendors whose work most affects the day. That may be an officiant, photographer, caterer, coordinator, or musician, depending on your priorities. Send a concise inquiry with date and location, guest estimate, service needed, budget range, and the time by which you need to decide. Ask for availability, a complete proposal, and a contract. Use consistent questions so responses are easy to compare. Close the loop with suppliers you do not select, which keeps communication clear and avoids leaving them waiting.

    Compare a small number of options against the same criteria: total price, inclusions, payment dates, cancellation terms, travel, setup, overtime, insurance requirements, and response time. A polished website cannot answer those questions for a specific booking. A fast decision can still be thoughtful if the comparison is consistent. When a supplier fits your budget, meets a must-have, and answers practical questions, choose and move forward rather than restarting the search for an imagined perfect option. Record the decision and link the signed agreement in the same planning space.

    Set a fallback rule before a deadline is missed. If your first-choice venue has not confirmed availability by a set time, contact the next suitable option. If the preferred weekend is full, try the weekday or format you already agreed could work. If a vendor cannot deliver on schedule, choose an available alternative rather than redesigning the whole celebration. A written fallback turns a delay into a manageable branch. For major payments, verify the supplier, read the agreement, and confirm exactly what the deposit secures before sending money.

    Keep attire, flowers, rentals, and printed goods tied to real lead times. Ask what is in stock, what can be altered, and when an item must be ordered or approved. Do not build other plans around a rush promise unless timing and terms are written down. If the custom choice cannot arrive with a sensible buffer, select an available option that still feels like you. A simple arrangement chosen early often creates less stress than an elaborate idea dependent on several late deliveries.

    quick wedding planning with partners sharing a simple task board
    Assign owners so the next wedding planning tasks stay visible.

    Run planning from one short decision board

    Use one shared planning space that both partners can open easily. A spreadsheet, document, or planning tool can work. Keep the main view practical: task, owner, due date, status, next action, dependency, cost, and link to the relevant contract or file. Write one outcome per row. “Confirm ceremony start time” is easier to assign than a broad task called “ceremony.” Break work down until the next action can be completed without another planning meeting. A modest board that stays current is more useful than a complicated system no one wants to update.

    Separate tasks from decisions. A task is work someone can complete, such as requesting a quote or confirming an appointment. A decision requires the couple or authorized person to choose between options. For each open decision, list the choices, what matters most, who has a say, and the date it must be made. When settled, record the outcome and tell anyone whose work depends on it. This avoids a task list full of questions nobody owns and prevents a settled choice from being debated again without new information.

    Hold one short weekly check-in, perhaps twenty minutes, and add another conversation only when a real deadline requires it. Review what changed, what is blocked, what needs a decision, and what can wait. End by assigning the next actions and confirming the next check-in. Keep inspiration browsing outside the meeting unless it answers a current question. The point is not to discuss every detail each week. It is to keep important choices visible, avoid duplicate research, and notice a missed deadline while there is still time to choose a fallback.

    When the board feels crowded, sort work in a consistent order. Handle legal and contract deadlines first. Next settle choices that unlock bookings or guest communication. Then address budget, access, food needs, transportation, and the event schedule. Only after those needs have owners should optional design details take time. Reapply the same order whenever someone proposes a new idea. If it does not support a must-have or solve a practical need, it can stay on the “not now” list. This filter protects attention as much as the budget.

    Store files with names another person can understand, such as supplier name, document type, and date. Keep signed contracts, payment proof, latest floor plan, guest information, and current schedule easy to find. Link to original documents rather than copying sensitive information into a broadly shared view. Decide who may edit the master plan and who receives a read-only copy. A tidy file structure makes a handoff possible and lowers the chance that a helper acts on an old version. It is practical groundwork, not a reason to spend an evening designing folders.

    Simplify the celebration without creating new problems

    A short runway is a reasonable moment to reduce moving parts. You might consider a smaller guest list, a venue with services already arranged, a weekday, a shorter reception, digital invitations, or attire that is available now. Choose changes that suit your priorities and guests. Do not make every compromise at once. Start with the option that removes the most coordination, then see whether the remaining plan works. Simplicity should make the event easier to deliver, not add workarounds or make an important guest feel excluded.

    Before dropping a detail, ask whether it is required by law or contract, important for access or safety, necessary for a guest to participate, or essential to the flow of the day. If yes, keep it and assign an owner. If not, ask whether it supports one of your must-haves. Guests need accurate date, location, timing, travel, and response information more than they need a custom paper suite. A long list of decorative extras is rarely more valuable than getting those practical facts right. Make the decision together and record it once, so it does not return as guilt.

    Include practical guest needs early. Confirm routes, seating, restroom access, dietary requirements, and transportation information with the venue or caterer. Provide a clear way for guests to ask privately about what they need. You do not have to guess every situation; ask relevant guests directly and share confirmed arrangements with the people responsible. These details are part of hosting well. They are easier to manage when they appear on the same board as the other important logistics instead of being remembered during the final week.

    Protect the budget while simplifying. Ask how attendance changes affect the price, what taxes or service charges apply, whether staffing is included, and when each payment is due. Compare the full commitment rather than the deposit alone. If the budget is tight, reduce scope before accepting terms you do not understand. Replacing a decorative element is usually easier than resolving an unclear payment schedule late in the process. Keep an updated total of booked amounts, remaining balances, and reserve. That gives both partners a shared view before they agree to another expense.

    Give yourselves permission to stop adding tasks once the essential plan works. The event does not need every tradition, printed piece, or photo opportunity to feel complete. Keep a short “nice if possible” list and revisit it only after the venue, ceremony, food, core vendors, guest information, and schedule have owners. If an optional idea becomes available without displacing those needs, decide together. If it requires another supplier, delivery deadline, or payment, count that effort before agreeing. A small, finished plan can feel more generous than a large plan that leaves everyone rushing.

    Give guests and helpers clear information early

    As soon as the date and location are firm, share the essential facts with guests and say when formal invitations or further details will follow. Digital communication can help when time is short, but use a format guests can access and provide a contact for questions. Set a response deadline that gives the venue or caterer enough time to prepare. Track replies in one place and follow up politely with anyone who has not answered. Do not assume a group message reached everyone who needs to make travel plans.

    Create a guest-facing page or message with the address, start time, travel details, parking or transportation notes, dress guidance, and access information. Assign one person to check it whenever something changes. If the time or location moves, notify guests directly instead of assuming they will notice an updated page. For a short engagement, clear information matters more than elaborate stationery. People can plan around concise, accurate details. Vague or changing information creates questions that the couple may have to answer repeatedly.

    Choose a trusted person to handle routine questions on the wedding day. Give them the latest schedule, vendor contacts, venue access notes, floor plan, payment responsibilities, emergency contact, and a list of decisions they may make without calling you. Mark which situations should be escalated. Confirm this role before the final week and tell vendors who the point of contact is. A helper needs useful instructions and clear authority, not a folder of inspiration pictures without context. This handoff protects time for the couple to be present at their own celebration.

    Run a final confirmation with the venue and each vendor. Verify arrival and access times, setup responsibilities, remaining balances, guest count, meal information, equipment, ceremony cues, transportation, weather contingency where relevant, and the person responsible for each handoff. Send the current schedule only to people who need it and replace outdated copies in shared folders. Set aside time to rest and eat. A wedding plan depends on the people carrying it, so the last step is making the day workable for them too.

    For couples who want one place to keep the working plan, The Wedding Command Center can be a relevant planning resource for organizing wedding details. Decide what information you need together before choosing any tool, and use a system only if it makes your next steps easier to see. The plan should serve your decisions, not become another project that needs constant styling. You can begin with a simple shared document and add structure only when the number of tasks makes that worthwhile.

    Sources and methodology

    This guide combines short-engagement planning coverage with broader wedding-planning guidance, then organizes the advice around dependencies, scope, and ownership. For related reading, see The Knot’s three-month planning guide and Inside Weddings’ short-engagement advice. Venue availability and legal requirements vary by location, so confirm details with relevant offices and suppliers before making a commitment.

    quick wedding planning with a coordinator receiving a final schedule
    Give a trusted helper the schedule and contacts before wedding day.

    FAQ

    How do you plan a wedding quickly?

    Agree on a budget ceiling, guest range, date flexibility, and must-haves first. Then book the venue and vendors whose availability controls the rest. Use one shared board with an owner and due date for each task, and simplify details that do not affect the ceremony, guest experience, or logistics.

    Can you plan a wedding in three months?

    It may be possible, depending on location, guest count, budget, vendor availability, and legal requirements. Check dates and essential services first, then choose a format that fits what is actually available. Do not assume every vendor or custom item can meet a compressed timeline.

    What should we book first for a quick wedding?

    Start with decisions that unlock other work: date, venue, ceremony requirements, and priority vendors. The order can vary. Confirm the guest ceiling and budget before signing a venue contract, and contact a planner or officiant early if either is essential.

    What can we skip when planning a wedding on short notice?

    You can often simplify optional extras such as custom favors, elaborate printed stationery, extra events, or numerous design details. Keep anything required by law or contract, and protect guest access, food needs, clear communication, and a workable event schedule.

    How can we make quick wedding planning less stressful?

    Limit decisions to a few options that meet your requirements, set a deadline for each choice, and record who owns the next action. Hold a short weekly check-in and keep inspiration browsing focused on a current decision. Let a trusted helper handle routine questions.

    Should we hire a wedding planner for a short engagement?

    A planner may help if your budget allows and you need support comparing vendors, coordinating logistics, or managing a complex event. Ask what services are included, how soon they can begin, and whether they have relevant experience. For a simple wedding, a coordinator or trusted helper may fit better.

    How do we tell guests about a short-notice wedding?

    Share the date, location, start time, travel information, response deadline, and a contact as soon as core details are firm. Use a format guests can access, and send direct updates if anything changes. Track replies in one place so vendors receive accurate numbers.

  • Where to Start Wedding Planning: Your First Steps

    Where to Start Wedding Planning: Your First Steps

    An engagement can turn a joyful question into a dozen practical ones: What kind of celebration do we want? How many people might come? What should we spend first? Do we need a venue before we choose a date? If you are wondering where to start wedding planning, you do not need a perfect vision or a complete checklist today. You need a shared starting point that helps the next decision become easier.

    Begin with one focused conversation, then write down what you know, what you are estimating, and what still needs an answer. That small distinction can keep early ideas from turning into accidental promises. By the end of this guide, you will have a simple way to align as a couple, choose the right first investigation, and keep the first week of planning manageable.

    where to start wedding planning with a couple sharing a calm first conversation
    A calm first conversation gives wedding planning a shared starting point.

    Start with one focused conversation, not a full wedding vision

    Before opening a venue directory or saving another inspiration board, set aside about an hour to talk together. Choose a time when neither of you is rushing to another commitment. Bring a notebook or one shared document. The goal is not to settle every detail. It is to understand what each person hopes the celebration will feel like and what practical limits should guide the next round of research.

    Start with a few open prompts. What do you most want to remember about the day? When you picture the people you love together, what are they doing? Which moments matter most to you: a meaningful ceremony, a long dinner, dancing, time with family, or something else? What would make the day feel unlike you? Give each person time to answer without immediately turning preferences into purchases or logistics.

    Then compare answers and look for shared themes. One partner might care most about an unhurried meal, while the other imagines a lively dance floor. Those ideas can fit together, but they suggest different choices about the schedule and space. Write down the common thread first, such as “we want guests to have time to connect,” before deciding what that means in practice.

    Use this short agenda to keep the conversation useful:

    • Each person names three things that would make the celebration feel meaningful.
    • Each person names one thing they feel comfortable keeping simple or skipping.
    • Discuss a rough guest range, not a finished invitation list.
    • Talk about the amount you can spend comfortably and whether anyone else may contribute.
    • List date, season, or location preferences as flexible, preferred, or essential.
    • Write down disagreements and questions without trying to solve them all in the room.

    End by agreeing on a brief summary, not a design concept. For example: “We are planning an evening celebration for roughly 70 to 90 guests, within a comfortable total spending range, in a location reachable for our closest family. Dinner together matters most; the date can be flexible.” A sentence like this is specific enough to guide research but open enough to change when you learn more.

    If one person is ready to book and the other is still processing the engagement, agree on a small pause. You can set a date for the next planning conversation without making a contract decision today. A shared pace is part of the plan. It is easier to make confident choices when both partners know what is being decided and why.

    where to start wedding planning by agreeing on priorities together
    Agree on priorities before comparing wedding options.

    Agree on the guardrails that shape every next choice

    A good starting brief separates firm boundaries from temporary estimates. If every idea is treated as final, the planning process can feel restrictive before you have learned what options exist. If nothing is written down, each conversation can begin from scratch. Use three labels: decided, working estimate, and open question.

    Decided means you have talked it through and are willing to use it as a real boundary for now. Perhaps you know that you want a local celebration or that a particular person must be present. Working estimate means you are using a reasonable placeholder to research the next choice, but you expect it may change. A guest range belongs here until you have reviewed names together. Open question means you need information or another conversation before choosing.

    Keep the first brief small. It can fit on one page and include five areas:

    • Feeling and priorities: three qualities you hope the day will have and the two details that matter most.
    • Guest range: a low and high estimate that helps you assess possible spaces.
    • Spending comfort: a range or ceiling that reflects what you can responsibly commit, not a figure borrowed from someone else’s wedding.
    • Date and place flexibility: the seasons, weekdays, travel radius, or location types you would consider.
    • People and input: who needs to be part of key conversations, including anyone who may contribute money or practical support.

    Money conversations deserve care because a contribution can come with assumptions. Before counting a possible gift as part of the plan, ask the person offering support what amount they have in mind, when it would be available, and whether they have expectations about how it is used. You and your partner can listen respectfully and still decide which choices belong to you. If an offer is uncertain, leave it outside the working budget until the details are clear.

    For your own spending boundary, focus first on what you can afford without relying on best-case guesses. If you do not know the final number yet, record what you know and assign a next action, such as reviewing savings, discussing a contribution, or deciding how much monthly saving feels reasonable. This is only an initial guardrail, not a full category-by-category budget. A dedicated budget setup can come after the couple agrees on the broad shape of the event.

    Likewise, do not force a precise guest count before you have looked at the people who matter. Make a rough range and note whose input could affect it. The range is useful because it helps you compare spaces and understand the scale of the event. It is not a reason to invite or exclude someone before you and your partner have talked through your priorities.

    Put an owner and review date beside every open question. “Ask our families about possible contributions” is easier to act on than “figure out money.” “Compare travel needs for our closest relatives” gives the location discussion a concrete next step. Your one-page brief should make uncertainty visible while keeping it from spreading through every decision.

    where to start wedding planning with a clear next step and venue shortlist
    Choose the next wedding decision by what it unlocks.

    Choose the next decision by dependency, not by excitement

    There is no universal rule that every couple must make the same first choice. The useful question is: which unknown is preventing the next meaningful choice? Start with the decision that unlocks the most other decisions while staying within the boundaries you have already discussed.

    For many couples, the guest range and spending comfort work together. A venue that fits 50 people may not fit a plan for 140, and a space that looks affordable at first may include requirements that change the total commitment. You do not need to know every vendor cost before researching. You do need enough of a range to avoid comparing options that cannot work for your likely event.

    Try a three-question filter whenever an idea or task appears:

    • What choice depends on this? Identify the next decision it could unlock.
    • What do we need to know to compare options? Name the missing information, such as capacity, access, total cost, or availability.
    • What is the smallest useful action? Choose one call, conversation, or comparison rather than launching a broad research project.

    Imagine you are drawn to an outdoor ceremony. Before collecting dozens of photographs, ask what conditions would make an outdoor setting work for you: a covered backup area, a nearby indoor option, accessible paths, or a particular kind of atmosphere. Those requirements can guide a short list of spaces. The point is not to predict every possible problem. It is to learn which practical questions matter to your decision.

    When you compare venues, record the same information for each option so that a beautiful first impression does not become the only measure. Note the available date range, comfortable guest capacity, what is included, what you would need to arrange separately, and any questions you need answered in writing. Do not assume that a photograph or a brief listing gives you the complete picture. A site visit and clear questions may be useful once an option fits your basic boundaries.

    If you are unsure whether to speak with a planner before venues, consider what kind of help would make the next decision easier. A planner may help you understand the planning scope, compare options, or coordinate a complex set of needs. If you are comfortable doing research together and have a straightforward event, you may prefer to gather a few facts first. Either way, the decision should follow your needs and budget, not a feeling that there is one correct order for every couple.

    Keep inspiration in a separate place from decisions. Save an image with a short note about what you like: the candlelit atmosphere, the long family-style table, or the garden setting. Later, use those notes to identify a pattern. A large collection of saved images can show preferences, but it cannot tell you whether a space fits your guest range or whether the overall plan feels comfortable.

    where to start wedding planning with a simple first-week task calendar
    A small first-week plan turns wedding ideas into clear actions.

    Make your first seven days useful and deliberately small

    The first week does not need to be a sprint. Give each action a purpose and a stopping point. A few good conversations can prevent hours of browsing that produces more options but no clarity.

    Day one or two: write the brief together. Capture your priorities, guest range, spending boundary, flexibility, contributors, and open questions. Read it aloud to check that it sounds fair to both of you. Keep it easy to edit. If you use a shared digital document, confirm that each partner can find and update the current version.

    Day two or three: check the assumptions that could change your options. Talk with anyone whose availability or contribution matters to your decisions. You are gathering information, not asking someone else to design the wedding. If a conversation is sensitive, agree on who will start it and what you need to learn. Record the answer in the brief and avoid treating a possibility as confirmed before it is.

    Day three or four: choose one research question. You might want to learn which nearby venue types can comfortably host your guest range, whether a meaningful location has practical access, or what different spaces include. Set a limit, such as reviewing a handful of relevant options and writing down the same comparison points. This is enough to identify what you need to ask next without creating a sprawling spreadsheet prematurely.

    Day four or five: decide how you will track active decisions. Start with the simplest format you will both actually check: a shared note, a spreadsheet, a calendar, or a planning platform you already use. At this stage, it only needs to show the question, the current answer, who owns the next action, and when you will revisit it. You can build a fuller planning system when you know what records you need to manage.

    Before the week ends: choose three next actions. Each action should have one owner and a date. For example, one partner can ask a contributor for clarity, the other can shortlist spaces that fit the guest range, and both can meet for 20 minutes to compare what they learned. Keep the rest of the idea list for later.

    At the review, ask what changed. Did an answer narrow your location choices? Did you learn that a guest estimate needs another conversation? Did the spending range feel grounded, or do you need to revisit it? Update the brief and choose the next dependency. If nothing needs a decision yet, it is fine to stop and return to planning at the agreed time.

    A lightweight planning resource such as The Wedding Command Center can be a useful place to keep a shared starting brief and return to decisions as the plan develops. Use any tool only if it makes the next step easier to see. You do not need to configure every feature or move every note before you know what the two of you want to plan.

    Decide whether to bring in a planner before the task list grows

    There is no single planning arrangement that works for every couple. Some want a professional to guide the full process. Others want help at a few important points, or support coordinating the event itself. Some prefer to plan independently. Consider the complexity of your plans, the time you can give them, your comfort with vendor conversations, and the amount you can set aside for support.

    A planner conversation may be useful early if you have competing priorities, multiple locations, a destination, a compressed planning window, accessibility considerations that require careful coordination, or simply want help deciding what kind of celebration is workable. Those are reasons to ask questions, not proof that you must hire someone. You can learn about services and fees before deciding whether there is a fit.

    Before an introductory call, write down what you hope the person will help you accomplish. Ask how their support is structured, what is included and excluded, how communication works, what decisions remain yours, and how fees and payment timing are explained in a contract. If you only need advice on priorities and a short list of next steps, ask whether that type of consultation is available. Compare the answers with your budget and expectations.

    If you are not ready to choose, create a decision date. For example, agree to revisit planner support after you understand your guest range and location options. That prevents the question from lingering in every conversation while preserving the option to ask for help later. The right starting point is the one that helps you make the next choice with enough information and without adding unnecessary pressure.

    Mistakes that make the beginning feel harder

    Trying to agree on every detail before exploring anything. You can start with priorities and boundaries without choosing colors, flowers, attire, music, and a full schedule. Separate the big questions that affect feasibility from creative decisions you can revisit later.

    Calling an estimate a decision. A rough guest count, possible gift, or preferred season is not a promise. Label it honestly, write down what could change it, and choose when to confirm it.

    Letting one person’s excitement set the pace. A partner who has already saved ideas may be ready to compare vendors, while the other still needs time to talk about the kind of event they want. Agree on a next conversation and one small shared task so that both people remain part of the process.

    Researching options without a decision filter. Browsing is useful when you know what you are trying to learn. Before opening another list, write one question and a stopping point. If a result does not help answer that question, save it for later.

    Choosing a tool before choosing the process. A platform can collect information, but it cannot decide which priorities matter or how the couple wants to handle family input. Start with a simple shared note. Add structure when you can name what needs to be tracked.

    Assuming there is a deadline for every idea. Some choices depend on other choices, and some can wait. Ask what must be known next and what can stay on the open-question list. A clear dependency is more useful than a long list that makes every task look urgent.

    Making a booking because it looks perfect online. Before signing, understand the agreement, what is included, the dates and payment obligations, the practical fit for your guests, and any questions that matter to your plans. If something is unclear, ask for clarification and review the written terms. Do not let urgency replace understanding.

    Wedding planning often feels more manageable when the couple can see the current answer and the next action in one place. Begin with a conversation, give uncertainty a label, and revisit the brief as new information arrives. Your first goal is not a finished wedding plan. It is a next step that both of you understand and are ready to take.

    Sources and methodology

    This guide was prepared after reviewing ten US search results covering first steps, planning checklists, tools, and newly engaged advice. The recommendations here are an editorial synthesis for the first planning conversation, not a report of personal testing or professional wedding-planning experience. For examples of common early prompts, see WeddingWire’s first five planning steps and Here Comes The Guide’s newly engaged guide.

    where to start wedding planning as a couple with less pressure
    Planning together starts with a shared conversation, not a race.

    FAQ

    What is the first thing to do when you start wedding planning?

    Have a focused conversation about the kind of celebration you want, your priorities, approximate guest range, spending comfort, and date or location flexibility. Write down what is decided, what is an estimate, and what needs another conversation.

    Should we set a budget or make a guest list first?

    Discuss them together as early planning boundaries. You can create a rough guest range and a comfortable spending limit at the same time, then refine both as you learn more. Neither needs to be a final number before you begin careful research.

    Do we need to pick a wedding date before looking at venues?

    You can research with a preferred season or a few possible dates in mind. A specific date may depend on venue availability and your flexibility, so treat early dates as preferences until you have checked the options and made a decision together.

    How much of the guest list should we decide at the beginning?

    A low and high estimate is often enough to guide early venue research. Make a full list later, after you and your partner have discussed the celebration you want and any family input that matters to you.

    Should we hire a wedding planner before booking a venue?

    It depends on the help you want, the complexity of your plans, your time, and your budget. You can speak with planners before booking to understand their services and fees, then decide whether that support fits your needs.

    What if our families have different ideas about the wedding?

    Start by agreeing as a couple on your priorities and who needs to be included in specific decisions. Listen to family preferences with care, clarify any offered contribution and related expectations, and decide together which choices you will make as a couple.

    What can wait until after we have a starting plan?

    Many detailed choices can wait, including most décor, stationery wording, favors, and the exact day-of schedule. Focus first on the questions that affect feasibility, such as priorities, a workable guest range, spending comfort, and location or date flexibility.

  • Wedding Reception Planning: Dinner, Layout, and Flow

    Wedding Reception Planning: Dinner, Layout, and Flow

    Wedding reception planning works best when you choose how guests will eat, sit, and move before filling in the evening’s schedule. A plated dinner, a buffet, and a reception built around food stations can all create a welcoming celebration. They ask different things of your room, catering team, seating plan, and microphone announcements.

    Start with the experience you want: a shared dinner with everyone seated, a relaxed meal with choices, or an evening of circulating and conversation. Then compare the practical requirements below. You will finish with a reception format, a sequence your vendors can review, and clear instructions for the moments when guests move from one activity to the next.

    wedding reception planning room with dinner tables and clear dance floor
    An open central floor keeps dinner seating and dancing in view.

    Choose the reception format before building the schedule

    Before requesting detailed proposals, write down your estimated attendance, reception spending limit, available event hours, and three priorities. Keep those priorities specific to the party. You might want a substantial meal, time to talk with relatives, and a long uninterrupted dance set. Those choices give your planner a stronger brief than a general request for an elegant evening.

    Ask the venue which service formats work in the room you are actually booking. A photograph of an empty ballroom cannot show what happens after tables, a bar, food stations, and entertainment equipment are installed. Request a proposed layout with your guest count and meal style represented together. Keep an attractive option provisional until that combination works.

    Plated dinner: choose it for a shared seated experience

    A plated reception centers the meal at assigned tables, with the catering team bringing food to guests. Consider it when conversation over dinner and a clearly defined meal period matter to you. Ask how the team collects entree choices, identifies each guest’s selection, and handles any meal that requires separate preparation.

    The planning trade-off is precision. Guest names, table assignments, meal totals, and the catering list need to agree. If someone changes tables, a server may need updated information. Establish a discreet way for the service team to find the correct guest instead of making meal identification an announcement across the room. A beautiful place card should also be useful to the people serving dinner.

    Buffet: choose it for choice with an organized return to tables

    A buffet lets guests select food at a shared service point before returning to their seats. Consider it when offering choices is a priority and the room can accommodate the service area and a queue. Ask the caterer to explain how guests will be released, how the line will be replenished, and how anyone who needs assistance will receive a meal.

    The trade-off is guest movement. The buffet must work while chairs are occupied and people carry plates back to tables. Do not assume that placing food along an empty wall solves the layout. Test where the line begins, where it ends, and whether it crosses the bar or the route from the kitchen. A buffet still needs a seating plan for the meal you are hosting.

    Food stations: choose them for a more fluid reception

    Food stations distribute service around several points in the room. They can suit a reception focused on mingling, but first clarify what the food actually provides. A few passed appetizers and a full dinner served from stations are different offers. Your invitation or wedding website should describe the meal accurately so guests know what to expect.

    The trade-off is coordinating several activities at once. Ask whether stations open together, how popular items are replenished, and where used plates go. Provide suitable places to sit and eat rather than treating standing tables as a complete seating plan. If you want speeches, decide how to gather everyone’s attention while food service is active. The room will need a deliberate transition into that shared moment.

    wedding reception planning floor plan with numbered guest tables
    Review table placement and guest routes together on a floor plan.

    Compare the room, food, and staffing requirements

    Compare proposals against the same event brief. A menu price alone does not tell you which reception offers better value for your celebration. Ask each provider to identify food, staffing, equipment, rentals, delivery, setup, clearing, and removal in its proposal. Have the provider clarify any additional charges before you treat two totals as equivalent.

    Avoid assuming that one format is always less expensive or faster. Instead, request comparable proposals for your attendance and service window. Ask what changes if attendance rises, if dinner moves later, or if the room requires a different layout. These questions produce information about your actual event without relying on national averages that may not fit it.

    Use the same questions for all three formats

    • Seating: Where can every guest comfortably eat, and which seats or tables are assigned?
    • Service: Who serves, replenishes, clears, and assists guests throughout the meal?
    • Movement: Where do guests queue, and where do staff carry food and used dishes?
    • Meal information: How are individual selections and dietary requests communicated to the right team member?
    • Timing: What must be ready before service begins, and when can the next activity safely start?
    • Equipment: Which tables, linens, dishes, glassware, service pieces, and preparation facilities are included?

    Give the catering lead the information guests have supplied about their meals and ask that team to confirm what it can provide. Do not promise a particular accommodation based on a menu label alone. Decide who will speak privately with the guest if clarification is needed. The final guest list should record the agreed arrangement without scattering sensitive details across decorative seating displays.

    Food and hospitality belong in the same conversation. Hampshire House’s reception advice connects prompt food and drink service with guest comfort and recommends discussing dietary needs with the catering team. Apply that principle by asking what guests can eat or drink when they first arrive, including those who do not want alcohol.

    Walk three routes through the proposed room

    First, follow a guest from the entrance to the seating display and then to a table. The display should be readable without requiring a crowd to block the doorway. Check whether table identifiers are visible from the direction people approach. Include a place for someone to pause while a companion looks up their assignment.

    Second, trace the food route. For plated service, ask the catering lead to review access between preparation space and guest tables. For a buffet, trace a person holding a plate from the queue back to a chair. For stations, look at the movement between the most appealing food points. Ask the venue to approve the layout and required clearances; do not use a decorative sketch as a capacity assessment.

    Third, follow the route to the bar, restrooms, and exit. Keep those paths usable when the dance floor is active. Place optional attractions only after the essential routes work. A guest book, dessert display, or photo backdrop should earn its location by serving guests without obstructing the rest of the evening.

    Review the tables at their actual planned size. Family-style serving platters, if you choose that variation, compete with flowers, candles, glassware, and personal items for space. Ask for a sample place setting or tabletop mockup before approving the centerpiece design. This small review can resolve a conflict that would be difficult to fix after rentals arrive.

    wedding reception planning buffet station with plates and clear aisle
    A clearly placed buffet helps protect the route between service and tables.

    Build a reception sequence that fits your meal service

    Create the schedule with the venue, catering lead, and entertainment provider. Add the photographer to decisions about moments you want documented. Start with the agreed arrival time, meal window, entertainment finish, and venue departure requirements. Then decide which optional events deserve a place between them. A grand entrance, cake announcement, or formal dance belongs on the plan because you want it there.

    Write each important moment with both a target time and a readiness condition. For example, seating can begin when tables are complete and the venue releases the room. Dinner can begin when guests are ready and the catering lead gives the service cue. The clock remains useful, but an announcement should not send people toward an unfinished room.

    An illustrative evening reception

    The following is a planning example, not a standard duration or a promise about catering speed. It assumes one venue, a 5:00 p.m. reception arrival, dinner at 6:15 p.m., and a 10:00 p.m. guest departure. Ask your own team to replace these times with workable estimates before using it.

    • 5:00 p.m., welcome drinks and food: The arrival area, refreshments, and guest directions are ready before guests enter.
    • 5:45 p.m., move toward dinner: The coordinator checks the dining room before the emcee invites guests to find their places.
    • 6:00 p.m., welcome and optional entrance: The couple and anyone being introduced are present, and the microphone is ready.
    • 6:15 p.m., meal service: The catering lead authorizes service or the release of tables to the buffet.
    • 7:15 p.m., selected toasts: The team confirms that the room can give attention and that food service will not conflict.
    • 7:35 p.m., optional special dances and open dancing: The entertainment lead receives the agreed cue.
    • 8:30 p.m., dessert available: The serving team, utensils, plates, and any desired photographs are accounted for.
    • 9:45 p.m., final music and departure guidance: Guests receive practical information about their exit and transport.
    • 10:00 p.m., guests depart: The named team handles belongings and removal within the separately agreed access window.

    Adjust the sequence for the service you chose

    With a plated meal, discuss toast placement around the catering team’s service sequence. Do not schedule a speech merely because a template places it between courses. Ask when servers need to move, when the kitchen needs an uninterrupted service period, and where the microphone can be heard. Share the speakers’ names and the length you have agreed with them.

    With a buffet, make the release order explicit. The emcee should know whether the catering lead or coordinator directs that order, and guests should know when it is their turn. Before starting speeches, confirm that the final tables have had an opportunity to receive food. Looking at the couple’s table alone will not reveal whether the entire room is ready.

    With stations, decide whether there will be a short coordinated pause for remarks or a different arrangement agreed with the team. Do not surprise station staff with an announcement that changes their service plan. If uninterrupted conversation is the main priority, you can choose a brief welcome and leave out additional formalities. Fewer scheduled events can be a considered choice.

    The transitions deserve their own notes. The Butterfly Pavilion’s guidance on reception flow highlights pathways, guest directions, and coordinated cues between activities. Translate those ideas into a named person who checks the next area and a named person who invites guests to move. Those are separate jobs, even when one person handles both.

    wedding reception planning microphone beside a candlelit dance floor
    A clear cue plan connects speeches, dinner, and dancing.

    Test the plan with realistic reception scenarios

    Use a short planning conversation to test the format against your guest count and room. The examples below are hypothetical. They show which questions to bring to your vendors, rather than suggesting that a particular number of guests requires one kind of meal. Your room, staffing, and priorities determine the answer.

    A 45-guest reception centered on conversation

    Imagine a couple who want dinner to feel like hosting their closest people at a restaurant. A plated meal is one option to compare because it allows everyone to stay at the table during service. A buffet could also work if the room has a suitable route and the couple enjoy a more casual pattern of movement.

    Ask for both layouts before deciding. If a buffet removes a comfortable table or puts the queue beside the only doorway, the food choices may not justify the compromise. If plated service requires a menu-selection process the couple dislike, ask whether the caterer offers another workable approach. Choose using the real proposal, not an assumption about what a small wedding should look like.

    A 120-guest reception with a buffet and dancing

    Here the couple want menu variety and a substantial dance period. Ask the catering lead to show how the buffet will serve this attendance and how long the team expects the process to take. Discuss whether more than one service point is workable, what staffing it requires, and how replenishment will happen. Do not add another station to the floor plan without that discussion.

    Then test the transition into dancing. Can the buffet remain open without drawing a line across the dance floor? Where will guests put plates when they leave the tables? Who tells the DJ that the final tables have been served? These questions connect the meal to the party and expose missing work before the evening begins.

    A room flip or a late dinner

    If the ceremony and dinner use the same room, ask who clears the first layout, who installs the second, and who approves the finished space. Confirm where guests wait and what service is available there. Do not assume that the people decorating the ceremony are also contracted to move chairs, set tables, and relocate flowers.

    If dinner runs late, have the coordinator speak with the catering lead before moving speeches or extending cocktails. Establish what is actually ready and what the revised service time means for the rest of the evening. The couple can decide in advance which optional activity may be shortened or omitted. That gives the coordinator a practical choice without asking the couple to redesign the reception during the party.

    Protect the confirmed venue finish time while reviewing the delay. A later dinner does not automatically create extra venue access, entertainment coverage, or transport availability. Check those arrangements with the providers instead of pushing every later item back by the same amount. The best recovery may be a simpler program with the meal and guest departure kept clear.

    Finish with a reception handoff that names every owner

    Prepare a concise reception document showing the approved floor plan, guest and meal totals, vendor contacts, service sequence, and cue responsibilities. Give it a version date. Ask each provider to confirm the details relevant to their work, including anything still unresolved. An emailed document is useful only when the people carrying out the plan understand their parts.

    Separate the guest-facing schedule from the working instructions. Guests need to know where to arrive and what the evening includes. The service team needs arrival access, equipment positions, meal information, cue ownership, and removal arrangements. Keeping those purposes distinct makes both versions easier to use without maintaining contradictory times.

    Reconcile the guest count before the final deadline

    Compare the seating plan with the catering count and any individual meal selections. Account for children, vendors, and anyone with a different meal arrangement according to your provider’s categories. Ask how late changes should be reported. If a guest moves tables after the final list is issued, make sure the person responsible for service receives the correction.

    Check the physical items against the plan as well. Table numbers should match the seating display; place cards should match the final list; the dessert station should have its agreed service pieces. Treat this as a practical reconciliation, not another round of design decisions. A coordinated set of ordinary details is more useful than an additional decorative item with no owner.

    Assign the moments that are easy to overlook

    • Room release: Who confirms that tables, lighting, and guest routes are ready?
    • Meal cue: Who authorizes service, and who communicates with the emcee?
    • Microphone handoff: Who finds each speaker and returns the microphone afterward?
    • Dessert service: Who cuts, portions, serves, and clears, whether or not there is a formal announcement?
    • Belongings: Who collects gifts, personal decorations, and items the couple want returned?
    • Departure and removal: Who guides guests out, checks the room, and handles each rental pickup?

    Confirm these responsibilities in the providers’ agreed scopes. A venue contact, planner, catering captain, and DJ may each handle different parts of the reception. Ask directly where one person’s responsibility ends and another person’s begins. If a friend volunteers to take personal items home, confirm the items, vehicle space, and collection time rather than leaving them with an undefined cleanup role.

    If you are considering The Wedding Command Center as your planning resource, use this reception brief to assess whether it suits the way you want to organize your work. Keep the practical questions in view: can you find the latest decisions, and can the right people get the instructions they need? Whatever resource you choose, the vendors still need to confirm the operational details themselves.

    Sources and methodology

    This guide compares reception service choices and guest transitions using venue-authored advice, planning publications, and an HGTV reception segment. The two linked venue guides support the discussion of hospitality and event flow. The comparison questions, hypothetical scenarios, and sample schedule are editorial planning examples, not reports of weddings we organized. Confirm costs, timing, capacity, and service arrangements with your own providers.

    wedding reception planning place setting beside a clear guest aisle
    Thoughtful seating gives guests a comfortable place to eat and talk.

    FAQ

    What should we decide first when planning a wedding reception?

    Agree on attendance, spending limit, available hours, and the experience you want guests to have. Then compare the venue and meal format together. Choosing food service before finalizing the room layout helps you identify seating, equipment, staffing, and movement requirements while there is still time to adjust them.

    Is a buffet better than a plated wedding dinner?

    Neither is the better choice for every reception. A plated dinner keeps guests seated for service, while a buffet lets them choose food at a shared point. Compare the complete proposals and proposed layouts. Pay particular attention to meal tracking for plated service and queue management for a buffet.

    Does a cocktail-style reception need seats for guests?

    Plan suitable seating and eating surfaces for the people you invite. Describe the food offering clearly, and discuss the layout with the venue and caterer. A reception designed for mingling should still give guests comfortable ways to eat and rest; a collection of standing tables may not meet those needs.

    Should wedding speeches happen before or after dinner?

    Choose a point that works with your catering sequence and the attention you want guests to give the speakers. Confirm it with the service team. Avoid beginning a speech while some tables are still being called to the buffet or while a planned course requires active service across the room.

    How do we prevent a buffet line from disrupting the reception?

    Have the caterer and venue review the queue and return routes on the actual floor plan. Agree on table release, replenishment, assistance, and clearing. Keep the emcee informed about who gives the service cue. Confirm the proposed arrangement for your guest count rather than assuming that an extra table will solve congestion.

    Who should manage the wedding reception timeline?

    Choose a coordinator or designated lead whose agreed responsibilities include managing the sequence. That person needs current instructions and direct contact with the venue, caterer, and entertainment team. Make clear who checks readiness and who makes announcements, so the couple are not the default contact for every transition.

    Can we skip a grand entrance or formal cake cutting?

    Yes, if those moments do not suit the celebration you want. Tell the emcee, photographer, and catering team what will happen instead. Skipping a public cake-cutting moment still requires a plan for dessert preparation and service. Remove the ceremony around an activity without accidentally removing the work that guests depend on.

  • 3 Month Wedding Planning: A Realistic 12-Week Plan

    3 Month Wedding Planning: A Realistic 12-Week Plan

    Starting 3 month wedding planning can make every decision feel urgent. The way through is not to squeeze a year of ideas into twelve weeks. It is to decide what your celebration needs to feel complete, secure the choices that other choices depend on, and give the remaining work clear owners and deadlines.

    This plan is for couples beginning with roughly 90 days until the wedding. If you have already been planning for months, use the final stretch as a priority check instead. Either way, your real calendar, location, guest needs, and available vendors matter more than a generic month-by-month list.

    3 month wedding planning conversation as a couple sets priorities
    Start with the decisions that matter most to you.

    A short engagement can be workable when you are willing to make timely decisions and shape the event around the options you can actually confirm. The useful question is not whether you can recreate a long engagement in miniature. It is what you can confidently host, and what you can simplify without losing the parts that matter to you.

    Can You Plan a Wedding in 3 Months?

    Often, yes, if your expectations are flexible and you can focus on the decisions that unlock the rest. A venue and date affect the ceremony, food, guest capacity, and vendor search. Your guest count affects the room, budget, invitations, seating, and transportation. Those decisions deserve attention before favors, elaborate paper details, or extra events.

    There is no guarantee that your first-choice venue, photographer, band, attire, or date will be available. Treat availability as information, not as a verdict on the wedding. You might choose a different day, host fewer guests, use a venue with services already included, choose a simpler meal, or move a separate celebration to another date. The Knot’s short-engagement planning guide also emphasizes quick decisions and giving smaller details less attention than essential bookings.

    Before building a calendar, separate three situations: a legal ceremony followed by a meal, a small ceremony and reception on one day, or a larger event with more moving parts. Each can be meaningful, but they do not require the same number of suppliers, decisions, or guest communications. Choose the shape that suits your priorities and capacity, not the one that produces the longest checklist.

    3 month wedding planning with a couple comparing venue options
    Confirm the choices that unlock the rest of the plan.

    The First 72 Hours: Set the Boundaries That Unlock Everything

    Hold one focused planning conversation with your partner. Keep notes in one shared place and leave the meeting with decisions, not just a collection of inspiration. You can refine details later, but these boundaries let you ask useful questions and compare real options.

    • Working budget: Write the amount you can spend, any confirmed contributions, and a reserve for costs you have not priced yet. Track deposits, balances, due dates, and contract terms separately.
    • Guest ceiling: Set a maximum you can afford and host comfortably. Make a short first list, then agree how you will handle additions or plus-ones.
    • Date flexibility: Choose a preferred date and a few acceptable alternatives, or decide which date is fixed. If a particular venue matters most, ask what dates it can offer.
    • Top priorities: Name the two or three parts you care about most, such as an intimate ceremony, a relaxed meal, or photography. These guide trade-offs when your first choice is unavailable.
    • Must-haves and maybes: Identify anything essential to the ceremony, your faith or culture, accessibility, or guest care. Put optional extras in a separate list.
    • Decision owners: Agree who can research, who can approve spending, and how quickly you will answer time-sensitive questions.

    Then check the legal process for the place where you plan to marry. Ask the relevant issuing office which documents, appointments, fees, waiting periods, or deadlines apply to your specific situation. Put any required steps on the calendar only after confirming them with that office. Legal details can depend on the location and circumstances, so do not rely on a checklist written for a different place.

    Create a single planning home for decisions, tasks, contacts, contracts, due dates, and payment status. A simple document, board, or spreadsheet is enough if both partners and any helper can find the current information. The Wedding Command Center can also serve as a shared planning resource when you want one place to keep details visible. Assign one owner and one next action to each task; a note that says “photographer” is less useful than “Alex will ask three photographers about our date by Thursday.”

    3 month wedding planning with a couple preparing guest invitations
    Give guests clear information and an RSVP deadline.

    Weeks 12 to 9: Book the Decisions That Block the Rest

    Start with the ceremony location and date, then contact the suppliers that matter most to your version of the day. You can do some outreach at the same time: one person checks venues while the other contacts photographers or caterers. Keep your maximum budget and guest range in each inquiry so you receive answers you can use.

    When comparing options, ask the same practical questions: Is the date available? What is included? What is the full price and payment schedule? What decisions are due next? What happens if plans change? Who will be present on the day? Write down the answers and read the agreement before paying. A fast decision still needs a clear scope, cancellation terms, and confirmation in writing.

    Prioritize the parts of the day that are difficult to replace or that affect many other decisions. For some couples that means a ceremony location, officiant, food, or photographer. For others, a family tradition, accessibility plan, or reliable transportation is the central need. There is no universal “top three” vendor list; let your own priorities and the shape of the event set it.

    Start the guest communication as soon as you can give people useful information. If details are still moving, send a clear save-the-date message with the date, location area, and when more information is coming. Follow with the invitation and a firm RSVP deadline that leaves you time to confirm numbers with the venue and food team. If many guests are traveling, make lodging and transportation information easy to find.

    At the end of this phase, review the dependency chain: a confirmed date supports vendor contracts; a realistic guest range supports venue and meal decisions; an agreed format supports ceremony and reception details. If one of these is still unresolved, make that the next planning meeting’s focus instead of adding decorative tasks.

    3 month wedding planning with a wedding day timeline
    Share the current timeline with the people who need it.

    Weeks 8 to 5: Build the Guest and Celebration Plan in Parallel

    Once the foundations are confirmed, divide the work into a few tracks. They can move forward at the same time, but give each one a person responsible, a due date, and a point when it needs to be checked against the other tracks.

    Guest and communication track

    Maintain one accurate guest list with names, contact details, invitation status, RSVP, meal selection if needed, and travel or access notes. Set a response deadline and a polite follow-up date. Keep a record of dietary or accessibility requests that the relevant venue or supplier needs to receive, and share only the information they need.

    Ceremony and legal track

    Confirm the officiant and the ceremony format. Decide who will speak, whether you will exchange personal vows, which readings or music you want, and what the ceremony location requires. If you need a marriage license or other official step, follow the instructions from the appropriate local office and give one person responsibility for the paperwork.

    Attire and personal details track

    Choose attire based on what is available with enough time for fit and alterations. Ask the shop or tailor directly about delivery and appointment timing before committing. For the wedding party, choose a clear, achievable direction and give everyone the same deadline and instructions. Keep accessories, hair, makeup, and any trial appointments focused on what you actually want to feel comfortable wearing.

    Reception and guest experience track

    Work with the venue and food team on a menu, room layout, and service plan that match your budget and guest count. Decide how guests will get between locations, where they can find schedule updates, and who will answer questions on the day. Choose music, flowers, and decor after you know what the venue includes and what setup time is available.

    Keep a weekly 20-minute coordination meeting. Review what changed, what is blocked, which deadlines are next, and whether any decision affects another track. If the guest count moves, update food and venue contacts. If the ceremony timing changes, update the officiant, photographer, transport, and run-of-show. This small habit limits the number of separate conversations you need to reconstruct later.

    Do not wait for every response before progressing on unrelated tasks. You can confirm attire while the guest list is being refined, or choose ceremony readings while a florist quote is pending. Mark dependencies plainly so that a real blocker gets attention and a non-blocking question does not stall the entire plan.

    Weeks 4 to 2: Close Open Loops and Reduce New Decisions

    Use this phase to turn provisional information into a plan suppliers can deliver. Follow up with guests who have not replied, confirm your final number according to each contract, and complete the seating plan if your event needs assigned seats. Check deadlines with your venue and caterer directly rather than assuming every supplier uses the same cutoff.

    Review every contract and payment record. Confirm balances, due dates, service hours, arrival windows, equipment, meals for vendors where applicable, and the person to contact if something changes. Ask each supplier to confirm receipt of the current schedule and any instructions relevant to their work.
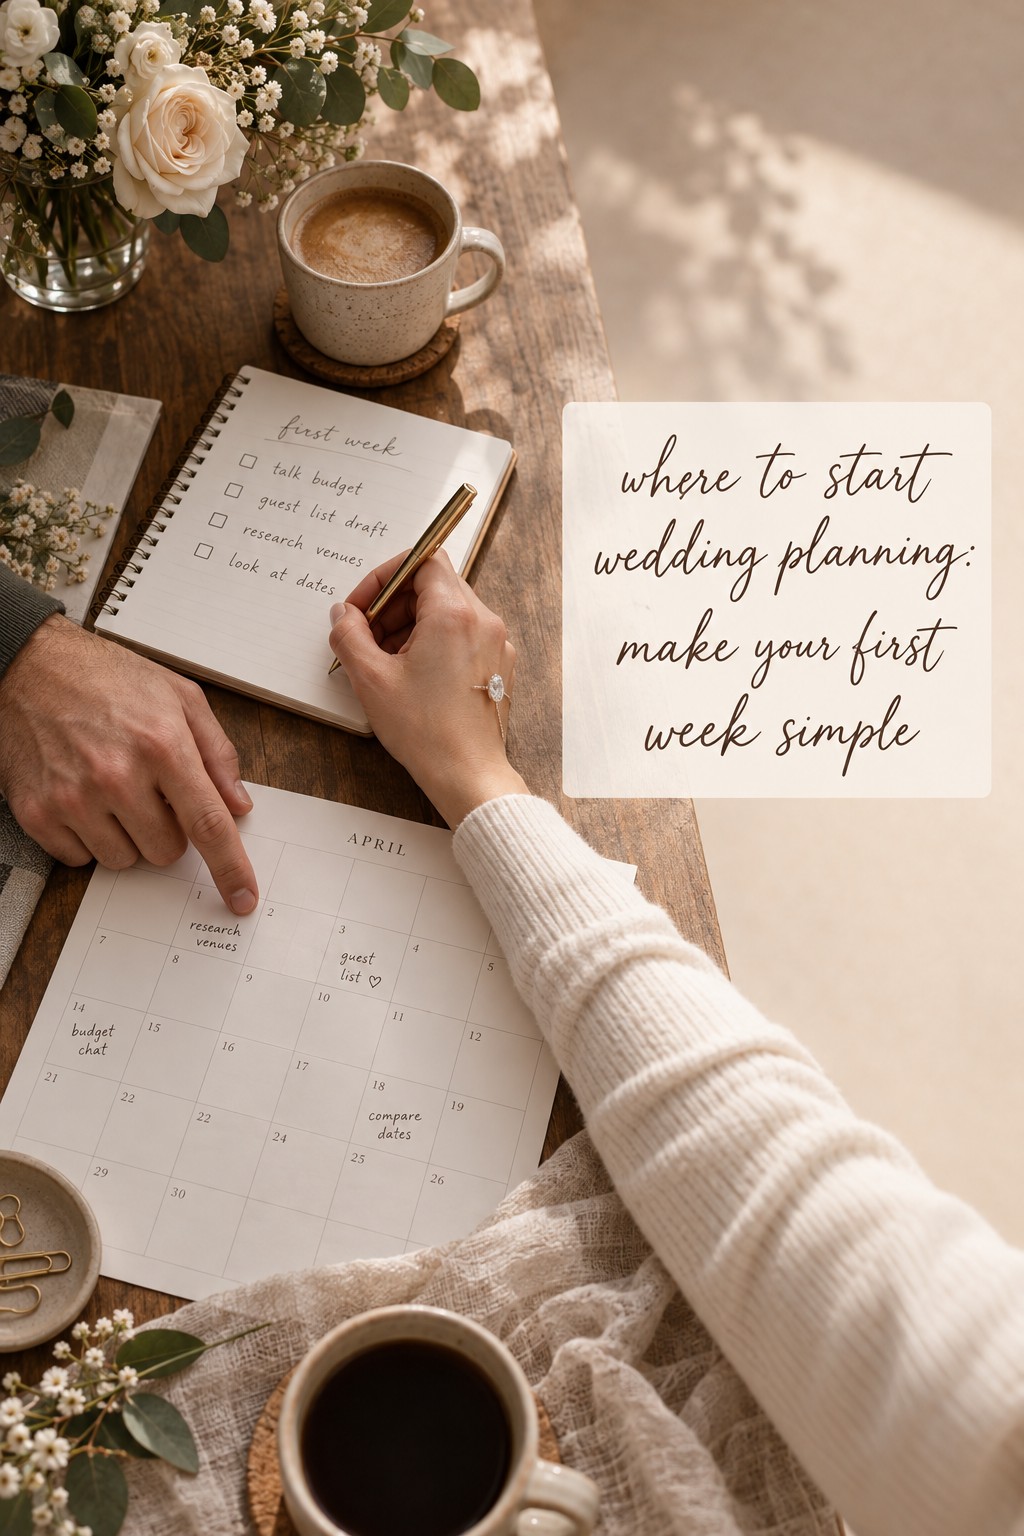
    Draft the day timeline with realistic travel and transition time. Include when the venue opens for setup, when key people need to arrive, ceremony start, portraits, meal service, speeches, dancing, cleanup, and transportation. Ask suppliers to flag conflicts. Share the final version with the people who need it, and label the version date so an old copy is not mistaken for the current one.

    Close decisions that affect several people: final ceremony order, music cues, who carries important items, where gifts or cards go, and what happens if weather changes an outdoor plan. Choose one contact person for routine questions. You and your partner should not both have to answer the same text thread while getting ready.

    At this point, pause new projects that do not solve a meaningful need. If a custom favor, elaborate welcome bag, or extra event requires new orders and coordination, decide whether it adds enough value to justify the time. Your remaining energy is a planning resource too.

    The Final Week: Hand Off the Details

    Make a concise handoff packet that someone else can use without asking you to search through messages. Include the current timeline, venue address and access notes, supplier names and contact numbers, floor plan, key responsibilities, delivery details, payment reminders, and any guest needs that the designated helper must know. Keep contracts or private information in a secure location and share them only with people who need them.

    Give each role a person and a clear boundary. One helper can greet deliveries; another can hold the rings or documents; the coordinator can handle supplier questions; a family member can direct guests. Write down which small choices they can make on your behalf and which issues require your approval. The point is not to control every moment. It is to make sure the people helping you are not guessing.

    Confirm that the final schedule has reached each supplier, check the essential attire and ceremony items, and pack what you will need. Then stop reopening choices that are already settled unless a real problem has appeared. Leave room to eat, rest, travel, and be with the people who came to celebrate with you.

    What to Simplify When the Plan Gets Tight

    Simplifying is a planning decision, not a sign that the wedding matters less. The right trade-off preserves your priorities and removes work that does not support them. Consider these options when availability, budget, or time makes the original idea difficult:

    • Choose a weekday, alternate time, or date with several venue options if your date is flexible.
    • Reduce the guest count if a smaller room makes the event easier to confirm and more comfortable for your budget.
    • Use a venue’s existing tables, chairs, meal service, or sound setup where it suits your needs.
    • Choose digital details or a simpler invitation when printing and mailing would take too long.
    • Use seasonal or readily available flowers rather than a custom design that depends on hard-to-source items.
    • Replace a separate pre-wedding event with a simple gathering, or skip it entirely.
    • Ask a trusted person to coordinate the day if a full planning service is not available or does not fit your budget.

    Do not simplify by leaving important people without information, signing agreements you do not understand, ignoring official paperwork, or expecting suppliers to infer your plan. Those shortcuts create uncertainty for everyone. A smaller, well-communicated celebration can feel more complete than a larger event with unresolved essentials.

    If the plan starts to feel unmanageable, return to your first decision brief. Keep the pieces that support your priorities, move optional details off the calendar, and agree on the next decision you can complete today. A focused plan is allowed to change as you learn what is actually available.

    3 month wedding planning handoff of the final details
    Pass the final details to a trusted day-of helper.

    FAQ

    Is three months enough time to plan a wedding?

    It can be enough for a celebration that fits the available dates, suppliers, budget, and guest needs. Start with the ceremony, venue, date, guest ceiling, and the parts you value most. Be ready to change the format or scale if your first choices are unavailable.

    What should we book first for a wedding in three months?

    Confirm the date and ceremony location, then contact the suppliers that most affect your event. The right order depends on your priorities, but venue capacity, legal steps, food, and guest count often shape later decisions. Ask about availability and terms before paying.

    Should we invite fewer guests for a short engagement?

    A smaller guest list can make more venues and event formats practical, but it is your choice. Set a clear maximum using your budget, capacity, and the people you most want present. Apply the same invitation rules consistently so the list does not keep expanding.

    When should we apply for a marriage license?

    Check with the official office responsible for the place where you plan to marry as soon as your date and location are known. Ask what documents, appointments, fees, and timing apply to your specific circumstances, then assign someone to keep the paperwork on schedule.

    When should invitations go out for a 90-day wedding plan?

    Share the date and location information early, then send invitations as soon as the details are reliable enough for guests to make plans. Set an RSVP deadline that gives you enough time to confirm final numbers with your venue and caterer. Guests who need to travel may need information even sooner.

    Do we need a wedding planner for a three-month engagement?

    Not necessarily. A planner or day-of coordinator may be useful if your event has many suppliers, multiple locations, or complex logistics. If you are planning yourselves, appoint a trusted person to manage the timeline and routine questions so the couple is not the only point of contact.

    What if we are already behind on the checklist?

    Stop adding optional tasks and list the open decisions that can block the event: legal steps, venue, date, guest count, essential suppliers, invitations, and payment deadlines. Contact the relevant people, choose one next action for each item, and delegate follow-ups where possible. Ask suppliers directly what is still feasible.
  • Step by Step Wedding Planning Guide for a Calmer Plan

    Step by Step Wedding Planning Guide for a Calmer Plan

    Getting engaged can make the future feel wonderfully clear for about five minutes. Then the questions arrive: What should we do first? How much can we spend? When should we book the venue? Do we need a planner? A search for a step by step wedding planning guide is often a sign that you do not need more inspiration. You need an order of operations.
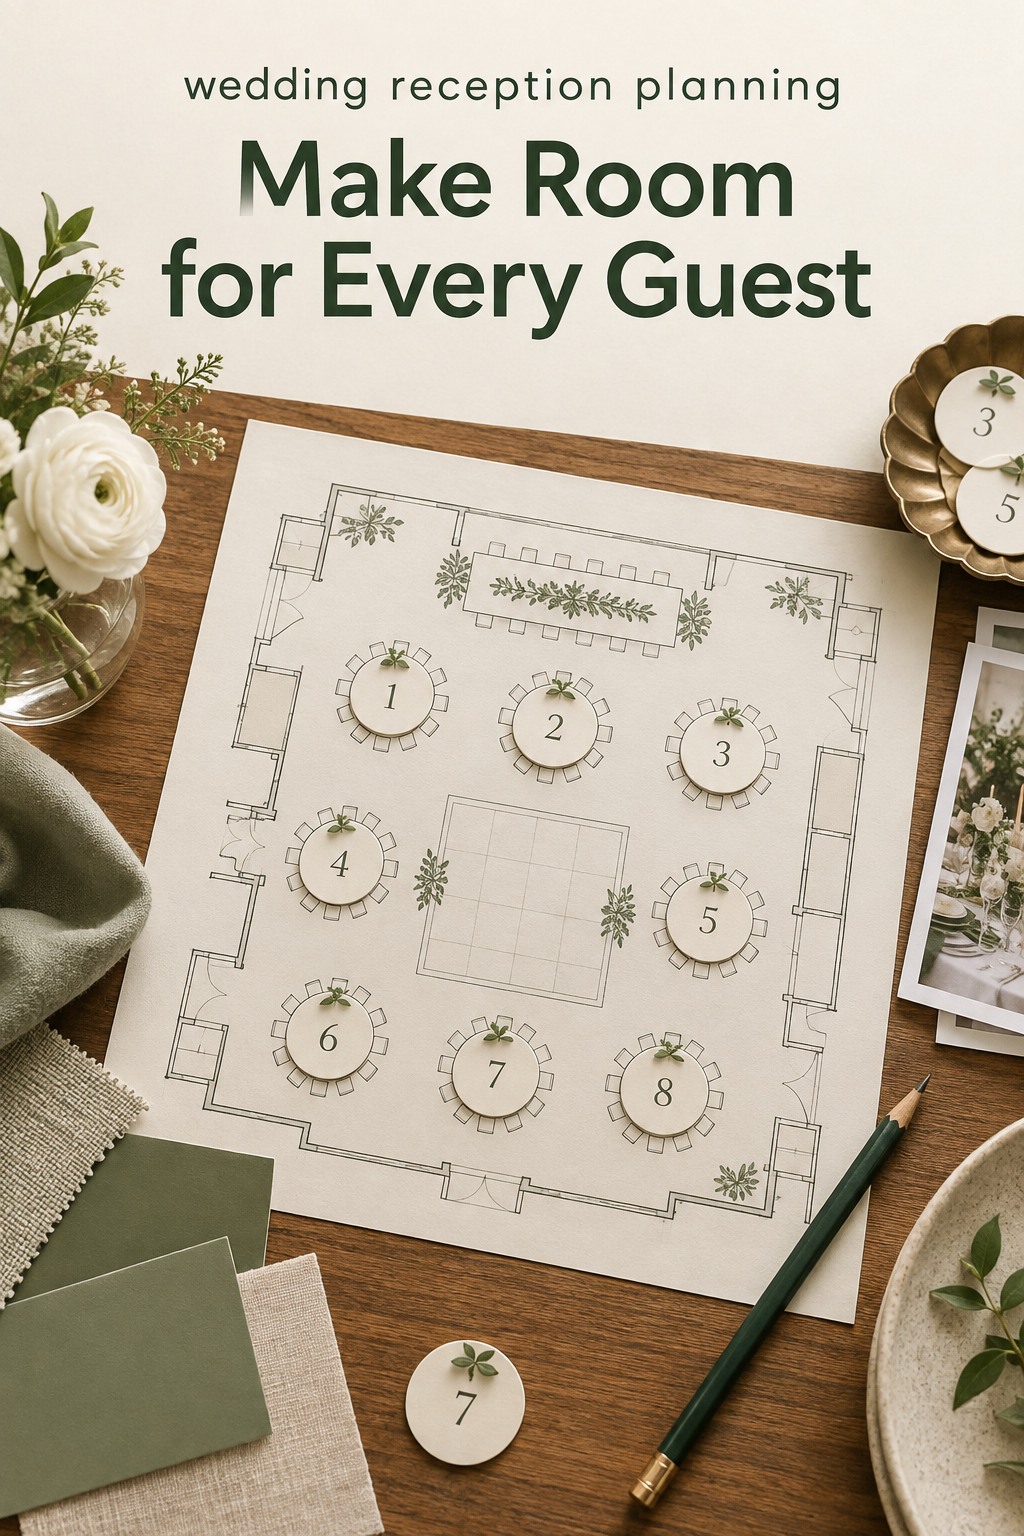
    The good news is that wedding planning becomes much easier when each decision unlocks the next one. You do not need to choose napkin colors before you know the guest-count range. You do not need to compare every photographer before you have a date and venue region. This guide gives you a practical sequence, explains why the sequence works, and shows what to do when your timeline, budget, or energy changes.

    step by step wedding planning guide couple organizing notes
    A calm first planning session with one shared wedding plan.

    Think of the process as a series of planning gates. At each gate, make only the decisions that control what comes after it. Keep one shared planning document, assign an owner to every open task, and protect one weekly planning session. A wedding can be personal and beautiful without becoming a second full-time job.

    First, stop planning everything at once

    The most common planning friction is not a lack of ideas. It is too many open decisions competing for attention. Couples save venues, dresses, flowers, stationery, playlists, and ceremony readings at the same time, then feel behind because none of those ideas has become a decision. The solution is to separate collecting from choosing.

    Create one simple planning hub before you research another vendor. It can be a spreadsheet, a shared document, or a dedicated planning system. Give it sections for budget, guest list, venue, vendors, design, guest communication, timeline, and questions. Every link, quote, contract, and decision should have one home. If a family member sends a recommendation in a text message, move the useful information into the hub so it does not disappear.

    Next, sort every task into three categories: decide, research, or later. Decide means the choice controls other work, such as a budget limit or guest-count range. Research means you need facts before choosing, such as venue capacity or vendor availability. Later means the choice matters but cannot improve the next decision. This small sort prevents a low-impact detail from stealing time from a high-impact question.

    • Decide: priorities, budget boundaries, guest-count range, date flexibility, and location.
    • Research: venues, contracts, vendor availability, travel needs, and legal requirements.
    • Later: small decor details, favors, signage wording, and final playlist edits.

    Finally, set a weekly rhythm. Use one meeting to make decisions, update the budget, assign follow-ups, and close old browser tabs. Keep the rest of the week for normal life. If you use a planning tool such as The Wedding Command Center, treat it as the place where your decisions, deadlines, and responsibilities stay visible. The point is not to create more administration. It is to make the plan easier for both partners to share.

    step by step wedding planning guide couple setting priorities
    Sorting priorities before making expensive wedding decisions.

    Step 1: Set the decisions that control the budget

    Before contacting venues, agree on what the celebration must feel like. Use three short lists: our must-haves, our nice-to-haves, and our not-for-us items. A must-have might be a specific city, a relaxed dinner, live music, or space for a cultural tradition. A nice-to-have can happen if the budget and venue support it. A not-for-us item saves time by ending research that was never a fit.

    Now define the financial boundary. Write down the total amount you can responsibly use, who may contribute, when contributions will arrive, and what happens if a contribution changes. Do not treat an unconfirmed promise as available money. A clear budget is not a prediction of every final invoice. It is a decision tool that tells you which choices are safe to explore.

    Use ranges at the beginning. Estimate a comfortable guest-count range rather than pretending you know the final number. Create broad categories for venue and food, photography and video, attire, florals and decor, music, stationery, transportation, beauty, ceremony needs, lodging, and a reserve for surprises. The exact categories will change, but the act of naming them exposes trade-offs early.

    Guest count is one of the strongest budget controls, so build a first-pass list before falling in love with a venue. You do not need a perfect seating plan. You need a realistic conversation about immediate family, close friends, work connections, children, plus-ones, and guests who may travel from far away. Note where the list is firm and where it is still flexible.

    Choose a planning horizon without treating it as a deadline for perfection. A longer engagement gives you more availability and time to save. A shorter one can work when you make decisions quickly and accept that some choices will be simpler. If your date is flexible, list three acceptable seasons or date windows. Flexibility can help with availability, but only use it if both partners genuinely agree.

    At this stage, make a one-page decision brief. Include the approximate guest count, total budget boundary, preferred location, date flexibility, three must-haves, three items you will not prioritize, and the person responsible for each next conversation. This brief becomes a filter for every proposal. If a venue looks beautiful but fails a must-have, it is not a near miss. It is useful information.

    step by step wedding planning guide venue tour
    Comparing venue details with confidence before booking.

    Step 2: Lock the date, venue, and major vendors

    The venue is not just a backdrop. It affects capacity, catering, ceremony flow, rental needs, travel, weather plans, setup time, and the type of vendors you can hire. That is why venue research belongs before most detailed design decisions. Ask for the complete pricing and rules, not only the attractive starting rate.

    For every venue, compare the same questions: What is included? What is required? Which dates are available? Is there a preferred vendor list? Can outside catering come in? What are the payment dates and cancellation terms? How long do you have access to the space? Where do guests park or stay? What is the rain plan? Who manages the room flip, cleanup, and end-of-night departure?

    Read the contract before treating a venue as chosen. Put every deposit, deadline, restriction, and open question into your planning hub. If a clause is unclear, ask for an explanation in writing. This is also the moment to identify insurance or permit questions that depend on the venue and location. For legal or local requirements, confirm details with the appropriate local authority rather than relying on a generic checklist.

    Once the venue and date are secure, book the vendors whose availability controls the experience. Priorities often include photography, music, catering if it is separate, planning or coordination support, and any specialist service tied to your ceremony or cultural traditions. The exact order depends on your celebration, but the principle is consistent: secure the scarce, high-impact resources before fine-tuning the look.

    • Ask each vendor for a complete proposal, service scope, payment schedule, and cancellation terms.
    • Confirm who will actually be present on the wedding day and who is your point of contact.
    • Record arrival time, setup needs, meal requirements, power needs, and venue restrictions.
    • Compare proposals against the same priorities instead of comparing only the headline price.

    If you are considering a planner, decide what kind of help would remove the most friction. Full planning supports the whole process. Partial planning helps with selected decisions. Month-of or day-of coordination focuses on execution and handoff. A planner cannot replace every decision, but the right support can protect your time, clarify vendor communication, and give you a realistic view of what remains.

    Keep the design conversation connected to the venue. Save inspiration that reflects the light, architecture, season, and guest experience you actually have. A mood board should help you communicate a direction, not pressure you to reproduce a staged photo. Choose a few visual words, such as warm, garden-inspired, modern, or understated, then let those words guide later choices.

    step by step wedding planning guide invitations and guest details
    Bringing invitations, guest information, and design details together.

    Step 3: Build the guest experience and design details

    After the foundational bookings are complete, shift from private decisions to guest-facing communication. Create a guest list that shows names, household groupings, mailing details, invitation status, RSVP status, meal information, accessibility notes, and travel considerations. Keep a record of who owns each update. One accurate list is safer than several partial versions.

    Decide how guests will receive information. A wedding website can hold travel notes, schedule details, dress guidance, registry information, and updates that would otherwise be repeated in messages. Your invitation and website should agree on the basics. If information changes, update the central source first, then tell guests where to find the new version.

    Plan the ceremony and reception as a sequence of experiences. Consider how guests arrive, where they wait, what they need to know, how the ceremony transitions, when food is served, how speeches are paced, and where older guests or children may need comfort. These decisions are more useful than collecting isolated decor ideas because they reveal what the room and timeline need to support.

    Then work through attire, beauty, flowers, rentals, stationery, signage, cake, favors, and personal details. Give each category a purpose. Attire should support comfort and movement. Flowers should support the ceremony and tables that guests actually see. Signage should answer a question. A favor should be meaningful or useful, not simply another item to transport.

    Use decision deadlines instead of vague reminders. “Choose invitations” is difficult to act on. “Compare three invitation suites, confirm wording, and approve the proof by Thursday” is clear. Break any task that takes more than one session into a result, an owner, a due date, and the next action. This keeps a large wedding from becoming a cloud of unfinished intentions.

    Review the plan with the people who will execute it. Ask your photographer where family photos should happen. Ask the caterer how service affects speeches. Ask the venue when vendors may enter. Ask the coordinator which decisions must be complete before the final month. The best planning documents are built from these connections, not from isolated lists.

    Step 4: Turn the plan into a final-month operating system

    The final month is not the time to reinvent the wedding. It is the time to close loops. Confirm guest responses, finalize the seating approach, approve production details, share the latest timeline, verify balances, and identify who answers questions while you get ready. If a task is still undecided, choose the simplest option that protects the guest experience and your priorities.

    Create a final vendor contact sheet with names, phone numbers, arrival times, responsibilities, balances, special instructions, and emergency contacts. Send one current version to the coordinator or designated point person. Do not make the couple the only communication channel. Your wedding day should not depend on you answering every text while getting dressed.

    Build the wedding-day timeline from the fixed points backward. Start with the ceremony or reception start, then add guest arrival, photography, getting ready, transportation, setup, meal service, speeches, dances, and departure. Add realistic buffers. A timeline that works only if every person is early and every transition is perfect is not a useful timeline.

    • Four weeks out: close major guest and vendor questions, review contracts, and confirm the design order.
    • Two weeks out: finalize the timeline, seating information, ceremony materials, and personal packing list.
    • One week out: hand off documents, prepare payments and tips, confirm transportation, and protect rest.
    • Wedding week: follow the handoff plan, solve only true decisions, and let the designated team manage routine questions.

    If you are behind, do not start with guilt. Run a reset meeting. List every unfinished task, mark it essential, helpful, or optional, assign an owner, and give each essential task a next action. Remove optional items that add work without improving the guest experience. Contact vendors with a concise update rather than waiting until every detail is perfect.

    If the budget changes, return to your must-haves. Protect what creates the experience you care about and simplify what guests will barely notice. If the guest count changes, revisit food, seating, rentals, invitations, and transportation together. If a vendor cancels, ask the venue, coordinator, and trusted network for replacements before searching randomly. A calm response is usually more valuable than a perfect first plan.

    Common mistakes that make planning harder

    Booking before confirming the budget is one of the costliest mistakes. A beautiful proposal can still be wrong if it creates pressure in every later category. Confirm the total boundary and payment timing before signing. Another common mistake is building the guest list after choosing a venue. Capacity changes the venue search, catering, rentals, and the feeling of the day.

    Couples also lose time by assigning tasks without defining ownership. “We need to handle transportation” is not an assignment. “Jordan will request two quotes by Tuesday and add the best option to the budget” is. Shared responsibility is helpful, but shared vagueness leaves every task open.

    Do not confuse a full inspiration board with a plan. Inspiration can show a direction, but it does not answer availability, cost, capacity, setup time, or guest comfort. Translate each favorite image into a practical question. What part matters? The color, the texture, the layout, the lighting, or the feeling? Then find an option that fits your real event.

    Finally, avoid making the couple the help desk. Choose a coordinator, family contact, wedding party lead, or trusted friend to answer routine questions. Tell guests where current information lives. Protecting your attention is not selfish. It is part of making the plan work.

    Sources and methodology

    This guide was shaped by comparing current step-by-step wedding planning resources from US-facing wedding publications and planning services, including The Knot’s planning sequence and WeddingWire’s stress-reducing framework. The original contribution here is the decision-gate method: each stage is organized around the choices that control the next stage, with a reset process for couples who fall behind.

    step by step wedding planning guide final month timeline
    A final-month timeline and vendor handoff that protects calm.

    FAQ

    What is the first step in wedding planning?

    Start with a shared decision brief. Write down your approximate guest-count range, budget boundary, preferred location, date flexibility, must-haves, and items you will not prioritize. This gives you a filter before you contact venues or collect more inspiration.

    How early should we start planning a wedding?

    Start when you are ready to make the foundational decisions, not when you have every detail imagined. More time can provide more availability and saving flexibility, while a shorter engagement can work with a focused process. The realistic timeline depends on your date, location, guest count, and vendor availability.

    Should we choose the venue or guest list first?

    Work on them together. Create a realistic guest-count range before touring venues, then use venue capacity and cost to refine the list. Choosing either one in isolation can create expensive rework later.

    Do we need a wedding planner?

    Not every couple needs full planning support. Consider what is causing the most friction. Full planning helps with the entire process, partial planning supports selected decisions, and coordination support focuses on execution and vendor handoff. The useful question is which kind of help would protect your time and reduce risk.

    What should we do if we are behind on planning?

    Run a reset meeting. List all unfinished tasks, label each essential, helpful, or optional, assign one owner, and define the next action. Remove optional work that adds little value, then contact the venue and vendors about the remaining essential decisions. Progress comes from narrowing the list.

    How can we keep wedding planning from taking over our lives?

    Protect one weekly planning session, keep one source of truth, and stop researching when the session ends. Give each task an owner and deadline so decisions do not remain in your head. A clear handoff to a coordinator or trusted contact can also keep routine questions away from the couple.

    When should we create the wedding-day timeline?

    Build a working version after the venue and major vendors are booked, then finalize it during the last month. Start with fixed moments and work backward, adding travel, setup, photography, meals, speeches, and realistic buffers. Share the final version with the people who will execute it.