Blog

  • Planning a Wedding in 3 Months Checklist: 90-Day Guide

    Planning a Wedding in 3 Months Checklist: 90-Day Guide

    Planning a wedding in three months is not the same as taking a twelve-month checklist and trying to do everything faster. The workable approach is smaller and more deliberate: decide what must be true for the ceremony to happen, book the choices that unlock other choices, and simplify anything that does not improve the guest experience.

    This planning a wedding in 3 months checklist is built for a couple who needs a clear order of operations. It covers the first decisions, the middle stretch, the final month, and the handoff that keeps wedding-day details from living in one person’s memory. You can use it whether you are planning a celebration from scratch or taking over after a change of date, venue, or circumstances.

    planning a wedding in 3 months checklist start with a clear shared plan
    Start your 90-day wedding plan with one clear shared direction.

    Before you begin, open one shared planning space. It can be a spreadsheet, a digital dashboard, a binder, or a combination that both partners will actually check. A resource such as The Wedding Command Center can be useful when you want one place for decisions, deadlines, contacts, and handoff notes. The tool matters less than the habit: every open decision needs an owner, a next action, and a date.

    The 90-day rule: decide what must be true first

    Start by separating ceremony-critical decisions from details that can be adjusted later. A venue and date affect almost everything else. Guest count affects the venue, food, rentals, invitations, and budget. The ceremony format affects the officiant, location, legal steps, and timing. Your total budget affects every conversation with a vendor. Those are the decisions that deserve attention before color palettes, favors, or elaborate stationery.

    A short engagement rewards flexibility. If the ideal Saturday is unavailable, consider a Friday, Sunday, weekday, or an off-peak date. If a custom gown cannot be produced in time, look at ready-to-wear, a sample appointment, or a simpler silhouette. If a full-service vendor is booked, ask whether a smaller package or trusted colleague is available. The goal is not to accept poor quality. The goal is to protect the parts of the day that matter most while giving yourself more possible paths.

    Make a must-have, nice-to-have, and not-now list

    Write three short lists before you contact vendors. Must-haves are the conditions that make the wedding feel right or make the event possible, such as a particular ceremony tradition, an accessible location, a meal that works for important guests, or photography you genuinely value. Nice-to-haves are meaningful but replaceable. Not-now items are ideas you can revisit only if the essentials are secure.

    • Must have: the date range, legal ceremony plan, realistic guest capacity, total budget, and the vendors or services that protect the guest experience.
    • Nice to have: upgraded linens, specialty signage, extra portrait sessions, elaborate favors, or a more complex reception design.
    • Not now: anything that requires custom production, multiple rounds of comparison, or a decision that does not affect the next two weeks.

    Use the list whenever planning begins to feel scattered. If an item does not affect the ceremony, the guest experience, the budget, or a firm deadline, it probably does not belong in the first sprint. This is how a compressed plan stays calm instead of becoming a frantic collection of tabs.

    Give every decision an owner and a finish line

    Shared planning does not mean both partners must research every option. Assign one owner to each decision, then agree on the information the owner must bring back. For example, one partner can compare three venues using the same questions, while the other contacts photographers and caterers. A family member might research ceremony requirements, but the couple should make the final decision and record it.

    Use a simple decision card: decision, owner, options, deadline, deposit or cost, and next person to inform. If a vendor is waiting for your answer, record that too. The point is to make invisible work visible. A five-minute weekly review can then focus on decisions that are due, blocked, or waiting for someone else.
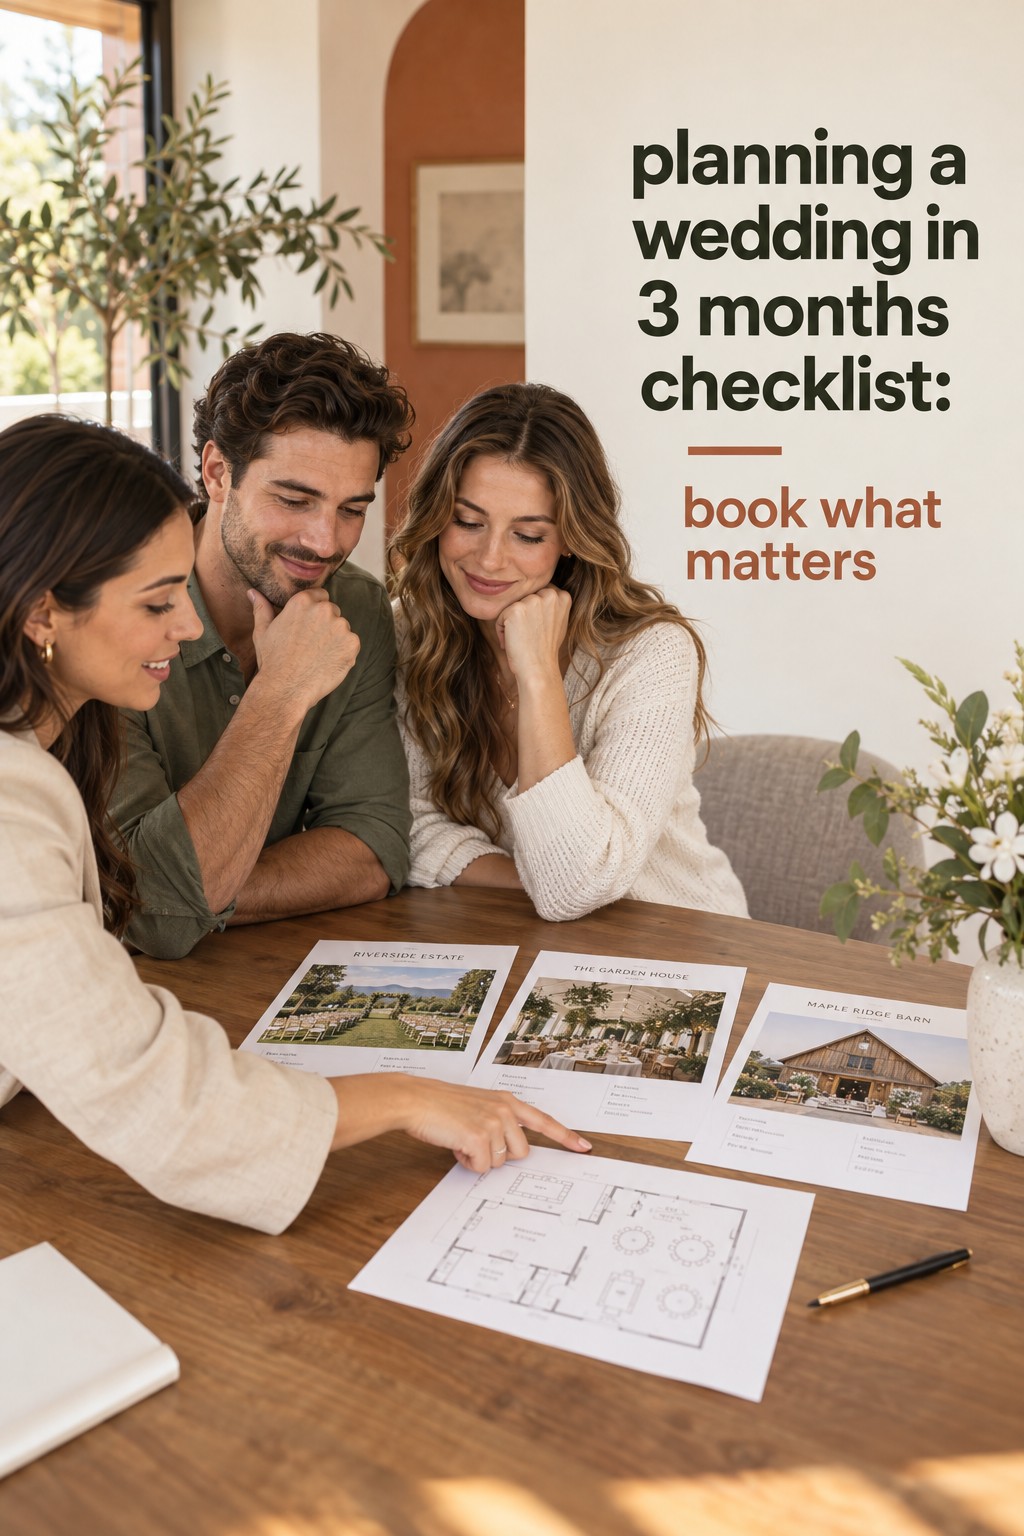
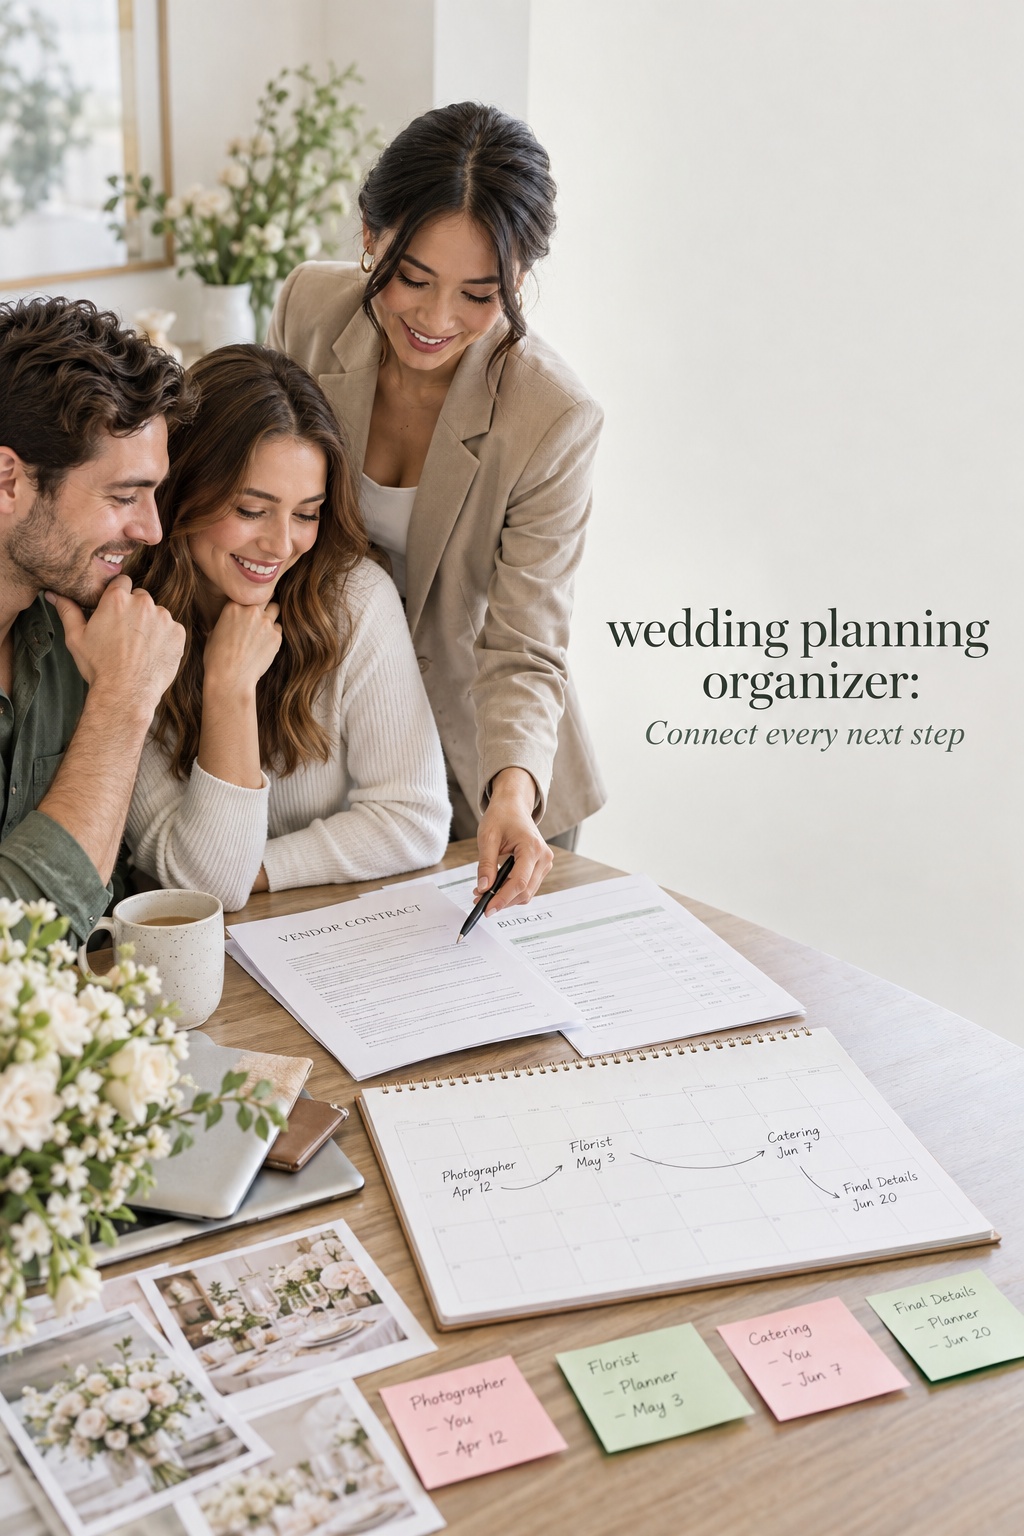
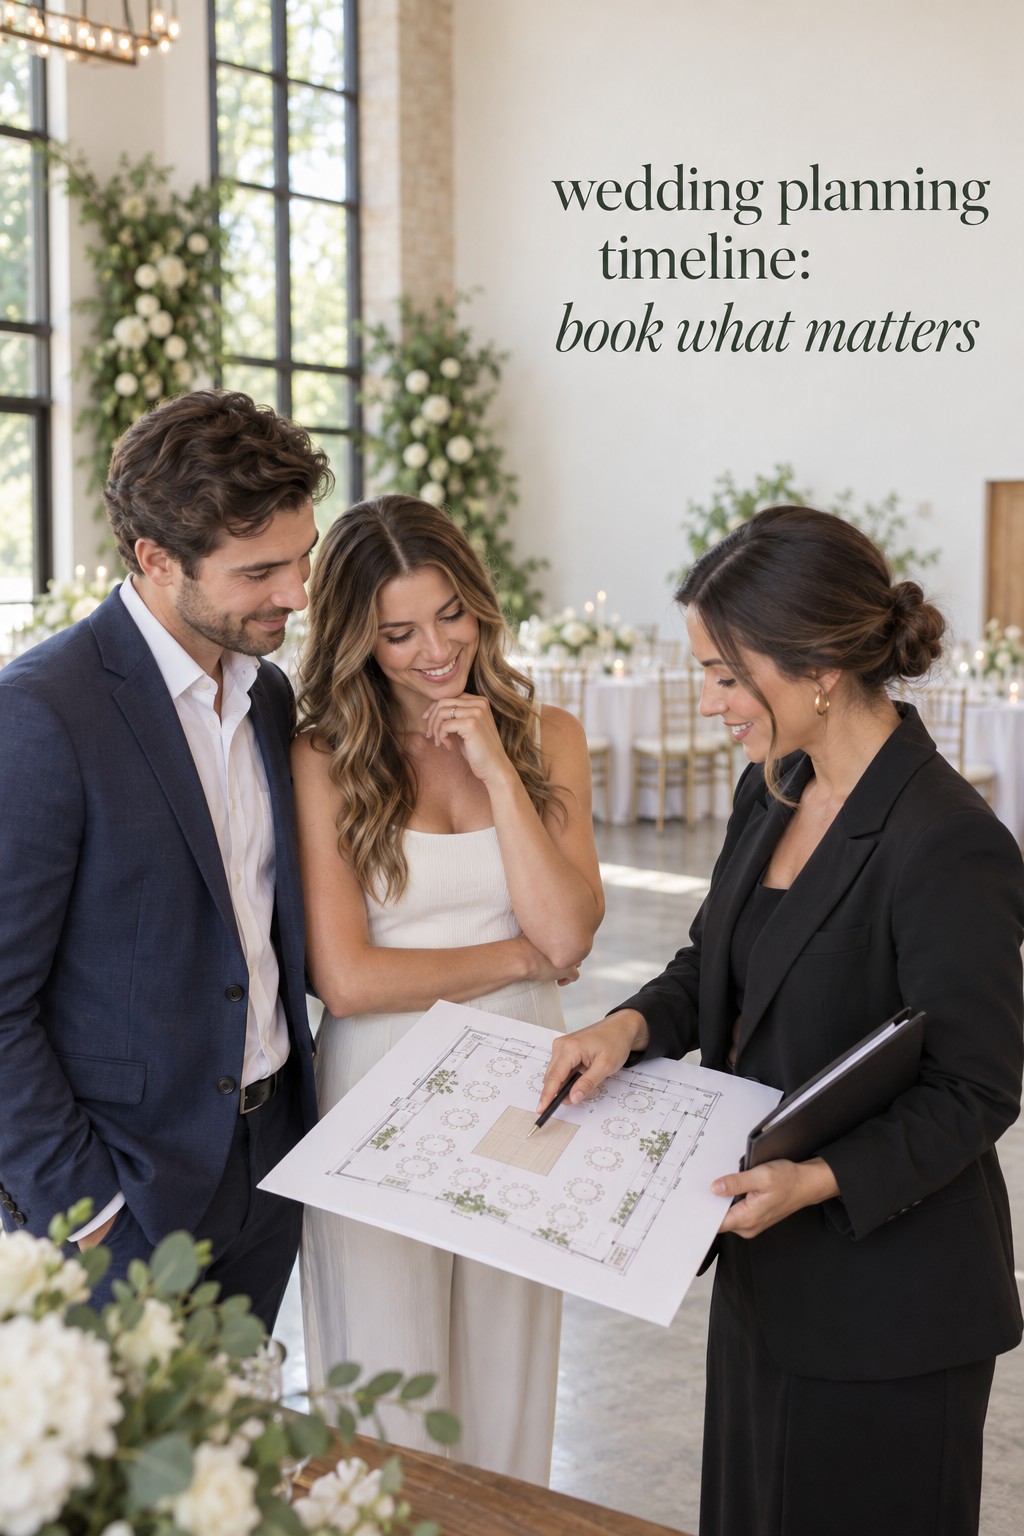
    planning a wedding in 3 months checklist for booking what matters first
    Book the decisions that unlock the rest of the wedding plan.

    Weeks 12 to 9: secure the decisions that unlock everything else

    The first four weeks are a booking sprint. Do not spend them making the entire wedding look finished. Spend them making the wedding possible. The short-timeline guidance from The Knot also places the venue, date, budget, and essential suppliers at the front of the process. That order is useful because later decisions become easier once the foundation is real.

    Week 12: confirm the date, venue, ceremony, and budget

    Begin with a realistic total budget, including taxes, service charges, attire alterations, transportation, tips, marriage-license costs, rush fees, and a small contingency. If family members are contributing, clarify whether the contribution is a gift, a fixed amount, or connected to specific expectations. That conversation is easier before deposits are made.

    Next, confirm the venue and ceremony plan. Ask about availability, guest capacity, rain or weather procedures, required vendors, payment schedule, setup time, cleanup, accessibility, parking, and what is included. An all-inclusive venue can be helpful when time is short, but compare the full cost and contract terms rather than assuming included services are automatically the best value.

    Contact the officiant or ceremony authority early. Requirements differ by location and ceremony type, so treat legal information as a local question to verify with the relevant government office or officiant. Record what documents are needed, when an appointment is required, and who is responsible for each step.

    Weeks 11 and 10: book the essential vendor team

    Contact the vendors that can limit the date: photographer, caterer, DJ or musician, florist, rentals, hair and makeup, transportation, and coordinator or planner. You may not need every category, but you do need a clear answer for each one. If the venue includes catering, ask what remains to be arranged. If you are using a restaurant, backyard, community hall, or other nontraditional space, rentals and logistics may become more important than décor.

    • Send the same short brief to each vendor: date, location, guest estimate, service needed, budget range, and response deadline.
    • Compare proposals using the same columns: total cost, inclusions, overtime, deposit, cancellation terms, arrival time, and decision deadline.
    • Ask what the vendor needs from you next and record the answer in the shared planning space.
    • Move on when a vendor cannot respond within the window your timeline allows. A slow response may create a bigger problem later.

    Do not let a beautiful portfolio hide an unclear contract. In a three-month plan, clarity is part of quality. You need to know who arrives when, what they bring, what you supply, and how changes are handled.

    Week 9: close the guest and communication loop

    Finalize the guest list enough to communicate clearly. You may still have a few names to resolve, but avoid keeping the entire list open. Send invitations as soon as the date, location, ceremony timing, and response method are dependable. Digital invitations can be a practical choice when speed matters. Printed invitations can still work when the design is simple and production is available quickly.

    Create a guest information page or message with the address, parking, hotel details, dress guidance, meal response instructions, and a contact for questions. The more useful information guests receive early, the fewer one-off messages the couple will need to answer later.
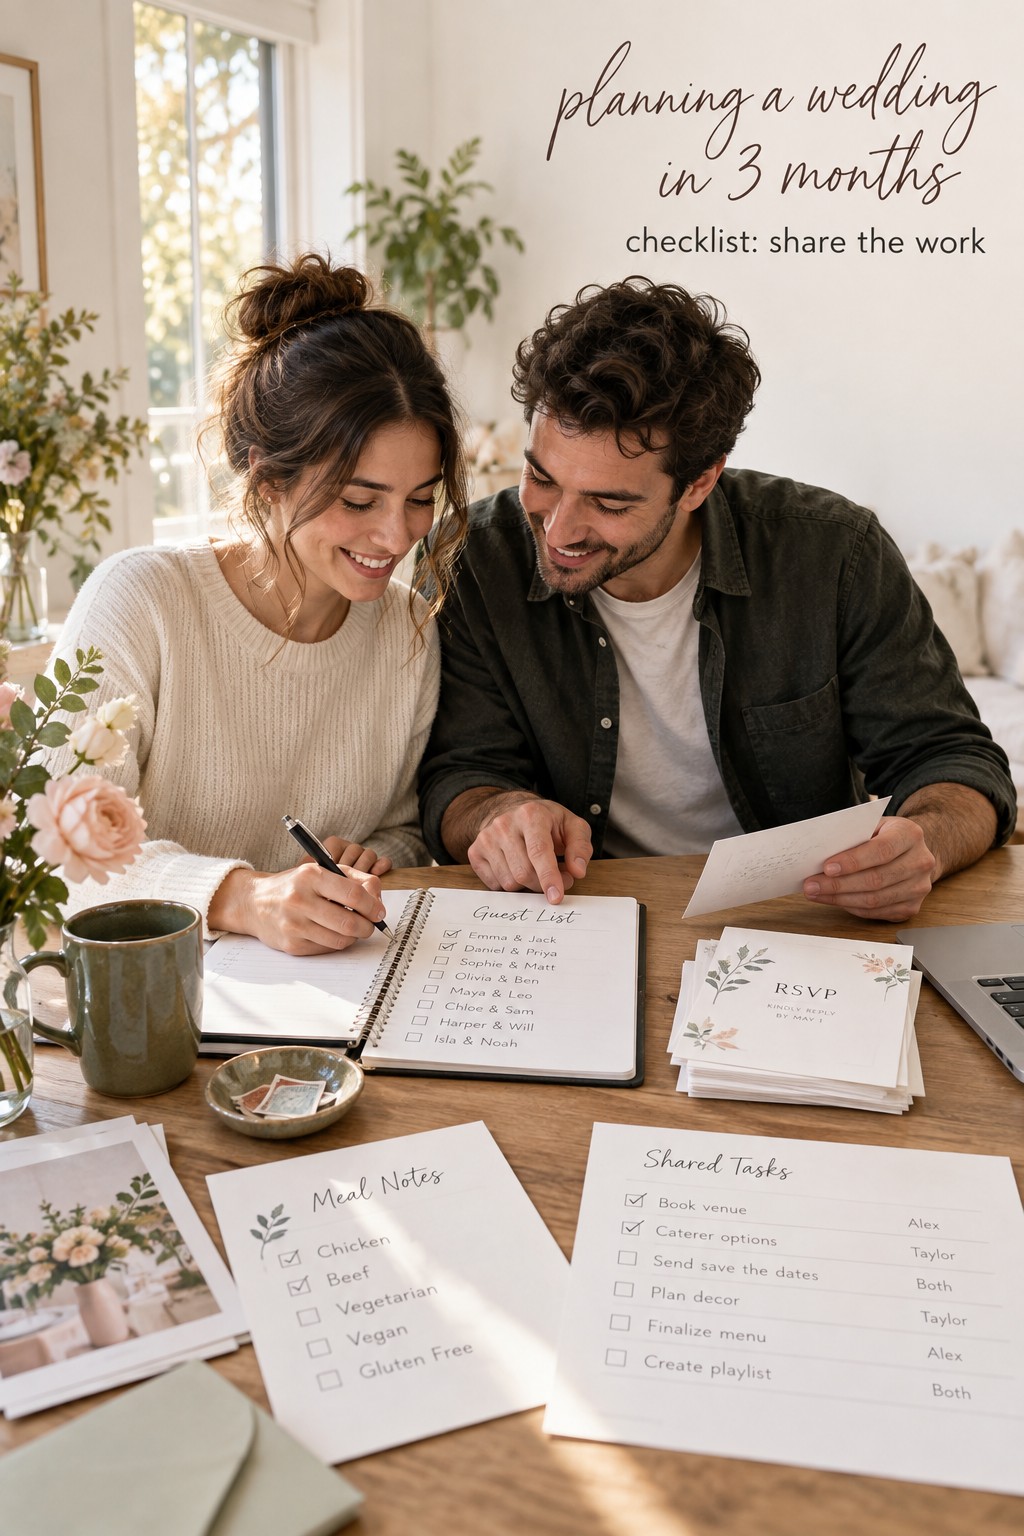
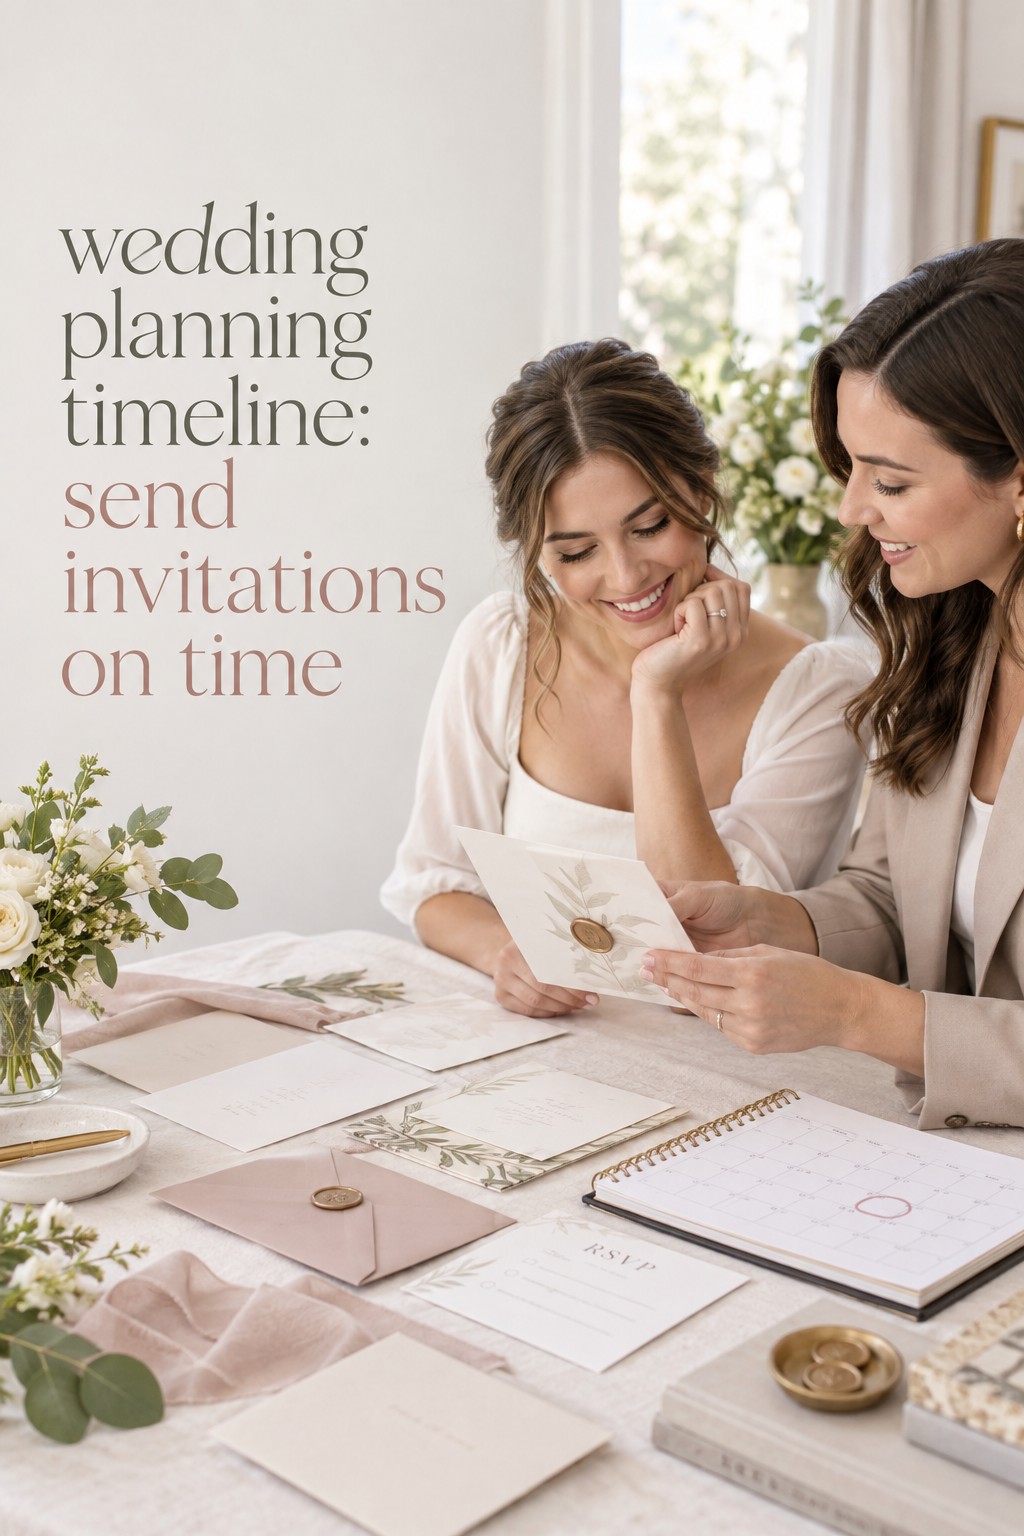
    planning a wedding in 3 months checklist for sharing guest and planning work
    Share guest details and planning tasks so progress stays visible.

    Weeks 8 to 5: turn decisions into a guest-ready wedding

    Once the major bookings are secure, the work changes. You are no longer proving that the wedding can happen. You are making the guest experience easy to understand and the vendor team easy to coordinate. Keep a weekly planning appointment, but limit it to three questions: what must be decided this week, what is waiting on someone else, and what can be removed?

    Use one review for attire, beauty, ceremony, and reception

    Order or select attire with the actual timeline in mind. Ask about alterations, delivery, shoes, accessories, undergarments, and backup options. Schedule hair and makeup trials only if they will help you make a decision. A trial is not useful when it creates another open-ended search. Bring the final look into the day-of schedule, including time for dressing, travel, photos, and a buffer.

    For the ceremony, choose the officiant, readings, music, vows, participants, and processional order. Keep the program intentional and short enough for the setting. For the reception, decide the meal format, bar plan, seating approach, key music moments, toasts, and any accessibility or dietary needs. You do not need to design every minute, but the people responsible for each transition need to know what happens next.

    Make the guest list operational

    A guest list is not finished when names are typed into a document. It becomes operational when you know who has responded, who needs a follow-up, who has dietary or mobility needs, who needs accommodation information, and who should not be placed together. Keep these notes private and share only what each helper needs.

    • Set a response deadline that gives you time to confirm food, seating, rentals, and printed materials.
    • Assign one person to follow up with missing responses so the couple is not carrying every conversation.
    • Track meal needs and accessibility notes beside the guest record, not in scattered messages.
    • Start a seating draft before every response arrives, then mark uncertain seats clearly.

    If the guest list remains larger than the venue or budget can support, return to the priorities rather than trying to hide the problem in the final week. A clear conversation now is kinder than a rushed compromise after menus and rentals are ordered.

    Build a vendor brief instead of repeating the story

    Create a two-page vendor brief with the date, addresses, arrival windows, contact list, layout, ceremony order, meal notes, photography priorities, music cues, payment status, and emergency contacts. Add a short section called “what matters most to us.” This gives vendors context without forcing them to search through a long message history.

    Send the brief as a working draft, not a final document. Ask each vendor what is missing or unclear. Then make one controlled update rather than changing the plan in five different conversations. This small habit reduces contradictory instructions and helps a coordinator or trusted helper step in later.
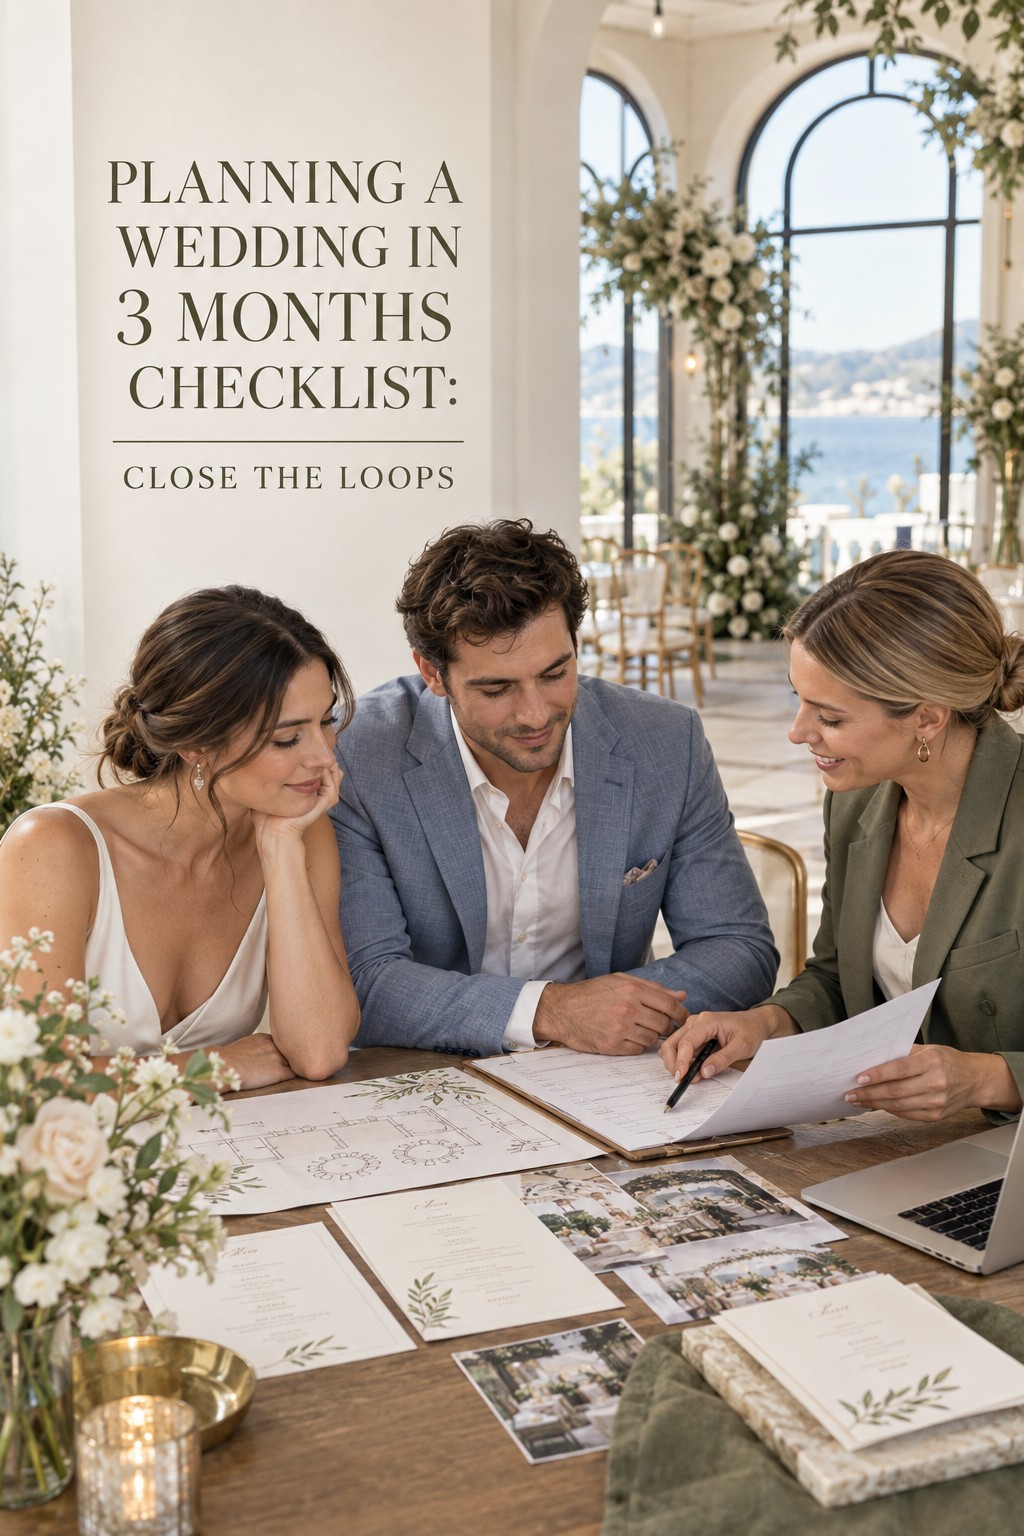
    planning a wedding in 3 months checklist for closing vendor and ceremony loops
    Confirm the details that make the final month feel manageable.

    Weeks 4 to 1: close loops and hand off the day

    The final month is for confirmation, not constant invention. Freeze the big choices early. New ideas are allowed only when they solve a real problem or make the guest experience clearer. A beautiful extra that creates another vendor, payment, delivery, or setup dependency is not free. It consumes attention at the moment your plan needs reliability.

    Four weeks out: confirm the facts

    Review the response count, meal needs, seating draft, attire status, ceremony wording, transportation, hotel information, rentals, weather plan, and vendor arrival times. Confirm every balance and due date. Ask vendors to confirm the date, location, service, headcount assumption, and best day-of contact. If a contract or permit is still incomplete, make that the week’s first task.

    Schedule fittings, beauty appointments, final menu decisions, rehearsal details, and any necessary walkthrough. Keep buffers in the calendar. A short timeline does not mean every hour should be assigned. It means the important tasks must have somewhere to land.

    Two weeks out: make the plan usable by someone else

    Choose the person who will answer questions on the wedding day. This may be a coordinator, planner, family member, friend, or venue contact. It should not automatically be the couple. Give that person the vendor brief, timeline, contact list, payment notes, floor plan, seating information, ceremony details, transportation plan, and the list of decisions they are authorized to make.

    Walk through the day in order. Ask: where does each person need to be, what arrives, who receives it, who moves it, and what happens if the original plan changes? This is where a simple handoff system becomes more valuable than another inspiration board. A planner or tool can store the information, but a human owner still needs to know that the handoff exists and how to use it.

    One week out: protect attention

    Complete the final guest and vendor confirmations, prepare tips or final payments according to your contracts, pack personal items, confirm transportation, and share the final schedule. Put the rings, license documents, attire accessories, vows, emergency supplies, and important contact details in clearly labeled places. Keep copies of essential documents where the handoff person can reach them.

    Stop making low-value changes. If a small detail is imperfect but does not affect safety, timing, comfort, or the meaning of the ceremony, let it be. The best final-week checklist protects the couple’s energy as carefully as it protects the schedule.

    Use a final handoff packet

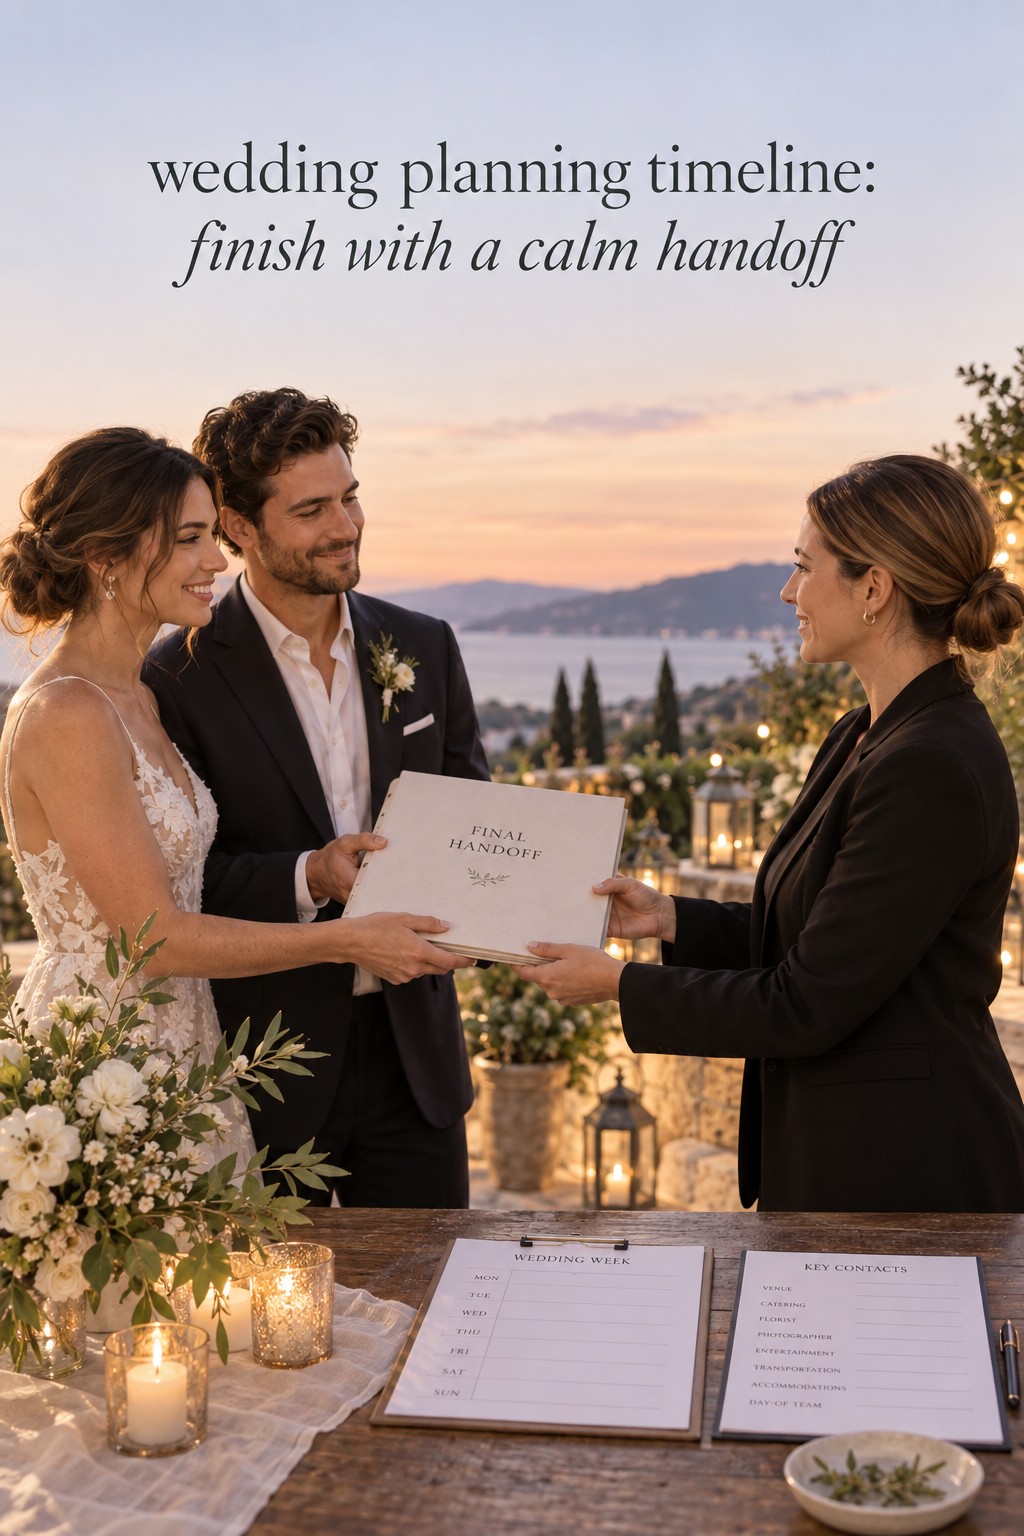
    Your final handoff packet can be digital, printed, or both. Keep it concise enough that a helper will open it under pressure. Include the final timeline, venue map, vendor contacts, guest count, seating plan, ceremony order, meal notes, transportation, payment reminders, weather decision, setup responsibilities, cleanup responsibilities, and the couple’s emergency contact preferences.

    • One page for the timeline: include locations, arrival windows, transitions, and buffers.
    • One page for contacts: list the person to call for each category and the order for urgent questions.
    • One page for people: include guest count, seating notes, meal needs, wedding party, family contacts, and ceremony participants.
    • One page for money and items: list final payments, envelopes, rentals, personal items, and who receives each item.

    Give the packet to the handoff person during a short meeting, not in a last-minute text. Ask them to explain the first three actions they would take if the couple became unavailable. If the answer is clear, the plan is ready. If it is not, simplify the packet until the next action is obvious.
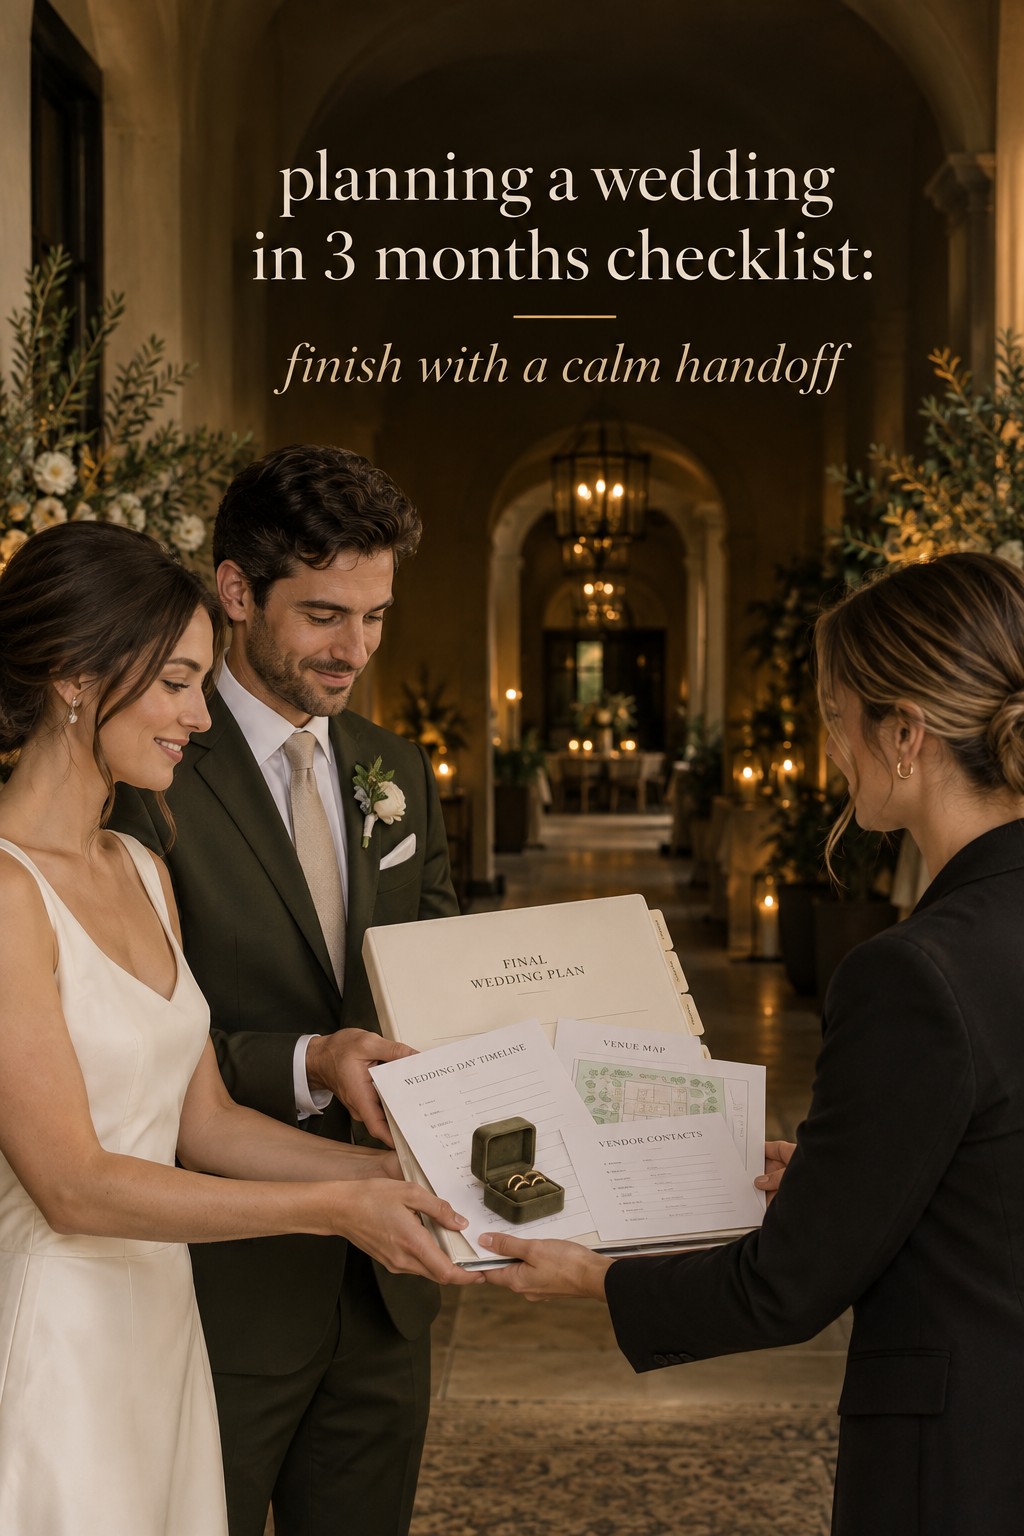
    planning a wedding in 3 months checklist with a calm final handoff
    Finish with a handoff packet that keeps wedding-day details easy to use.

    FAQ

    Can you really plan a wedding in three months?

    Yes, when you accept that the plan must be selective. A three-month wedding is most manageable when the couple confirms the date, venue, ceremony, budget, guest communication, and essential vendors first. Flexibility with the day, location, format, attire, and décor creates more workable options.

    What should be booked first for a three-month wedding?

    Start with the venue and date, then confirm the ceremony route, budget, and vendors whose availability can limit the wedding, such as photography, catering, music, rentals, beauty, and transportation. The exact order can change by event, but book anything that unlocks multiple later decisions before optional details.

    How do you simplify wedding planning when time is short?

    Use a must-have, nice-to-have, and not-now list. Choose flexible dates, reduce custom production, use digital communication when helpful, select a venue or vendor package that removes logistics, and limit the number of options you compare. Simplifying the process does not mean making the wedding generic. It means protecting the choices that carry meaning.

    Should you hire a wedding planner for a three-month timeline?

    A planner or coordinator can be especially helpful when the venue, vendor team, guest count, or family logistics are complicated. If a full planning service is outside your budget, ask about partial planning, a month-of package, or day-of coordination. The useful question is not whether you need a particular title. It is whether someone besides the couple can own the final schedule and vendor communication.

    When should invitations go out for a wedding in three months?

    Send them as soon as the date, location, ceremony timing, and response method are dependable. With a compressed timeline, a simple printed or digital invitation can be more practical than waiting for a highly customized design. Give guests clear travel, lodging, meal, accessibility, and response information so they can act quickly.

    What is the most common mistake in a 90-day wedding plan?

    The most common mistake is treating every task as equally urgent. That creates busywork while a venue, contract, guest count, or legal step remains unresolved. Keep asking which decision unlocks the next group of decisions, assign an owner, and put the final details into a handoff packet before the wedding week.

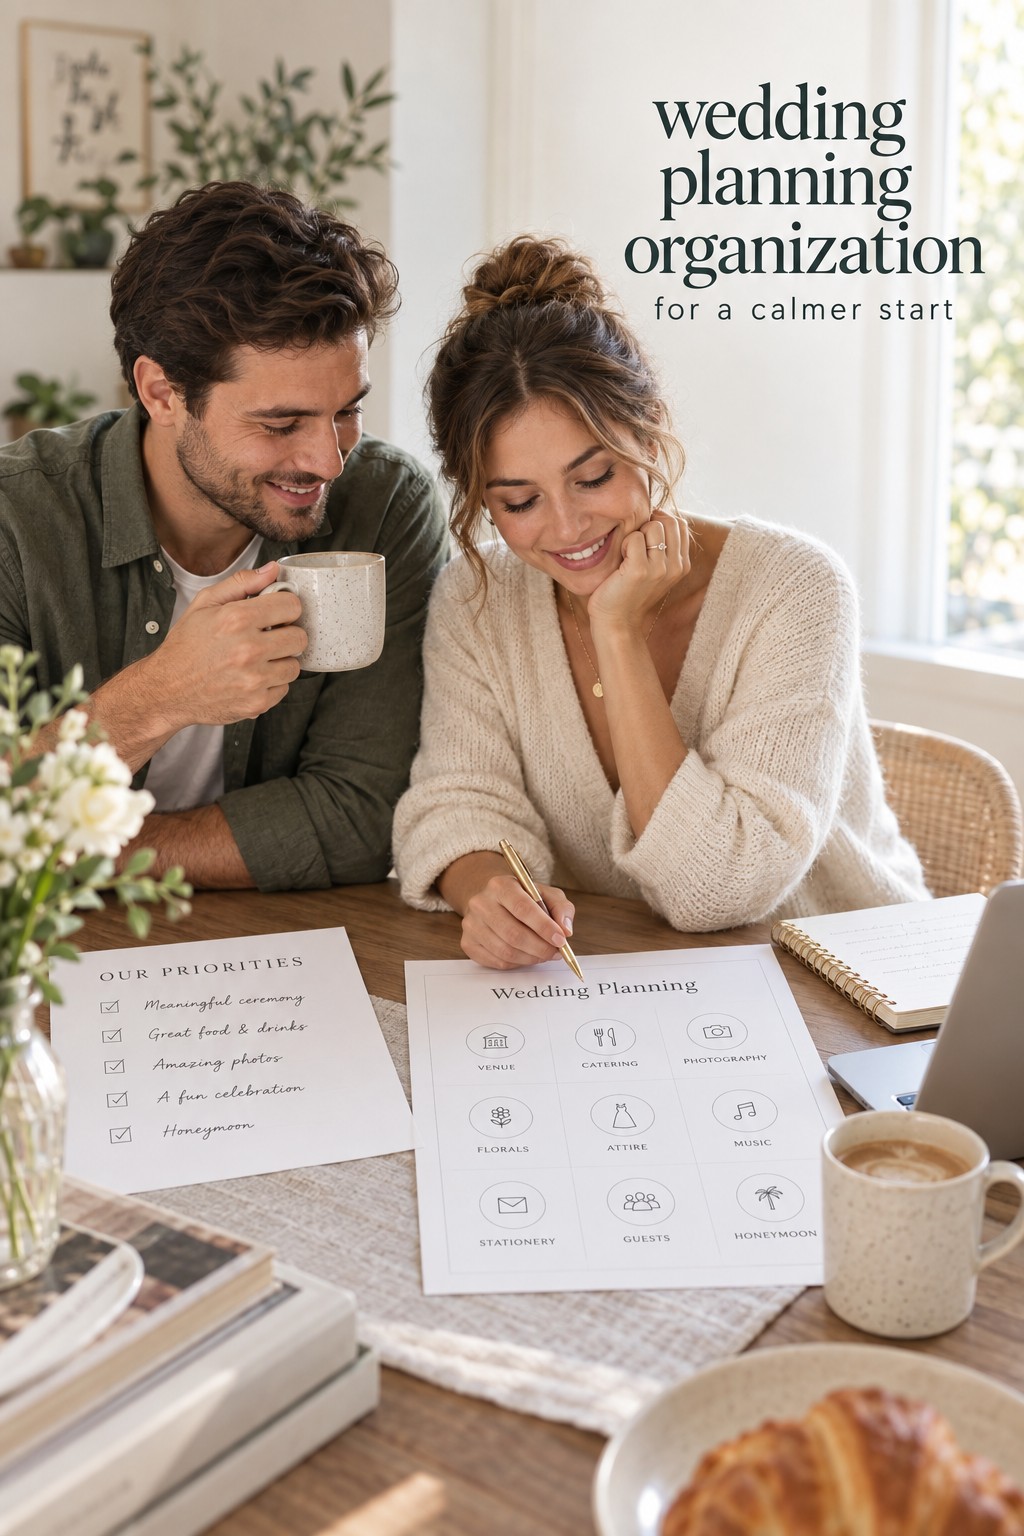
  • Wedding Planning Organization: Build a Calm System

    Wedding Planning Organization: Build a Calm System

    At first, wedding planning can feel wonderfully simple. You save a few ideas, compare two venues, text your sister about dates, and open a spreadsheet for the budget. Then the decisions multiply. A vendor sends a new proposal, a family member asks about the guest list, and someone needs to know whether the ceremony time is final. The problem is rarely a lack of effort. It is that the same fact begins living in too many places. Good wedding planning organization gives every important detail a clear home, a clear owner, and a clear next step.

    This guide is for couples who want planning to feel collaborative and visible without turning their engagement into a second full-time job. You do not need the most elaborate app or a binder with a tab for every possible scenario. You need a small system that answers five questions quickly: What have we decided? What is still open? What happens next? Who owns it? Where is the current information?

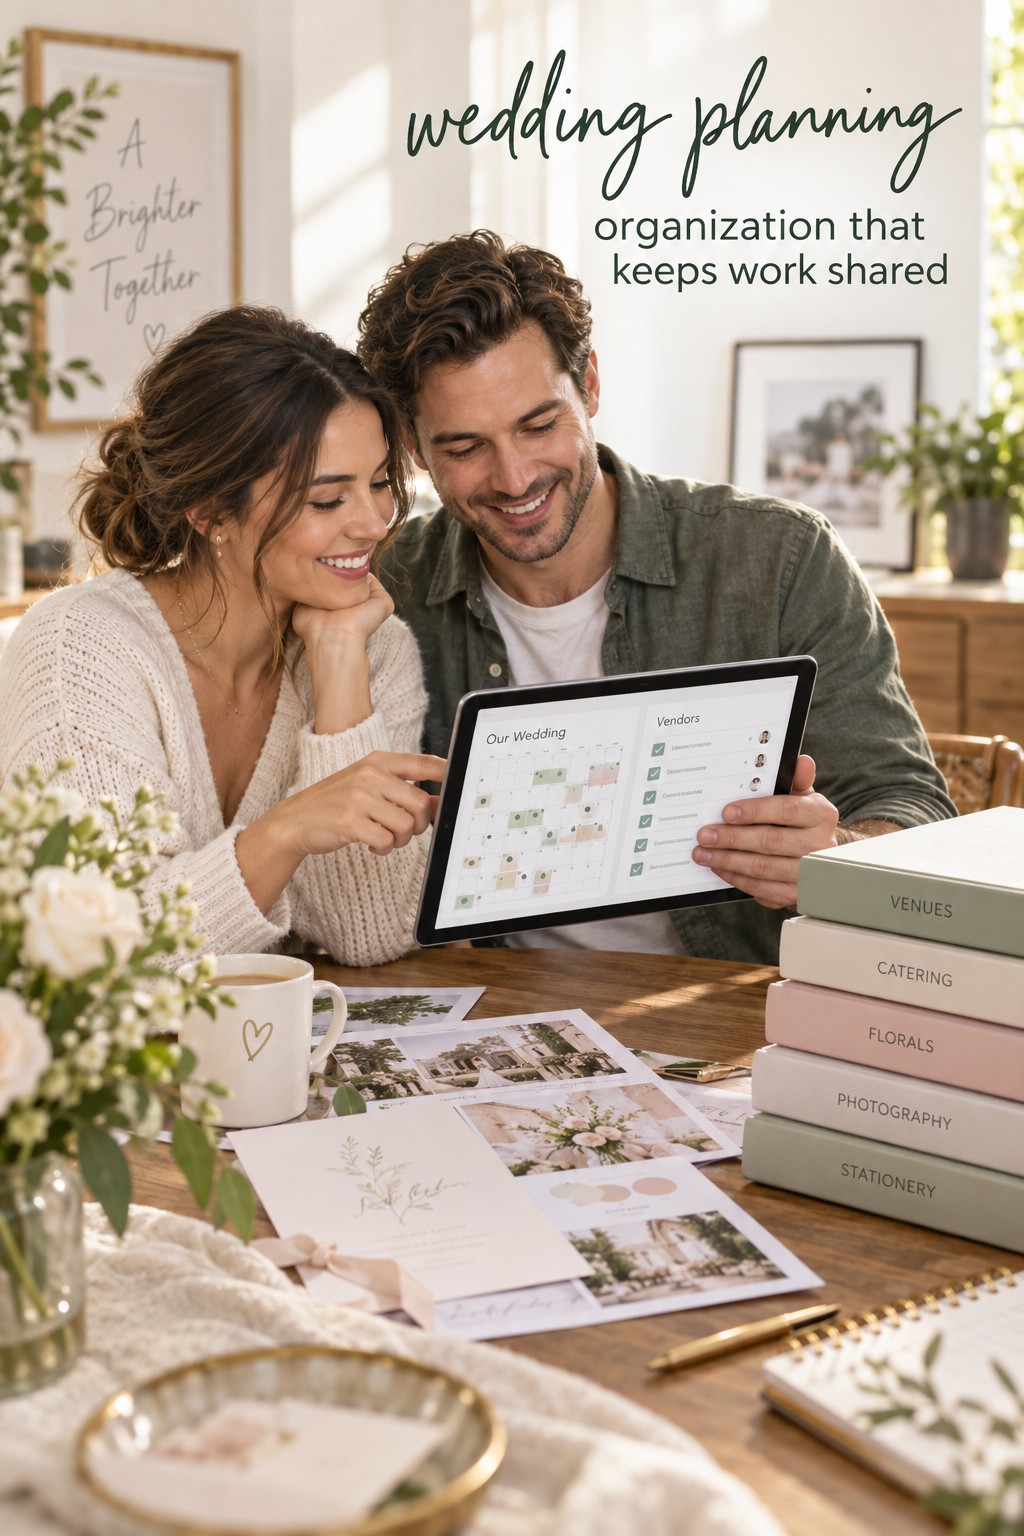
    wedding planning organization for a calmer start with a couple at a shared table
    wedding planning organization for a calmer start

    The most useful approach is to build one source of truth, then give each kind of information the right place inside it. A dashboard is not the same as a calendar. A contract folder is not the same as a task list. A decision log is not the same as a mood board. When those roles are clear, you can use paper, a spreadsheet, a shared drive, a planning platform, or a combination without losing track of the wedding itself.

    The moment wedding planning starts to feel scattered

    Most couples notice the organization problem in a small moment. One partner remembers that the photographer’s quote included an extra hour, while the other is looking at an older PDF. A parent has a different guest count from the current list. The venue coordinator asks for the final floor plan, but the latest version is attached to an email that neither partner can find. None of these problems is dramatic on its own. Together, they create hesitation, duplicate work, and avoidable tension.

    Start by treating scattered information as a design problem, not a character flaw. If a couple keeps asking the same question, the answer is probably difficult to locate. If a task changes hands repeatedly, its owner may not be visible. If a decision gets reopened, the reason for the original choice may never have been recorded. Wedding planning organization should reduce those frictions before the final months become crowded.

    Before choosing a tool, write down the constraints that shape your celebration. Include your date or date range, location, approximate guest range, overall budget boundary, ceremony and reception format, and any non-negotiables. The order matters because these constraints affect almost every later decision. A helpful checklist framework also treats a live task as more than a deadline: it should show the action, its dependency, its owner, and the next review point. This adaptable checklist approach is useful when your timeline does not match a standard twelve-month countdown.

    • A decision has one current record, not several competing copies.
    • Every active task has one person responsible for moving it forward.
    • Every deadline is connected to a real event, payment, delivery, or review.
    • Every important file can be found by both partners and the people who need it.
    • Every change leaves enough context for someone else to understand what happened.
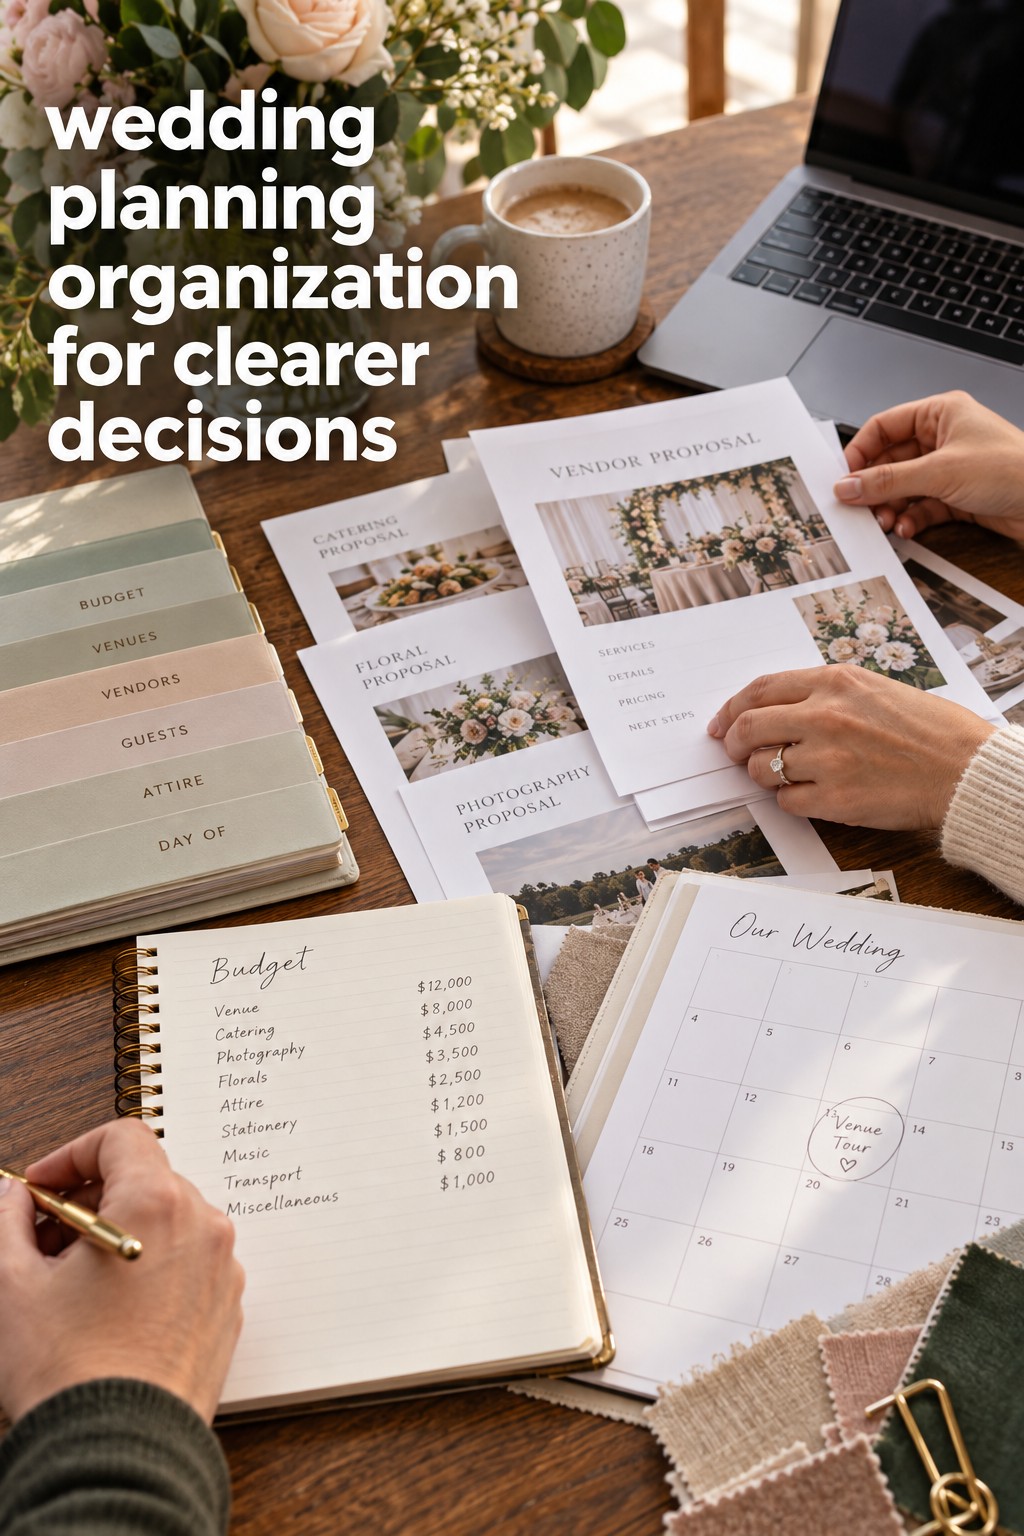
    wedding planning organization for clearer decisions with budget and vendor notes
    wedding planning organization for clearer decisions

    What a useful wedding planning organization system contains

    A calm system usually has five connected parts. You can keep them in one planning workspace with clearly labeled sections, or spread them across a few tools if each tool has a defined job. The goal is not to force every detail into one giant document. The goal is to make the relationship between details obvious. A task can point to a contract. A payment can point to a due date. A vendor record can point to the latest proposal. A decision can explain why a detail changed.

    First, create a dashboard for the present moment. This is the page you open during a weekly planning conversation. Keep it short. Include the next five to ten actions, upcoming appointments, decisions waiting for input, payments due soon, and anything that could block another task. Do not turn the dashboard into a complete archive. Its job is to show what deserves attention now.

    Second, keep a master task list for the full project. Useful columns include task, category, status, owner, due date, dependency, link to the related file, and next review date. Status should describe reality, not create a false sense of progress. Consider labels such as not started, researching, waiting for reply, ready to decide, booked, paid, and complete. A task is not complete merely because an email was sent if the contract still needs review.

    Third, use a calendar only for things that happen at a specific time. Put venue visits, tastings, appointments, payment due dates, guest RSVP deadlines, rehearsal events, and vendor meetings there. Keep flexible tasks on the master list. When every task becomes a calendar event, the calendar becomes noisy and you lose the ability to see what is truly time-sensitive.

    Fourth, create a records area for the information you will need to look up. This can include the budget, guest list, vendor tracker, contracts, payment schedule, ceremony details, reception details, attire notes, transportation, and accessibility or meal information. Use consistent names and dates for files. A folder called “final” is not enough. Use a name such as “2026-09-14-caterer-menu-approved” so the status is visible before you open anything.

    Fifth, keep a decision log. Record the decision, date, people involved, options considered, final choice, reason, and any tasks it creates. This is especially helpful for guest count, ceremony timing, rain plans, design direction, menu choices, and vendor substitutions. A decision log protects you from repeatedly reopening settled conversations while still leaving room to change course when new information genuinely changes the situation.

    A shared resource such as The Wedding Command Center can be useful when you want a planning reference that keeps the practical work visible alongside your personal priorities. Use it as a support for your chosen system, not as another place to duplicate every fact. The best resource is the one you and your partner will actually review and keep current.

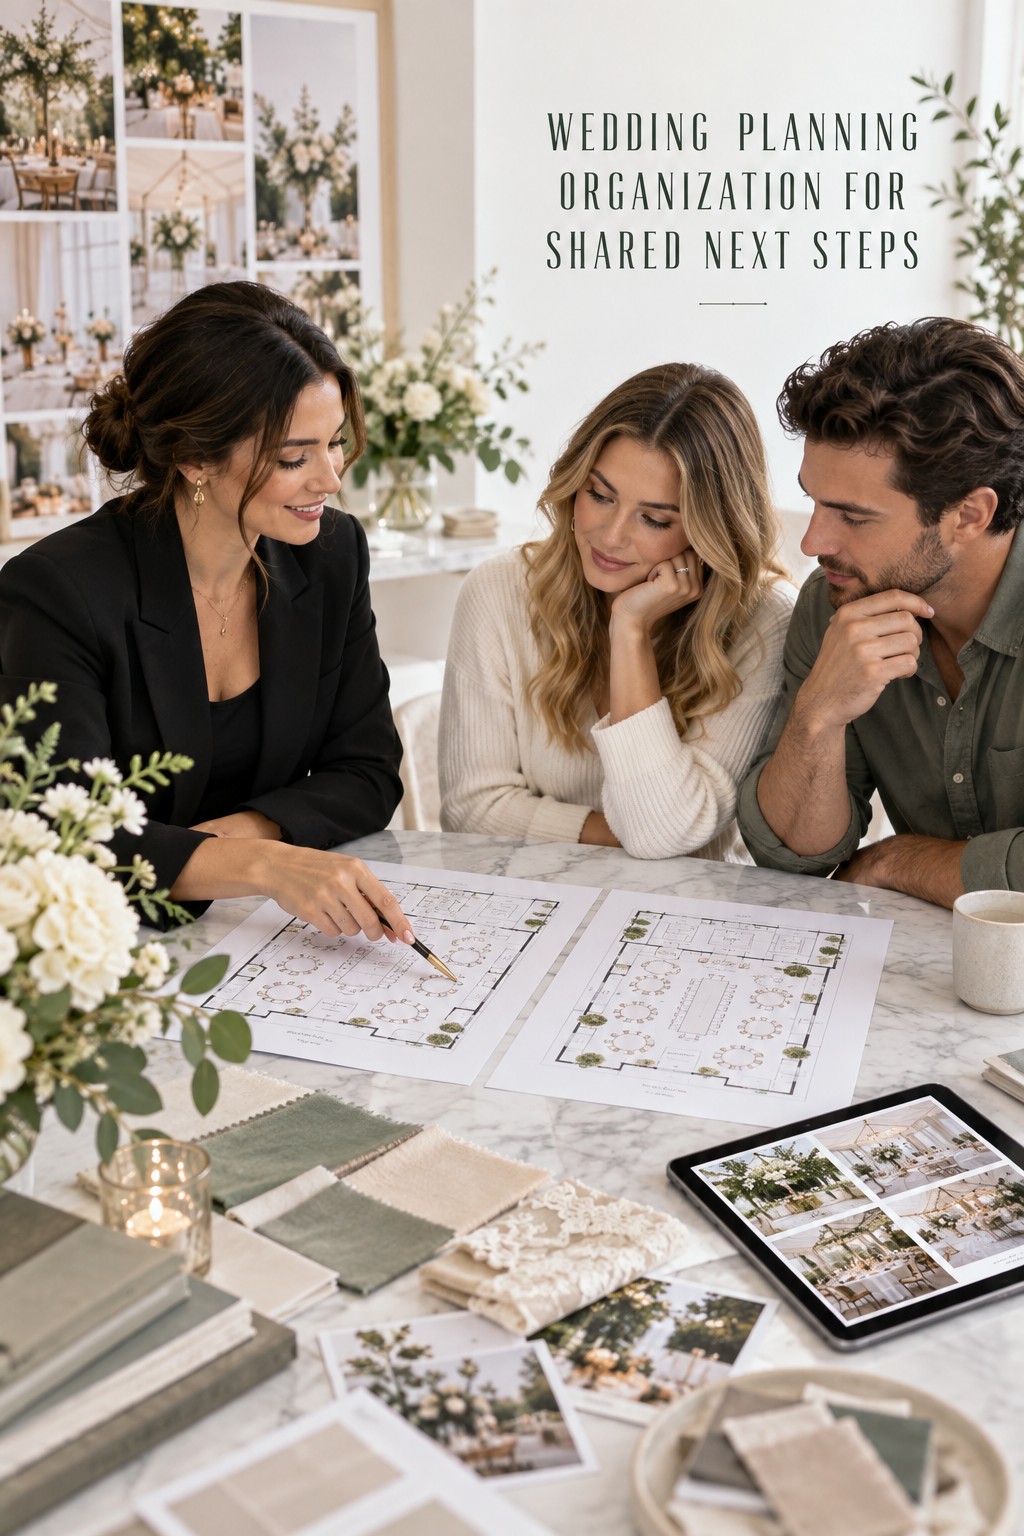
    wedding planning organization for shared next steps with venue plans and a planner
    wedding planning organization for shared next steps

    How to build the system in one focused afternoon

    Set aside two or three uninterrupted hours. Bring your current notes, saved emails, contracts, screenshots, calendar entries, and any spreadsheets you have already started. Do not try to perfect the system while you build it. Your first version only needs to make the present situation visible. You can improve labels and layouts after you understand where the information actually lives.

    Begin with an information sweep. Write down every open question, active task, important file, upcoming deadline, and decision you can remember. Add items from your inbox and messages. This is not the time to organize beautifully. It is a brain release. The list may feel long, but it gives you a complete starting point and shows which categories are creating the most friction.

    Next, sort the material into a small number of homes: dashboard, tasks, calendar, budget, guests, vendors, files, decisions, and wedding-week handoff. If an item does not fit, pause before creating a new category. It may belong inside an existing one. Too many categories create the same problem as too many apps: you spend energy deciding where to look instead of moving the plan forward.

    Now assign owners. An owner is not the person who does every step alone. It is the person who notices the next action, follows up, and reports the current status. You might assign one partner to vendor communication and the other to guest records, then share budget approval and design decisions. Family members and wedding party helpers can own specific tasks too, but make the handoff explicit. “Someone is checking transportation” is not an owner.

    After ownership, add dependencies. A dependency explains what must happen before another task can move. You may need a guest range before comparing venues, a venue layout before finalizing rentals, a menu decision before printing place cards, or a confirmed ceremony time before building the day-of schedule. Mark blocked items clearly. A blocked task is useful information because it tells you where a decision is needed.

    • Write the outcome you need, such as signed contract, confirmed count, approved design, or paid balance.
    • List the decision or action that unlocks that outcome.
    • Assign one owner and record the next review date.
    • Link the current file, quote, contract, or conversation.
    • Move the item to the dashboard only when it needs attention this week.

    Finally, establish a weekly review that takes about thirty minutes. Open the dashboard together. Close completed tasks, update changed dates, confirm the next few actions, and move new files into their official locations. Review the budget and payments, then scan the decision log for anything that affects another vendor. If the system takes longer to maintain than the planning itself, simplify it. Organization should make decisions easier, not become another project to manage.

    wedding planning organization that keeps work shared with a calendar and vendor tracker
    wedding planning organization that keeps work shared

    How to keep organization working through the final handoff

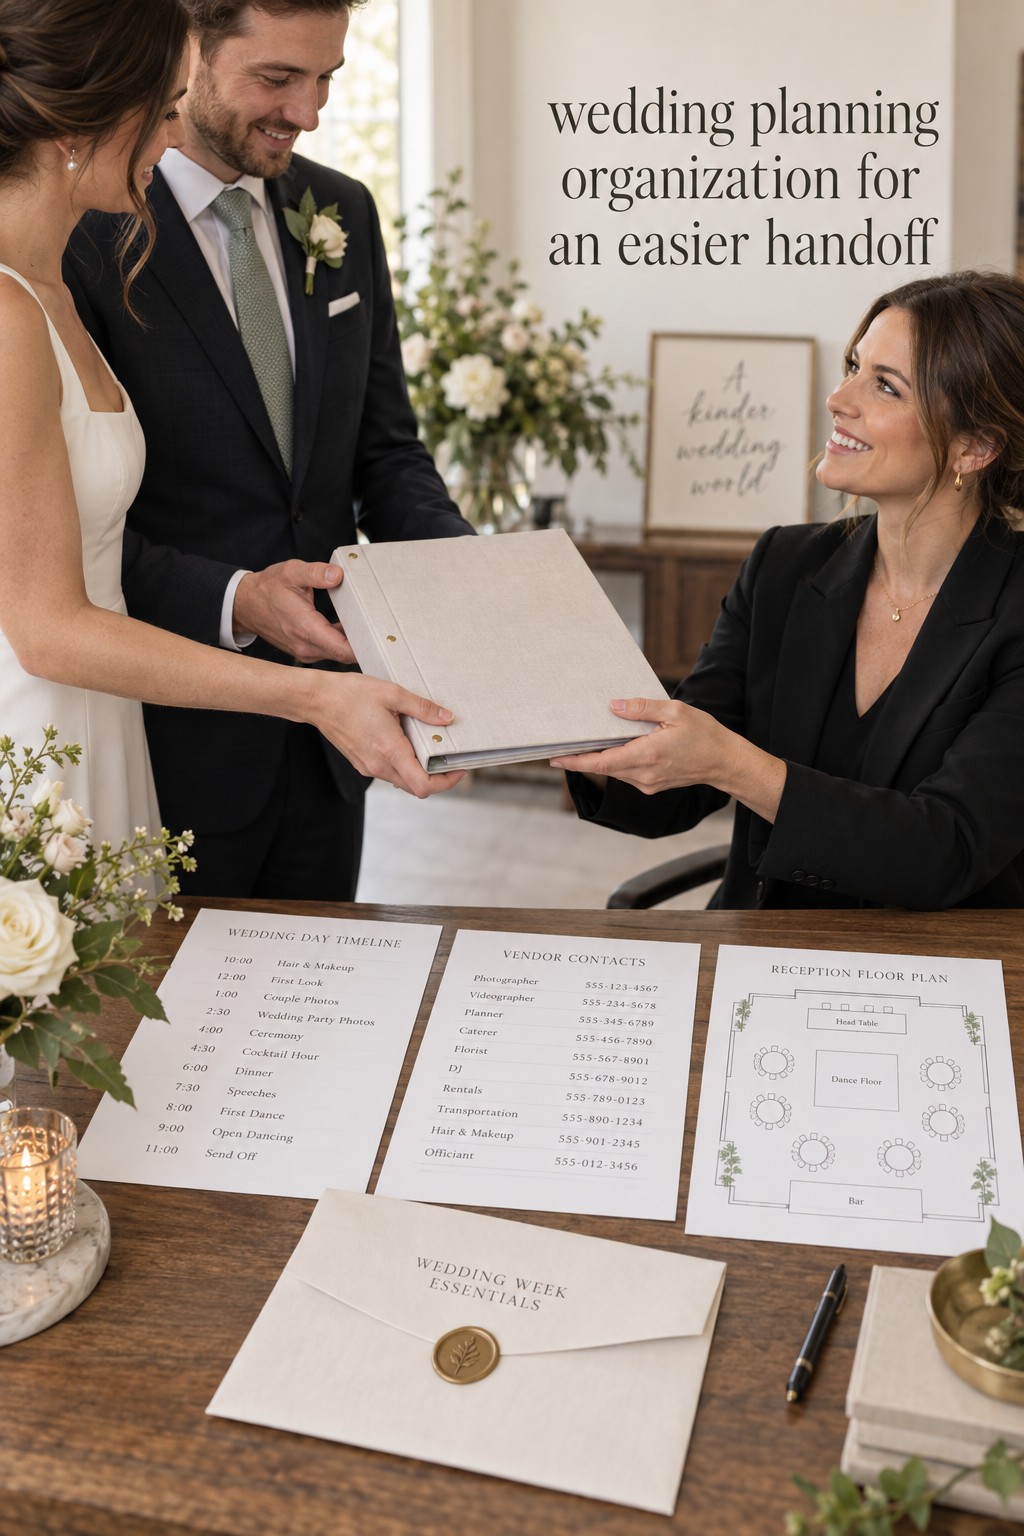
    Organization matters most when the number of people involved increases. In the final weeks, vendors, family members, the wedding party, and a coordinator may each need a different part of the plan. Prepare a short handoff packet rather than sending everyone your entire planning archive. Include the final timeline, vendor contacts, venue rules, floor plan, ceremony details, guest or meal notes that helpers truly need, transportation information, emergency contacts, and a list of decisions that should not be changed without approval.

    Use one final review to confirm the difference between “approved,” “sent,” and “received.” An email to a vendor is not proof that the vendor has the correct timeline. A paid invoice is not proof that the payment schedule is complete. A seating chart is not final until the people responsible for printing, setup, and meal service have the same version. Put a version date on anything that will be shared widely.

    Keep the couple’s personal priorities visible. A system can become technically tidy while losing the reason the wedding matters. Add a small “protect this” section to the dashboard with the guest experience, traditions, moments, or boundaries you want to preserve. When a new option arrives, compare it with those priorities instead of treating every idea as equally urgent. This turns organization into a decision filter, not just storage.

    Do not duplicate sensitive or changing information across multiple documents unless there is a clear reason. If the guest list is the official record, link to it rather than copying numbers into five files. If the budget is the source of truth, use a link in the dashboard. If a vendor contract changes, replace the current file deliberately and note the change in the decision log. A central system works because everyone knows which record wins when two versions disagree. A practical organization model also separates dated calendar events from flexible tasks and keeps ownership visible.

    In the last week, shift the dashboard from planning mode to handoff mode. The couple should be able to stop answering routine questions because the right helper has the right information. Give one person authority to coordinate vendor questions, one person the emergency contact list, and one person the physical items or envelopes that need to move. Then protect a small amount of time for the couple to be present. The purpose of wedding planning organization is not to control every minute. It is to create enough clarity that you can enjoy the day you planned.

    • Do not keep the latest timeline only in a private inbox.
    • Do not label a file “final” without a date or version.
    • Do not assign a group when one person needs to act.
    • Do not add a new tool when a clearer rule would solve the problem.
    • Do not continue a weekly review that has become too detailed to sustain.
    wedding planning organization for an easier handoff with a coordinator and final folder
    wedding planning organization for an easier handoff

    FAQ

    What is the best tool for wedding planning organization?

    The best tool is the one both partners can open, understand, and update consistently. A spreadsheet works well for structured records, a shared drive works well for files, and a calendar works well for fixed dates. A planning platform can bring several views together. Choose based on your habits, then define where each type of information belongs.

    How can couples divide wedding planning fairly?

    Divide ownership by category or outcome, not by asking one person to be the assistant for every task. One partner might own vendor follow-up while the other owns guest records, with shared approval for budget and major decisions. Review the workload weekly so invisible tasks, emotional labor, and family communication are included in the conversation.

    Should wedding planning tasks go on the calendar?

    Only tasks tied to a real date or time need to become calendar events. Put appointments, payment due dates, RSVP deadlines, tastings, and meetings on the calendar. Keep flexible research, comparison, and follow-up tasks on the master list so the calendar remains readable and useful.

    How do we stop having multiple versions of the same wedding file?

    Choose one official location for each record, give files consistent names, and link to the current version instead of downloading copies. When something changes, update the official file and record the change. A simple date or version label makes it easier for vendors and helpers to identify the document they should use.

    When should we prepare the wedding-week handoff?

    Start the handoff structure when you build the main planning system, then complete the working packet several weeks before the wedding. The final version should be checked after the last major vendor confirmations and shared with the people who will use it. Leave enough time for questions, corrections, and a short walkthrough.

    Can wedding planning organization still feel personal?

    Yes. Organization protects the parts of the celebration that matter to you. Keep your priorities, traditions, guest experience, and boundaries visible beside the practical tasks. When the system helps you decide what deserves time and money, it supports your story instead of flattening the wedding into a checklist.

  • Wedding Planning Excel Spreadsheet: Build a Better System

    Wedding Planning Excel Spreadsheet: Build a Better System

    A wedding planning Excel spreadsheet can become the calm center of your planning, but only if it answers real questions quickly. What has been promised? What has been paid? Which guests still need a response? Who owns the next task? What must be handed to the coordinator before the wedding week?

    The goal is not to build the biggest workbook. It is to build one that you and your partner can update without guessing where information belongs. This guide shows you how to set up a wedding planning Excel spreadsheet from a blank file, connect the most useful tabs, add simple formulas, and review the workbook each week.

    wedding planning excel spreadsheet start with clarity at a shared planning desk
    Start a wedding planning excel spreadsheet with clear priorities.

    You do not need advanced Excel skills. You need consistent names, a small number of dependable columns, and rules that make incomplete information visible. Start with the structure below, then add detail only when it helps you make a decision.

    Decide what your Excel workbook must answer

    Before opening Excel, write down the decisions your workbook needs to support. A spreadsheet becomes difficult when it stores everything but answers nothing. Your first version should help you see the planning picture at a glance and open the right detail when a decision needs more attention.

    • How much of the working budget is estimated, committed, paid, and still due?
    • Which guests are invited, which responses are missing, and which meal or dietary details need follow-up?
    • Which vendors have been researched, contacted, booked, or paid?
    • What tasks are due next, who owns them, and which tasks depend on another decision?
    • What information will a planner, coordinator, family member, or trusted helper need later?

    These questions point to five useful areas: setup, budget, guests, vendors, and timeline. You may later add seating, payments, ceremony details, or a wedding-day schedule. Do not create every possible tab on day one. Empty tabs create the feeling of progress without giving you a working system.

    Use one workbook as the planning source of truth. That does not mean every conversation must happen inside Excel. It means that when a price, deadline, guest status, or vendor decision becomes official, you record it in the workbook. If you also use The Wedding Command Center as a planning resource, keep the confirmed details aligned so your partner and vendors are not working from different versions.

    Finally, choose a naming convention before you enter data. Use the same vendor name everywhere, enter dates as real Excel dates rather than typed sentences, and decide whether amounts include tax, service charges, or tips. A small rule made early can prevent a large clean-up later.

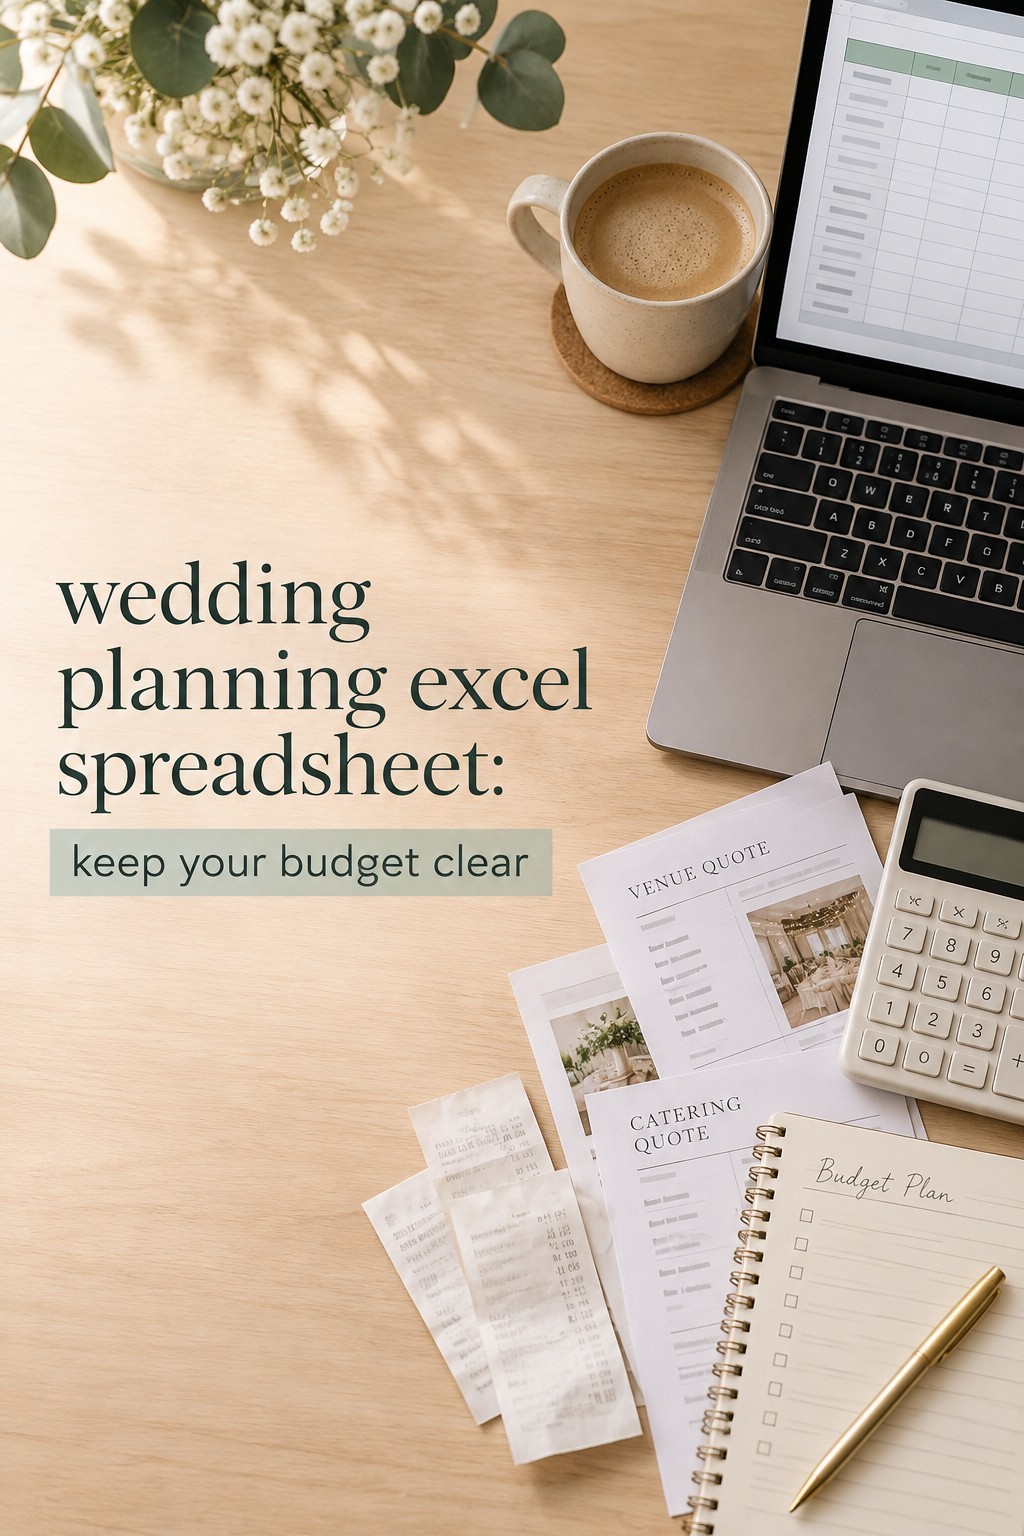
    wedding planning excel spreadsheet budget tracker with receipts and vendor costs
    Keep a wedding planning excel spreadsheet budget clear and reviewable.

    Build the five core tabs in the right order

    Create these tabs in order: Setup, Budget, Guests, Vendors, and Timeline. The order matters because the first tab establishes the values that other sheets will use. Keep the names short and stable so formulas remain easy to read.

    1. Setup: enter the values that should not be repeated

    Use the Setup tab for the wedding date, couple names, working currency, target guest count, starting budget, and the planning status values you want to use. You can also keep a short list of vendor categories and task owners here. This tab is not a dashboard. It is a controlled place for the values that other sheets may reference.

    • Wedding date
    • Working budget
    • Target guest count
    • Partner one, partner two, planner, and other task owners
    • Vendor categories such as venue, catering, photography, attire, flowers, music, stationery, and transportation
    • Status values such as Not started, In progress, Waiting, Booked, Paid, and Complete

    Give the key cells clear labels and use them consistently. If you are comfortable with named ranges, naming the wedding date and working budget can make formulas more readable. If not, keep the Setup tab visible and use direct cell references carefully.

    2. Budget: separate estimates, commitments, and payments

    The Budget tab should show what you expect to spend and what is actually happening. Use one row per cost item or vendor charge, not one row for an entire category. This makes it easier to compare a quote with the final contract and to see which charges are still missing.

    • Category
    • Vendor
    • Item or service
    • Estimated cost
    • Contracted cost
    • Deposit paid
    • Additional payments
    • Balance due
    • Due date
    • Status
    • Notes or contract link

    Use a consistent rule for taxes, service charges, gratuities, and rentals. For example, you might record the contracted cost as the full amount you expect to owe, then record each payment separately. If a quote is not final, mark the status as Estimate rather than treating the number as a promise.

    3. Guests: make every follow-up visible

    The Guests tab needs enough information to support invitations, RSVPs, meals, seating, and day-of communication. A practical starting row includes household or group name, guest name, email, phone, invitation status, RSVP, meal choice, dietary notes, plus-one status, children, table, and thank-you note status.

    Do not put several people into one cell if you will later need to count or filter them. Keep one guest per row when possible. If your invitations are managed by household, add a separate household or invitation group column. This lets you track the mailing without losing individual meal and seating details.

    4. Vendors: track decisions and obligations together

    The Vendors tab is more useful when it records the path from research to booking. Add category, vendor name, contact, website, quote date, quoted amount, contract status, deposit, final payment date, arrival or setup details, and notes. A simple status column can show whether a vendor is a lead, contacted, comparing, booked, or declined.

    Keep vendor comparison notes factual and short. Record what each proposal includes, what is excluded, and which question is still unanswered. A separate row for every vendor is easier to filter than a large comparison paragraph.

    5. Timeline: turn the plan into assigned next steps

    Use the Timeline tab for tasks rather than general reminders. Each row should have a task, area, owner, due date, dependency, status, and next note. Examples include request catering proposals, review venue contract, finalize invitation wording, confirm meal counts, and prepare the coordinator handoff.

    • Task
    • Area
    • Owner
    • Due date
    • Dependency
    • Status
    • Priority
    • Notes or link

    Sort the active view by due date, but keep the original task area available for filtering. Your timeline should make the next conversation obvious. If a task has no owner, it is not yet a complete task. If it has no due date, it is a possibility rather than a deadline.

    wedding planning excel spreadsheet comparing wedding vendors and proposals
    Compare wedding vendors clearly in a wedding planning excel spreadsheet.

    Add formulas and controls that keep the file trustworthy

    A few dependable formulas can do more for a wedding planning Excel spreadsheet than a complicated dashboard. Add formulas only after the columns are stable, and test them with a small sample before filling them down.

    Calculate the budget without hiding the assumptions

    If contracted cost is in column E, deposit paid in column F, and additional payments in column G, a balance formula might be =MAX(0,E2-F2-G2). The MAX function prevents a negative balance when a payment is entered twice, but it does not fix the underlying error. Add an alert column that flags payments greater than the contracted cost so an accidental duplicate is still visible.

    At the top or bottom of the Budget tab, use =SUM(E:E) for committed costs, =SUM(F:F)+SUM(G:G) for payments, and =SUM(H:H) for the remaining balance. If your sheet includes headings or notes inside the same columns, use a bounded range such as =SUM(E2:E200) instead. Bounded ranges are easier to audit.

    Count guests and surface missing responses

    On the Guests tab, use =COUNTIF(F:F,"Yes") to count confirmed guests if RSVP is in column F. Use =COUNTIF(F:F,"Pending") to count follow-ups. For a more useful summary, count confirmed adults and children separately if those are important for catering or venue capacity.

    Add a simple follow-up flag such as =IF(AND(E2="Sent",F2="Pending"),"Follow up"," "). The exact columns can differ, but the principle is the same: make the spreadsheet tell you where attention is needed rather than relying on memory.

    Use real dates for deadlines and countdowns

    Enter the wedding date and task deadlines as Excel dates. A typed note such as “six months before” cannot be sorted or compared reliably. If the wedding date is in Setup!B2, a days-until formula can use =Setup!$B$2-TODAY(). A task warning can use =IF(AND(D2<TODAY(),F2<>"Complete"),"Overdue"," "), assuming the due date is in D and status is in F.

    Be careful with formulas that use TODAY. The result changes each time the workbook recalculates, which is useful for current planning but not ideal for a historical record. Before the wedding week, export or save a final reference copy if you need a fixed snapshot.

    Use dropdowns and conditional formatting for consistency

    Use Excel data validation to create dropdowns for status, owner, category, RSVP, and priority. Dropdowns reduce variations such as “Booked”, “booked”, and “Confirmed booking”, which would otherwise split your filters and counts.

    • Highlight overdue incomplete tasks in a soft red.
    • Highlight payment dates within the next 30 days in a soft yellow.
    • Highlight missing RSVP, meal, or dietary data when an invitation is marked sent.
    • Highlight budget rows where contracted cost is blank but status is booked.
    • Use a calm green only for complete or confirmed information.

    Do not use color as the only signal. Keep the status text visible so the workbook remains understandable when printed, exported, or viewed by someone who cannot distinguish your chosen colors.

    wedding planning excel spreadsheet shared tasks and timeline for engaged couple
    Share the next steps in a wedding planning excel spreadsheet.

    Use the workbook as a weekly planning system

    A wedding planning Excel spreadsheet only stays useful when it has a maintenance rhythm. Choose one weekly review time and make the review short enough that you will repeat it. The point is not to stare at every cell. The point is to close loops and agree on the next actions.

    Start with the dashboard questions

    • What changed since the last review?
    • Which payments are due before the next review?
    • Which guest responses or vendor answers are waiting?
    • Which task is blocked by a decision?
    • What information should be shared with a planner, coordinator, or family helper?

    Keep a small “This week” view on the Timeline tab with filters for active tasks and near-term deadlines. You can also add a Notes or Decisions tab if your team needs a short record of why a choice was made. Keep decisions brief: date, decision, people involved, and the next action.

    Protect the workbook from accidental confusion

    • Keep a dated backup before major edits.
    • Use a clear file name such as Wedding Planning Workbook and add the latest review date only to backup copies.
    • Freeze the header row and turn each data range into an Excel table when appropriate.
    • Protect formula cells if several people will edit the file.
    • Leave a short Read Me note explaining the status values and payment convention.
    • Do not duplicate a vendor row just because a new quote arrived. Update the quote field or create a clearly labeled proposal record.

    If more than one person edits the workbook, agree on who owns each kind of update. One person may update guest responses, another may update vendor contracts, and both partners may review budget changes. Shared access is helpful only when the workbook still has one clear source of truth.

    Prepare the final handoff before the last week

    Near the end of planning, create a handoff view or export a clean copy that includes the final guest count, vendor contacts, payment status, arrival windows, important restrictions, ceremony and reception timing, and the person responsible for each open question. Remove private notes that a vendor does not need.

    The handoff should be readable without explaining the whole workbook. Use plain labels, consistent times, and a short list of unresolved items. If your coordinator uses a different document, treat the Excel handoff as the source for confirmed facts and check that both versions agree before sharing.

    Common mistakes that make an Excel wedding planner harder to use

    • Building too many tabs first. Start with the five core areas and add a tab only when it answers a recurring planning question.
    • Mixing estimates and confirmed costs. Use separate columns and a visible status so a rough quote is not mistaken for a contract total.
    • Typing dates as prose. Use real Excel dates and keep explanations in a notes column.
    • Using inconsistent status words. Add dropdowns and keep the list short.
    • Hiding important information in comments. Put the value that drives a decision in a visible column, then use comments or links for supporting detail.
    • Making one person the only editor. Share ownership, but agree on update rules before several people begin changing the file.
    • Adding formulas without testing edge cases. Test a blank row, a paid-in-full row, a missing date, a duplicate payment, and a canceled vendor.
    • Confusing a pretty dashboard with a working system. A simple filtered table that is current is more useful than a polished summary built on incomplete data.

    The best wedding planning Excel spreadsheet is not the one with the most automation. It is the one that makes the next decision clear, keeps confirmed details together, and remains understandable when planning becomes busy.

    Sources and methodology

    This guide was informed by current wedding spreadsheet structures and Excel-specific checklist guidance, including the tab and formula patterns described by Pix Wedding and the Excel control examples from FormulaSmith. The recommendations here are editorial guidance for organizing a workbook, not a claim that one template fits every wedding.

    wedding planning excel spreadsheet final handoff folder for wedding coordinator
    Make the final wedding planning excel spreadsheet handoff easy.

    FAQ

    What should a wedding planning Excel spreadsheet include?

    Start with Setup, Budget, Guests, Vendors, and Timeline. Add payments, seating, ceremony details, or a wedding-day schedule only when those areas need their own rows, filters, and review routine.

    How many tabs should a wedding planning Excel spreadsheet have?

    There is no universal number. Five core tabs are enough to build a useful first version. The right number is the smallest set that keeps related information together without forcing different decisions into one crowded table.

    What formulas are most useful for wedding planning in Excel?

    SUM is useful for cost and payment totals. COUNTIF counts RSVP or status values. IF and AND create follow-up alerts. MAX can prevent a negative balance display. Date subtraction and TODAY help surface upcoming or overdue tasks.

    How do I track wedding vendor payments in Excel?

    Keep the contracted cost, deposit paid, additional payments, balance due, and final payment date in visible columns. Use one row per vendor charge when a vendor has multiple installments, or use a separate payment log that links back to the vendor name.

    How can I share an Excel wedding planning spreadsheet with my partner?

    Use a shared storage location that both of you can access, agree on who updates each area, and keep a short Read Me note in the workbook. Review changes together weekly so the file supports decisions rather than becoming an invisible task list.

    Should I use Excel or Google Sheets for wedding planning?

    Choose the tool your planning group will reliably open and update. Excel is a strong choice if you prefer its formulas, tables, or offline workflow. A cloud-based sheet may be easier when several people need to edit at the same time. The structure and maintenance habit matter more than the brand of spreadsheet.

    When should I stop adding features to my wedding planning spreadsheet?

    Stop when a new feature adds more maintenance than clarity. If a dashboard does not change a decision, or a new tab duplicates information already stored elsewhere, leave it out. A smaller current workbook is safer than a large workbook no one trusts.

  • Wedding Planning Calendar: Choose the Right Format

    Wedding Planning Calendar: Choose the Right Format

    A wedding planning calendar should do more than fill every square with tasks. It should tell you what matters next, which decisions depend on one another, and who needs to act before a deadline becomes urgent. The best system is the one you and your partner will actually open, update, and understand on a busy Tuesday.

    That is why choosing a wedding planning calendar is not simply a question of downloading the longest checklist. A paper planner can make the whole process feel tangible. A spreadsheet can make costs, contacts, and deadlines visible in one place. An app can send reminders and adjust dates. A hybrid system can give you the strengths of each without forcing every planning detail into one format.

    wedding planning calendar formats with paper planner, spreadsheet, and phone
    Compare paper, spreadsheet, and app formats before choosing your wedding planning calendar.

    This guide compares those options and shows how to build a calendar around your actual engagement length, decision style, wedding size, and vendor commitments. You will also find a simple way to compress the plan if you have six or three months, plus a set of questions to help you choose before the planning workload gets noisy.

    What a wedding planning calendar should do

    Start by defining the job. A calendar is not a storage unit for every idea you have seen online. It is a decision and timing system. Every entry should help you answer one of four questions: what needs to be decided, what needs to be booked, what needs to be communicated, or what needs to be checked before the wedding day.

    The first useful feature is a clear next action. “Think about flowers” is too vague to place on a calendar. “Choose three floral directions and request two proposals” gives you something you can finish. The second is an owner. A shared task can still belong primarily to one person, a partner, a family member, or a planner. Naming that person reduces the quiet assumption that someone else will handle it.

    The third feature is a real deadline. Some tasks have fixed dates, such as an invitation mailing window or a venue final headcount. Others have preferred windows, such as attire shopping or menu decisions. Marking the difference helps you spend energy where timing has consequences instead of treating every task as equally urgent.

    The fourth feature is a dependency. A venue choice may affect the date, guest capacity, catering rules, rental needs, and transportation. A guest-count decision affects the budget and the size of the venue. When a calendar shows those links, it becomes easier to understand why one decision needs attention before another.

    Finally, leave room for unknowns. Vendor availability, family conversations, travel plans, and personal energy can change. A calendar with no breathing space is not efficient; it is fragile. Use weekly focus areas and a short buffer rather than filling every day with a promise you may not be able to keep.

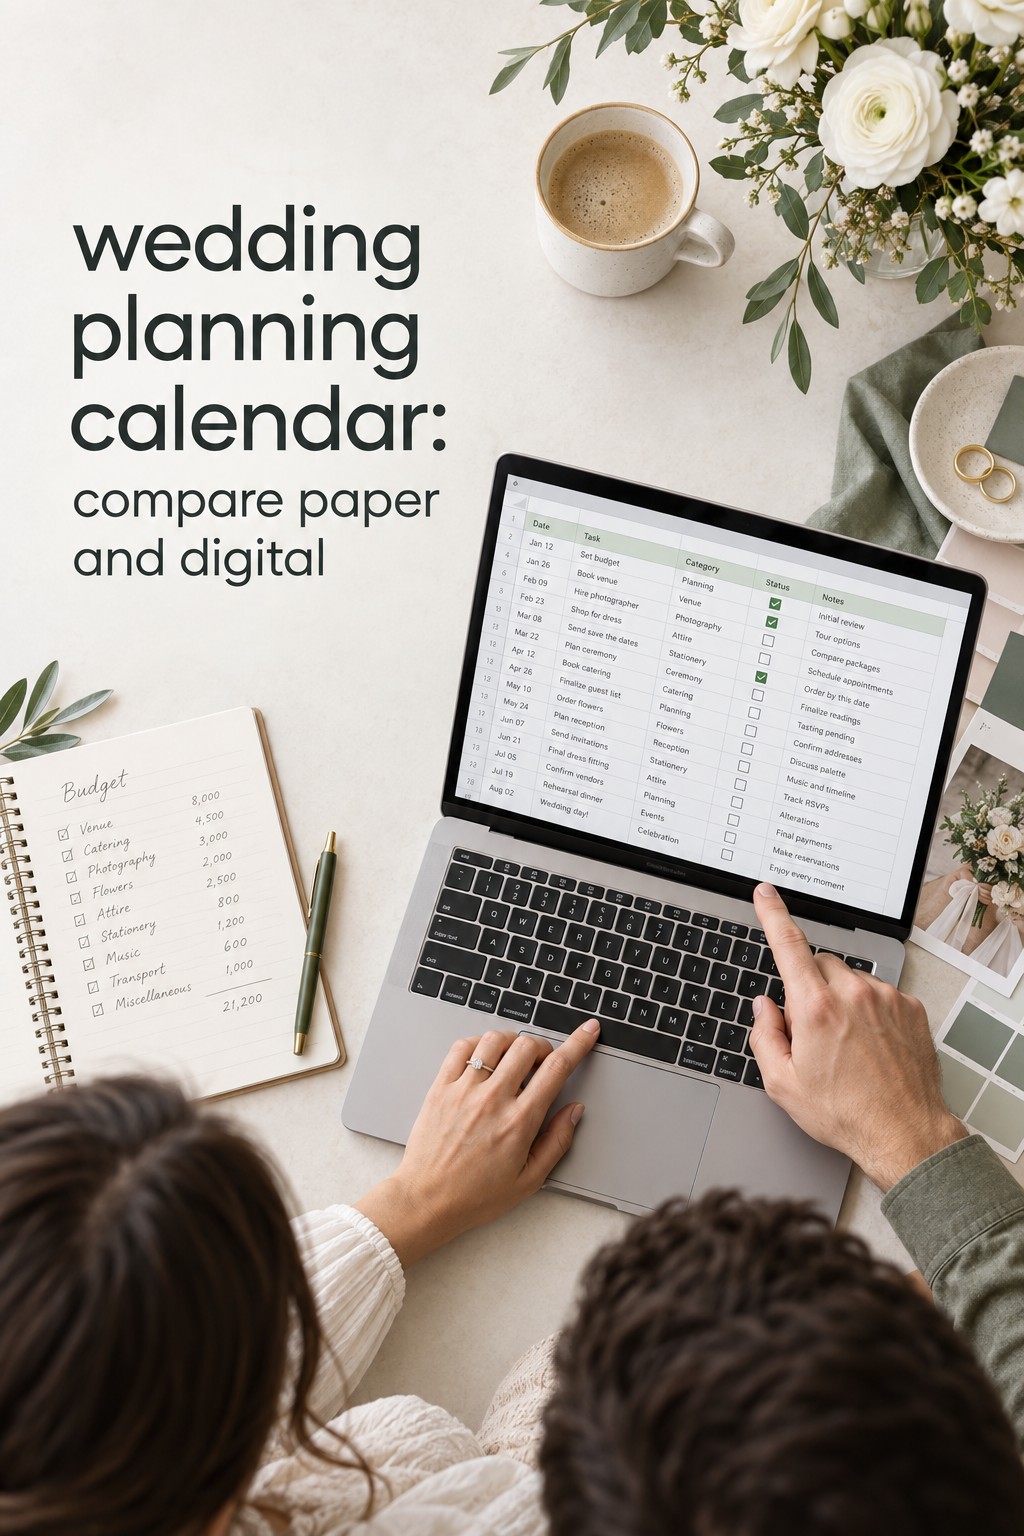
    wedding planning calendar comparison with spreadsheet and paper notes
    See how paper and digital planning tools can work together.

    Choose the right calendar format

    A paper calendar works well when you think spatially and enjoy seeing progress away from a screen. It can be a wall calendar, a bound planner, or a binder with monthly pages. Paper makes broad timing easy to see and can become a calm planning ritual. Its limits are collaboration, search, version control, and reminders. If several people need access, define one person as the keeper of the current version.

    A spreadsheet is a strong choice when your planning involves many vendors, changing numbers, or detailed comparisons. You can create separate tabs for the calendar, budget, guest list, vendor contacts, payments, and questions. A spreadsheet also makes it simple to filter tasks by month, owner, status, or category. Its main risk is overbuilding. If the file requires a tutorial before either partner can use it, simplify the structure.

    An app is useful when reminders and mobile access matter more than a complete custom database. Digital checklists can work well for couples who plan between commutes, work breaks, and venue visits. Some tools personalize dates around your wedding date, which saves setup time. Before committing, check whether both partners can edit, whether tasks can be removed, and whether the system supports notes that explain why a deadline matters.

    A hybrid calendar is often the most practical answer. Keep the master deadlines and owner assignments in a shared digital calendar or spreadsheet. Use a paper page for the month’s priorities and meeting notes. Store contracts and detailed vendor information separately, then link to them from the master system. This keeps the calendar readable while preserving the evidence you need when a decision is revisited.

    Choose based on behavior, not aspiration. If you love beautiful stationery but rarely update it, paper alone may not be enough. If you build elaborate spreadsheets and stop opening them, the design is working against you. If your partner prefers quick phone tasks and you prefer a weekly overview, a hybrid setup can respect both styles without creating two competing plans.

    The Wedding Command Center can also be useful as a planning resource when you want a central place to keep the moving parts visible. Treat it as a support for your chosen system, not as a reason to add more tracking than your wedding actually requires. The goal is fewer forgotten handoffs and clearer decisions.

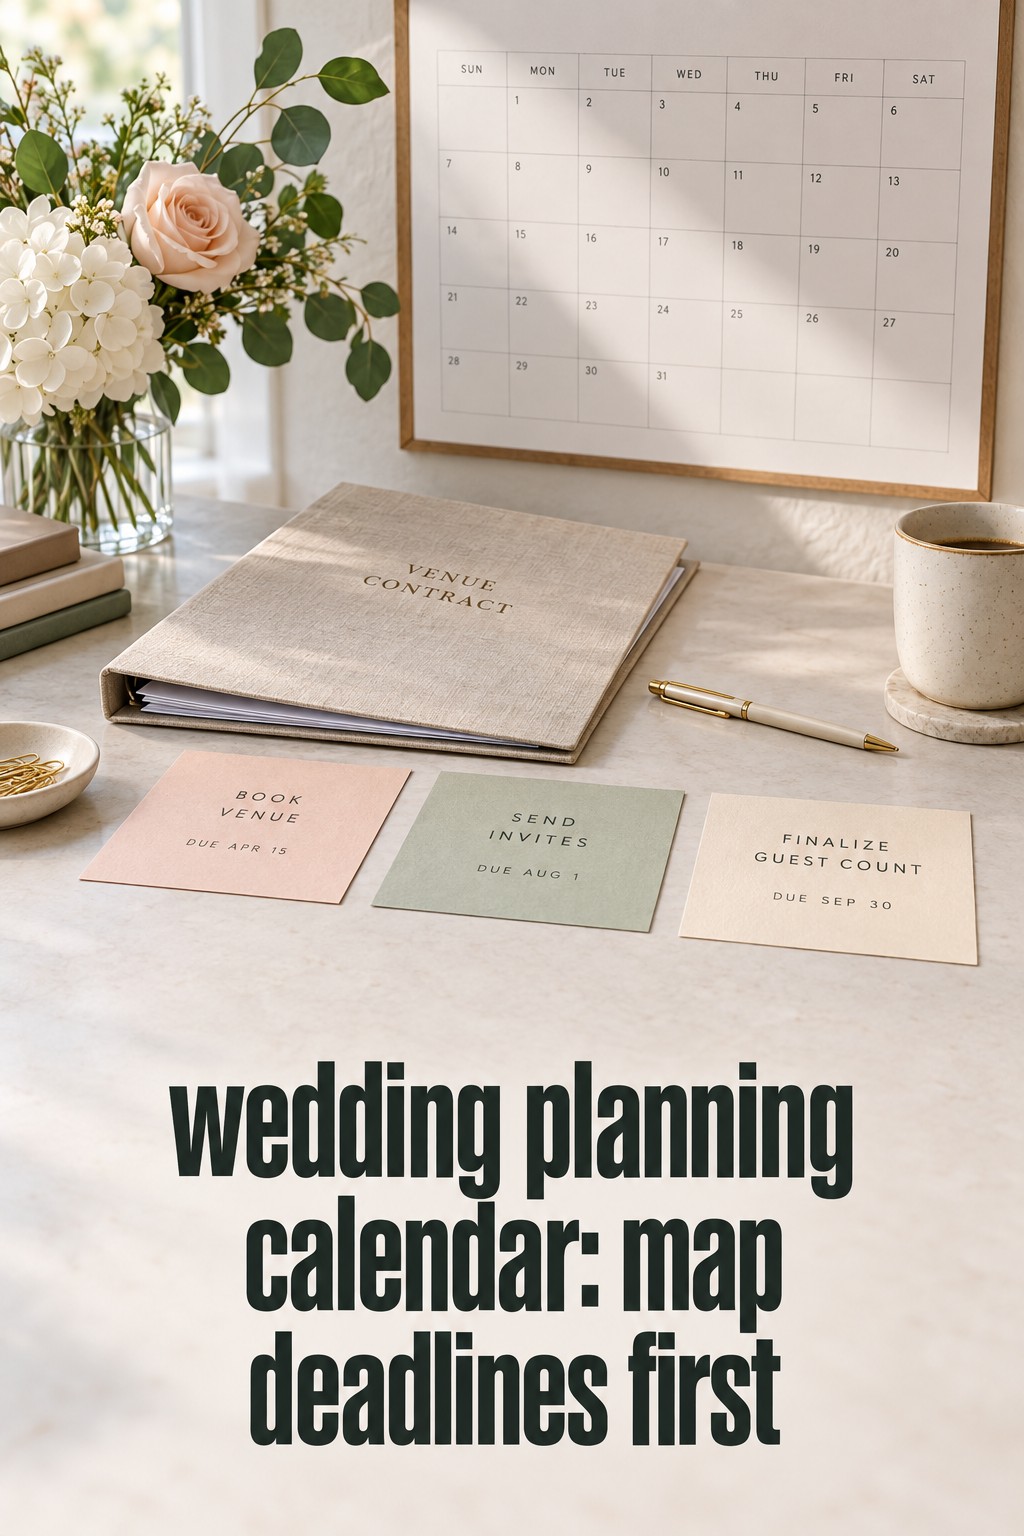
    wedding planning calendar with venue contract and deadline cards
    Map dependencies and deadlines before the planning list grows.

    Build the calendar around deadlines and dependencies

    Begin with the wedding date, ceremony location, reception location, and engagement length. If the date is not set, create a planning window instead of pretending that every month is fixed. Add the commitments that are difficult to move first: venue availability, vendor booking windows, invitation production, attire alterations, guest travel, and any legal or religious requirements that apply to your ceremony.

    Next, create four layers. The first layer is decisions, such as guest-count range, ceremony style, budget priorities, and the kind of experience you want guests to have. The second is bookings, such as venue, photographer, caterer, entertainment, rentals, beauty services, and transportation. The third is communications, including save-the-dates, invitations, RSVP follow-up, family updates, and vendor questionnaires. The fourth is execution, including fittings, final counts, seating, packing, payments, and handoffs.

    Within each month, give the calendar one headline. For example, an early month might be “make the big decisions,” a middle month might be “secure the guest experience,” and a final month might be “confirm and hand off.” This makes the system easier to scan than a long list of unrelated tasks. It also helps you tell the difference between work that moves the plan forward and work that merely creates more options.

    Use a simple entry format: task, owner, target date, dependency, and definition of done. Add a link or note only when it helps someone complete the task. For instance, “compare venues” should include the guest range, date options, budget ceiling, and questions to ask. “Book venue” should include the signed agreement, payment schedule, and next deadline. The more concrete the completion note, the less likely a task will remain half-finished.

    Review the calendar once a week for about twenty minutes. Move completed items out of the active view, choose the next three meaningful actions, and check whether any decision is blocking other work. Do not use the review to redesign the entire system. A calendar earns its place by making the next week clearer, not by becoming another project.

    Add a short “waiting on” list. It might include a family answer, a venue contract, a vendor proposal, or a guest address. This prevents pending work from being mixed with tasks you can complete today. Set a follow-up date for each item. If a response is still missing then, decide whether to send a reminder, choose another option, or ask for help.

    Keep a separate idea bank for details that are not ready to decide. Pinterest inspiration, favor ideas, ceremony readings, and color references can be valuable without belonging on the active calendar. When ideas and deadlines share the same view, inspiration can crowd out the decisions that protect your date, budget, and guest experience.

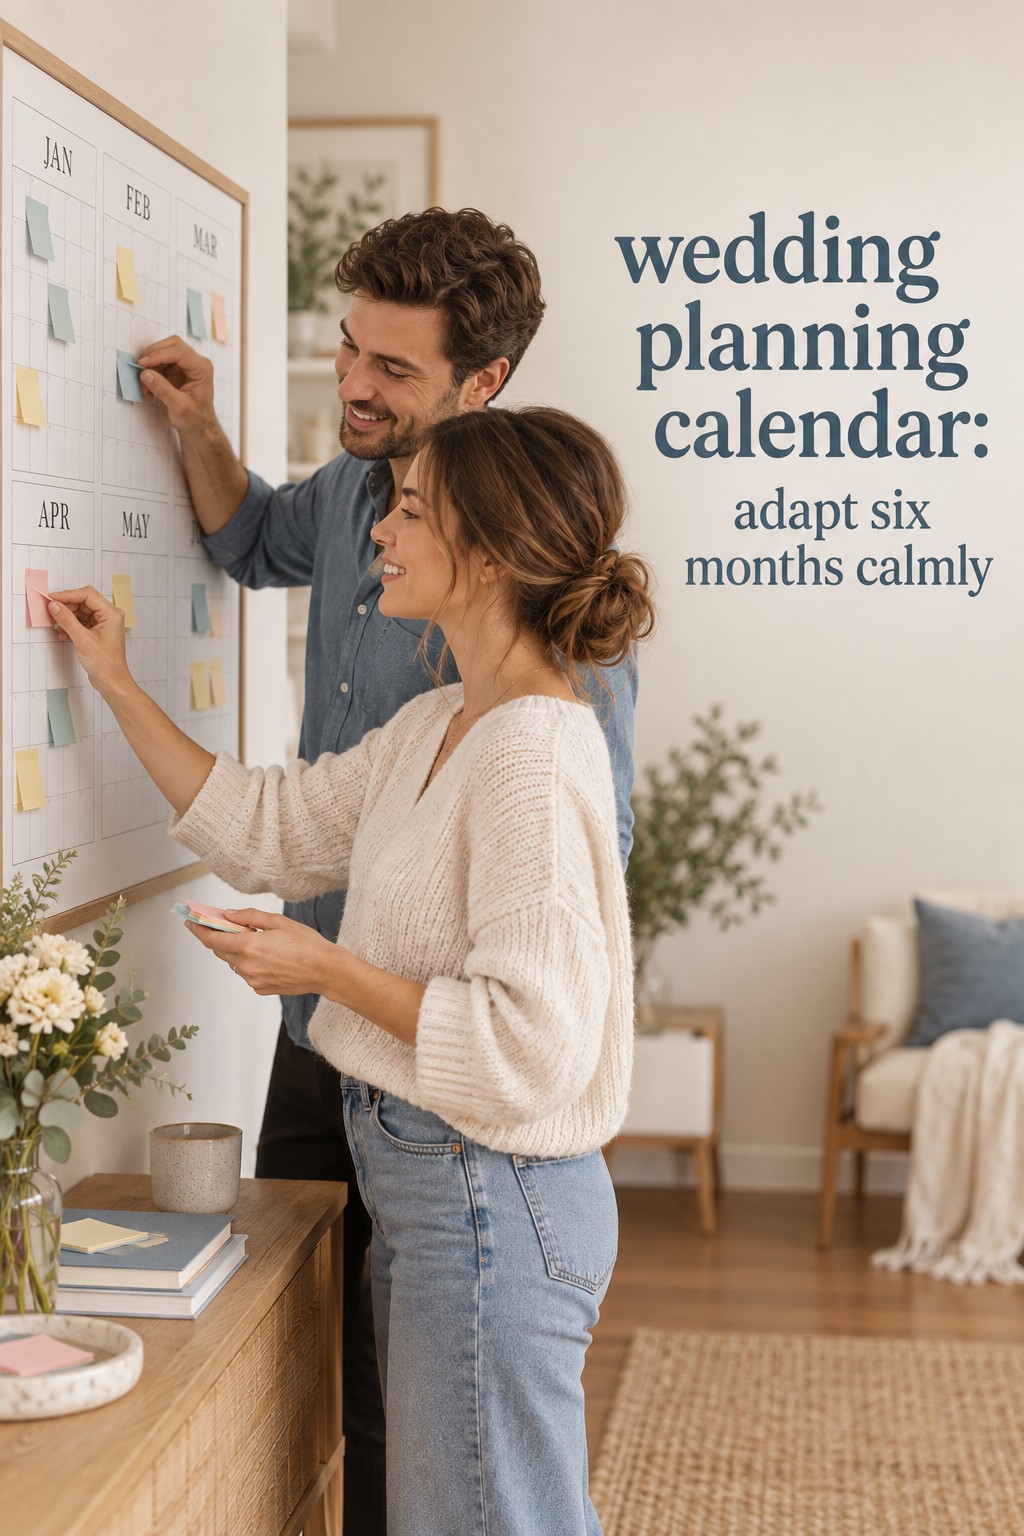
    wedding planning calendar for six months with sticky notes
    Adapt the calendar calmly when your engagement is shorter.

    Adapt it for 12, 6, or 3 months

    A 12-month calendar gives you room to sequence decisions. Use the first phase to establish the budget, guest range, priorities, and date or venue. The next phase secures the vendors and attire with the longest lead times. The middle phase turns the vision into guest communications, ceremony details, menu choices, rentals, and travel information. The final phase is for confirmations, final counts, packing, payments, and handoffs rather than major experiments.

    For a 6-month engagement, do not simply squeeze twelve monthly columns into half the space. Remove low-consequence decisions, group related appointments, and start with the commitments that can limit every other choice. Venue, budget, guest count, and priority vendors belong at the front. You may need to choose a ready-made design direction, reduce custom details, or delegate administrative work so the calendar remains realistic.

    For a 3-month engagement, build a minimum viable wedding plan. Decide the venue, ceremony format, guest range, budget guardrails, and priority vendors immediately. Ask each vendor for the fastest realistic path and write their deadlines into the calendar. Combine tasks that depend on the same appointment, use existing or simplified stationery, and appoint someone to manage questions and day-of logistics. Short planning does not require panic, but it does require fewer open loops.

    Long engagements need a different kind of protection. Instead of filling every month with tasks, set a small number of milestones and a quarterly review. Confirm that the budget still reflects your priorities, that the guest range is still credible, and that booked vendors have the information they need. A long timeline can create decision fatigue when couples keep reopening choices that were already good enough.

    Destination weddings, large guest lists, and weddings with multiple events need extra calendar layers. Add travel communication, room blocks, welcome events, rehearsal activities, and local delivery deadlines. Keep one master date for the wedding weekend, then create a second event-day timeline later. The planning calendar gets you to the weekend; the event-day timeline tells people where to be once the weekend begins.

    Whatever the planning length, protect the decisions that affect other people. Guests need enough notice to travel. Attendants need enough time for attire and fittings. Vendors need accurate information before they can create a schedule. Your calendar should prioritize these handoffs ahead of decorative details that can be changed without disrupting the rest of the plan.

    Common mistakes to avoid

    The first mistake is treating a sample timeline as a contract. Online calendars are useful starting points, but they cannot know your date, venue rules, vendor availability, travel distance, family structure, or energy level. Use them to see the shape of the work, then adjust the sequence around your actual commitments.

    The second is confusing a deadline with a suggestion. Ask why each date exists. A vendor may need information by a certain date to order materials. A venue may need the final guest count to prepare staffing. An invitation may need to be mailed early because guests are traveling. When you understand the reason, you can make a sensible adjustment instead of either ignoring the date or treating it as immovable.

    The third is putting every task on the calendar without assigning responsibility. Shared ownership sounds fair but often means no one feels accountable. Give each item one primary owner, then list collaborators in the notes. This is especially important for guest addresses, payment tracking, family communication, and vendor follow-up.

    The fourth is keeping completed and active work in the same crowded view. Archive finished tasks or filter them out. Keep a short record of important decisions, but do not force the active calendar to carry your entire planning history. A clean view reduces the feeling that you are behind when you are actually making progress.

    The last mistake is using the calendar to avoid a conversation. If the budget, guest list, division of work, or family expectations are unclear, adding more tasks will not solve the problem. Put the conversation itself on the calendar, decide what you need to learn, and record the agreed outcome. A good wedding planning calendar makes decisions visible; it cannot make them for you.

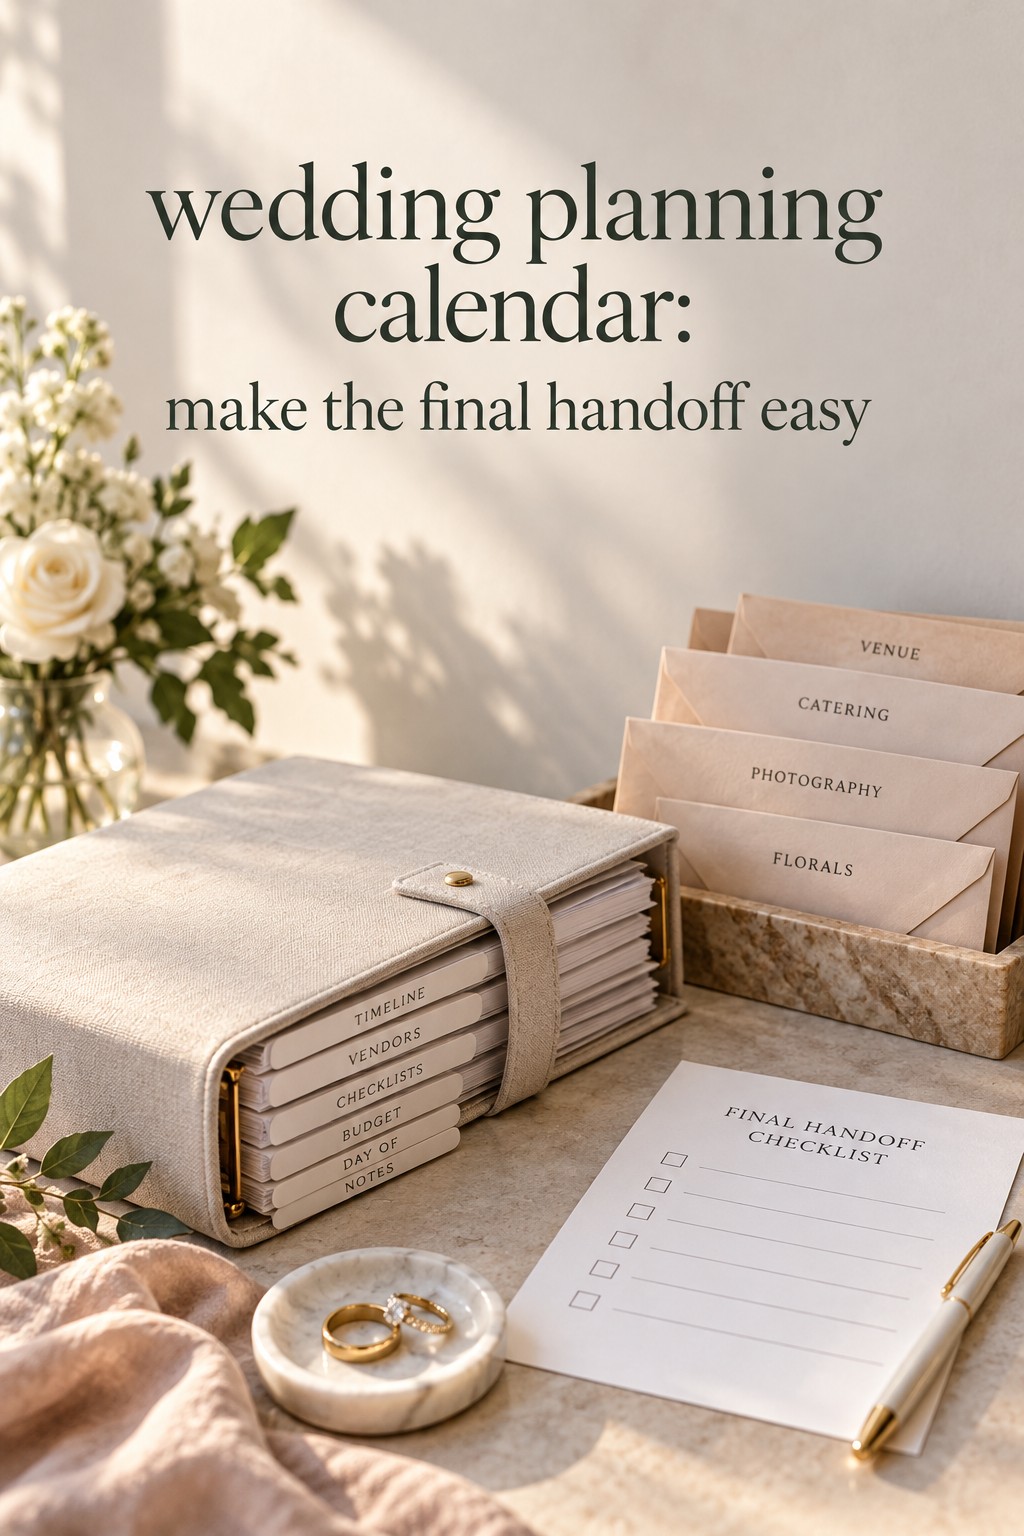
    wedding planning calendar final handoff with vendor envelopes and binder
    Make the final planning handoff clear with one organized review.

    FAQ

    What is the best wedding planning calendar format?

    The best format is the one you will update consistently. A spreadsheet is often the most flexible for shared planning, while an app is helpful for reminders and mobile access. A paper or hybrid system can be better if you need a visible monthly overview. Choose one master source of truth so deadlines do not split across competing versions.

    How far in advance should a wedding planning calendar start?

    Start as soon as you have a planning window, even if the wedding date is not final. Use broad time ranges until the date and venue are confirmed. Once those are set, replace the ranges with real deadlines and work backward from vendor, invitation, attire, travel, and final-count requirements.

    Can I use a wedding planning calendar for a six-month engagement?

    Yes. Build it around the decisions and bookings that constrain the rest of the plan, then remove low-priority tasks and combine related appointments. A six-month calendar should not attempt to preserve every optional detail from a 12-month checklist. Protect guest communication, vendor lead times, attire, legal requirements, and the final handoff.

    What should every calendar entry include?

    Include the task, primary owner, target date, dependency, and definition of done. Add the contact, file link, budget note, or follow-up date when it helps someone act. Avoid vague entries such as “work on invitations.” Use a finishable action such as “approve wording and send the final proof to the stationer.”

    How do I keep my wedding planning calendar from becoming overwhelming?

    Keep one active view, choose three meaningful actions each week, and store ideas separately from deadlines. Review the calendar at the same time each week, archive completed work, and maintain a waiting-on list for external responses. If the system still feels heavy, remove detail before adding another tool.

    Should my wedding planning calendar include the wedding day timeline?

    Include a milestone for creating and approving the wedding day timeline, but keep the detailed event-day schedule in its own document. The planning calendar covers months of decisions and handoffs. The day-of timeline covers exact times, locations, vendor arrivals, transitions, and who is responsible during the celebration.

  • Wedding Planning Budget: A Practical Setup

    Wedding Planning Budget: A Practical Setup

    A wedding planning budget is most useful when it helps you make the next responsible decision. It is not a test of how little you can spend, and it is not a promise that every national average will match your town. A good budget tells you what you can comfortably commit, which parts of the celebration matter most, what each quote really includes, and when money will leave your account. This guide gives you a practical setup for turning one total ceiling into a working plan that both partners can understand and review.

    Start before venue tours, dress appointments, or a long list of inspiration purchases. The earlier you define the number, the easier it becomes to compare choices without falling in love with an option that was never financially workable. You will still make adjustments as you learn more. The goal is not perfect forecasting. The goal is a clear first version, a visible record of assumptions, and a habit of checking the plan before new commitments become difficult to change.

    wedding planning budget: start with a clear total
    Start wedding planning budget work with a clear total and shared plan.

    Set the ceiling before you divide the categories

    Your first number should be a responsible spending ceiling, not a hopeful guess and not the price of the most beautiful wedding you have seen online. Add the savings you are willing to use, the amount you can contribute from future income, and confirmed family support that has a clear amount and timing. Keep possible gifts separate until they are genuinely confirmed. If someone offers help only if the guest list, venue, or date meets a condition, record that condition beside the contribution rather than treating it as unrestricted cash.

    Next, decide what the ceiling includes. Some couples include rings, attire, beauty appointments, rehearsal events, lodging, transportation, and the honeymoon. Others track those expenses separately. Either approach can work, but an invisible boundary creates false confidence. Write a short scope note at the top of the budget: included costs, excluded costs, contributors, and the date when the plan will be reviewed. This note prevents a low wedding total from quietly becoming a much larger household expense.

    Protect a contingency reserve before assigning every dollar. Five to ten percent is a practical starting range for many plans, but outdoor events, complex venues, multiple celebrations, long engagements, or uncertain guest counts may justify more. The reserve is not a permission slip for upgrades. It covers ordinary uncertainty such as a higher final headcount, delivery charges, alterations, additional rentals, overtime, weather equipment, vendor meals, postage, taxes, or service charges that were not visible in an early conversation.

    Make a second calculation based on time. Divide the amount still needed by the number of months before the wedding, then compare that monthly contribution with your existing obligations and other goals. If the result would force you to use credit, skip essential savings, or create regular household stress, change the plan now. A shorter guest list, a different date, a simpler format, or a longer timeline can be a responsible design choice. The budget should protect your marriage, not compete with it.

    It also helps to agree on a maximum that neither partner can approve alone. The maximum is different from the target. Your target is the amount you expect to spend. Your maximum is the line that requires a new conversation before any commitment crosses it. Put both numbers in the shared planning file. When a vendor proposal arrives, you can ask whether it fits the target, uses the reserve, or challenges the maximum instead of arguing from surprise.

    Before moving on, write three priorities and three flexible areas. A priority might be a generous meal, a relaxed guest experience, a meaningful ceremony, or complete photography coverage. A flexible area might be the exact flower recipe, the amount of printed stationery, or the shape of the tables. This simple exercise gives every later decision a test. You are not trying to make every category equally important. You are deciding where the money should do the most work.

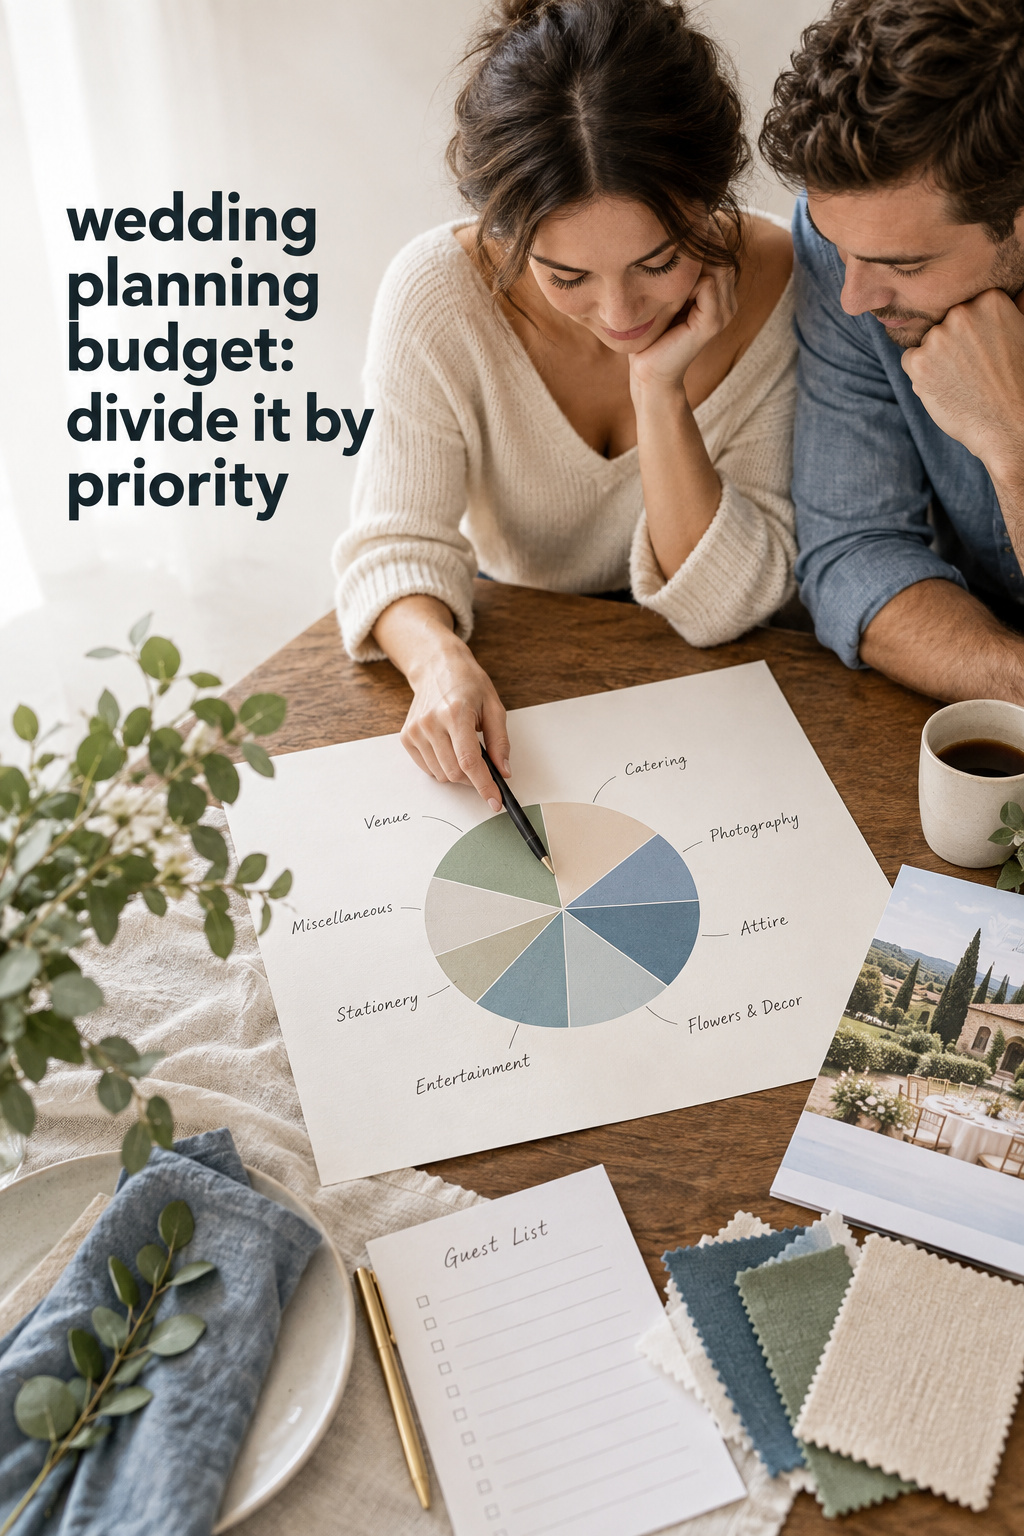
    wedding planning budget: divide it by priority
    Divide your wedding planning budget by priority before comparing vendor options.

    Build a budget that matches the wedding you are actually planning

    Percentage charts can be helpful as a first map, but they are not rules. A venue with catering included will distribute money differently from a blank-canvas venue. A courthouse ceremony followed by dinner will not use the same categories as a full reception. A destination weekend may shift money into lodging and transportation. Start with the format you are actually considering, then make categories that describe the services you will need rather than copying a template that assumes a different celebration.

    A useful starting framework is to reserve the largest share for venue, food, drinks, and rentals, then create lines for photography and video, flowers and decor, music, attire and beauty, stationery, transportation, ceremony costs, rings, lodging, planner or coordination, favors, and contingency. The exact percentages should remain adjustable. If photography is one of your priorities, give it room before signing the venue. If dinner is the main experience, let decor flex before cutting food quality or guest comfort.

    Guest count is one of the strongest budget levers because it can affect several categories at once. More guests may require a larger room, more meals, additional drinks, more tables and chairs, extra staffing, a larger cake, more invitations, more transportation, and more hotel support. Build at least two scenarios, such as an intimate list and a fuller list. Ask vendors for complete estimates at both counts. The difference is more useful than a general warning that weddings cost more as they grow.

    Use the per-guest number as a diagnostic, not as a verdict. Divide the working total by the number of invited guests to see whether your format feels plausible for your market and priorities. A low number may indicate that the list is too large for the experience you want, that a major category is missing, or that you need a different venue model. A high number does not automatically mean waste. It may reflect a small celebration with more attention per guest.

    Create a category table with at least four money columns: target, current estimate, contracted amount, and final actual. Add amount paid, balance remaining, due date, and notes. The target shows your intention. The estimate shows what research suggests. The contracted amount shows what you have accepted. The actual amount will be completed later. Keeping these values separate lets you see whether a change came from a bad initial assumption, a scope upgrade, a market quote, or a simple headcount change.

    For every category, decide what is protected and what can flex. In catering, the protected item might be a comfortable meal and reliable dietary options, while the flexible item is the number of passed appetizers. In photography, the protected item might be coverage of the ceremony and family, while the flexible item is an album purchased later. In flowers, the protected item might be a ceremony focal point, while the flexible item is the number of individual centerpieces. This is how a budget becomes a set of choices rather than a list of disappointments.

    Keep a separate line for items that are easy to forget. Include marriage license fees, permits, insurance, postage, alterations, trials, vendor meals, tips, delivery, setup, cleanup, cake cutting, rental damage deposits, late-night transportation, welcome events, and weather plans when they apply. You do not need to know every amount immediately. A visible unknown is safer than a missing category because it tells you to ask a question before the contract is signed.

    The Wedding Command Center can be a useful planning resource when you need a shared place to keep decisions, deadlines, and wedding details visible to both partners. Use any planning system that makes ownership and next steps clear. The important budget feature is not a particular tool. It is one source of truth where you can see the current total, the next payments, open questions, and the decisions that could change more than one category.

    wedding planning budget: compare the full quote
    Compare the full quote before signing a wedding vendor contract.

    Turn vendor quotes into a payment-ready plan

    A quote is not always a final cost. Ask each vendor to explain what the number includes and what is billed separately. Depending on the service, the final amount may change because of taxes, service charges, gratuity, delivery, setup, cleanup, overtime, rentals, travel, staffing, or guest-count minimums. Put the answer in writing beside the quote. When two proposals look different, compare their scope line by line before deciding which one is cheaper.

    Normalize quotes into the same structure. For each vendor, record the base service, included hours, included people or guests, equipment, travel, tax assumptions, service charges, gratuity guidance, deposit, payment schedule, cancellation terms, and balance due. If the vendor says something is included, identify where it appears in the proposal or contract. A friendly verbal assurance can be helpful, but it should not carry the same weight as a written term you can review later.

    Then build a payment calendar. Sort deposits and balances by due date, not by vendor category. A plan can be under its total ceiling and still create a cash-flow problem if three large balances arrive in the same month. Add the expected payment amount, the account or person responsible, and the date when funds must be available. Review the next four payments during a short weekly money meeting. This gives you time to adjust before a deadline becomes a crisis.

    Use a simple status system: researching, quote received, decision needed, contracted, deposit paid, balance due, and complete. Add one owner to each open item. A couple does not need a complicated project-management system to stay organized. They need a clear answer to three questions: what is the current number, what happens next, and who is responsible for moving it forward? Record a decision after a conversation so you do not have to reconstruct the same answer from messages later.

    Be careful with package comparisons. A low venue price may exclude chairs, linens, staffing, food service, bar labor, cleanup, or a required caterer. A low photography package may cover fewer hours or exclude a second photographer, engagement session, editing style, travel, or an album. A lower dress price may not include alterations, cleaning, or accessories. Compare the complete version you would actually use, not the smallest advertised version.

    DIY can fit a wedding planning budget, but calculate the whole project. Include supplies, tools, storage, transportation, failed attempts, setup, cleanup, and the time that you or your family will spend. DIY is often strongest when the project is small, uses an existing skill, can be finished early, and does not create a wedding-day job. If it must be completed the night before or managed during the reception, the apparent saving may be buying stress rather than reducing cost.

    If a quote is higher than the target, do not immediately cut random lines. First ask what changed. Is the guest count higher? Did the scope expand? Was a fee missing from the original estimate? Is the vendor essential to a priority? Then choose a specific response: reduce the scope, change the date, compare another vendor, use the reserve, move money from a flexible category, or revise the total after a deliberate conversation. A named trade-off is calmer than a series of small emergency cuts.

    Before you sign, read the cancellation and change terms. Note the deposit, refund rules, rescheduling conditions, overtime rate, guest-count deadline, final-payment date, weather responsibilities, and what happens if the vendor cannot perform. These details belong in the budget file because they describe financial risk as well as service. You do not need to predict every problem. You do need to know which decisions would create a new cost if the plan changes.

    wedding planning budget: track deposits and due dates
    Track wedding planning budget deposits and due dates in one clear calendar.

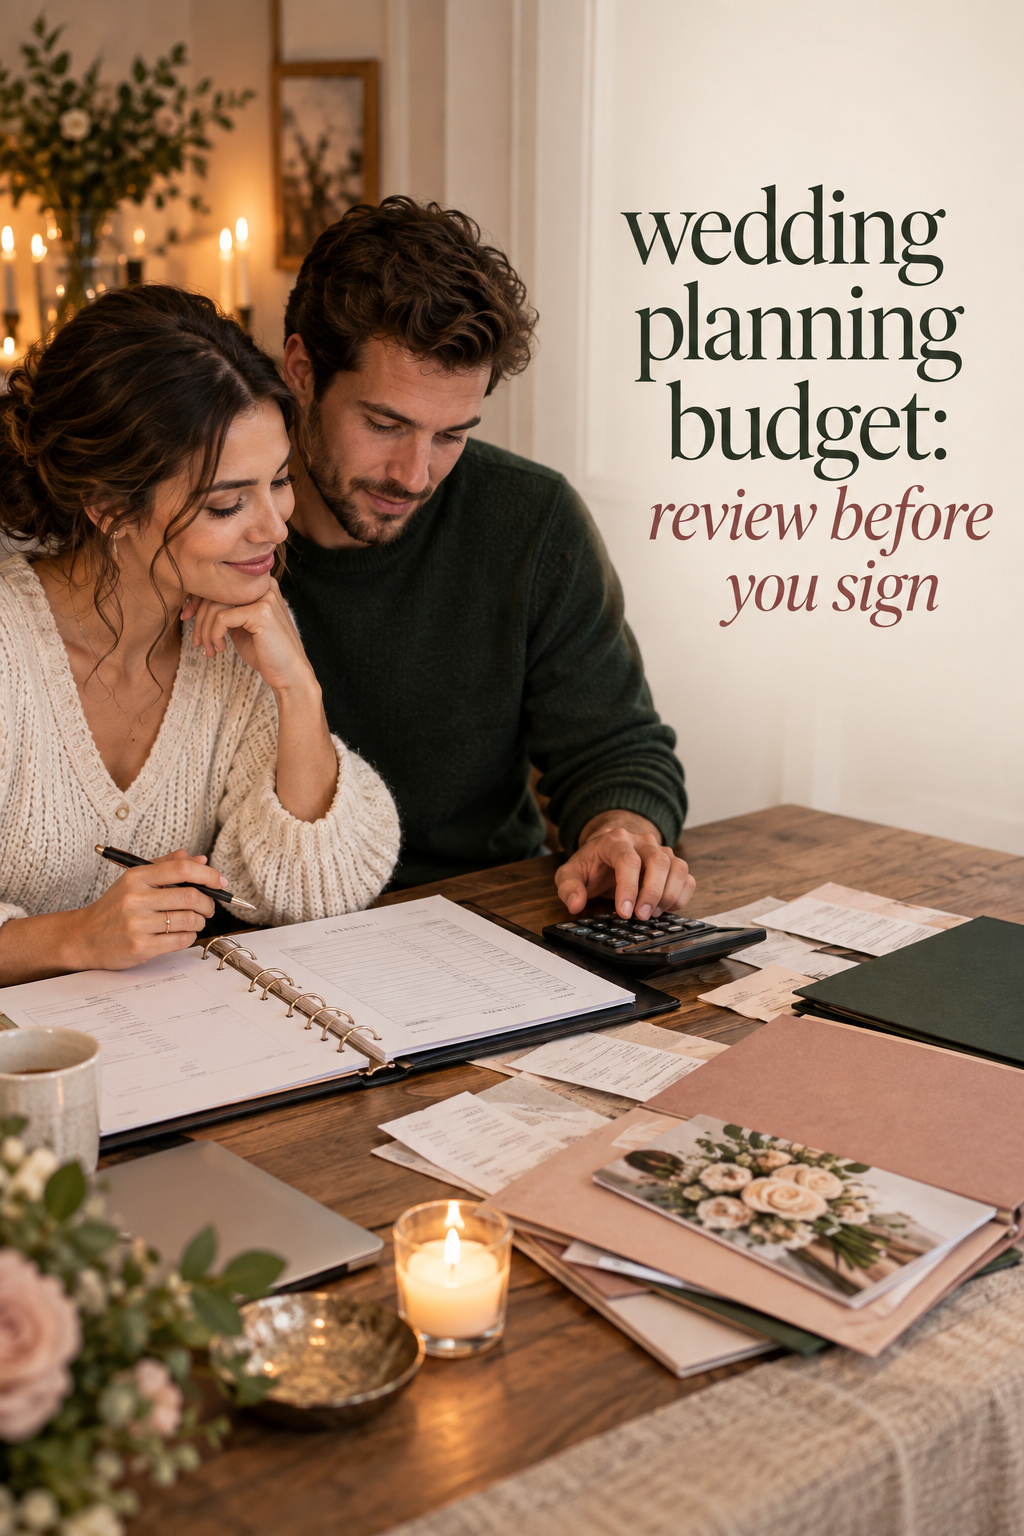
    Review the budget before each major commitment

    Set a regular review rhythm, even when nothing seems urgent. A fifteen-minute weekly meeting is enough for many couples. Look at the current committed total, the next four payments, new quotes, unresolved questions, reserve balance, guest-count changes, and one decision that needs an owner. Keep the meeting practical. The purpose is not to revisit every creative idea. It is to keep the financial picture shared and current.

    Use an upgrade rule for new expenses. Before approving an addition, ask what changes for guests, how many people benefit, whether it supports a named priority, and which funded category will pay for it. If the answer is unclear, wait a day. If you still want the item, write the trade-off beside it. A series of small additions can create a large overage because each one feels harmless in isolation. The rule makes the cumulative effect visible.

    Audit the plan after every major booking. Update the contracted amount, deposit paid, balance, due dates, included services, and remaining target. Then look at the categories that depend on the booking. A venue may change rentals, catering, transportation, ceremony layout, or lodging. A guest-count decision may change food, stationery, cake, staffing, and the room. Updating connected categories immediately is faster than discovering the impact in the final month.

    Review the reserve separately from the rest of the budget. If you use part of it, decide whether it will be replenished or whether another category will be reduced. Do not treat the reserve as a hidden upgrade fund. It exists so a necessary change does not force you into debt or a last-minute compromise. If the reserve is still untouched near the end, you can decide together whether to keep it, use it for a meaningful addition, or direct it toward another household goal.

    Before the final vendor commitments, run a short audit. Confirm that the guest count matches the catering estimate, the room matches the rental order, the schedule includes setup and cleanup, the vendor meals are assigned, and all taxes, service charges, tips, and overtime assumptions are visible. Check that attire alterations, marriage license fees, transportation, lodging, rehearsal meals, and weather plans have a home. Then verify the next payment dates against the money you will actually have available.

    A good budget should also support a calm handoff. As the wedding approaches, collect the timeline, vendor contacts, final headcount, floor plan, meal notes, payment envelopes, weather decision, access details, and emergency contacts in one place. Give a trusted person clear authority to answer operational questions. This is a financial decision because delays, missing information, duplicate purchases, and overtime can all create costs. A clear handoff protects the time and money you have already invested.

    Your final question is not whether every line matches a popular percentage chart. Ask whether the plan still reflects what matters to both of you, whether the total is responsible, and whether you understand the remaining risks. If the answer is yes, the budget is doing its job. It has turned a large emotional project into a set of choices you can see, discuss, and adjust together.

    wedding planning budget: review before you sign
    Review the wedding planning budget before signing the next contract.

    FAQ

    What is the first step in creating a wedding planning budget?

    Set a responsible total ceiling from savings, realistic monthly contributions, and confirmed financial help. Decide what the ceiling includes, then reserve five to ten percent for uncertainty before allocating money to categories. This gives you a boundary for venue research and prevents a beautiful idea from becoming your financial starting point.

    How should we divide a wedding planning budget?

    Begin with the format, guest count, and priorities of your actual wedding. Use a percentage framework as a first estimate, then adjust it for venue inclusions, food and drink, photography, music, attire, decor, transportation, and other required services. Keep target, estimate, contracted amount, paid amount, and final actual separate so the budget can learn as you receive real quotes.

    How much contingency should a wedding budget include?

    Five to ten percent is a practical starting range for many weddings, but the right reserve depends on uncertainty. Outdoor events, complex logistics, multiple celebrations, long timelines, and changing guest counts may require more. Reserve the money before spending the rest, and replenish it or make a clear trade-off if you use it.

    How can we avoid hidden wedding costs?

    Ask every vendor what is excluded and request a written explanation of taxes, service charges, gratuity, delivery, setup, cleanup, overtime, rentals, staffing, travel, vendor meals, and guest-count minimums. Add a visible unknown-cost section to your budget. A question recorded early is safer than a missing line discovered after a deposit has been paid.

    Should the guest list or budget come first?

    Create them together. Your budget sets a responsible ceiling, while the guest count changes venue, catering, rentals, stationery, staffing, cake, and transportation. Build two or three guest-count scenarios and request complete estimates. This makes the trade-off visible instead of forcing you to choose between an emotional list and an abstract total.

    When does DIY actually save money?

    DIY is most likely to help when the project is small, you already have the skill, materials are affordable, and it can be completed early without wedding-day labor. Include tools, storage, transportation, setup, cleanup, failed attempts, and your time. If the project creates a deadline crisis or requires family members to work during the celebration, compare it with a complete vendor price before deciding.

    How often should we review our wedding budget?

    Hold a short weekly review and update the plan after every major quote or booking. Look at the committed total, the next four payments, the reserve, open questions, and any guest-count or scope change. A consistent routine keeps small decisions from becoming a surprise during the final weeks.

    How do we keep a wedding budget from growing quietly?

    Use one shared source of truth and require every new expense to identify the priority it supports and the category that will pay for it. If no funded category can absorb the cost, pause and name a trade-off before approving it. This keeps a series of small upgrades from consuming the reserve or pushing the total beyond your maximum.

  • Wedding Planning Organizer: Build a Calm System

    Wedding Planning Organizer: Build a Calm System

    A wedding planning organizer should do more than collect pretty ideas. It should help you answer practical questions quickly: What needs a decision? Who owns it? What has been paid? Which guest details are still missing? Where is the current contract? What does the person helping on the wedding day need to know?

    The most useful organizer is not necessarily the largest binder or the most sophisticated app. It is the system you and your partner can open, understand, and update without wondering which version is current. You can build one digitally, on paper, or as a hybrid. The important choice is to give every active planning detail a clear home and a next action.

    wedding planning organizer with couple reviewing a calm shared system
    Start with one calm wedding planning organizer.

    This guide shows how to build a wedding planning organizer around six working sections: overview, budget, guests, vendors, decisions and tasks, and the wedding-day handoff. It also explains how to choose a format, connect related information, and run a short weekly review so the organizer remains useful throughout the engagement.

    What a wedding planning organizer should make easier

    Wedding planning creates a chain of connected decisions. The guest count affects catering, rentals, stationery, and seating. The venue contract affects setup time, bar service, noise limits, and the vendors you can hire. A payment deadline affects your cash flow. The ceremony start time affects transportation, portraits, beauty appointments, and the reception schedule.

    When those details live in separate messages, notebooks, screenshots, and browser tabs, the work feels larger than it is. An organizer reduces that friction by making the connections visible. It should show the current answer, the source of that answer, and the next action that follows from it.

    Think of your organizer as a small operating system for the wedding. It does not replace conversations or professional advice. It gives those conversations a place to land. After you compare venues, the decision belongs in the organizer. After you sign a contract, the payment dates and document link belong there too. After a guest replies, the RSVP record should become current immediately.

    A good system has four qualities. It is shared enough that both partners can participate. It is specific enough that an open item has an owner and due date. It is simple enough to maintain during busy weeks. It is controlled enough that vendors and family members receive only the information they need.

    wedding planning organizer with digital tablet and paper binder choices
    Pick the wedding planning organizer format you will use.

    Choose a format: digital, binder, or hybrid

    Choose the format based on how you actually plan, not on what looks most complete in a product photo. A digital organizer is often the easiest choice when both partners need live access, numbers change frequently, or you are sharing selected information with a planner. A paper binder can feel more natural when you prefer handwritten notes, attend in-person vendor meetings, or want a physical packet for the day-of helper.

    A hybrid system often works well. Keep the budget, guest list, task list, and vendor status in one digital master. Use a binder for printed contracts, fabric swatches, stationery proofs, floor plans, inspiration, and meeting notes that are easier to spread across a table. At the end of each meeting, transfer every real decision into the digital master.

    If you prefer a spreadsheet, begin with a small number of views rather than building every possible tab. A useful starting structure is budget, guests, vendors, and timeline, a combination also reflected in practical spreadsheet guidance from Aisle’s wedding-planning spreadsheet guide. Add a separate decisions log and document index when those needs become real.

    If you prefer a binder, use dividers with clear labels and keep the active pages near the front. A focused printable model can include only the worksheets your celebration needs, rather than forcing you to maintain blank pages for every possible wedding detail. Big Day Binder’s printable planner approach is a useful reminder that a smaller working binder can be more practical than a decorative archive.

    • Choose digital when collaboration, search, automatic saving, and frequent updates matter most.
    • Choose paper when portability, handwriting, and face-to-face meetings are central to your process.
    • Choose hybrid when you need a live operational record and a tactile place for contracts and visual materials.

    Whatever you choose, name the master clearly and avoid labels such as “final” or “latest.” A name that includes the couple, event, and date is easier to recognize. Decide who can edit it, who can comment, and who receives a read-only view. The organizer should make access clearer, not create another set of uncertain copies.

    wedding planning organizer section cards for budget guests vendors and timeline
    Build the six core wedding planning organizer sections.

    Build the six core sections

    Start with the information that drives decisions. You can add specialty sections for attire, flowers, music, transportation, or a destination weekend later. A section earns its place when it supports a recurring decision or prevents a detail from getting lost.

    wedding planning organizer connecting vendor contracts owners and deadlines
    Connect every next step in your wedding planning organizer.

    1. Overview and priorities

    The overview is the first page or dashboard. It should orient anyone who is allowed to see the plan in under a minute. Include the wedding date, ceremony and reception locations, estimated guest count, working budget, planning phase, and the next three decisions.

    • Wedding date, city, and venue status
    • Estimated guest range and current confirmed count
    • Working budget and amount already committed
    • Top three priorities for the guest experience
    • Next planning meeting and next three actions
    • Names of the people who can make day-of decisions

    Keep priorities visible because they help you evaluate new options. If a proposal is attractive but does not support what matters most, you can say no without opening another debate from the beginning. The overview is not a mood board. It is a decision compass.

    2. Budget and payments

    A useful budget separates estimates, contracted amounts, payments, balances, and final costs. One number cannot tell you whether money is still uncertain or whether a payment is due soon. Give every financial figure a label and, when possible, a source.

    • Category and vendor
    • Early estimate and current contracted amount
    • Deposit or installment paid
    • Balance remaining and payment due date
    • Taxes, service charges, delivery, setup, or gratuity notes
    • Contract status and document link
    • Person responsible for the next payment or question

    Use a status vocabulary that everyone understands, such as researching, proposal received, reviewing, booked, paid in part, and complete. If you use formulas, keep them visible and protect the cells that should not be edited. If formulas are not your strength, clear columns and consistent manual updates are better than clever automation that nobody trusts.

    Do not hide small but predictable costs. Include attire alterations, postage, transportation, vendor meals, rental delivery, rehearsal events, marriage-license fees, tips, and a contingency line. The exact categories will differ by celebration. The principle is simple: add a place for a cost before it surprises you.

    3. Guest list and RSVP tracker

    Keep one row or record for each invited person, even when several people share a household. That structure makes meal choices, dietary notes, accessibility needs, lodging, plus-ones, and thank-you messages easier to manage. Add an invitation group field if you need to track which people belong together for mailing.

    • Full name and invitation group
    • Email, mailing address, and preferred contact method
    • Relationship or guest category
    • Invitation status and RSVP status
    • Plus-one decision, meal choice, and dietary information
    • Lodging, transportation, accessibility, or childcare notes
    • Table assignment and thank-you note status

    Use a small set of RSVP labels so counts remain reliable. For example, use invited, awaiting response, yes, and no. Update the record when a response arrives, when a meal choice changes, or when a household asks a question that affects planning. Do not keep the most important guest detail only in a text thread.

    4. Vendors and contracts

    Create one vendor record for every category you may book. Before signing, use the same questions for each candidate so you can compare complete proposals rather than headline prices. After signing, convert the record into an obligation tracker.

    • Category, business name, and primary contact
    • Website, email, and phone number
    • Quote, package, inclusions, and exclusions
    • Contract status, deposit, balance, and due dates
    • Arrival, setup, departure, and delivery details
    • Cancellation, substitution, overtime, insurance, and meal notes
    • Signed contract, invoice, and communication links
    • Next question, next decision, and owner

    Record answers in the organizer instead of relying on memory. If the venue says the room is available for setup at a particular time, record that time and link to the relevant message or contract section. If the photographer needs a family photo list, create a task with an owner and internal deadline. The vendor section becomes more valuable when it records dependencies, not just contact details.

    5. Decisions, tasks, and deadlines

    A checklist tells you what exists. A working task view tells you what happens next. Give every active task one owner, one due date, one status, and one explanation of what “done” means. You can collaborate on a task, but shared ownership should not mean invisible ownership.

    • Task or decision
    • Category and priority
    • Owner and supporting person
    • Due date and internal buffer date
    • Status: not started, in progress, waiting, or complete
    • Dependency, such as final guest count before seating
    • Notes, source, and link to the related contract or file

    Add a decisions log for choices that you may otherwise revisit. Record the date, options considered, decision, reason, budget impact, and who approved it. This is especially useful when family members contribute money or when a vendor recommendation changes the original plan. A short note can prevent a long repeat conversation.

    Work backward from fixed deadlines. If a caterer needs the final count two weeks before the wedding, set your internal count earlier. If invitations must be mailed by a certain week, schedule addressing, proofing, postage, and guest-data cleanup before that date. Buffer turns a deadline into a manageable sequence.

    6. Wedding-day handoff

    The handoff section is the bridge between planning and execution. Start it when the main vendors are booked, then update it after every major decision. By the final weeks, create a clean version for the coordinator, venue contact, trusted helper, or family member who will answer operational questions.

    • Final timeline with locations and realistic transition time
    • Vendor contacts and arrival or load-in instructions
    • Floor plan, seating plan, ceremony order, and key music cues
    • Final guest count, meal notes, accessibility needs, and transportation
    • Payment, tip, delivery, and pickup responsibilities
    • Family photo list and priority photographs
    • Weather backup, emergency contacts, and decision authority
    • Items to pack, return, collect, or preserve after the event

    Separate the private master from the shareable handoff. A vendor may need arrival instructions and the final floor plan but not every guest address or your complete budget. Limit sensitive information to the people who need it. A good handoff gives others enough clarity to protect your attention on the wedding day.

    Connect the records so the organizer tells one story

    The sections become powerful when they reference one another. A venue record should link to its contract, appear in the budget, and connect to tasks such as final headcount and floor-plan approval. A guest record should flow into RSVP totals, meal counts, seating, transportation, and thank-you tracking. A vendor payment should appear both in the vendor record and in the budget.

    Use consistent names for categories, vendors, and statuses. If one page says “photo,” another says “photographer,” and a third says “photography,” searches and totals become less dependable. Decide on labels at the beginning. The goal is not technical perfection. It is making the next person able to understand the record without asking you to translate it.

    Keep a document index rather than pasting long contracts into the organizer. Record the document name, related vendor, date received, version, and link. When a contract changes, archive the earlier version and mark the current one clearly. This keeps the working record readable while preserving the context you may need later.

    The Wedding Command Center can be useful as a companion planning resource when you want a guided place to keep priorities and next steps visible. Use it because it solves a real coordination need, while your organizer remains the agreed source of truth for the records your partner, planner, and vendors need.

    Run a weekly review and prepare the final handoff

    An organizer only reduces stress when it reflects reality. Schedule a short weekly review with your partner. Begin with the overview, then check payments due soon, open vendor questions, overdue tasks, guest responses, and decisions waiting for an answer. Finish by choosing the next three actions.

    • Update anything that changed since the last review.
    • Check the next 30 days for payments and fixed deadlines.
    • Review tasks marked waiting and identify the person or answer needed.
    • Reconcile new quotes, deposits, RSVPs, and guest notes.
    • Move completed decisions into the current record.
    • Assign the next three actions and set internal buffer dates.

    As the wedding approaches, make the review more operational. Confirm that the final guest count matches catering, the seating plan matches the floor plan, the vendor arrival windows fit the venue access hours, and the person holding the handoff knows who can make decisions. Ask that person to read the packet and explain what they would do if you were unavailable.

    After the wedding, keep the organizer long enough to track returns, final invoices, photo delivery, contract closeout, thank-you notes, and borrowed items. Then archive it. A calm system has an ending. It should preserve useful records without turning the wedding into a project you can never close.

    Mistakes that make an organizer harder to trust

    Building too much too soon is the first common mistake. A tab for every possible detail can make the organizer look thorough while making it harder to find the active work. Start with the six core sections and add a new page only when you can name the decision it supports.

    Mixing estimates, signed costs, payments, and balances is another problem. Keep those numbers separate. A total can look reassuring while a payment due next week remains hidden. Clear labels are more valuable than decorative color coding.

    Multiple unofficial copies create quiet confusion. If one partner has a spreadsheet, a parent has a printed list, and a planner has a separate document, nobody knows which answer is current. Share views from the master or record exactly when a paper copy was printed.

    Vague ownership also weakens the system. “We need to contact the florist” is not an assigned task. “Alex will email the florist by Tuesday about delivery access” is clear. Give the task an owner, then let the weekly review redistribute work if one person is carrying too much.

    Finally, do not use the organizer to avoid a decision. A record can show the options, costs, and consequences, but it cannot decide your shared priorities. Talk, choose, and then write down the result. The value of the organizer is that the decision becomes easier to remember and easier to act on.

    wedding planning organizer handoff packet with timeline and vendor contacts
    Make the wedding planning organizer handoff feel easy.

    FAQ

    What should be included in a wedding planning organizer?

    Start with an overview, budget and payments, guest list and RSVPs, vendors and contracts, tasks and decisions, and a wedding-day handoff. Add attire, flowers, music, travel, or honeymoon sections only when they support a recurring decision. The best organizer is complete enough to be useful and small enough to maintain.

    Is a wedding planning binder better than a digital organizer?

    Neither format is automatically better. A binder works well for handwritten notes, printed contracts, and in-person meetings. A digital organizer is usually easier to search, update, share, and connect across budget, guests, vendors, and tasks. A hybrid system can give you both benefits when one digital master remains authoritative.

    How do couples keep a wedding organizer updated?

    Set a weekly review and update the organizer whenever you sign a contract, pay money, receive an RSVP, or change a major decision. Use one owner for each active task and record the source of important information. Small updates are easier to trust than a large catch-up session months later.

    What is the most important wedding planning organizer section?

    For most couples, the budget and payments section is one of the most important because it shows what is estimated, committed, paid, and still due. The overview and task list are equally important for daily use. Together, they show both the current position and the next action.

    Should wedding vendors have access to the organizer?

    Give vendors only the information they need, and consider sharing a read-only view or a clean handoff packet. A venue may need the floor plan and arrival schedule, while a photographer may need the photo list and family contacts. Keep private budgets, full guest addresses, and unrelated contracts restricted.

    When should a couple create the wedding-day handoff?

    Start the handoff when the main vendors are booked and update it as decisions become final. Aim to give the coordinator or trusted helper a clean version several weeks before the wedding. Include the timeline, contacts, floor plan, guest details, payment responsibilities, emergency instructions, and decision authority.

  • Wedding Planning Timeline: What to Do and When

    Wedding Planning Timeline: What to Do and When

    A wedding planning timeline can make an exciting season feel calmer, but only when it reflects the order of the decisions. Many couples begin with details that are easy to browse, such as colors, favors, or day-of stationery, while the choices that control the whole plan are still unsettled. That is why a checklist can grow longer without making the wedding feel more organized.

    The useful question is not, ‘What can we plan today?’ It is, ‘Which decision will make the next decision easier?’ Your date affects vendor availability. Your venue affects the guest experience, floor plan, and logistics. Your guest range affects the budget and the size of every space. Once you see those connections, the timeline becomes a sequence instead of a pile.

    wedding planning timeline with a couple reviewing priorities and a shared calendar
    Start your wedding planning timeline with a clear shared plan.

    This wedding planning timeline gives you a practical baseline for a typical engagement, then shows how to adapt it when you have six months, eighteen months, a destination celebration, or a date already approaching. Use the month ranges as guidance rather than rules. The order matters more than the labels.

    Why wedding planning timelines feel backwards

    Wedding planning often feels backwards because the most visible tasks are not always the most urgent. A cake tasting feels like progress, and it is enjoyable progress, but it cannot solve an unconfirmed guest range or an unknown venue capacity. A beautiful invitation design is still a draft if you do not know the address, ceremony location, or RSVP deadline. A floral mood board may need to change when the venue has strict installation rules.

    Start by separating decisions into three groups. First are anchor decisions. These define the boundaries of the wedding: budget, guest range, date, venue, and the priorities that matter most to you. Second are dependent decisions. These become easier after an anchor is set: catering style, ceremony layout, photography coverage, attire, transportation, and invitations. Third are finishing decisions. These include detailed signage, final décor counts, seating assignments, favors, and the handoff documents used during wedding week.
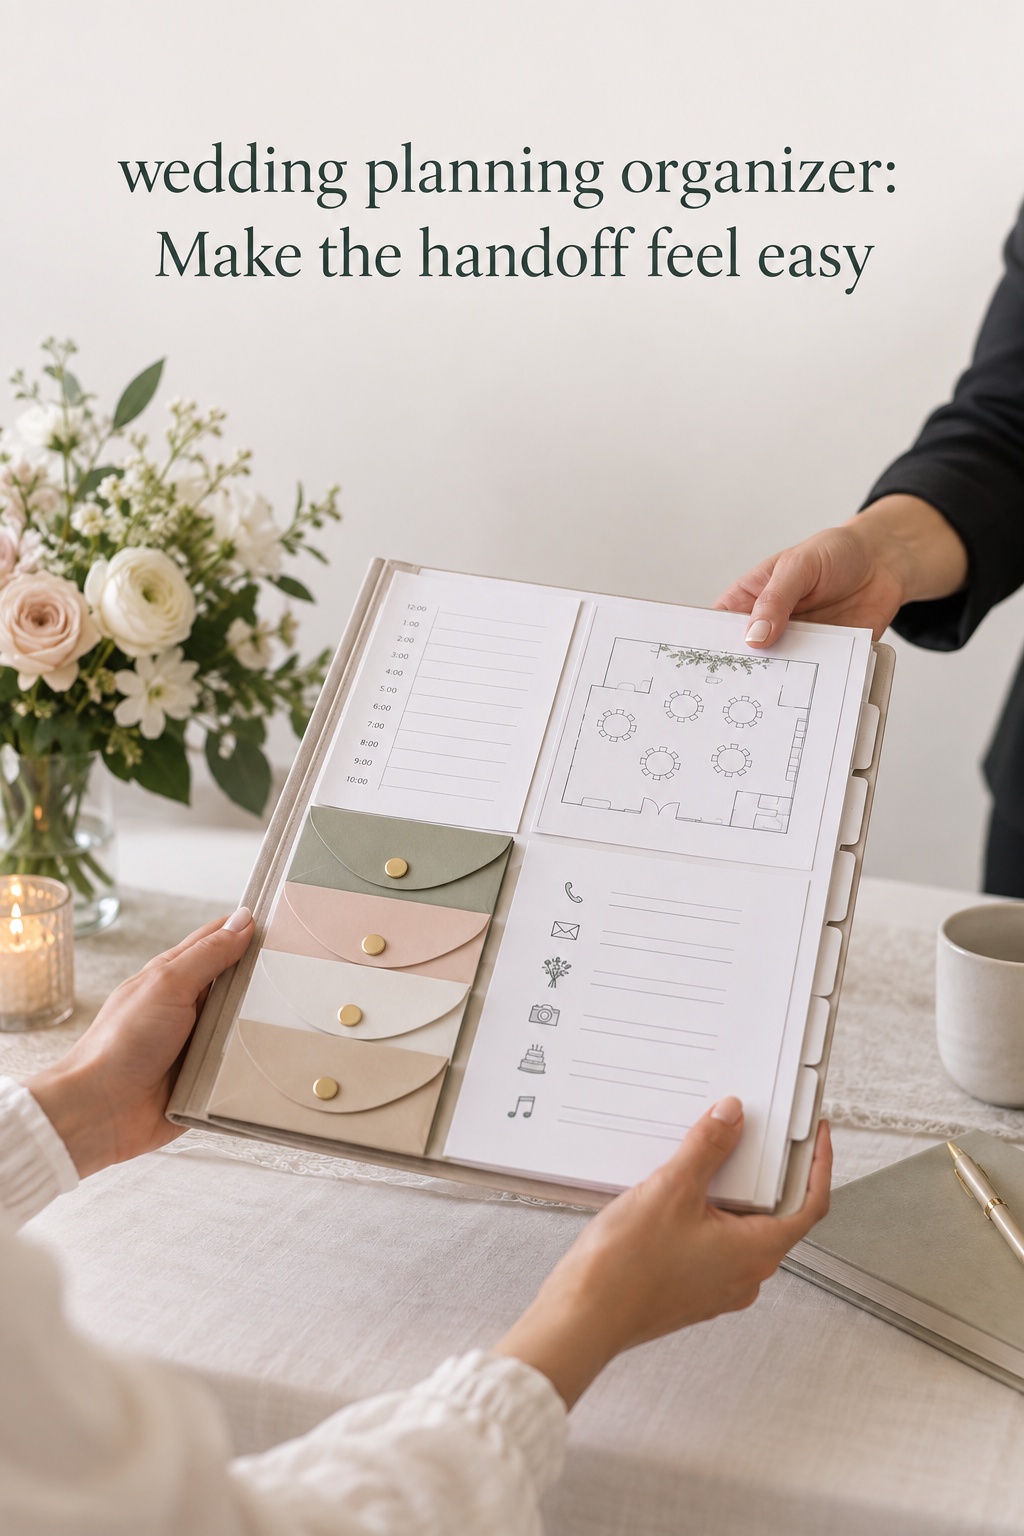
    The groups are connected, but they do not all need equal attention at the same time. Your timeline should protect the decisions that are difficult to reverse or that depend on other people’s calendars. It should leave breathing room for choices that can be made later without changing the foundation.

    wedding planning timeline with a couple and coordinator comparing a venue floor plan
    Use your wedding planning timeline to book the decisions that shape the day.

    Build the timeline around five anchor decisions

    A strong wedding planning timeline begins with five anchors. They do not have to be finalized in a single weekend, but they should be discussed in this order. Together, they turn a vague project into a set of boundaries that your vendors and family can understand.

    1. Budget and contribution plan

    Choose a working budget before you fall in love with a venue or vendor package. The first version does not need to be perfect. It needs to show the total amount you expect to spend, who is contributing, when money will be available, and which categories are non-negotiable. Include taxes, service charges, gratuities, attire alterations, transportation, stationery postage, and a reserve for changes. A budget that ignores those items creates false confidence.

    Use the budget as a decision tool, not as a document that only records spending after it happens. When you compare a full-service venue with a blank-space venue, record the rentals, labor, delivery, setup, and cleanup that come with each option. This makes the timeline more useful because you can see which choice is affordable in practice, not just in its headline price.

    2. Guest range

    You do not need a final guest list at the beginning, but you do need a realistic range. Write down the people who must be there, the people you hope to invite, and the people you would invite if space and budget allowed. This first range helps you compare venues and catering minimums without pretending that every name is settled.

    Keep the list connected to practical information. Note children, likely plus-ones, travel needs, dietary concerns, and households that may share an address. Later, those details will shape invitations, transportation, lodging information, menu planning, and seating. A shared planning workspace, including The Wedding Command Center when it fits your system, can be useful here because the list should be visible to the people who are actually making decisions. Use it as a planning resource, not as a substitute for a thoughtful guest conversation.

    3. Date or date range

    Some couples choose a date first and search for a venue that can hold it. Others choose a season or several acceptable dates, then let venue availability guide the final decision. Either approach can work. The key is to know how flexible you are before you begin inquiries.

    Consider the season, day of week, travel requirements, religious or cultural dates, school calendars, and the amount of time your priority vendors need. A date is not only a line on the calendar. It is the starting point for invitations, attire, final payments, menu counts, and every later deadline.

    4. Venue and guest experience

    The venue is the hinge of the planning process. Compare more than photographs and rental fees. Ask about capacity, rain plans, accessibility, sound restrictions, end times, vendor rules, power, parking, restrooms, getting-ready spaces, load-in, cleanup, and what is included. A beautiful room that creates difficult logistics may require more money and more work than its first quote suggests.

    Imagine the guest journey from arrival to departure. Where will guests go first? Is there a clear transition between ceremony and reception? Will older relatives have a comfortable place to pause? Does the plan work in the actual season and light? These questions help you choose a venue that supports the wedding you want to have, not just the wedding you want to photograph.

    5. Priority vendors

    After the venue and date are secure, book the vendors whose availability matters most to you. For many couples, that means the photographer, planner or coordinator, caterer, entertainment, and sometimes a hair and makeup team. Your list may be different. The right order is based on scarcity and importance, not on a universal rule.

    When you inquire, ask for the information that will affect later decisions: coverage hours, setup requirements, meal counts, travel fees, contract deadlines, backup plans, and what the vendor needs from you. Save the answers with the proposal and contract. The timeline should remember not only that a vendor is booked, but also what that booking requires next.

    wedding planning timeline with partners sharing vendor proposals budget notes and deadlines
    Share the next planning steps so progress stays visible to both partners.

    A flexible wedding planning timeline from engagement to wedding week

    The following schedule assumes roughly twelve months. If your engagement is longer, spread out the research and use the extra time for savings, design refinement, or vendor conversations. If it is shorter, keep the sequence and compress the gaps. At every stage, choose a small number of outcomes rather than trying to touch every category.

    Twelve to ten months before

    • Agree on the working budget, contribution plan, and guest range.
    • Choose a date, season, or set of acceptable dates.
    • Research venues and ask for complete cost and policy information.
    • Book the venue and record every deadline in the contract.
    • Decide whether you need a full planner, partial planner, or month-of coordinator.
    • Create one shared place for decisions, contracts, contacts, and open questions.

    Do not rush into detailed décor before these outcomes are clear. Your goal is a stable foundation. If the venue search takes longer, that is not automatically lost time. It is often better to spend another week comparing the real logistics than to build a timeline around a room that cannot support the guest experience.

    Nine to seven months before

    • Book priority vendors such as photography, catering, entertainment, and planning support.
    • Choose a broad visual direction that fits the venue and the season.
    • Research attire and allow time for ordering, alterations, and accessories.
    • Build a preliminary wedding website or information page if guests will travel.
    • Decide whether you will send save-the-dates and collect the information they require.
    • Start a transportation and lodging plan for guests who need it.

    This is a good stage for a short monthly review. Ask what has been decided, what is waiting on a vendor, and what could create a later bottleneck. For example, an attire choice may affect the hair and makeup brief, while a ceremony location may affect transportation and the timing of photography. Record the dependency so it does not live only in one person’s memory.

    Six to four months before

    • Order attire and schedule alterations or fittings.
    • Send save-the-dates if they fit your guest and travel plan.
    • Choose the ceremony structure, officiant, readings, and key participants.
    • Begin detailed conversations with the florist, rental company, baker, and stationery designer.
    • Review the venue floor plan, guest flow, and rain or backup plan.
    • Decide on the invitation wording, enclosure pieces, and RSVP method.
    • Reserve rehearsal dinner or welcome-event spaces if needed.

    At this point, the planning process should move from broad research to clear selections. Avoid reopening every choice whenever you see new inspiration online. Instead, keep a short list of changes that would genuinely improve the guest experience, solve a logistical problem, or protect the budget. A timeline is not meant to prevent creativity. It is meant to give creativity a safe place to happen.

    Three to two months before

    • Mail invitations and set an RSVP deadline that leaves time for final counts.
    • Confirm vendor arrival windows, meal requirements, payment dates, and points of contact.
    • Finalize ceremony and reception choices, including music, readings, speeches, and special dances.
    • Order rings, printed materials, favors, and any custom pieces with production lead time.
    • Gather guest travel, accessibility, dietary, and lodging information.
    • Begin a working seating plan once responses and household details are reliable enough.

    Use this stage to test the plan from another person’s perspective. Could a guest understand where to go? Could a vendor find the correct contact quickly? Could a family member answer a common question without interrupting you? These are signs that the timeline is becoming a shared system instead of a private list.

    One month to one week before

    • Complete the seating plan, table assignments, and final guest count.
    • Confirm the menu, rentals, floor plan, ceremony details, and transportation.
    • Finish fittings, collect attire, and prepare accessories and emergency items.
    • Create a day-of schedule with realistic travel, setup, meals, portraits, and transition time.
    • Share the schedule with vendors, the wedding party, family helpers, and the person coordinating the day.
    • Prepare final payments, tips, printed materials, personal items, and a labeled handoff bag or folder.

    Do not build the day-of timeline by filling every minute. Build it around fixed anchors such as ceremony start, venue access, meal service, speeches, and the end of the reception. Then add buffers for transportation, bathroom breaks, touch-ups, late arrivals, and simple human pauses. The schedule should help the day breathe.

    wedding planning timeline with invitation cards RSVP details and a planner
    Let your wedding planning timeline make invitation deadlines easier to see.

    How to adapt the timeline to your actual engagement

    A standard wedding planning timeline is useful because it shows dependencies, but it can become stressful when couples treat every month as a deadline. Instead, identify the first date-driven decision you have not made, then work forward from it. Keep the order of the anchors and compress or expand the space between them.

    If you have six months

    Start with budget, guest range, date, and venue in the same planning sprint. Inquire with priority vendors immediately and ask about availability, standard packages, and realistic lead times. Choose attire that can be ordered or sourced within your window, and simplify custom work that would create risk. Send invitations as soon as your venue, guest information, and wording are ready.

    For a compressed timeline, replace perfect sequencing with daily clarity. Decide who owns each open item, what information is missing, and what the next physical action is. A short planning meeting every few days may be more useful than a large weekly checklist. Keep the guest experience and the legal or venue requirements at the center.

    If you have eighteen months or more

    Use the extra runway to make high-impact choices without urgency. You can compare venues carefully, build savings, interview vendors, and allow more time for attire or custom details. Do not feel pressured to invent tasks just because the calendar looks open. Keep a short ‘now, next, later’ view and review it monthly.

    Long engagements need protection from decision fatigue. Once a choice is made and documented, move it out of the active decision list. Revisit it only when a later fact changes the foundation. This keeps inspiration from turning into endless revision.

    If the venue and date are already booked

    Begin with the contracts you already have. List every deadline, included service, restriction, payment, and vendor recommendation. Then create the five anchors around that reality. Your budget may need a new working version, your guest range may be constrained by capacity, and your priority vendor list may be shaped by the venue’s preferred providers.

    This is not a problem. It simply means your timeline begins in the middle of the dependency chain. Make the constraints visible, then book the vendors and make the guest decisions that are most affected by them.

    If you are planning a destination wedding

    Move guest communication earlier. Travel time, passports, lodging, transportation, local customs, and accessibility can affect who is able to attend. Build an information page before guests need every detail, then update it as flights, room blocks, and weekend events become clearer. Ask vendors about travel fees, local backup teams, weather, and delivery logistics.

    Give yourself a stronger final confirmation process. A destination plan needs a single place for the schedule, arrival information, vendor contacts, venue rules, and emergency decisions. Share the parts that guests need without sending them every internal planning note.

    The simple weekly review that keeps the timeline useful

    Once a week, spend twenty minutes reviewing the plan. First, mark what is complete. Second, identify the next three decisions that genuinely matter. Third, check for deadlines within the next six weeks. Fourth, assign an owner and a next action to every open item. Finally, move non-urgent ideas to a later list.

    This rhythm prevents the common problem of having a beautifully organized timeline that no one uses. It also creates a record of why choices were made. If a vendor changes the schedule or a budget category shifts, you can adjust the next actions without rebuilding the entire plan.

    wedding planning timeline with a coordinator receiving a final schedule handoff folder
    Finish your wedding planning timeline with a clear handoff for wedding week.
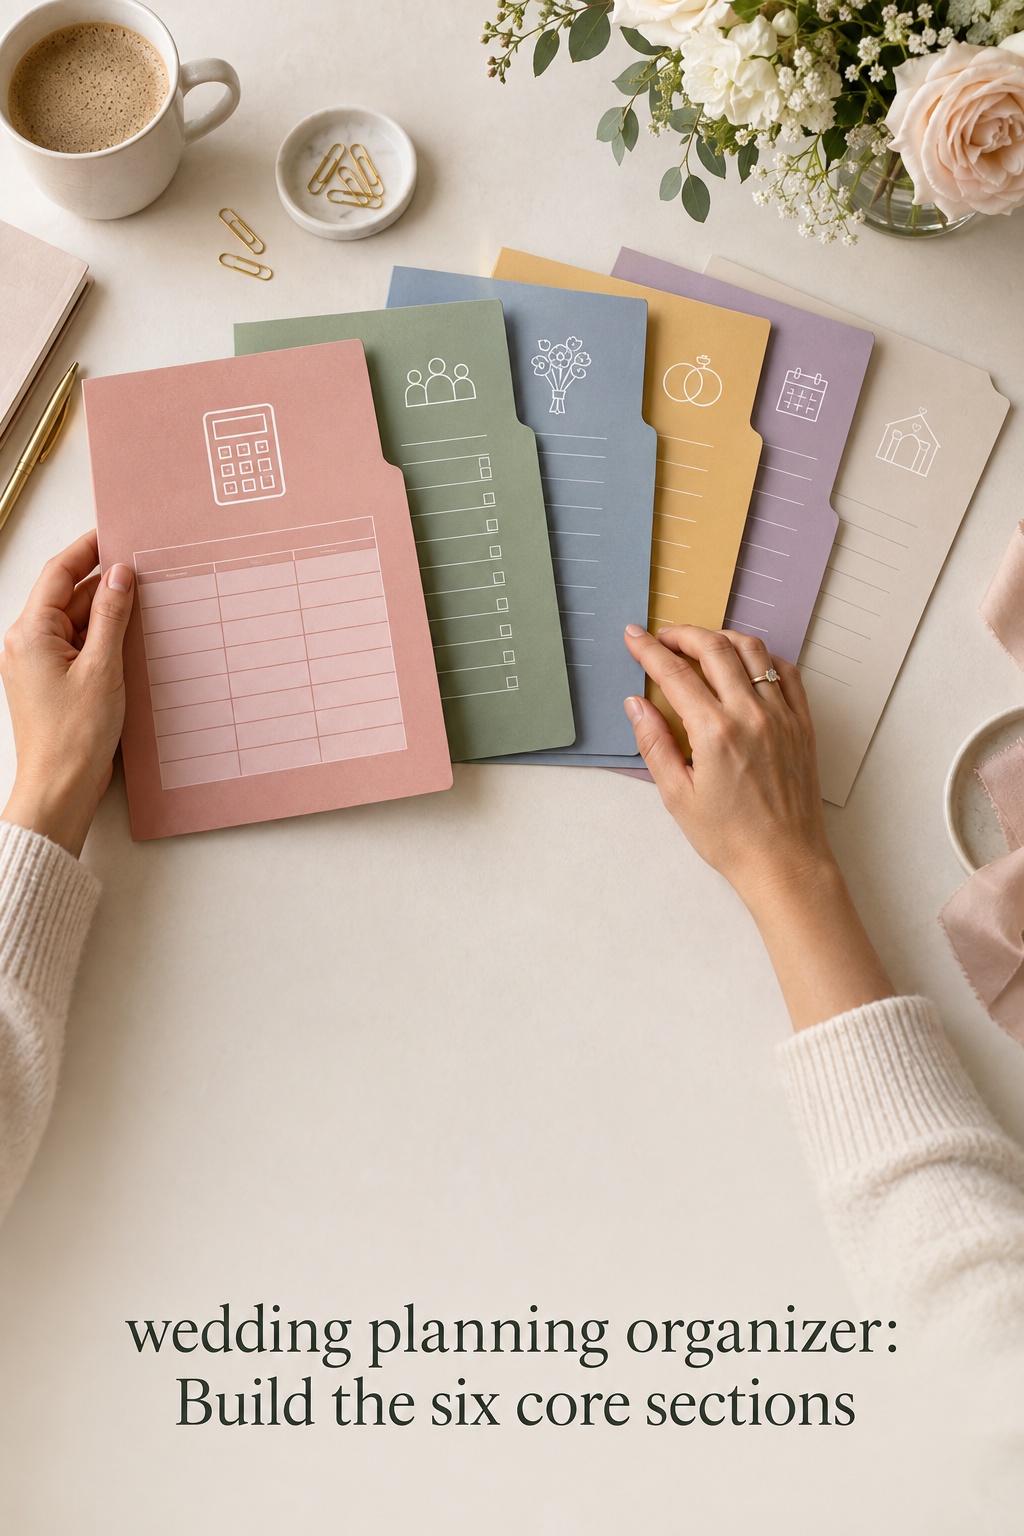
    FAQ

    How long does a wedding planning timeline usually take?

    A twelve-month timeline is a useful baseline, but it is not a requirement. Some couples plan comfortably in six months, while others use eighteen months or longer. The important factors are venue and vendor availability, guest travel, attire lead time, budget readiness, and how quickly you can make the anchor decisions.

    What should we do first when planning a wedding?

    Start with a working budget, a realistic guest range, and a date or date range. Use those three pieces to compare venues. Once the venue and date are secure, book the priority vendors whose availability matters most to you.

    When should wedding invitations be sent?

    Many couples send formal invitations roughly two to three months before the wedding, allowing time for delivery, responses, meal selections, and the seating plan. Destination celebrations or events with substantial travel may need earlier communication. Set the RSVP deadline based on when your caterer and venue require the final count.

    Can we plan a wedding in six months?

    Yes. Begin with the budget, guest range, venue, date, and priority vendors, then compress the gaps between dependent choices. Be flexible about dates, packages, attire, and custom production. A clear owner for each task and frequent short reviews will help more than an oversized checklist.

    When should we book wedding vendors?

    Book vendors after the date and venue are secure, prioritizing the people who are most important to you or who have limited availability. Ask each vendor about lead times, contract deadlines, setup needs, final counts, and backup plans. Those details belong in the timeline alongside the booking itself.

    What if we are behind on our wedding planning timeline?

    Find the first unfinished anchor decision and restart there. Separate tasks that affect the date, venue, guest communication, or vendor availability from details that can wait. Make a short list of the next three actions, assign owners, and contact any vendors who need updated information. You do not need to recreate every missed month to regain control.

    How can we keep wedding planning from becoming overwhelming?

    Keep one shared source of truth for decisions, contracts, contacts, deadlines, and open questions. Review it briefly each week, limit the active list to the decisions that matter now, and create a clear handoff for wedding week. The goal of a wedding planning timeline is not to fill every day. It is to make the next right step easy to see.
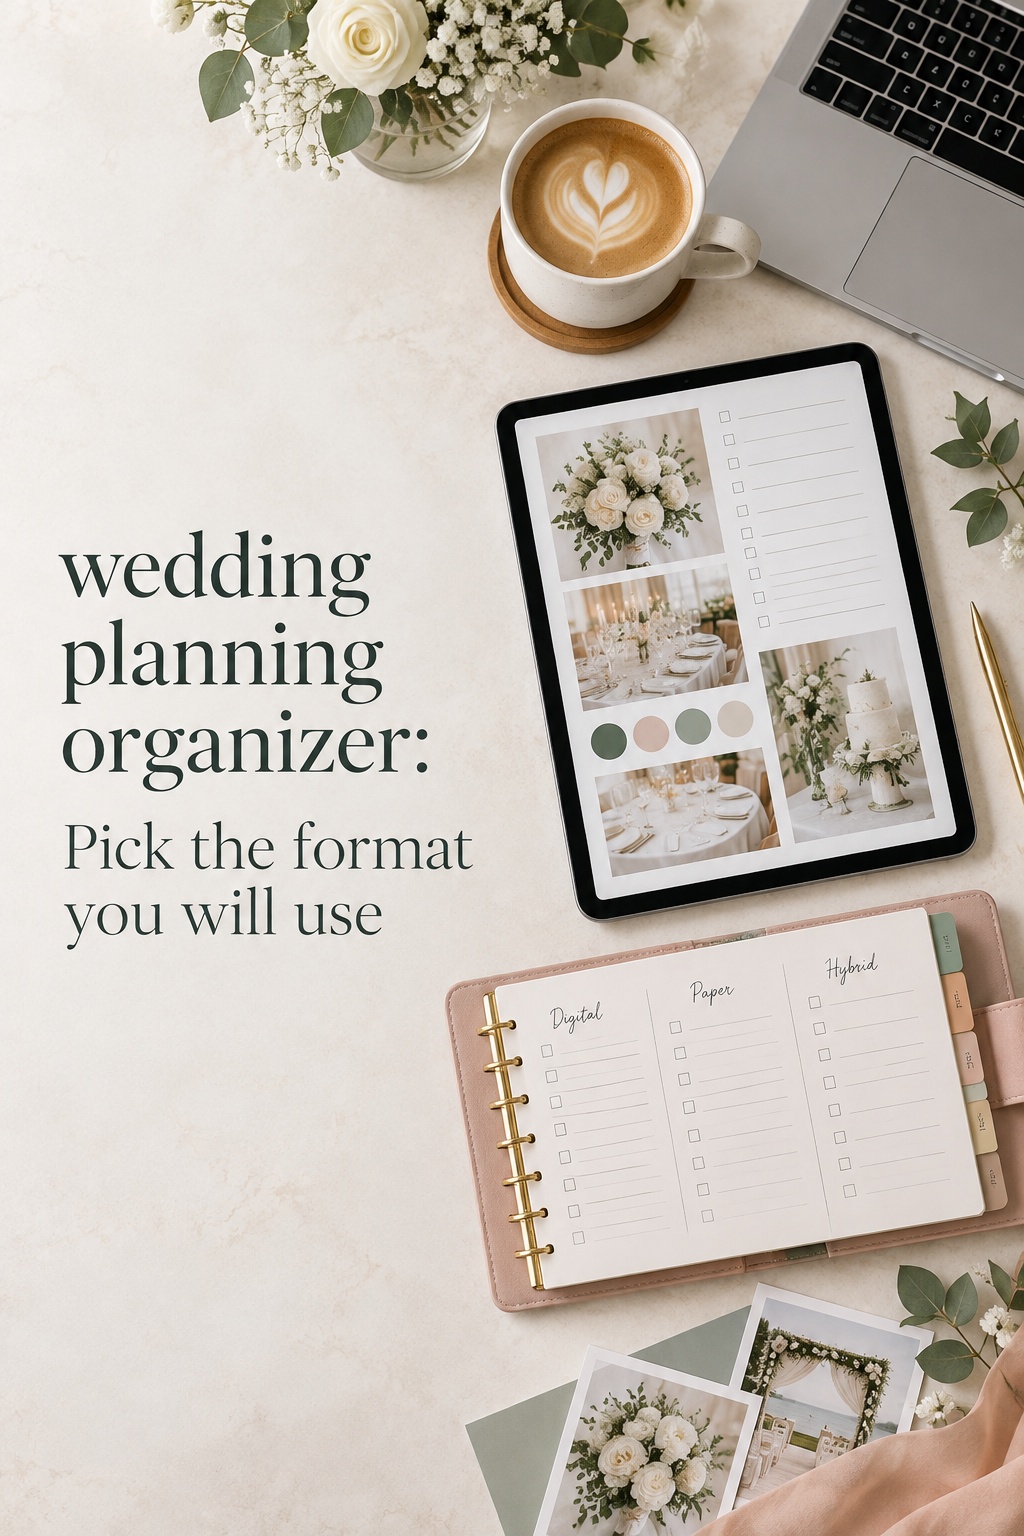
  • Wedding Planning Aesthetic Vision Board: Make It Useful

    Wedding Planning Aesthetic Vision Board: Make It Useful

    A wedding planning aesthetic vision board should do more than prove that you have excellent taste. At its best, it helps the two of you make decisions before every floral stem, menu card, and rental option becomes a separate debate. The goal is not to make a perfectly polished collage. It is to create a small visual brief that captures how the celebration should feel, what details carry that feeling, and what does not belong.

    Think of the board as a bridge between instinct and execution. You may know that you want the day to feel warm, quietly celebratory, and a little cinematic. Your florist, stationer, planner, photographer, and venue coordinator need more than those words. They need examples and priorities. A focused board gives them a starting point while keeping you from being pulled in a new direction every time you see another beautiful idea online.

    wedding planning aesthetic vision board created by a couple
    Begin with the atmosphere you want guests to feel.

    Start with the feeling, not a color palette

    Before opening Pinterest or saving a single image, sit down together and name the experience you want to create. Not the theme. Not a list of objects. Start with three feeling words. For example: intimate, sun-washed, and generous. Or: tailored, lively, and low-lit. Words like these are useful because they can guide choices that do not look alike at first glance. A tapered candle, a handwritten place card, and a long shared table may all support an intimate feeling. A random trend may be lovely yet not support it at all.

    Then add two practical constraints. You may be working with a historic venue whose architecture is already visually strong. You may be hosting outdoors where the light changes quickly. You may care most about an easy guest experience, a family tradition, or a dinner that lasts long enough for real conversation. Constraints do not make a vision less romantic. They make it more personal and more achievable.

    This is also the moment to name a few clear noes. Perhaps neither of you wants a ballroom to feel overly formal, a garden dinner to feel rustic, or a modern space to become cold. A board without boundaries becomes a storage place for everything you like. A board with boundaries becomes a decision tool. WeddingWire similarly suggests looking at your everyday home and wardrobe preferences, rather than adopting an aesthetic that only feels appealing on a screen. Their guide to choosing a wedding aesthetic is a useful prompt for that conversation.

    • Write three feeling words that describe the guest experience.
    • Write two real-world constraints, such as venue, season, budget, or guest comfort.
    • Write three things that are beautiful but not right for your day.

    Keep this short statement at the top of the board. It gives you a way to test later choices. When you are choosing between two linen colors or deciding whether to add a lounge area, ask which option supports the statement. You do not need unanimous excitement about every object. You need a coherent reason for the decisions that shape the room.

    wedding planning aesthetic vision board with materials and flowers
    Connect atmosphere, materials, guest experience, and execution.

    Build the board in four connected layers

    A single stream of saved images can be inspiring, but it is hard to use in a planning meeting. Build your wedding planning aesthetic vision board in four layers instead. Each layer answers a different question, and together they keep the final look from becoming a collection of unrelated pretty things.

    Layer one: atmosphere

    Atmosphere is the first impression. Include images of light, scale, setting, movement, and emotional energy. These do not have to be wedding images. A restaurant at dusk, a favorite hotel lobby, the particular shade of sky on a memorable trip, or a film still can say more than another photograph of centerpieces. The Knot notes that mood boards can combine wedding and non-wedding references, including architecture, texture, typography, and settings. Its mood-board guide is especially helpful for widening the search beyond wedding galleries.

    Choose only a few atmosphere images. If every image is a close-up, the board will not communicate the scale of the day. If every image is a wide venue shot, it will not communicate intimacy. Aim for a balanced set: one or two location references, one image for lighting, one for the pace of the celebration, and one that simply makes both of you say, “That feels like us.”

    Layer two: materials and visual language

    Now look closer. This layer includes color relationships, texture, shape, typography, floral movement, and finishes. A palette is more useful when it is described as a relationship rather than a row of swatches. Instead of “green, cream, and gold,” try “soft green against warm ivory, with aged brass only in small moments.” That sentence tells a stationer, rental company, and florist more about proportion and mood.

    Choose a few materials that make the aesthetic tangible: matte paper, cut glass, washed linen, polished wood, stone, silk ribbon, patterned ceramics, or brushed metal. You are not committing to every item in the image. You are identifying the qualities that repeat. This is where a board stops being a generic color palette and starts becoming a design language.

    Layer three: guest experience

    Aesthetic decisions are strongest when they support the way guests move through the day. Add references for arrival, ceremony seating, cocktail hour, dinner, dancing, and farewell. A beautiful tablescape may not suit a dinner meant to feel relaxed and abundant. A dramatic ceremony backdrop may be less important than shade, clear sound, and an easy path for older guests. This layer keeps the design human rather than purely photographic.

    Ask what you want people to notice first, where you want them to linger, and when you want the energy to shift. If the answer is “we want dinner to feel like the heart of the celebration,” then candlelight, table spacing, menu style, and music level belong on the board. If the answer is “we want guests to explore the grounds before dancing,” then signage, lounge placement, lighting, and the transition between spaces matter more than another specialty linen.

    Layer four: execution clues

    The final layer answers the question vendors quietly ask: what exactly are we meant to do with this? Add a few references that show an achievable translation of the atmosphere and materials. A close-up of gathered, seasonal-looking flowers can help a florist understand movement. A photo of simple ink-on-paper menus can help a stationer understand restraint. A candlelit table with clear place settings can help a rental company understand the balance between texture and practicality.

    Keep each image annotated with a short note: “light, not flowers,” “shape of the menu, not the color,” or “the welcome feeling, not the furniture.” Junebug Weddings recommends narrowing a broader collection to a concise selection before pulling recurring colors and creating a shareable board. Its five-step approach supports this same edit-first process.

    wedding planning aesthetic vision board reviewed with planner
    A visual brief helps turn preferences into clear decisions.

    Turn visuals into a decision-ready design brief

    Once the four layers are visible, add a small written brief beside the images. This is the part that makes your board practical. It does not need design-school language. It needs clear preferences that can survive a vendor call, a budget review, and an ordinary busy Tuesday.

    • Overall feeling: Write your three feeling words and one sentence about the guest experience.
    • Palette direction: Name the dominant colors, supporting colors, and what should remain neutral.
    • Materials: List three to five textures or finishes that matter.
    • Priority moments: Identify where you want to invest visual attention, such as ceremony, dinner, or entrance.
    • Not for us: List the motifs, colors, or formality cues you want to avoid.

    Next, turn each important image into one of three labels: inspiration, direction, or decision. Inspiration means you like the feeling but have not chosen an application. Direction means you want a vendor to propose options in that spirit. Decision means you have approved a specific choice, such as ivory stationery with a dark green type treatment or low, garden-style arrangements in bud vases. The labels prevent an old saved image from quietly turning into a commitment.

    Give every decision an owner and a next step. “Florals: direction, ask florist for a proposal that uses movement and negative space.” “Lighting: decision, add warm table candles after venue confirms open-flame policy.” “Stationery: inspiration, collect three typography examples before meeting the designer.” This is a natural place for The Wedding Command Center or another shared planning home: use it to keep the board linked to active decisions, responsibilities, and questions instead of treating it as a separate piece of décor.

    The written brief should be editable. Your venue may change. Your guest count may change. A wonderful floral proposal may reveal a detail you had not considered. The goal is not rigidity. It is to know which changes are thoughtful refinements and which changes pull the celebration away from what you actually want.

    wedding planning aesthetic vision board translated to reception table
    Test the design against the venue, light, and guest experience.

    Use the board without letting it overrule reality

    The fastest way to make a board frustrating is to treat every image as a requirement. Images are evidence of preference, not a shopping list. Before you carry a visual idea into a contract or purchase, run it through four checks: venue, budget, guest experience, and maintenance.

    Venue comes first because architecture, light, restrictions, and logistics affect what will make sense. A mood board full of candlelit, low-ceiling dinner scenes may not translate to an afternoon tent reception. That does not mean you must abandon the mood. It means you may translate it through layered textiles, shaded seating, or a later transition into warmer lighting. Ask what the image is accomplishing, then find the venue-appropriate version of that effect.

    Budget is not an aesthetic failure. It is a design parameter. If an image depends on hundreds of individual floral arrangements, identify whether the feeling comes from the flower count, the vessel, the color repetition, or the candlelight around it. Often you can preserve the essential visual language by choosing fewer but more intentional moments. Keep a priority list so that the elements you care about most receive attention before lower-impact extras.

    Guest experience deserves equal weight. Consider sightlines, accessibility, comfort, noise, and movement. A ceremony setup should let people see and hear. A long dinner table should still let servers move comfortably. A dark dance floor may look dramatic in photographs but needs safe paths and usable signage. These are not compromises that dilute the aesthetic. They are choices that allow people to enjoy it.

    Finally, think about maintenance. Ask who will set up, move, light, replenish, or remove the element. If the answer is unclear, the idea is not ready. The best visual choices are beautiful because they are well supported, not because someone tries to recreate a photo at the last minute.

    How to share the board with each vendor

    Do not send every vendor the same giant link and hope they find what matters. Give each person a focused view plus the short overall brief. Your florist needs images that explain color, scale, movement, and vase style. Your stationer needs typography, paper feel, formality, and the places where printed pieces will appear. Your rental company needs table shape, chairs, linens, glassware, and the density of the place setting. Your photographer needs the emotional pace, light, and moments you value most.

    In each conversation, explain why you chose an image. “We like how open the center of this table feels,” is more useful than “We want this exact table.” “We love the soft contrast, but our room is darker,” gives a florist or planner room to solve the right problem. Vendors bring technical knowledge that a board cannot provide, so invite them to point out where a reference may not fit your conditions.

    Bring the board to venue visits and ask practical questions. What lighting is included? Which surfaces can hold candles? What is already visually prominent? Where do guests enter? Which furniture must remain? Aesthetic planning becomes easier when you understand the space early, and it becomes less expensive when the design grows from what the venue already offers.

    Set a review point after each major decision. Once the venue, floral direction, stationery, and rentals are moving, look at the board again. Remove references that no longer fit and mark the decisions that are final. A board should become quieter as the plan becomes clearer. That calm is a sign that it is doing its job.

    Sources and methodology

    This guide draws on wedding-planning resources that describe mood boards as a tool for clarifying a couple’s preferences and communicating with vendors. The process here adds a decision layer so that an aesthetic board connects to budget, venue, guest experience, and ownership. Useful starting references include Zola’s overview of wedding vision boards, Junebug Weddings’ advice on using inspiration, and WeddingWire’s discussion of inspiration overload.

    wedding planning aesthetic vision board shared with florist
    Tell vendors why an image matters, not only what it shows.

    FAQ

    What should go on a wedding planning aesthetic vision board?

    Include atmosphere, materials, guest experience, and a few execution examples. Add a short statement of the feeling you want, the colors and textures that repeat, your priority moments, and clear boundaries about what does not suit the celebration.

    How many images should a wedding vision board have?

    Use enough images to show the full experience, but few enough that a vendor can identify the pattern. A concise board is usually more useful than a large pin collection. Start broad, then edit until every remaining image has a job.

    Should we make one board or separate boards for each vendor?

    Make one master board for the overall aesthetic, then create focused views for florals, stationery, rentals, and photography. Each vendor should see the shared feeling plus the references that relate to their work.

    When should we create our wedding aesthetic vision board?

    Create it early, after you have discussed priorities and before you make many visual commitments. Refine it after the venue is confirmed, because the space, light, and restrictions will affect how the aesthetic translates.

    What if we like different wedding styles?

    Start with the feeling each of you wants guests to have, then identify the qualities you share. You do not need to merge every favorite image. Use the board to find a common visual language and allow each person a few meaningful details within it.

    How do we keep a wedding board from becoming overwhelming?

    Separate inspiration from approved decisions, label each important idea with a next step, and review the board at planned points rather than adding to it every day. If a new image does not support your feeling statement or solve a real planning question, leave it out.

  • Wedding Planning Aesthetic: A Practical Guide

    Wedding Planning Aesthetic: A Practical Guide

    A wedding planning aesthetic is more useful than a collection of pretty pictures. It gives you a shared visual language for making decisions when the choices begin to multiply. Instead of asking whether every centerpiece, invitation, dress detail, or rental is beautiful on its own, you can ask whether it belongs to the atmosphere you are creating together.

    The best aesthetic is not a rigid theme or a copy of a wedding you saved online. It is a practical description of how you want the day to feel, what you want guests to notice, and which visual details will make the celebration feel like yours. This guide walks through a simple process for turning that feeling into a usable plan for your venue, color palette, vendors, and budget.

    wedding planning aesthetic vision board with warm neutral wedding details
    Start with the feeling you want your wedding to create.

    Start with the feeling, not the color palette

    Color is often the first thing couples try to choose, but it is rarely the complete answer. A palette can be beautiful and still feel disconnected from the experience you want. Begin with three to five words that describe the emotional direction of the wedding. You might choose welcoming, candlelit, garden-inspired, relaxed, artful, modern, coastal, intimate, or celebratory. These words become a filter for every later decision.

    Try completing this sentence: “We want our guests to feel…” Then write the first honest answers without editing them. Maybe you want guests to feel as if they have entered a warm dinner party, a quiet garden, a joyful family gathering, or a thoughtful gallery opening. This exercise moves the planning conversation away from trend names and toward an experience you can actually design.

    Next, separate your words into three categories:

    • Atmosphere: the emotional mood, such as relaxed, romantic, energetic, or intimate.
    • Visual language: the shapes, colors, materials, and styling references that express that mood.
    • Guest experience: the moments you want people to remember, such as a long dinner, dancing under lights, or a ceremony surrounded by flowers.

    This distinction keeps the aesthetic from becoming surface decoration. If “warm and welcoming” is central, that may lead to a generous seating plan, comfortable lounge furniture, soft lighting, and a meal that encourages conversation. The same phrase may influence your stationery, your ceremony music, and the way your coordinator plans transitions. The aesthetic becomes a planning tool rather than a mood board that sits unused.

    Choose one primary direction and two supporting qualities. For example, your primary direction might be modern garden, supported by intimate and slightly playful. This is more useful than listing ten styles at once. A focused aesthetic leaves room for personality while giving vendors enough information to make recommendations that feel related.

    wedding planning aesthetic vision board with color swatches and fabric
    Edit your inspiration until the patterns become clear.

    Build a focused wedding vision board

    A vision board should show patterns, not every possibility. Start with a small collection of images that capture the atmosphere, then add references for the parts of the day that need practical decisions. Include the venue or a similar architectural setting, ceremony structure, tablescape, floral shape, attire, stationery, lighting, cake, and one or two guest-experience details. You can also include non-wedding references such as a landscape, painting, room, fabric, or restaurant that expresses the mood more accurately than a wedding photograph.

    Use a two-stage process. In the first stage, collect freely for a limited amount of time. Save anything that creates a clear reaction, but avoid explaining every image. In the second stage, edit firmly. Remove images that only work because they show a different venue, season, budget level, or event size. A wedding planning aesthetic becomes clearer when you study what repeats across the remaining references.

    Look for repeated visual signals

    Count the details that appear more than once. Are you drawn to low, loose flowers or tall sculptural arrangements? Do you repeatedly save warm ivory, olive, and brown, or do you prefer clear white with saturated color? Are your favorite spaces full of texture, clean lines, vintage details, or open negative space? These repetitions are stronger evidence than a label such as “romantic” or “classic.”

    Choose three to six recurring signals and write them in plain language. A useful list might be soft natural light, unstructured florals, creamy neutrals, handwritten details, long-table dining, and subtle vintage objects. This list is easy for a florist, planner, stationer, photographer, or rental company to understand.

    Give the board boundaries

    Decide how many images belong in the final board. There is no universal number, but a compact board is easier to share and remember than a feed that never ends. Give each part of the wedding a role, and remove duplicates that communicate the same idea. If five images all show the same bouquet, keep the one that best represents the shape, color, and scale you want.

    Add short notes to clarify what you are borrowing from each image. Write “the candlelight,” “the relaxed spacing,” “the paper texture,” or “the contrast between the old building and modern tables.” Do not imply that the vendor should copy the entire photograph. Notes turn inspiration into direction while leaving room for professional interpretation.

    A planning resource such as The Wedding Command Center can be useful at this stage when you need to keep visual decisions connected to tasks, conversations, and deadlines. The point is not to make the board more complicated. It is to give the aesthetic a practical home so it can guide the rest of the plan.

    wedding planning aesthetic reception table in a bright architectural venue
    Let the architecture guide your palette and materials.

    Translate the aesthetic into venue, palette, and materials

    Your venue is part of the aesthetic whether you planned for it or not. Study its permanent colors, flooring, ceiling height, windows, light quality, architectural details, and existing furniture. Then decide whether your design should harmonize with those elements, create contrast, or visually soften them. A bright historic room may support saturated flowers and darker wood, while a modern white space may need warm textiles, layered lighting, or organic shapes to keep it from feeling stark.

    Photograph the venue at the time of day when your event will happen. Look at the images without filters and note where the eye naturally travels. This helps you place the strongest design moments where they will be visible. A beautiful ceremony installation may disappear against a dramatic background, while a simple arrangement may be enough when the architecture already carries the scene.

    Choose a layered palette

    A useful wedding palette often has a foundation, a supporting family, and a restrained accent. The foundation may come from the venue or from a neutral you genuinely like. Supporting colors can appear in flowers, linens, paper, attire, or small objects. The accent should be used intentionally rather than scattered everywhere. You do not need to assign every color to every category.

    • Foundation: the largest visual fields, such as ivory, sand, stone, soft green, or a venue color.
    • Supporting tones: colors that create depth across florals, textiles, stationery, and attire.
    • Accent: a smaller note that adds definition, such as black ink, brass, berry, blue, or a warm metallic.

    Test the palette in materials, not only digital swatches. Colors change on paper, linen, velvet, ceramic, and flowers. Ask your florist what is locally available in the season, and ask your rental company which linens and tabletop pieces exist in your price range. A palette that works beautifully on a screen may feel flat when all of its colors have the same finish.

    Repeat materials with restraint

    Materials can make an aesthetic feel consistent without making it look themed. If texture is important, repeat two or three materials, such as linen, handmade paper, wood, glass, stone, or brushed metal. Use them at different scales. A paper texture might appear in invitations, place cards, and menus, while wood might be limited to signage and a bar detail.

    Think about contrast as carefully as repetition. Smooth stationery with loose florals creates one kind of mood. Rough paper, clean typography, and structured flowers create another. If every surface is equally ornate, the eye has nowhere to rest. Leave some quiet areas so the important moments feel intentional.

    Let the season influence the translation without dictating it. A summer wedding does not have to be bright, and a winter wedding does not have to be dark. Season can guide flower availability, light, fabric weight, and food, while your main words keep the visual direction personal.

    wedding planning aesthetic vendor consultation with flowers and linen samples
    Turn your visual direction into a clear vendor brief.

    Make the aesthetic usable for vendors and budget decisions

    Aesthetic decisions become much easier when you rank them. Create three lists: non-negotiables, strong preferences, and flexible details. Non-negotiables might include warm candlelight, a long dinner, a specific floral feeling, or a venue view that must remain visible. Strong preferences could include a certain paper stock, lounge seating, or a color family. Flexible details are elements you can change when availability or budget calls for it.

    Then assign an emotional value to each major design category. Ask which choices will most affect how the day feels in person and in photographs. Often, lighting, layout, ceremony backdrop, guest comfort, and the scale of the floral plan matter more than small favors or a long list of decorative objects. This ranking helps you spend where the aesthetic will actually be experienced.

    Create a one-page vendor brief

    Before sending a large folder of inspiration, make a one-page summary. Put the primary aesthetic phrase at the top, followed by three mood words, the palette, recurring materials, and the guest experience you want to prioritize. Add a short “please avoid” section. For example, you may want to avoid overly symmetrical arrangements, bright white uplighting, rustic props, or anything that blocks conversation across the table.

    • One sentence describing the feeling of the day.
    • Three to six visual signals that should repeat.
    • A palette with practical material notes.
    • Two or three non-negotiables.
    • A short list of details that are flexible.
    • Selected images with notes explaining what each image contributes.

    Ask each vendor to reflect the brief back in their proposal. You are not testing whether they use the same vocabulary. You are checking whether they understand the priorities. A florist may translate “airy and garden-inspired” into movement and seasonal flowers, while a stationer may translate it into paper texture and generous spacing. Good collaboration allows different vendors to interpret the same direction without making the wedding look disconnected.

    Use a decision test when new ideas appear

    New ideas will keep arriving after the board is finished. Before adding one, ask four questions: Does it support the emotional goal? Does it work with the venue? Does it repeat or thoughtfully contrast an existing signal? Is it worth the budget, time, or complexity it introduces? If the answer is no to most of these, save the idea in a separate inspiration folder rather than changing the whole direction.

    Do not confuse consistency with sameness. A wedding can have a restrained palette and still include a playful cake, an unexpected song, colorful shoes, or a sentimental object. Personal details are strongest when they are chosen because they matter to you, not because they match every other item.

    Common wedding planning aesthetic mistakes to avoid

    The first mistake is choosing a label before understanding the feeling. Words like timeless, boho, modern, or romantic can be useful starting points, but they mean different things to different people. Translate the label into specific evidence: colors, shapes, materials, lighting, and guest moments. The second mistake is building the aesthetic around one photograph. A single image may show a perfect venue, season, or budget that cannot be reproduced. Look for a pattern across references instead.

    Another common problem is asking the palette to do all the work. Color cannot fix a layout that makes conversation difficult or lighting that feels harsh. Plan the experience first, then use visual choices to support it. Also watch for too many competing priorities. If you want a formal ceremony, a relaxed dinner, a colorful party, a minimalist room, and a vintage garden all at once, decide which feeling leads and which ones become supporting notes.

    Finally, avoid changing direction every time you see a new trend. A wedding planning aesthetic should make decisions calmer over time. Review your brief when you are unsure, compare the new idea with your priorities, and keep the elements that feel meaningful. The goal is a celebration with a recognizable point of view, not a performance of perfect visual consistency.

    wedding planning aesthetic candlelit dinner with long table and organic flowers
    Design the feeling guests will remember after dinner begins.

    FAQ

    What is a wedding planning aesthetic?

    A wedding planning aesthetic is the connected visual and emotional direction for your celebration. It includes the atmosphere you want guests to feel, plus the colors, materials, shapes, lighting, venue cues, and details that support that experience. It is broader than a theme and more useful than a list of trends.

    When should we choose our wedding aesthetic?

    Begin exploring it before making many design commitments, then refine it after you understand your venue, season, guest count, and budget. You do not need a finished board before booking a venue, but the venue should become part of the final direction rather than an afterthought.

    How many colors should a wedding palette include?

    There is no required number, but a foundation, two or three supporting tones, and one accent is a practical place to start. Test colors in real materials and decide where each one appears. A palette feels cohesive because of proportion and repetition, not because every item contains every color.

    How do we keep a vision board from becoming overwhelming?

    Collect freely first, then edit to remove duplicates, incompatible settings, and images that only appeal because of a different budget or season. Keep the final board compact, group references by purpose, and add notes that explain the specific detail you want to carry forward.

    How do we explain our aesthetic to wedding vendors?

    Share a one-page brief with your primary direction, mood words, visual signals, palette, non-negotiables, flexible details, and selected images. Explain what you like about each image rather than asking a vendor to recreate it. This gives professionals enough direction to interpret the aesthetic for their specialty.

    Can our wedding aesthetic include more than one style?

    Yes. Choose one leading feeling and let other styles support it. For example, a modern garden wedding can include vintage stationery or a playful cake if those details reinforce the main experience. Limiting the number of competing priorities helps the combination feel intentional rather than accidental.

  • Wedding Planning Templates: Which Format Fits You?

    Wedding Planning Templates: Which Format Fits You?

    The best wedding planning templates are not the ones with the most tabs, prettiest colors, or longest task lists. They are the ones that make your next decision obvious. A couple planning an intimate dinner needs a different system from a couple coordinating a destination weekend, a large guest list, or several cultural events. The right template should match the way you think, the people who need access, and the information your vendors actually need.

    This guide compares the main types of wedding planning templates: printable checklists, spreadsheets, digital workspaces, table-based trackers, and all-in-one dashboards. Use it to choose one primary source of truth, decide which supporting templates are genuinely useful, and avoid the common trap of collecting files instead of making decisions. The Wedding Command Center can also serve as a useful planning resource when you want a shared place for priorities, tasks, and progress. Whatever system you choose, clarity matters more than the brand name.

    wedding planning templates comparison at a shared planning desk
    A couple compares wedding planning templates before choosing a shared system.

    There is no universal winner. A simple four-tab spreadsheet may be perfect for one couple and frustrating for another. Your goal is to choose a format that you will update consistently, that keeps sensitive information reasonably protected, and that can hand accurate information to the next person when planning becomes busy.

    Start with the decision you need the template to support

    Before downloading anything, name the planning problem. Do you need to see every task by month? Do you need to know whether the budget is drifting? Are you trying to keep addresses and RSVP answers accurate? Do you need a vendor record that shows contracts, balances, arrival times, and open questions? These are related problems, but they are not the same problem.

    Many couples begin with an attractive planner and only later discover that it does not support the information they care about. A printable checklist may show when to order invitations, but it cannot calculate the cost of postage or filter guests who have not replied. A spreadsheet may calculate totals beautifully, but it may feel too abstract when you need an inspiring overview of the whole celebration. A digital workspace may be easy to share, but it can become cluttered if every idea is treated as an active task.

    • Choose a checklist when your main need is sequence and momentum.
    • Choose a spreadsheet when your main need is numbers, filters, and flexible records.
    • Choose a digital workspace when several people need shared access and linked notes.
    • Choose a table tracker when you want a simple database for vendors, guests, or tasks.
    • Choose an all-in-one dashboard when you value one overview and are willing to learn the system.

    Write down your non-negotiables before you compare templates. You may need mobile access, offline access, printing, partner collaboration, a currency other than US dollars, or a place for several connected events. You may also want to avoid account creation, email gates, subscriptions, or systems that store guest information outside your preferred tools. A template is only helpful when its practical conditions fit your life.

    wedding planning templates budget spreadsheet with calculator and contracts
    A budget-focused wedding planning template helps a couple review costs and contracts.

    Printable wedding planning templates: best for a visible, low-tech plan

    Printable wedding planning templates are usually checklists, timelines, budget worksheets, vendor pages, or planning binders. Their main strength is visibility. You can bring a page to a venue tour, mark questions during a fitting, or put the current priorities on a kitchen table. For couples who think well on paper, a printed page can make a large project feel finite.

    A printable checklist works particularly well at the beginning of planning. It gives you a sequence without requiring you to build a system from scratch. Look for a checklist that starts with budget, guest range, date strategy, and venue decisions before moving into details. That order matters because later choices depend on earlier ones. A list that begins with favors and signage may be attractive, but it does not protect you from the decisions most likely to affect the whole plan.

    Printable templates also work well for a final wedding-day packet. You can print the timeline, vendor contacts, floor plan, ceremony order, delivery notes, and emergency decisions for the coordinator or trusted helper. Keep the printed packet current, and label it with the date it was last reviewed. An outdated printout can create more confusion than no printout at all.

    The weakness is that paper does not calculate, sync, or remind you automatically. If a guest count changes, you must update every affected page. If a vendor payment moves, someone has to notice and rewrite the balance. Paper is therefore strongest as a meeting and handoff layer, not always as the only master record.

    • Best for: visual thinkers, venue visits, meetings, and final handoffs.
    • Watch for: fixed timelines that do not fit short or long engagements.
    • Add: a clear owner, last-updated date, and place to record follow-up actions.
    wedding planning templates guest list with RSVP cards and tablet
    Guest-list and RSVP details are easier to manage in a clear shared template.

    Spreadsheet wedding planning templates: best for connected details

    Spreadsheets remain popular because they can be simple or highly customized. A useful wedding planning spreadsheet usually includes a budget, guest list, vendor tracker, and timeline. Larger workbooks may add seating, contracts, payments, registry, stationery, attire, ceremony details, travel, and a wedding-day schedule. The advantage is not the number of tabs. It is the ability to sort, filter, calculate, and keep related details together.

    Start with the smallest structure that solves your current problem. A four-tab workbook can be enough: Budget, Guests, Vendors, and Timeline. In the budget tab, include category, item, estimated cost, actual cost, deposit paid, balance due, vendor, payment date, and notes. In the guest tab, track household, names, address, invitation status, RSVP, meal choice, plus-one, accessibility needs, and notes. In the vendor tab, include service, contact, contract status, deposit, balance, arrival time, deliverables, and next question.

    The timeline tab should do more than list dates. Add a phase, task, owner, priority, dependency, status, and proof of completion. A task such as “book photographer” is easier to manage when it also says who is comparing proposals, what must be decided first, and where the signed agreement is stored. The difference between a list and a planning system is often the context around each task.

    Formulas can help, but they should remain understandable. Use totals for estimated and actual costs, a balance calculation, an RSVP count, and perhaps a percentage of tasks completed. Avoid building a workbook so elaborate that only one person understands it. If a formula breaks, a partner cannot tell whether the budget is accurate, or a vendor needs an answer immediately, complexity has become a liability.

    Spreadsheets are especially strong when the guest count changes often. One update can inform catering, rentals, seating, transportation, stationery, and accommodation planning. They are also useful when you need to compare venues by total cost rather than rental price alone. Add taxes, service charges, required rentals, overtime, transportation, and contingency so the comparison reflects the actual experience.

    • Best for: budgets, RSVP tracking, vendor comparisons, and flexible timelines.
    • Watch for: duplicate copies, unclear ownership, and sensitive data shared too widely.
    • Add: a short “how to use this file” note and a weekly review routine.
    wedding planning templates for comparing vendors and wedding contracts
    A couple reviews vendor contracts and timeline notes with a planner.

    Digital workspaces and table trackers: best for collaboration

    Digital workspaces combine pages, lists, databases, files, and comments. Table-based tools focus on structured records with customizable fields. Both can be helpful when couples, planners, family members, and vendors need different views of the same information. You might keep a master vendor table, a filtered view of unpaid balances, and a short list of decisions that need the couple’s attention this week.
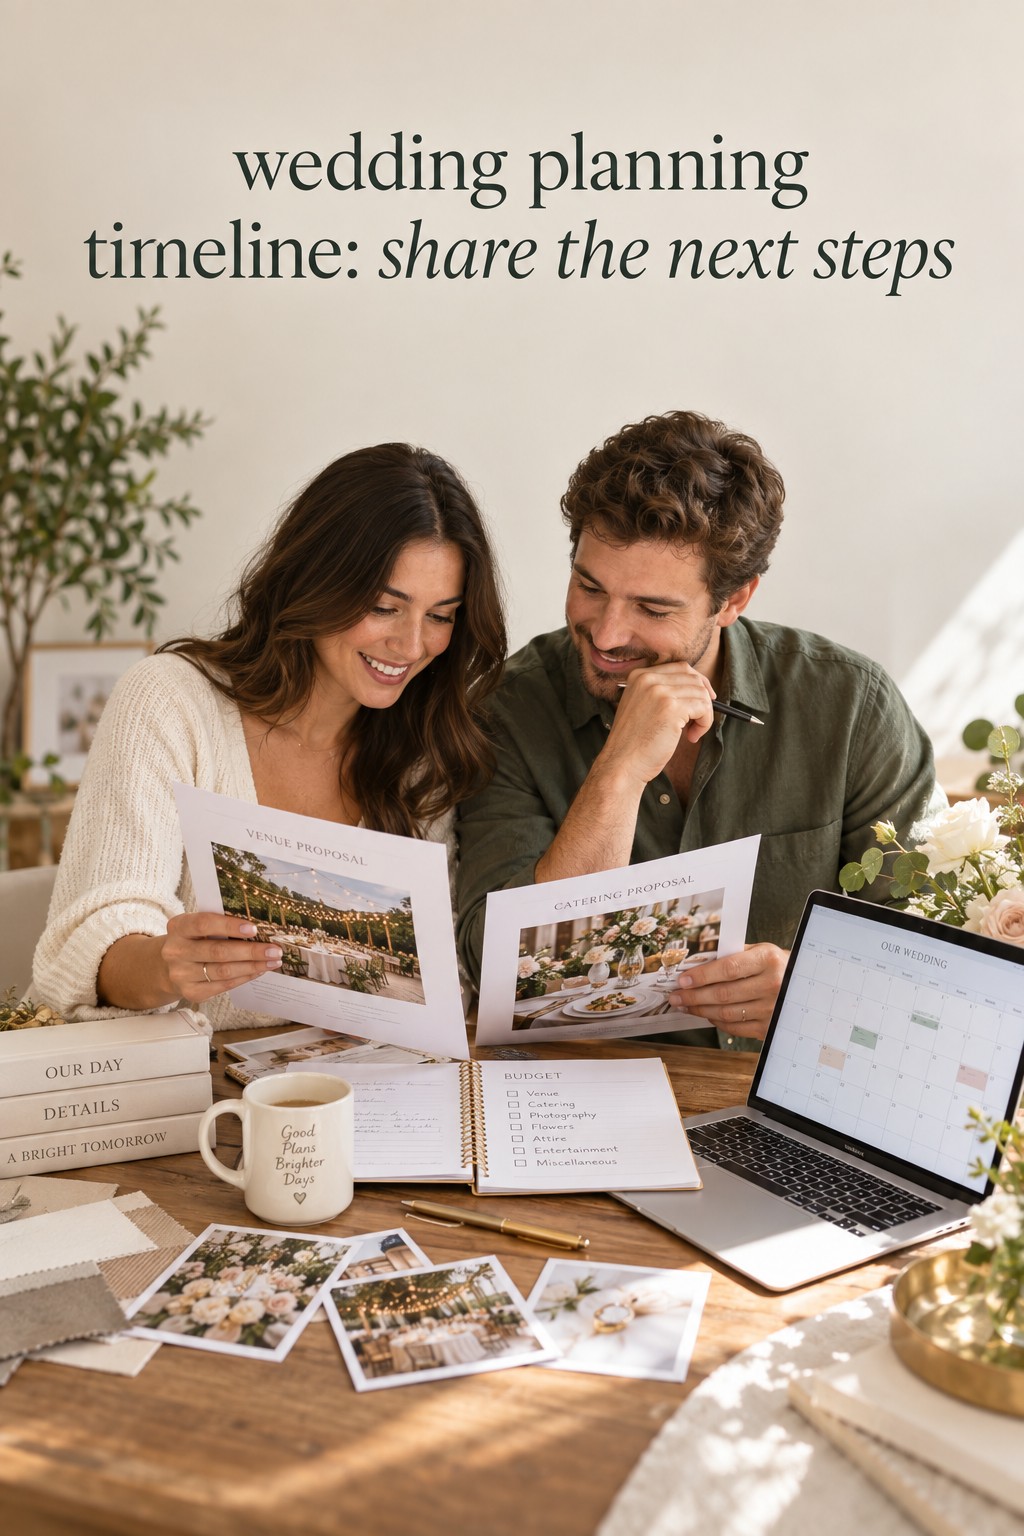
    The strongest reason to use a shared workspace is not that it looks modern. It is that responsibility becomes visible. Each task can have an owner and a status. Each vendor can have a contract link and next contact date. Each guest record can show what is missing. Shared visibility reduces the risk that one partner becomes the only person who knows where everything lives.

    These tools are also useful for information that does not fit neatly into a spreadsheet cell. Add venue notes, questions from a site visit, inspiration grouped by decision, ceremony wording, transportation maps, or a written explanation of family expectations. Keep inspiration separate from approved decisions so a saved image does not accidentally become a commitment.

    The trade-off is maintenance. A workspace with too many pages, tags, views, and color codes can create the feeling of progress without actual decisions. Start with a home page that answers four questions: What is urgent? What is blocked? What has changed? Who owns the next action? Add structure only when it solves a repeated problem.

    Think carefully about permissions and privacy. Guest addresses, phone numbers, dietary needs, payment records, and contracts should not be exposed to every collaborator by default. Create a planning view for the couple, a logistics view for the coordinator, and only the vendor information each supplier needs. A shared system should make access intentional rather than automatically broad.

    • Best for: multiple collaborators, notes, linked records, and responsibility tracking.
    • Watch for: overbuilding, notifications, and unclear privacy settings.
    • Add: a simple weekly dashboard and separate views for sensitive information.

    All-in-one wedding planning templates: best for a complete overview

    All-in-one wedding planning templates promise to bring the project into one workbook or dashboard. They may include budget, checklist, guest list, vendors, payments, seating, registry, ceremony, decor, travel, and day-of details. This format is appealing because it reduces the number of places you need to search. It can also provide a helpful starting structure when you do not want to design your own system.

    Before choosing an all-in-one template, inspect the parts you will actually use. Does it include a guest record that works for households? Can you track both deposits and final balances? Is there a place for contract links and cancellation terms? Can you adapt it to a destination wedding, multi-day celebration, or religious ceremony? Can you remove sections that do not apply? A large template is valuable only when it remains readable.

    Pay attention to the format. A downloadable Excel workbook may work well offline and support detailed calculations. Google Sheets may be easier for live collaboration. A printable binder may be better for meetings and travel. Some templates offer several formats, while others are designed around one platform. Decide where the master record will live before you begin entering information.

    Do not confuse comprehensiveness with completeness. A file can contain hundreds of rows and still fail to tell you who is responsible, what depends on what, or whether a decision is final. Add three columns to any system that feels overwhelming: owner, next action, and status. Those fields turn a collection of information into a working plan.

    An all-in-one system can also become the wrong choice for a small wedding. If you are planning a simple ceremony and dinner, a large workbook may bury the few decisions that matter. Delete unused categories or choose a leaner template. The best system feels proportionate to the celebration, not impressive in a product description.

    • Best for: couples who want one broad overview and a ready-made structure.
    • Watch for: unnecessary tabs, platform lock-in, and an intimidating setup.
    • Add: a short start-here page, clear ownership, and a regular archive of old versions.

    Compare templates by real planning situation

    For a small local wedding, begin with a checklist plus a four-tab spreadsheet. The checklist gives you sequence, while the spreadsheet tracks money, guests, vendors, and timing. You probably do not need separate dashboards for every category. Keep the system light enough that both partners can update it in a few minutes.

    For a large guest list, prioritize a spreadsheet or structured table. You need reliable household records, invitation status, RSVP responses, meal choices, seating information, and accessibility notes. Add filters and validation where they reduce errors. Schedule a weekly guest-data review during the invitation period and make one person responsible for reconciling updates from family members.

    For a destination wedding, choose a system that can connect guests, travel, lodging, transportation, and events. Add arrival dates, hotel information, room-block details, passport reminders when relevant, and a separate schedule for welcome events. Keep guest-facing information separate from private notes, and give vendors only the logistics they need.

    For a short engagement, choose a checklist with dependencies and a compact task tracker. You do not have time to learn an elaborate system for its own sake. Mark tasks as urgent, parallel, or optional. Book the venue and core vendors first, then move attire, stationery, ceremony, and guest logistics forward at the same time where possible.

    For a long engagement, avoid filling every quiet month with invented work. Use a simple timeline, a decision log, and a budget record. Review contracts and savings plans periodically, but let details wait until you have the information needed to make them well. A calm system should create buffer, not pressure.

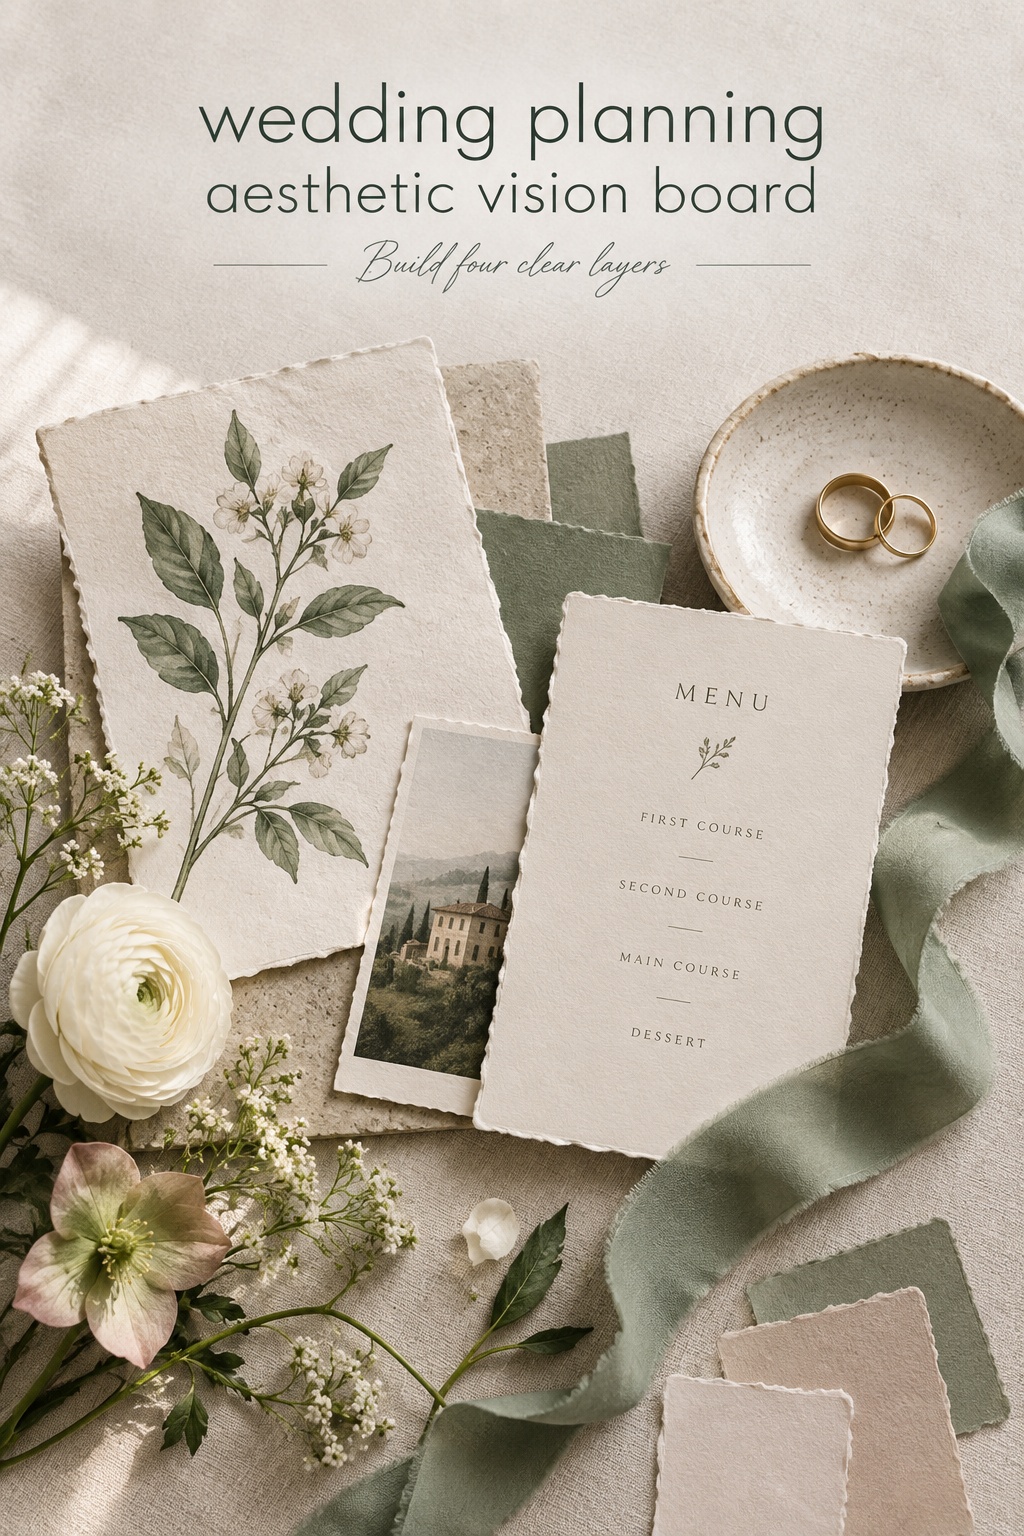
    For a wedding with several cultural or religious events, choose a workspace or workbook that supports multiple dates and separate vendor requirements. Create one master budget, then add event-specific views for guest counts, attire, ceremonies, meals, music, and transportation. Make dependencies explicit so a change in one event does not disappear from the wider plan.

    Build a template system you will keep using

    Choose one master location and name it clearly. Add the wedding date, couple’s names, last updated date, and a short explanation of what the file contains. If there are supporting documents, link them from the master record rather than creating multiple unofficial copies. Old versions should be archived or labeled clearly so a vendor never receives yesterday’s timeline by mistake.

    Set a weekly planning rhythm. During a short meeting, review new information, overdue tasks, blocked decisions, payments due, and the next two weeks. End by assigning owners. Keep inspiration and optional ideas in a separate section so they do not compete with decisions that affect guests or vendors.

    Use a decision log for choices that have consequences. Record the decision, date, reason, budget impact, people affected, and any follow-up. This helps when you revisit a vendor proposal or a family request later. It also makes it easier to explain why the plan changed without relying on memory.

    Test the template with a realistic example before you fill it with final information. Add three guests, one vendor, one deposit, and one changed date. Can you find the current answer quickly? Can your partner understand the status? Can you print the information a coordinator needs? A ten-minute test can reveal a system problem before it becomes a wedding-week problem.

    Finally, remove what you do not need. A planning template should reduce mental load, not display every possible wedding task. Keep the categories that help you make decisions, communicate with vendors, protect the budget, and care for your guests. Everything else can remain optional or disappear.

    wedding planning templates wedding day handoff with timeline and floor plan
    A final wedding planning handoff keeps the timeline, contacts, and floor plan together.

    FAQ

    What should a wedding planning template include first?

    Start with budget, guest range, date options, venue, core vendors, and a timeline of dependencies. These decisions affect most of the later planning. Add design details after the foundation is clear.

    Are spreadsheet wedding planning templates better than printable checklists?

    Neither is automatically better. Spreadsheets are stronger for calculations, filters, and changing guest or vendor data. Printable checklists are stronger for meetings, visual progress, and final handoffs. Many couples use both, with the spreadsheet as the master record.

    How many tabs should a wedding planning spreadsheet have?

    Use four tabs as a starting point: budget, guests, vendors, and timeline. Add seating, payments, stationery, travel, ceremony, or day-of tabs only when those details become active and need their own view.

    How can we keep wedding planning templates from becoming overwhelming?

    Give every active task an owner, next action, status, and due window. Hide or archive unused sections, separate inspiration from commitments, and review the system once a week instead of constantly reorganizing it.

    What is the best template for a destination wedding?

    Choose a shared spreadsheet or workspace that connects guests, travel, lodging, transportation, multiple events, vendors, and payments. Add guest-facing and private views so personal information is shared only with people who need it.

    Should both partners edit the wedding planning template?

    Both partners should be able to find the current plan and understand the next decisions. They do not need to edit every field equally, but ownership should be visible and neither partner should become the only keeper of contracts, payments, or guest information.

    When should we switch from a simple checklist to a larger system?

    Switch when the checklist no longer answers practical questions about money, guests, vendors, or responsibility. Move the existing information carefully, test the new system, and keep the old file archived until you know the new source of truth works.