Author: admin

  • Wedding Planner Checklist: After the Bookings

    Wedding Planner Checklist: After the Bookings

    A wedding planner checklist becomes especially useful after the big bookings are made. The venue is reserved, the photographer has your date, and the florist has a deposit, yet there are still decisions that nobody can finish for you. Meal choices need checking, ceremony cues need naming, and suppliers need the final information that turns a reservation into a workable event.

    Use this checklist for that middle-to-late planning stage. It separates three questions: Is the service booked? Have we approved the details? Is everything ready for the person who will deliver it? You can use the checks with a professional planner, a coordinator, or your partner. Keep your actual agreements and provider deadlines beside the list, and remove any item that does not belong to your celebration.
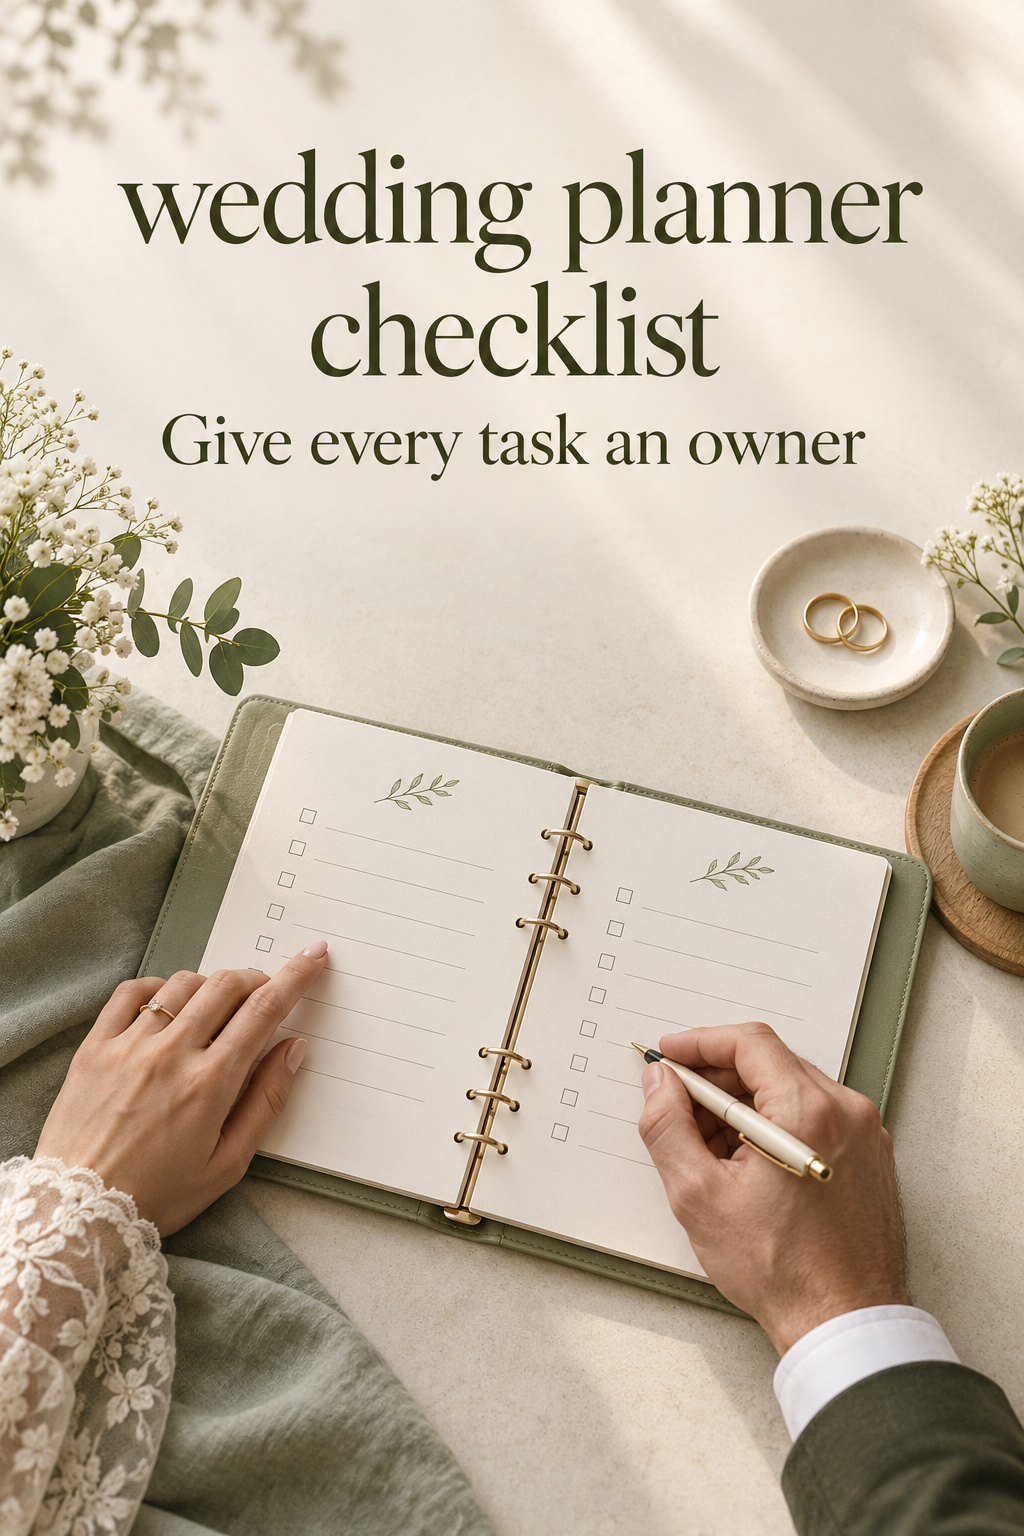
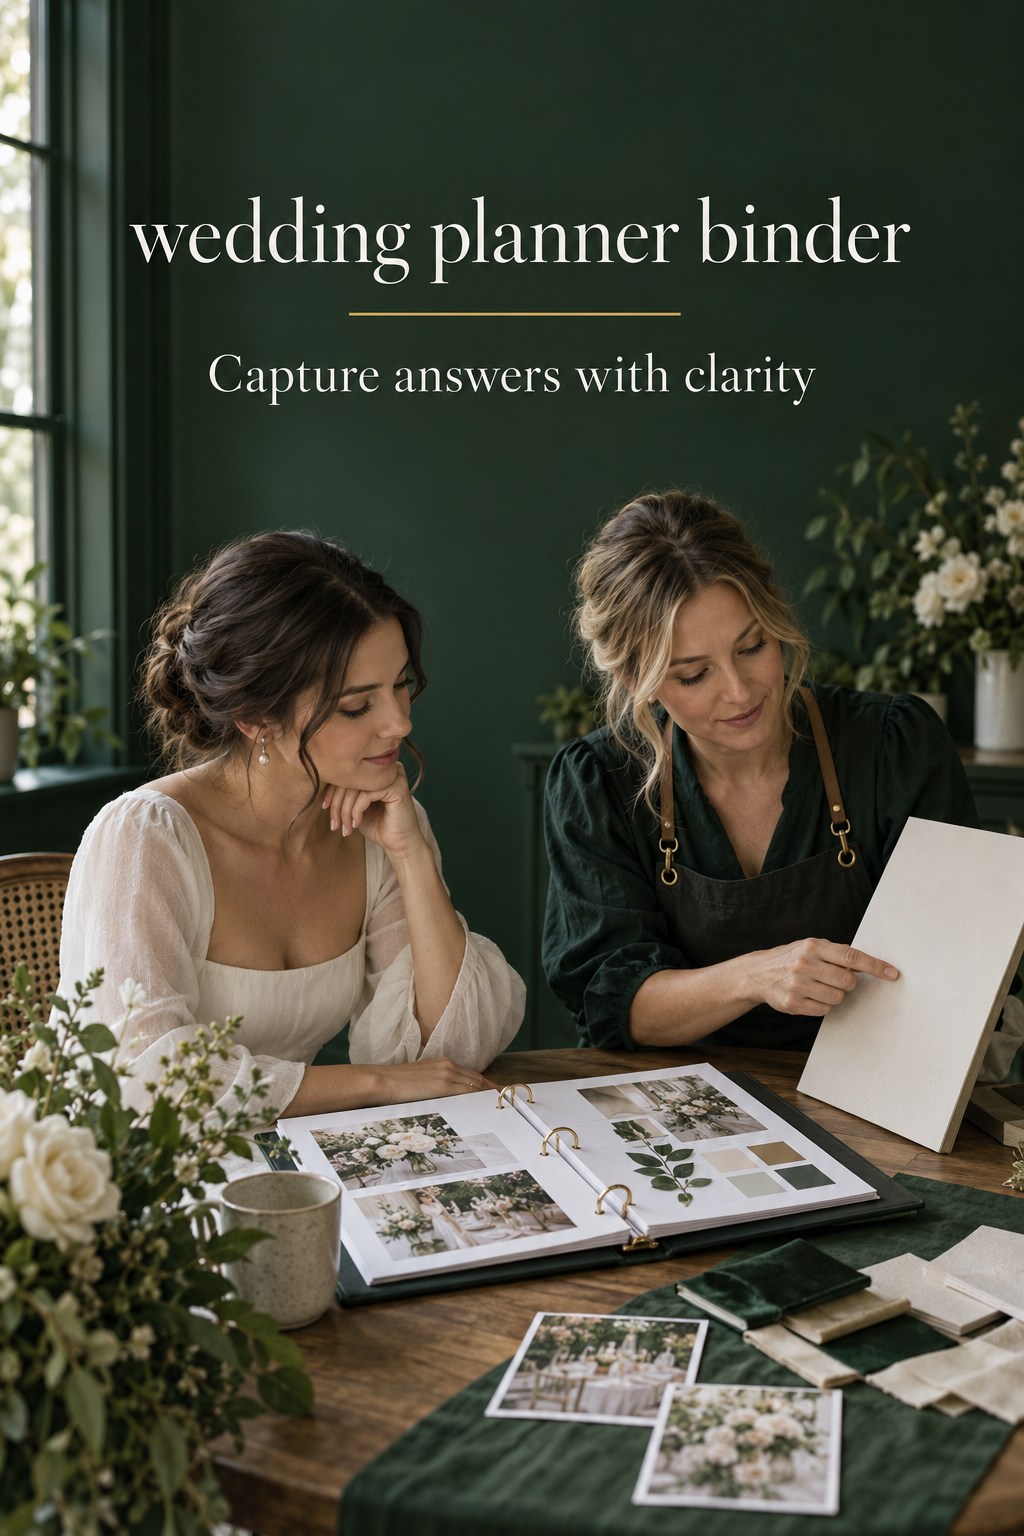
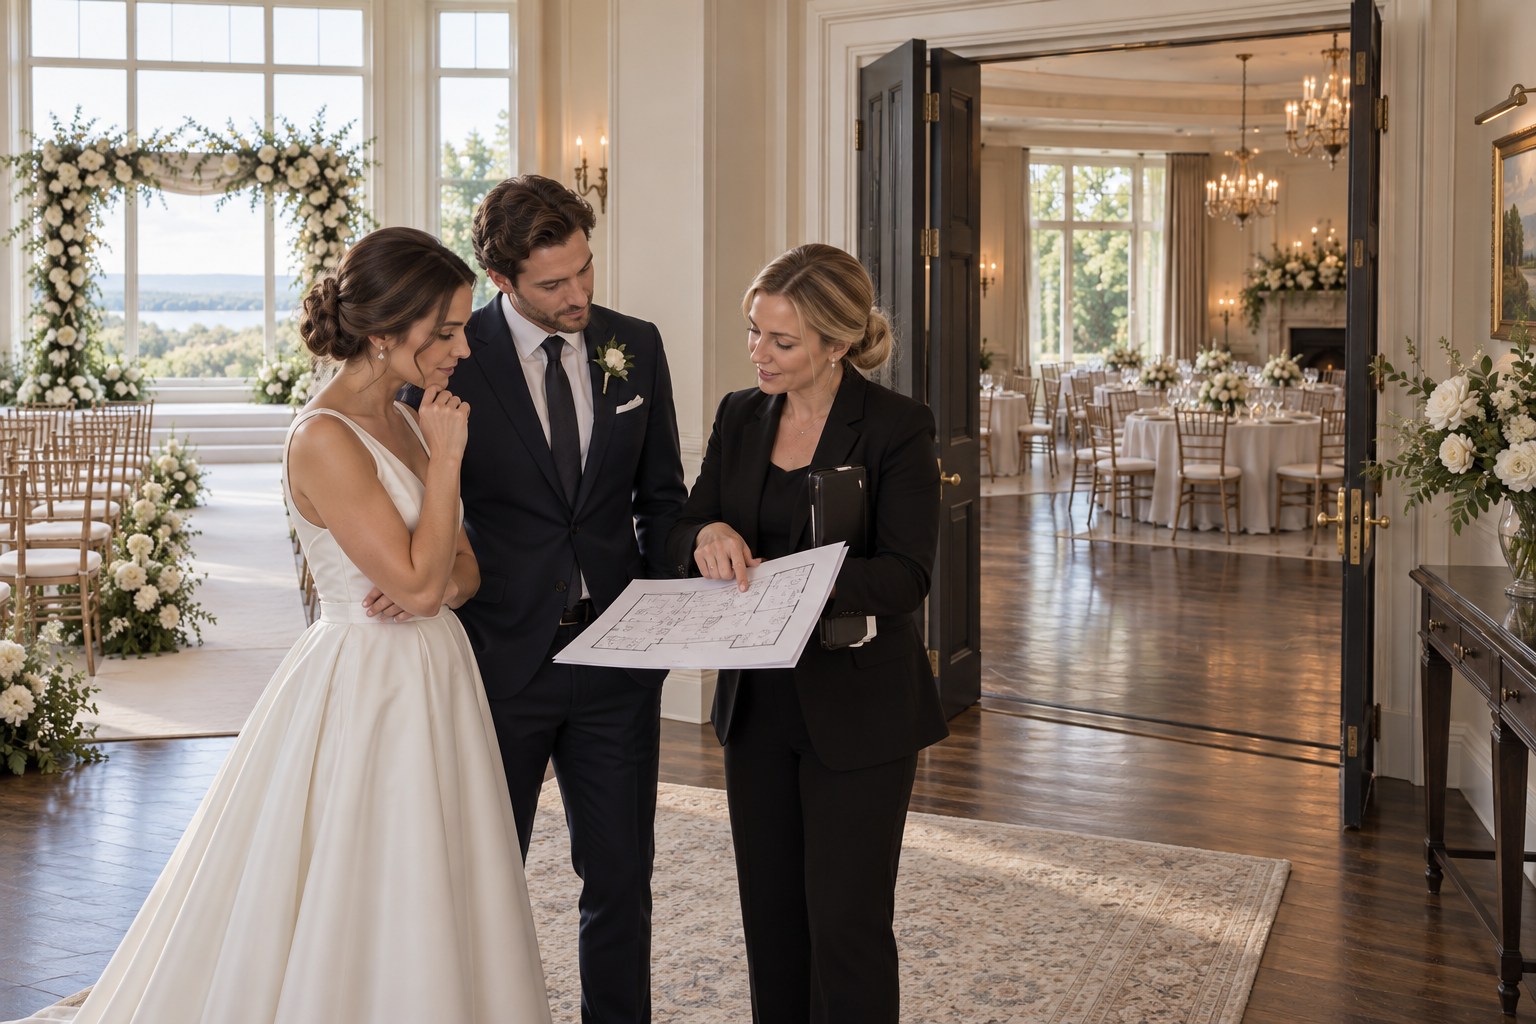
    wedding planner checklist binder reviewed by two partners with rings and a pen
    Give every remaining action a named owner and a clear finish line.

    Build a Checklist That Separates Booked, Approved, and Ready

    Start with three small groups of tasks rather than one enormous box labeled wedding planning. Booked means you have recorded the reservation and its remaining obligations. Approved means the relevant choice has been made and communicated. Ready means the people involved have the information, timing, and materials they need. These are practical labels you can adopt, not industry certifications.

    For example, booking a photographer does not choose your family-photo groups. Approving those groups does not establish where the people will gather. A useful checklist lets you see all three stages without making a paid deposit look like the end of the work. Write separate actions when they require different people or different evidence.

    Give each row a concrete finish line

    You need only five fields to make a row useful: the action, the person doing it, the due date, the present stage, and what will prove it is finished. An evidence note can point to an email reply, an approved list, or a current document. It does not need to copy the whole message into your checklist. Choose a named person who has accepted the task, rather than assigning it to everyone.

    • Action: send the family-photo group list to the photographer.
    • Owner: the partner collecting the family names.
    • Due date: the date agreed with the photographer.
    • Stage: awaiting approval, rather than ready.
    • Finish line: photographer acknowledges the groups and confirms where and when to gather.

    Avoid writing a task so broadly that it never feels complete. Replace sort out food with confirm menu selections, reconcile meal counts, and obtain the caterer’s acknowledgment. You can keep these as sub-items under catering if that feels easier. The point is to make unfinished work visible without turning every tiny action into its own project.

    Also separate a decision from a reminder. Choosing a song is a decision; sending the audio information requested by the musician is an action. Checking the payment deadline is a reminder; paying a balance is an action. A checked reminder does not close the action it was meant to prompt. Use wording that describes the result you actually need.

    Create a small remaining-work inventory

    Scan the services and details you have already chosen. For each one, ask what the next recipient still needs from you. Start with guests, ceremony, food, photography, music, attire, flowers, and any transport you have booked. Then add the specific extra services in your wedding. Do not import a full list of traditions you never intended to include.

    If you still have a foundational decision open, such as the venue, give it its own planning task and keep dependent rows tentative. This article is a review of work after bookings, so it should complement your broader schedule. It cannot supply a date or capacity that you have not confirmed. A short note saying waiting for venue information is more honest than checking the row because you discussed it.

    Keep this inventory wherever you already coordinate planning. If you are considering The Wedding Command Center as a planning resource, use these readiness questions to decide whether it fits the way you work. You do not need to move your records just to use this checklist; the questions work on paper or in your existing shared file.
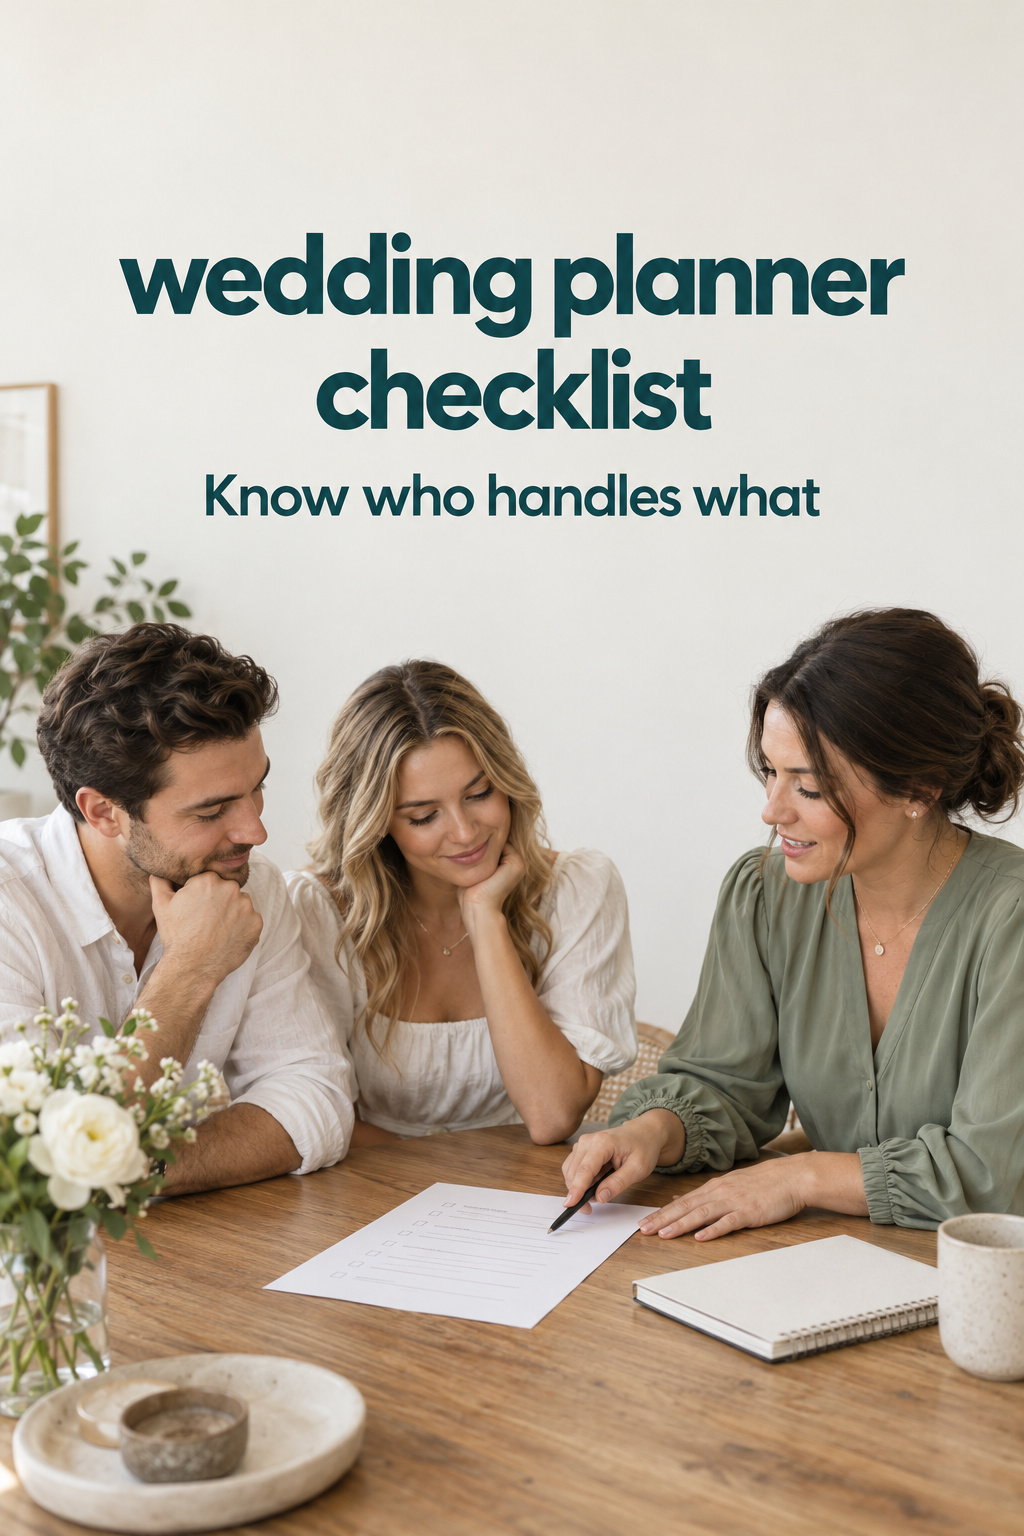
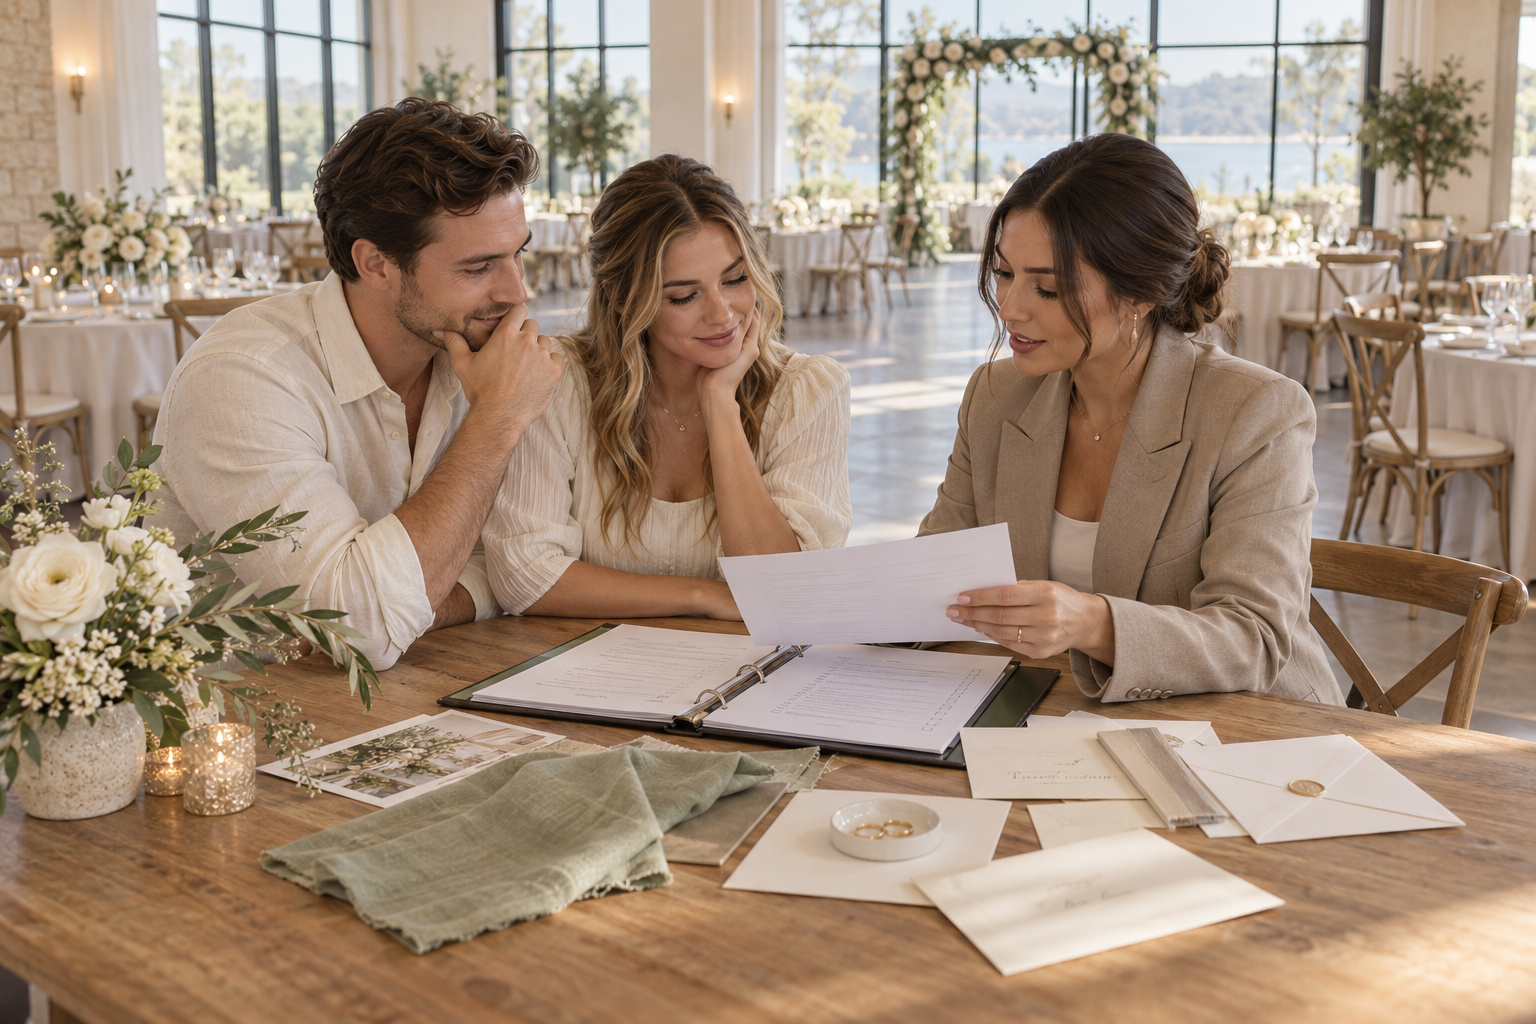
    wedding planner checklist reviewed by an engaged couple and planner at a table
    Distinguish booked services from approved details and ready arrangements.

    Check Guest and Ceremony Details as Connected Sets

    Guest information is a good place to begin because one unresolved answer can affect several other tasks. A received RSVP tells you whether someone plans to attend. It may still leave the meal choice unanswered, the name unclear, or an agreed transport request unresolved. Treat the response as an input to the plan, rather than proof that every guest-related row is ready.

    Reconcile responses, meals, and seats

    • Account for every invited person as attending, declining, or awaiting a reply.
    • Resolve unclear names, party sizes, and any missing information you requested.
    • Check that meal selections match the people who are attending and the options you are serving.
    • Send relevant dietary information through the process agreed with the caterer, and request acknowledgment.
    • Match the current seating plan to the confirmed attending list.
    • Proofread printed names and table assignments before approving the final production file.
    • Record who will communicate changes after the final counts have been submitted.

    Consider a hypothetical dinner for 84 guests. Your response list shows 84 attendees, your meal worksheet contains 83 choices, and your seating plan has 85 seats assigned. Those three documents do not agree, even if each owner has marked their individual task complete. Start with the person-level attending list, identify the missing selection and extra assignment, and correct the affected records before confirming readiness.

    When reviewing food counts, ask your caterer how they want guest meals, children’s meals, and any crew meals represented. Do not silently combine different categories into one number. Your checklist should record that the requested counts were supplied and accepted in the provider’s format. This helps prevent a familiar problem: two people using the phrase final headcount while talking about different totals.

    A seating chart also needs a usability check. Ask the person placing the cards whether the table labels on the chart match the labels they will see in the room. If the chart says Table A while the printed pieces use numbers, decide which naming scheme will govern and update the other materials. You are checking consistency, not redesigning the reception.

    Check ceremony choices against the people performing them

    • Confirm the ceremony order with the person leading it.
    • Ask each reader or speaker to acknowledge the role they have agreed to perform.
    • Record the version of each reading, vow, or script that will be used.
    • Give musicians or the audio operator the approved selections and the cues they need.
    • Name who will hold the rings and when that person will hand them over.
    • Record any documents the officiant or relevant authority instructs you to prepare, and who will handle them.
    • Identify who will guide participants if positions or entrance cues change.

    Keep official paperwork instructions in their original source rather than deriving them from a generic month label. The checklist task is to verify and follow the instructions that apply to your ceremony. Do not mark it ready simply because another couple obtained a document at the same point in their engagement. Ask the appropriate office or officiant about unanswered requirements.

    For another hypothetical example, a reader has accepted a place in the ceremony, but the script contains an earlier reading and the musician expects a cue immediately afterward. Confirm the chosen reading first, then give the current sequence to both people. The ready state belongs to the connected arrangement. Three separate approvals are not enough when they describe different versions of the ceremony.

    Keep rehearsal notes focused on unresolved movements or cues. You do not need to revisit every emotional choice at the final review. If the reading, order, and people are already aligned, leave those decisions closed and concentrate on the remaining practical questions. This keeps a useful check from becoming another long round of wedding decisions.
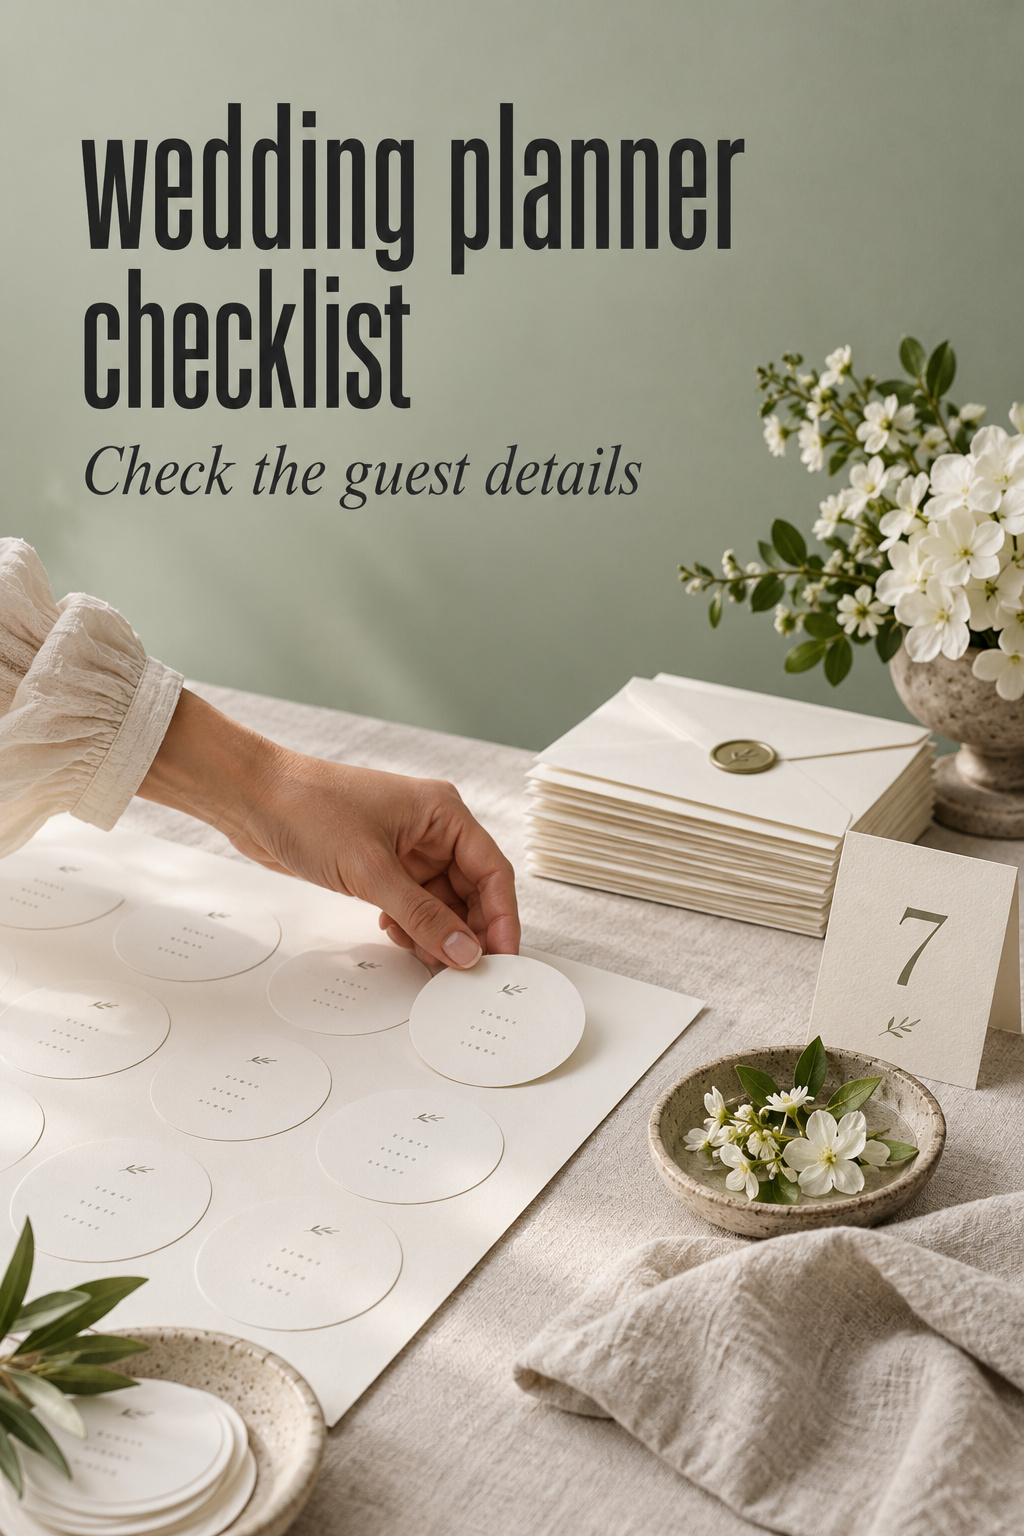
    wedding planner checklist guest seating plan with RSVP envelopes and table cards
    Check that attendance, meal selections, and seating assignments agree.

    Finish the Supplier Tasks That Survive a Booking

    Review each booked service by asking what you still owe the provider and what they still need to confirm. Look at their requested forms and your agreement before adding generic questions. A supplier may already have a detailed final-information process; use it, and put its outstanding actions on your checklist instead of creating a competing set of forms.

    Food, desserts, and service details

    • Approve the menu or dessert selection you will actually serve.
    • Submit the requested counts and final event information by the agreed date.
    • Confirm the delivery or service location, and identify the person receiving the supplier.
    • Check who provides any display stand, serving tools, plates, or other items needed for the chosen service.
    • Record outstanding balances and the agreed payment process.
    • Keep unresolved substitutions or service questions open until the relevant people accept the answer.

    Imagine that the bakery has confirmed a cake delivery to the reception, while the venue has reserved a display table in a different room and nobody has agreed to move the cake. The booking is complete, but the display is not ready. Resolve the intended location with the bakery and venue, identify any necessary movement, and have the person responsible accept it. A tick beside cake ordered cannot answer those questions.

    For catering, check any event information that changed after the tasting. The chosen menu may be settled while the service layout or meal counts are still pending. Do not ask the caterer to reapprove information that has not changed; send the outstanding inputs together and make the specific questions easy to answer. Close only the rows their reply resolves.

    Photography and music

    • Give the photographer the agreed group-photo requests and any important people they need identified.
    • Confirm the location and gathering plan for those groups with the person helping assemble them.
    • Check the approved photography schedule against the current ceremony and reception times.
    • Approve the music selections for the moments you are including.
    • Confirm who announces or cues those moments, and what information the performers need.
    • Record any outstanding equipment or location question with the provider responsible for answering it.

    A photo list is easier to act on when it names actual people instead of using a phrase such as all cousins. Assign one person who knows the group to help gather them if that arrangement is agreed with the photographer. You are not trying to prescribe how the photographer works. You are supplying the identification and decisions they have asked you to provide.

    For music, test the sequence on paper: who introduces the moment, what the audio operator or performer starts, and what signals the end. If you have chosen a first-dance track but nobody knows which version you mean, the selection remains incomplete. Send the version or reference your provider requests, and ask them to acknowledge it. Avoid assuming that a title alone identifies the same recording for everyone.

    Flowers, styling, attire, and transport

    • Approve the final design choices that your florist or stylist has asked you to make.
    • Confirm the quantities and locations in the current agreed plan.
    • Resolve any venue question the design depends on before treating the arrangement as ready.
    • Check that your own attire is collected or has a confirmed collection plan, with remaining fittings recorded.
    • Identify required shoes and accessories, and check them with the outfit you intend to wear.
    • For booked transport, confirm the actual pickup locations, service times, passengers, and contact process.

    Keep design approval separate from physical setup. You can love an arrangement and still need to answer where it belongs or whether a venue has accepted a proposed detail. If your styling involves moving flowers between ceremony and reception, use the separate ceremony-to-reception arrangements guide to resolve that plan. Your checklist only needs the outstanding decision and its finish line.

    For attire, treat ready as a practical check of the pieces you will actually use. Put the outfit, shoes, accessories, and any required fastening help into one review. A purchased outfit can still have an unfinished alteration, a missing accessory, or an unclear collection arrangement. Follow the provider’s instructions for handling it and write down any remaining question rather than inventing a universal care rule.

    Transport deserves the same specificity. A reservation for a shuttle does not settle the pickup point your guests will use. Compare the transport confirmation with the directions you intend to send guests. If they differ, resolve the location and correct both. The useful outcome is that the driver and passengers can act on the same instructions.
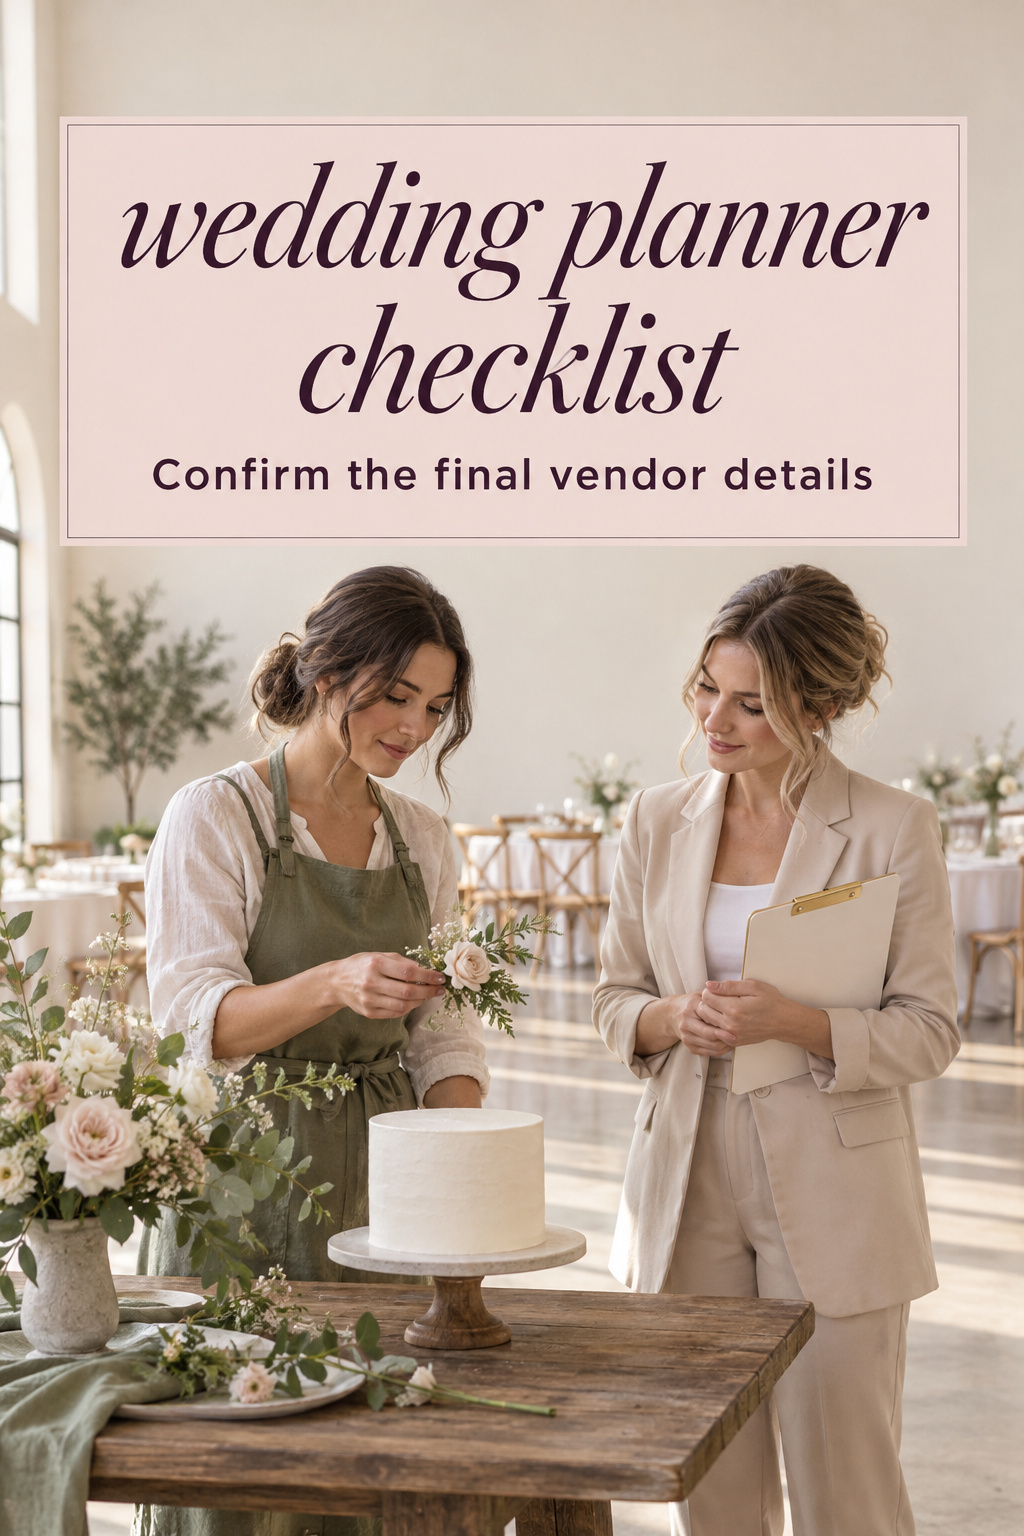
    wedding planner checklist used by a florist and coordinator beside a cake display
    Confirm the final supplier inputs, locations, and responsibilities.

    Adapt the Checklist as Deadlines and Details Change

    Build the review around your real dates. Put supplier-requested decision dates, payment dates, production approvals, and final-count deadlines on the checklist. Work backward from those dates to leave yourself time to collect the information. A monthly planning guide can help you discover tasks, but the dates in your actual arrangements should anchor this post-booking review.

    Review outstanding answers before adding new tasks

    At each review, begin with rows awaiting a reply. Ask whether the other person has the question, whether your message included the information they need, and when a follow-up is appropriate under your agreed communication process. Sometimes a slow answer is caused by a missing input you can provide. Sometimes the next useful action is a concise follow-up. Record the action, not an assumption about the delay.

    Then examine rows marked approved. Does anything else need to happen before they are ready? A seating proof might be approved while printing and delivery remain open. A transport route might be agreed while the guest directions still describe an earlier plan. This is the stage where a small cross-check is more useful than another inspirational task.

    Finally, look at ready rows affected by changes. Reopen only what the change touches. If two guests cancel, review the records and supplier information that need updating; do not reopen the ceremony music. If the ceremony time changes, check the photographer, musicians, transport, and guest-facing instructions that depend on it. Write down which recipients need the revision so the change does not end with one corrected document.

    Keep the remaining-issues handoff short

    As the event approaches, make a brief list of the questions that are still unresolved. For each one, include the decision needed, the person taking the next action, and the provider or helper who needs the answer. Keep confirmed arrangements in their existing documents. The remaining-issues list should make open work visible, without forcing someone to read through your entire planning history.

    • What is still undecided or awaiting confirmation?
    • Who has accepted the next action?
    • When is the answer needed under the actual plan?
    • Who else must receive the answer?
    • What will allow us to close the item?

    Before handing that list to a coordinator or helper, ask them to explain one remaining task back to you. If they cannot tell who to contact or what answer they need, improve the row. This is a comprehension check you can do together, not a test of their professionalism. It reveals missing context while there is still time to supply it.

    Separate event readiness from post-event work. Returning an item, reviewing a final invoice, or collecting a personal belonging may happen after the celebration. Keep those tasks scheduled and assigned instead of pretending they are complete at the final review. For physical objects, the wedding item-flow guide can support a more detailed collection and return plan.

    A useful stopping rule is simple: close the row when its stated finish line is met, and revisit it when a relevant fact changes. You do not need to keep reconfirming an unchanged answer because the wedding is getting closer. Give the checklist a defined review time, finish the outstanding actions, and let completed decisions stay completed.

    Sources and Methodology

    This checklist was developed after reviewing ten organic Google US results for the topic, including publisher checklists, a venue guide, a customizable planning-tool page, and a reader discussion about small remaining tasks. The Here Comes The Guide wedding checklist supports the task families involving final guest information, supplier confirmations, and assigned follow-through. The booked, approved, and ready labels and the hypothetical mismatch examples are editorial tools for checking your own plan. They do not replace provider instructions or official ceremony requirements.
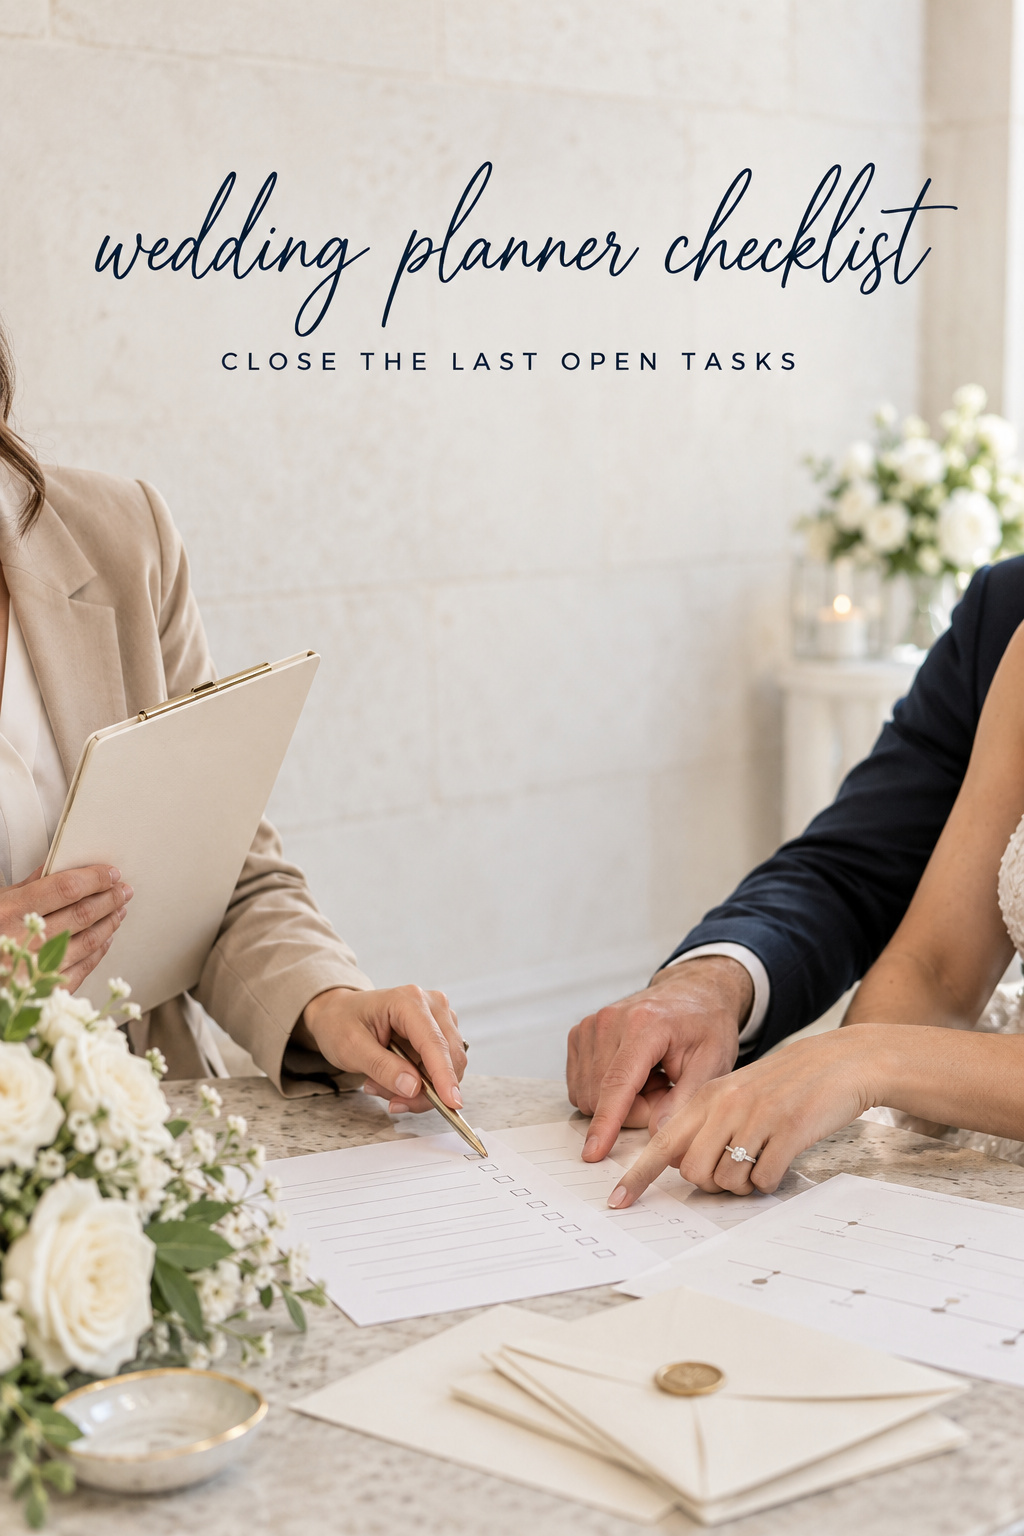
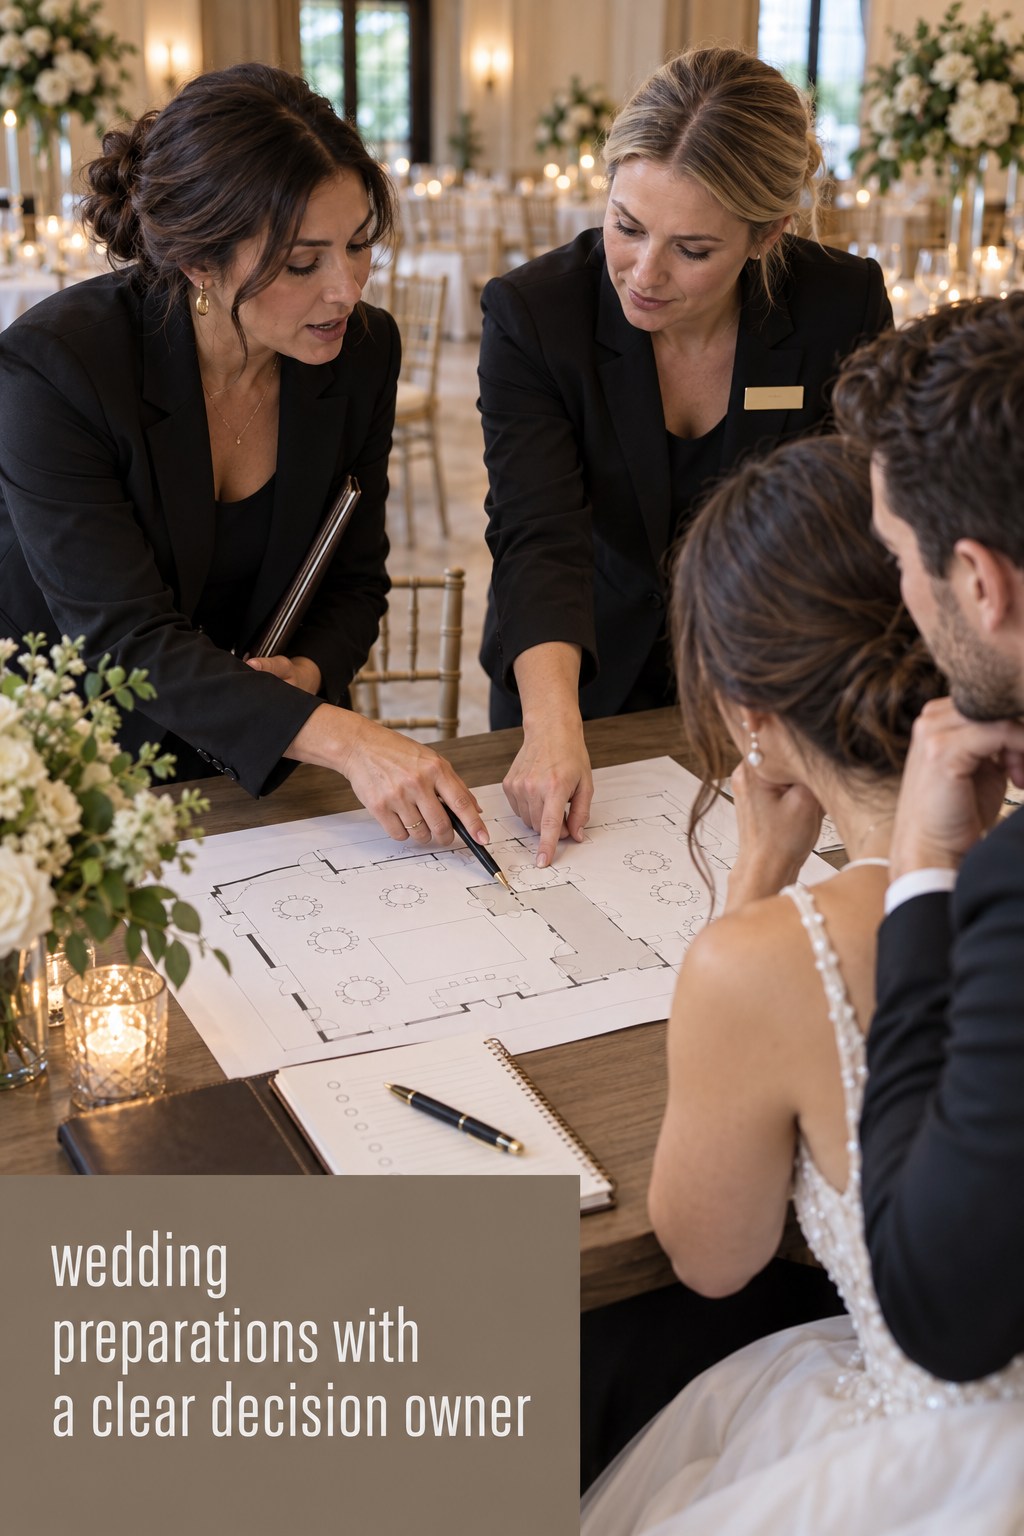
    wedding planner checklist remaining tasks checked by a couple and coordinator
    Close remaining questions and keep later follow-through assigned.

    FAQ

    What should remain on a wedding planner checklist after vendors are booked?

    Keep final choices, supplier-requested information, guest and meal details, ceremony cues, attire collection, payment actions, and event confirmations that are still unfinished. Remove tasks you do not need. A booking can be complete while the service still needs details from you, so give each remaining action its own finish line.

    Is booked the same as ready on a wedding checklist?

    No. In this checklist, booked records the reservation, approved records a settled choice, and ready means the necessary people have the agreed information and arrangements. A photographer can be booked before the family-photo groups are approved, and those groups can be approved before anyone has confirmed where to gather.

    How do we know when to check off a vendor confirmation?

    Check it off when the question you wrote has been answered and any required acceptance or follow-up is complete. Sending a message is not the same as receiving confirmation. If the reply resolves only part of the task, close that part and keep the unanswered question visible with a next action.

    How do we check that guest counts are consistent?

    Start with the current person-level attendance list. Compare it with the meal selections and seating assignments, and investigate missing or extra entries. Ask the caterer how to represent different meal categories. Submit the information in the agreed format, and update affected recipients when an accepted count changes.

    What should we reopen when a wedding detail changes?

    Reopen the checklist items that depend on the changed fact. A ceremony-time change may affect photographs, music, transport, and guest instructions. A guest cancellation may affect meal and seating records. Identify the affected recipients and confirm the needed update rather than restarting the entire checklist.

    Can we use this checklist without hiring a wedding planner?

    Yes. A couple can use the same questions to organize remaining work with providers and trusted helpers. Name someone who accepts each action and understands its finish line. The checklist helps you coordinate information; separately confirm who will carry out the actual work on the wedding day.

    Should every wedding task be ready before the event?

    Event-day arrangements should be resolved according to their real deadlines, but some follow-through happens afterward. Rental returns, personal-item collection, or later invoice checks may remain scheduled tasks. Keep them assigned with a date and a clear result instead of checking them off early to make the list look finished.

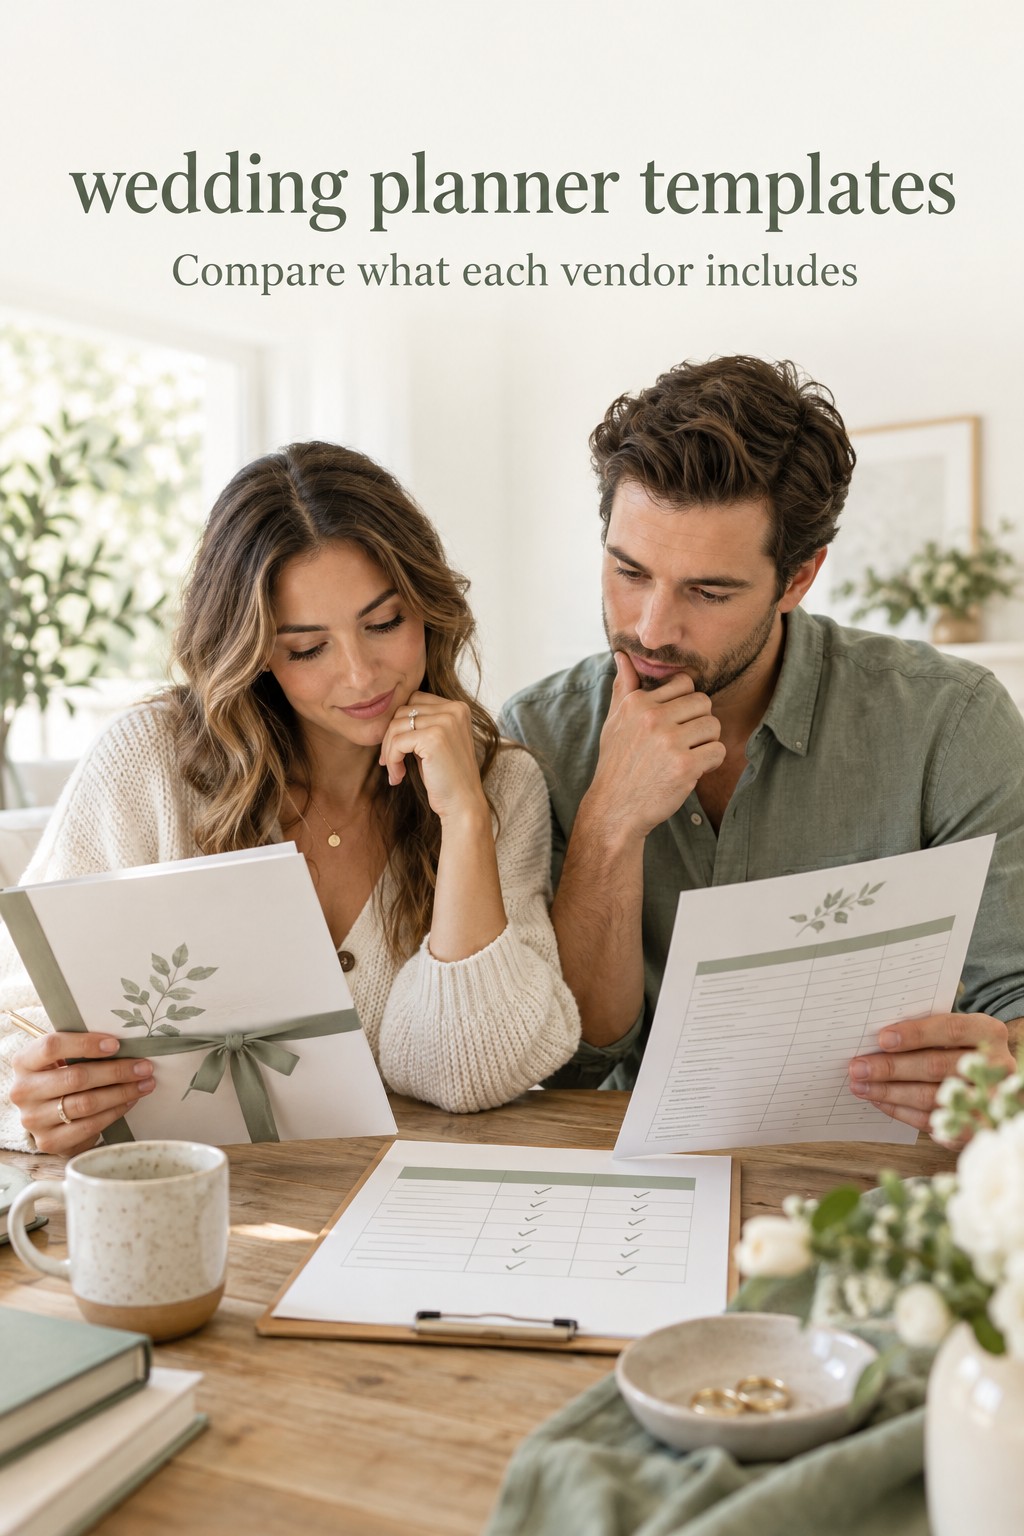
  • Wedding Planner Templates: Compare Vendor Offers

    Wedding Planner Templates: Compare Vendor Offers

    You open two vendor proposals after dinner. One is a tidy package with a single total. The other lists hours, deliverables, travel, and optional extras on separate lines. Both seem promising, but the numbers do not answer the same question. Before you choose the lower price, you need to know whether the offers cover the same work.

    A wedding planner template can help with that decision if it gives every proposal the same frame. Instead of collecting another all-in-one planning workbook, build one focused comparison page for the vendor category you are choosing now. Use it to record the required scope, what each offer includes, what costs extra, what is unclear, and what you need to ask next.

    wedding planner templates: couple examining vendor offers and a comparison worksheet
    Compare a shared scope, inclusions, and open questions before choosing a wedding vendor.

    This method does not decide which vendor is best, and a worksheet is not a substitute for reading the actual agreement. It helps you spot gaps before you make a choice. Once the same work is visible in the same columns, you can compare fit, timing, and cost with fewer assumptions.

    Start With the Work You Need the Vendor to Do

    Begin by describing your requirement in plain language before opening the proposals side by side. A package name such as “essential,” “signature,” or “full service” may mean different things from one vendor to another. Write down what you need the vendor to provide for your event, then check how each offer responds to that same description.

    For a photographer, your baseline might include the date, location, coverage window, number of photographers you are considering, and the deliverables you expect to receive. For a venue, it might include access hours, event spaces, setup needs, and the items you expect to be provided. For a caterer, it could include guest quantity, meal format, staffing, service window, and any equipment that needs to be supplied. The details change by category, but the comparison principle stays the same.

    Separate requirements from preferences

    Mark each item as required, preferred, or open. A required item is something the offer must cover for you to consider it. A preference helps you distinguish between viable offers, but you may be willing to adapt. An open item is a question you have not answered yet. This small distinction keeps a nice-to-have detail from being treated as a firm condition and makes it easier to spot a missing requirement.

    Keep the list short enough to use. You do not need to describe every part of the wedding in a vendor comparison. Include the details that change the work, the timing, the cost, or the experience. If the decision is about photography coverage, for example, your color palette is unlikely to help compare hours or image delivery. Save unrelated planning notes for the tool where they belong.

    Write down the assumptions behind the offer

    Proposals may rely on a guest count, service duration, room configuration, or location that you supplied earlier. Record that assumption beside the proposal. If your guest estimate changes, a catering offer may need to be recalculated. If a venue’s access window is shorter than you expected, setup may require a different plan. A comparison is only useful when you can see what each figure is based on.

    If you do not know an exact number, record a range and label it as an estimate. Do not replace an unknown with a precise-looking guess just to complete the table. “About 90 to 110 guests, still being confirmed” is more useful than a number that both partners know is provisional. You can then ask each vendor whether the estimate changes the proposal and when a final count is needed.

    wedding planner templates: proposal cards arranged beside a worksheet
    Define the same service requirements before entering vendor proposals into a comparison template.

    Build a Focused Wedding Planner Template for Vendor Quotes

    Create one row per vendor and one column for each decision point. You can make the page in a spreadsheet, a document, or a printed worksheet. The format matters less than using the same fields for every offer in the category. Keep the source proposal nearby and record its date, so you can return to the original wording when a note needs clarification.

    • Vendor and offer version: business name, contact person, proposal date, and the date you last received an update.
    • Required scope: the service, event date, location, hours or quantity, and any condition that must be met.
    • Included work and deliverables: what the vendor says is part of the proposed service, captured in clear words and quantities when available.
    • Optional extras: items you could add, with their price or a note that you still need a price.
    • Excluded or client-provided items: tasks, equipment, staffing, travel, supplies, or approvals that are not covered by the offer.
    • Cost and payment timing: quoted total, required deposit, installment dates, stated fees, and any assumption that could change the total.
    • Timing and availability: event date, service hours, setup or arrival window, and when a deliverable is expected.
    • Open questions and next owner: what needs an answer, who will ask, and when you expect to review the response.

    Add a status for each line: included, optional, excluded, or unclear. The status is more informative than a checkmark alone. An unchecked box might mean a vendor does not provide an item, or that you have not read far enough to know. “Unclear” is a useful result because it tells you not to compare that part as if it were settled.

    Use one worksheet per category rather than forcing every vendor into one giant comparison. A photographer and a florist do not need the same scope columns. Your photographer page might track coverage hours and image delivery, while your florist page might track design pieces, quantities, delivery, setup, and breakdown. Reusing a small core structure is helpful, but the details should reflect the work being offered.

    Leave a notes column for the exact question or source of an answer. A short note such as “proposal page two, travel listed separately” is easier to verify than a summary with no reference. You do not need to copy a full contract into the worksheet. The comparison page should direct you back to the original offer, not become a second contract archive.

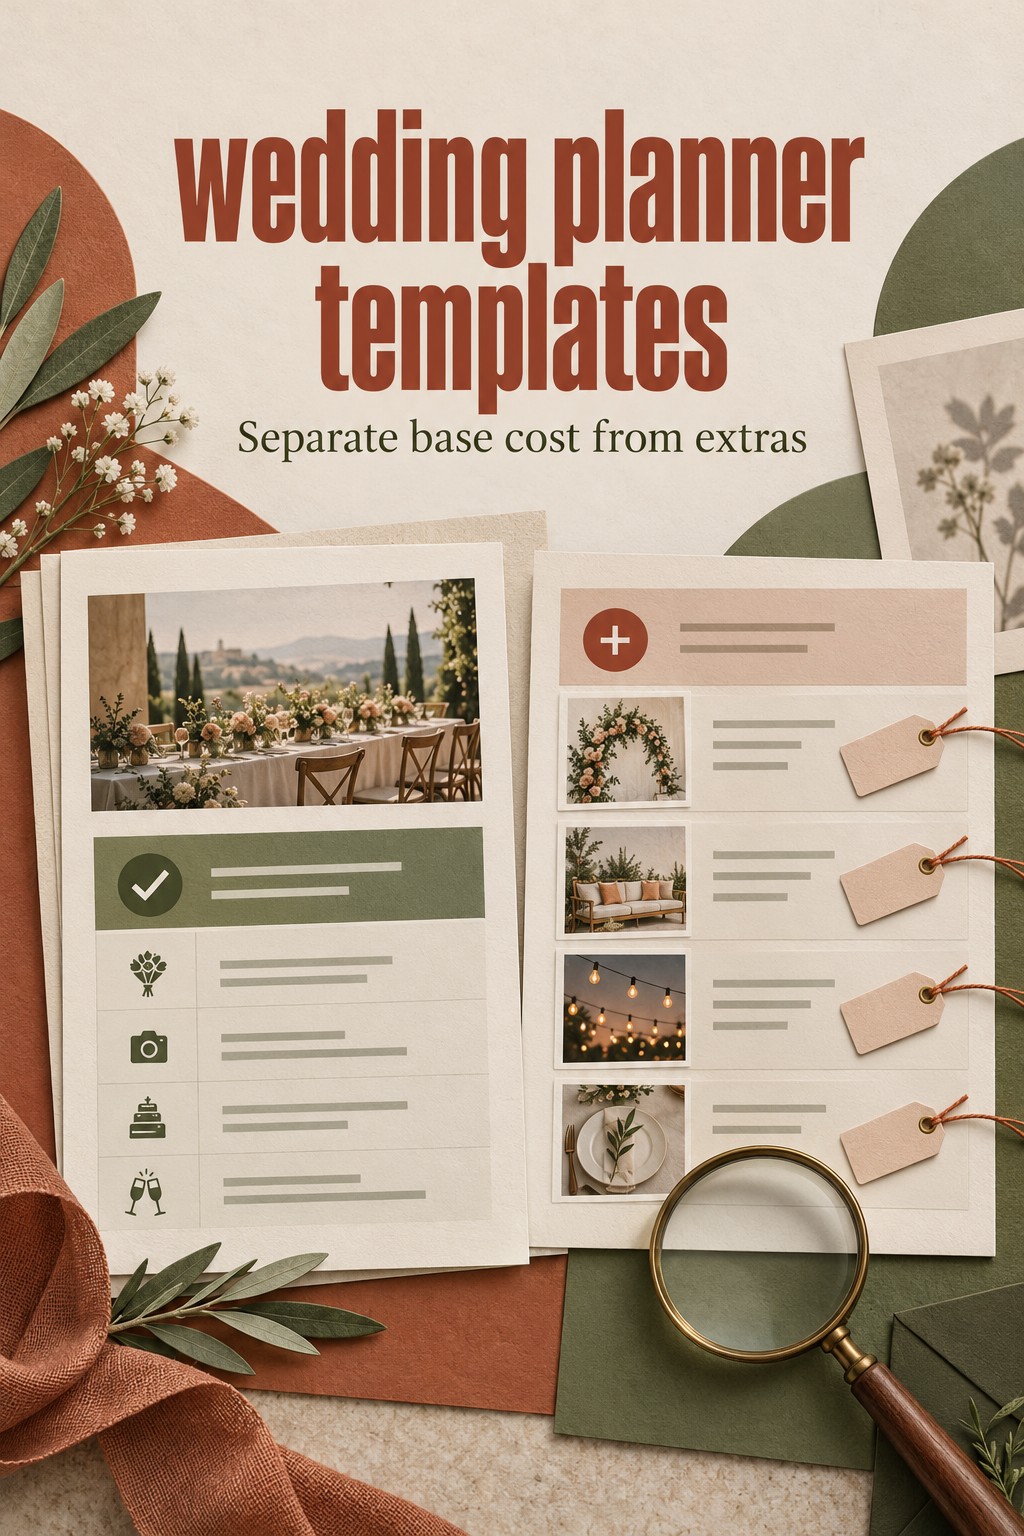
    wedding planner templates: proposal comparison showing base scope and add-ons
    Keep optional extras separate from each vendor’s base proposal while comparing costs.

    Compare Offers With One Worked Example

    Imagine that you are comparing two photography proposals for the same wedding. Offer A has one bundled total and a short description of coverage. Offer B separates coverage hours, a second photographer, travel, and an album option. Do not place the two headline totals in adjacent cells and call the lower one the winner. First check what each offer includes against the requirement you wrote down.

    Your comparison might look like this:

    • Coverage window: Offer A says “wedding day coverage” without defining the start and end times. Mark it unclear. Offer B lists a specific number of hours. Ask whether those hours include travel between locations and how additional coverage is priced.
    • Second photographer: Offer A does not mention one. Mark it unclear, not excluded, until the vendor confirms. Offer B lists it as an optional addition. Decide whether it is a requirement or a preference before comparing the totals.
    • Travel: Offer A notes a service area but does not explain the charge for your venue. Offer B lists a separate travel line. Ask both vendors for the amount that applies to your location, and put each answer in the same column.
    • Image delivery: Offer A says that edited images are included but does not state the quantity or timing in the summary. Offer B describes a gallery and gives a delivery window. Ask Offer A for the same level of detail and check whether it appears in the written offer.
    • Album: Offer A does not mention a printed album. Offer B lists an album as an add-on. If an album is optional for you, leave it outside the base comparison and note the separate choice rather than treating it as an included benefit.

    This example uses no market prices because the point is to compare scope, not claim what a service should cost. Once the missing information is filled in, create two views if helpful: the base offer that meets your required needs, and the version with optional extras you are genuinely considering. This prevents an add-on from obscuring the cost of the core service.

    Keep calculations simple and transparent. If you add travel or an extra hour to a total, label it as a planning estimate until the vendor confirms it. Do not assume that taxes, service charges, delivery, overtime, or gratuities are treated the same way in every offer. Record what the proposal says and ask about anything that affects the total you are comparing.

    The same method works for a venue. List the spaces, access hours, setup and cleanup windows, included tables or chairs, staffing, and possible extra fees. The Knot’s venue contract guide recommends checking an itemized description of what the venue provides, plus access times and additional fees. Use those details as prompts for the comparison, then verify the venue’s own proposal and agreement for your event.

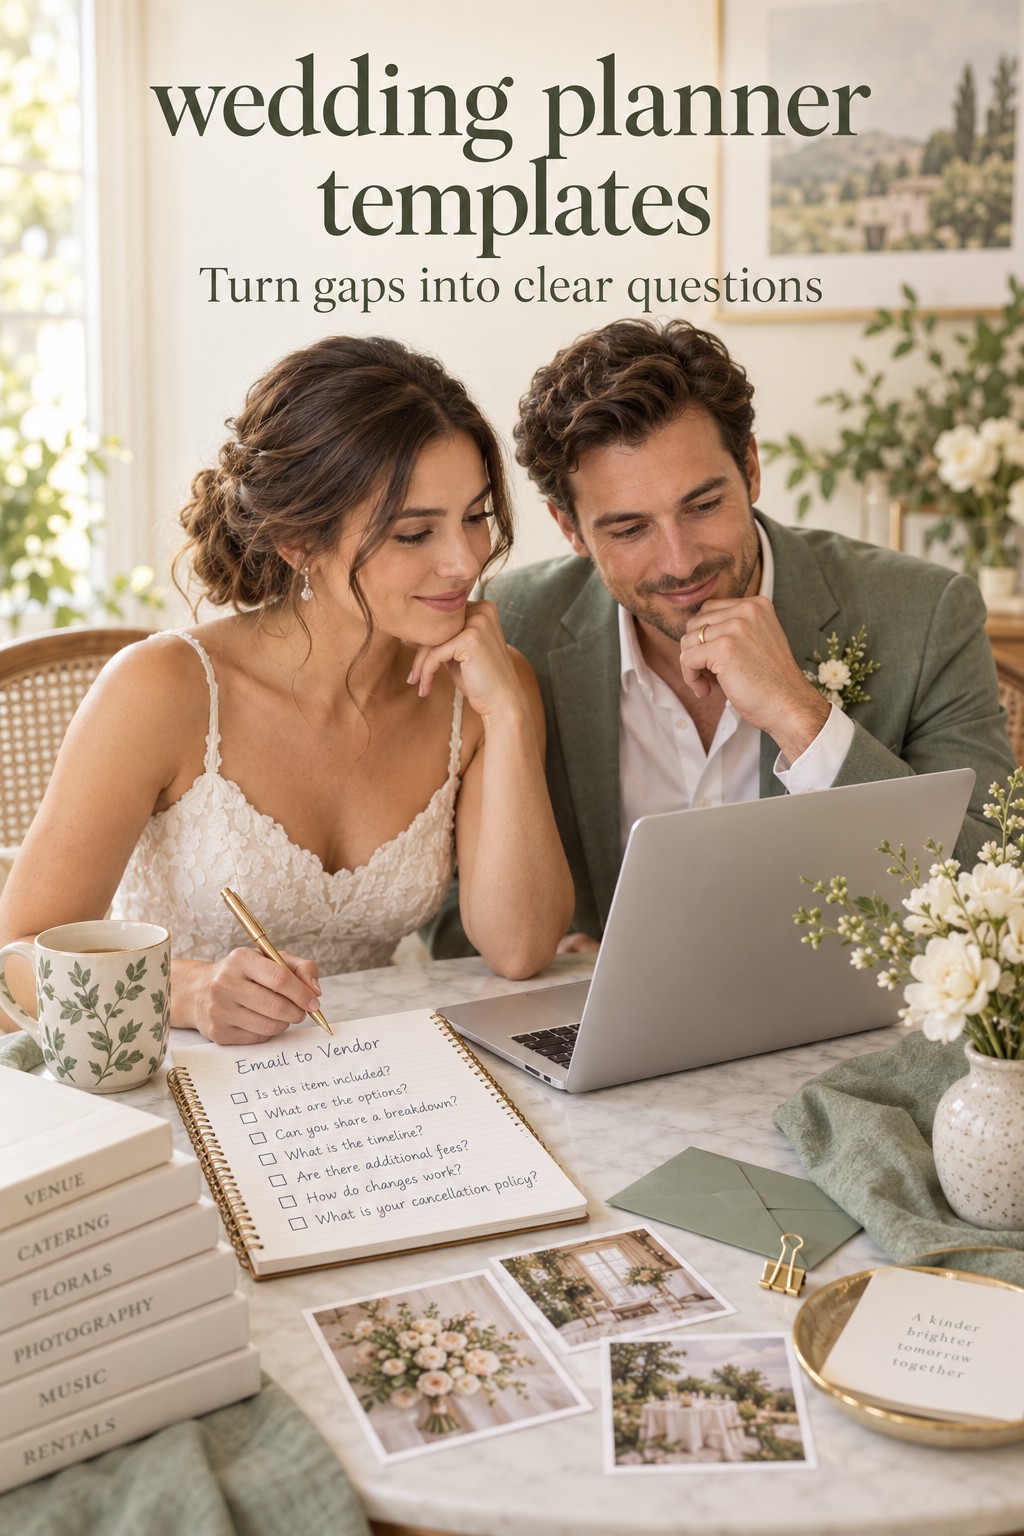
    wedding planner templates: couple drafting follow-up questions for a vendor
    Turn unclear proposal details into specific questions for the vendor before booking.

    Turn Blank Fields Into Specific Follow-Up Questions

    Once you have entered the proposals, scan for blank or unclear cells. Each one should become a question, a confirmed exclusion, or a decision you no longer need. Avoid sending a vague message such as “Can you tell me more about the package?” Point to the line that affects your comparison and ask for the information in a way that lets you update the table.

    • For an unclear inclusion: “Does this package include setup at the reception site, or should we arrange that separately?”
    • For an undefined quantity: “How many hours of coverage are included, and what is the process if we need to add time?”
    • For a possible extra: “Is travel to this venue included in the quoted total? If not, can you show the applicable charge in writing?”
    • For timing: “What is the earliest arrival time available, and when would the finished deliverables be ready?”
    • For a changing assumption: “Our current guest estimate is a range. At what point would the count affect staffing or the proposal?”

    Assign each question to one person and add a date to revisit it. If both partners contact the same vendor separately, the responses can become difficult to reconcile. One owner can send the question, while both partners review the answer and decide whether it changes their choice. Record the date and source of the response in the worksheet so you know whether it came from a proposal, email, or conversation.

    Do not treat a friendly verbal explanation as a final update to the offer. If the answer affects what is included, what you will pay, or when the work happens, ask the vendor to add or confirm it in the written proposal or agreement. The goal is a shared understanding, not a larger collection of notes that no one can verify.

    Check the Proposal Against the Written Agreement

    A comparison worksheet helps you choose which offer to pursue. It does not replace the vendor’s contract. Before signing, read the agreement itself and compare it with the proposal and any answers you received. Confirm that the names, event details, services, deliverables, quantities, payment dates, and additional charges match what you intend to book.

    The Knot’s guide to wedding vendor contracts explains that written agreements can cover services, payment terms, event details, responsibilities, and cancellation or service-change terms. Use your worksheet to identify what needs checking, not to interpret legal language or decide whether a clause is enforceable. If a term is unclear or significant, ask the vendor for clarification and consider qualified legal advice where appropriate.

    Make a short reconciliation list with three columns: worksheet note, contract wording, and question to resolve. If the worksheet says that setup is included but the agreement says the couple must arrange it, pause and ask which document reflects the current offer. If an optional extra appears in the contract total, confirm whether you approved it. If a payment deadline changed, update your current planning record after you understand the change.

    Keep the final comparison separate from the signed agreement. The worksheet can help you remember why you chose a vendor and what you still need to coordinate. The agreement remains the document to review for the actual booked services and terms. Do not write over an original proposal or contract to make it look consistent with your notes. Ask for a revised document or written clarification instead.

    Know When Two Proposals Are Not Comparable Yet

    Sometimes one proposal is not simply a better or worse version of another. The vendors may be quoting different amounts of work. One venue might include furniture and staff while another charges separately. A planner’s package may begin at a different stage of the engagement. A caterer may be using a different guest estimate. In those cases, the comparison should show the difference, not hide it behind a single total.

    Use one of three next steps. First, ask both vendors to quote the same scope if they are able to do so. Second, mark one offer as a partial fit and list what you would need to arrange separately. Third, keep the offers in separate categories because the services are not interchangeable. You can still choose between them, but you should name the trade-off you are accepting.

    Do not force a numerical score when the information is incomplete. A vendor with a lower total may be the right choice if the excluded work does not matter to you. A higher offer may be easier to evaluate because it explains more. That difference is a reason to ask another question, not proof that one vendor is more honest or more capable.

    Once your required scope is covered and the major open questions have answers, you can compare the qualities that matter to you: service approach, communication, availability, deliverables, cost, and how comfortable you feel working together. Keep personal fit visible beside the numbers. A worksheet is there to support your judgment, not replace it.

    When you have chosen, mark the decision date, the approved proposal version, and the next payment or planning action. Archive or label earlier offers so they are not mistaken for the current agreement. You do not need to continue maintaining every proposal throughout the engagement. The comparison page has done its job when it helped you make a clear choice and understand what must happen next.

    Sources and Methodology

    This article draws on a review of ten US search results for wedding planner templates, including template libraries, spreadsheet guides, and downloadable planning packs, plus wedding contract guidance used to verify the proposal-to-contract distinction. The comparison fields are a planning aid and should be adapted to the vendor category and the couple’s actual requirements. Product features and contract terms vary, so review the current written offer before booking.

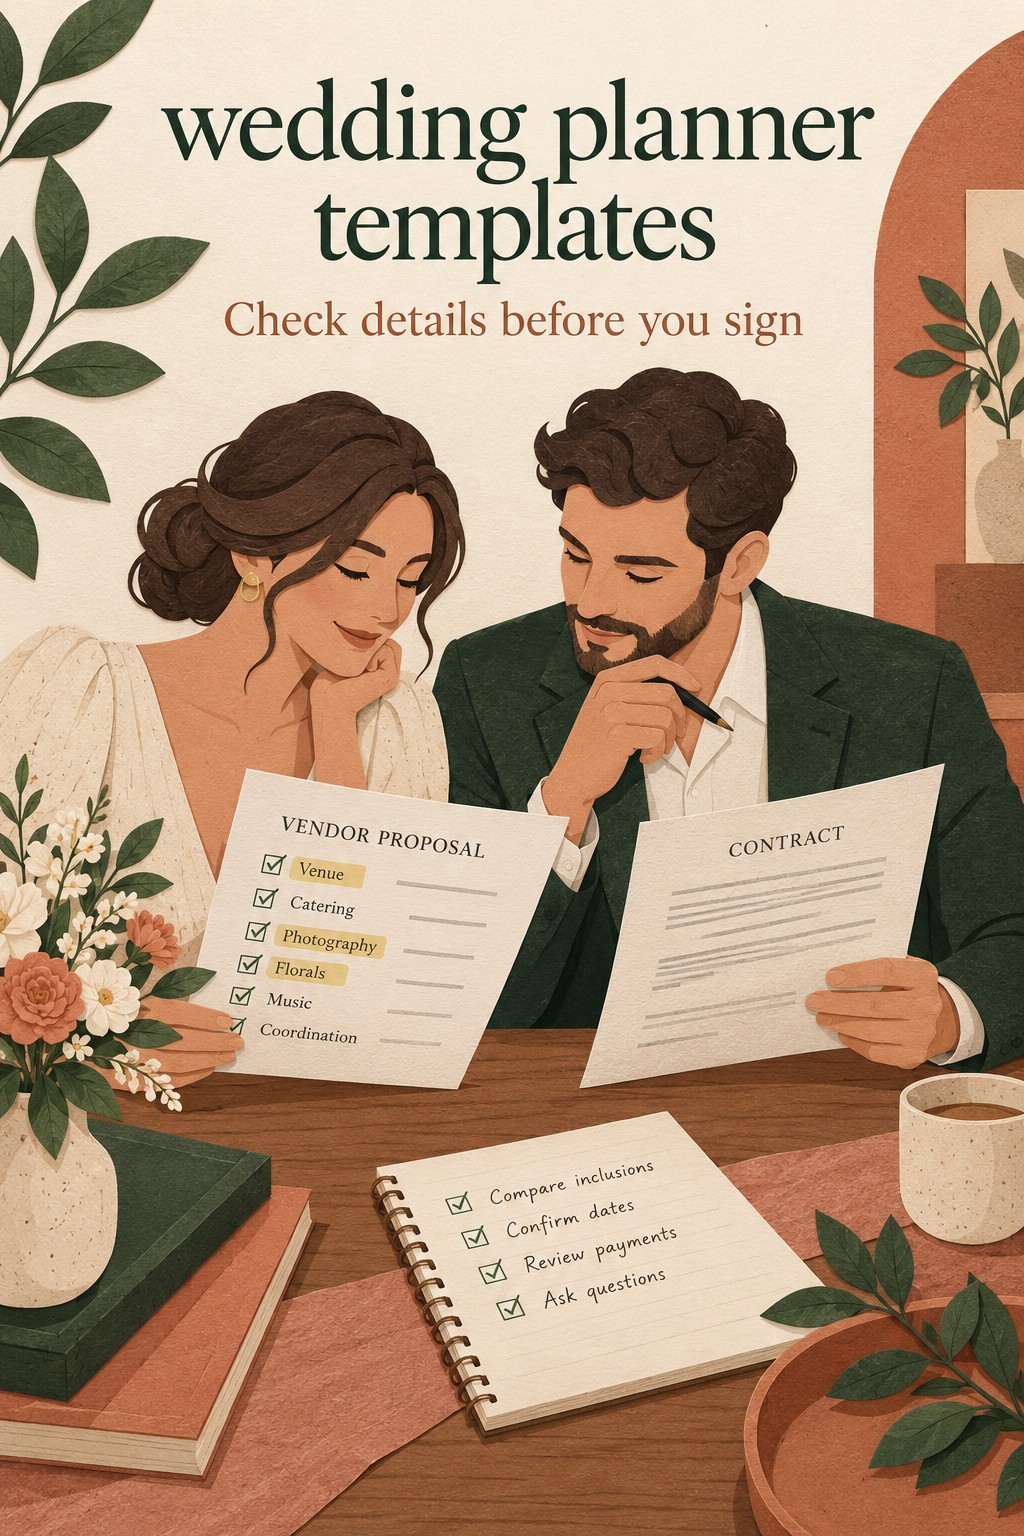
    wedding planner templates: couple comparing written proposal with contract
    Check that the written agreement matches the proposal and your vendor comparison notes.

    FAQ

    What should a wedding vendor comparison template include?

    Include the vendor and proposal date, your required scope, included work, optional extras, exclusions, assumptions, cost, payment timing, availability, open questions, and next action. Add category-specific fields such as coverage hours for photography or access and setup details for a venue.

    How do I compare wedding vendor quotes fairly?

    Write the work you need before comparing offers, then check how each proposal covers the same date, location, quantity, hours, and deliverables. Ask about missing or unclear items and keep optional extras separate from the base offer until you decide whether you need them.

    Should I compare vendors by total price?

    Compare totals only after you understand the scope behind them. A low headline figure may exclude work, travel, equipment, or additional hours that another offer includes. Record confirmed extra costs separately and label estimates until the vendor confirms them.

    What if a vendor proposal does not list something I need?

    Mark the item as unclear rather than assuming it is included or excluded. Ask the vendor to confirm whether the service is available, what it would cost, and whether it can be added to the written proposal. Update the comparison when you receive a clear answer.

    Can I use one wedding planner template for every vendor?

    You can reuse a core structure for vendor, offer date, scope, cost, questions, and next action. Add category-specific fields for the actual service. The details for a venue, photographer, caterer, and florist differ, so one identical set of columns may hide information you need.

    Is a vendor comparison worksheet the same as a contract review?

    No. The worksheet helps you compare proposals and identify questions. The contract is the written agreement for the services, payment, timing, and terms you are accepting. Check that the documents match, ask for clarification when they do not, and seek qualified advice for legal interpretation.

    When should I stop comparing wedding vendors?

    Stop when each viable offer covers your required scope clearly enough to make a decision, the important open questions are answered, and you understand the remaining trade-offs. You do not need every detail to be identical. You do need to know which differences matter to your plans before you commit.

  • Wedding Planner Book: Choose One You’ll Use

    Wedding Planner Book: Choose One You’ll Use

    A wedding planner book can make a complicated season feel easier to approach, but only when the pages match the way you actually make decisions. A beautiful cover does not tell you whether you will use a dated schedule, whether the prompts will help when you feel stuck, or whether there is room to write what matters to your celebration.

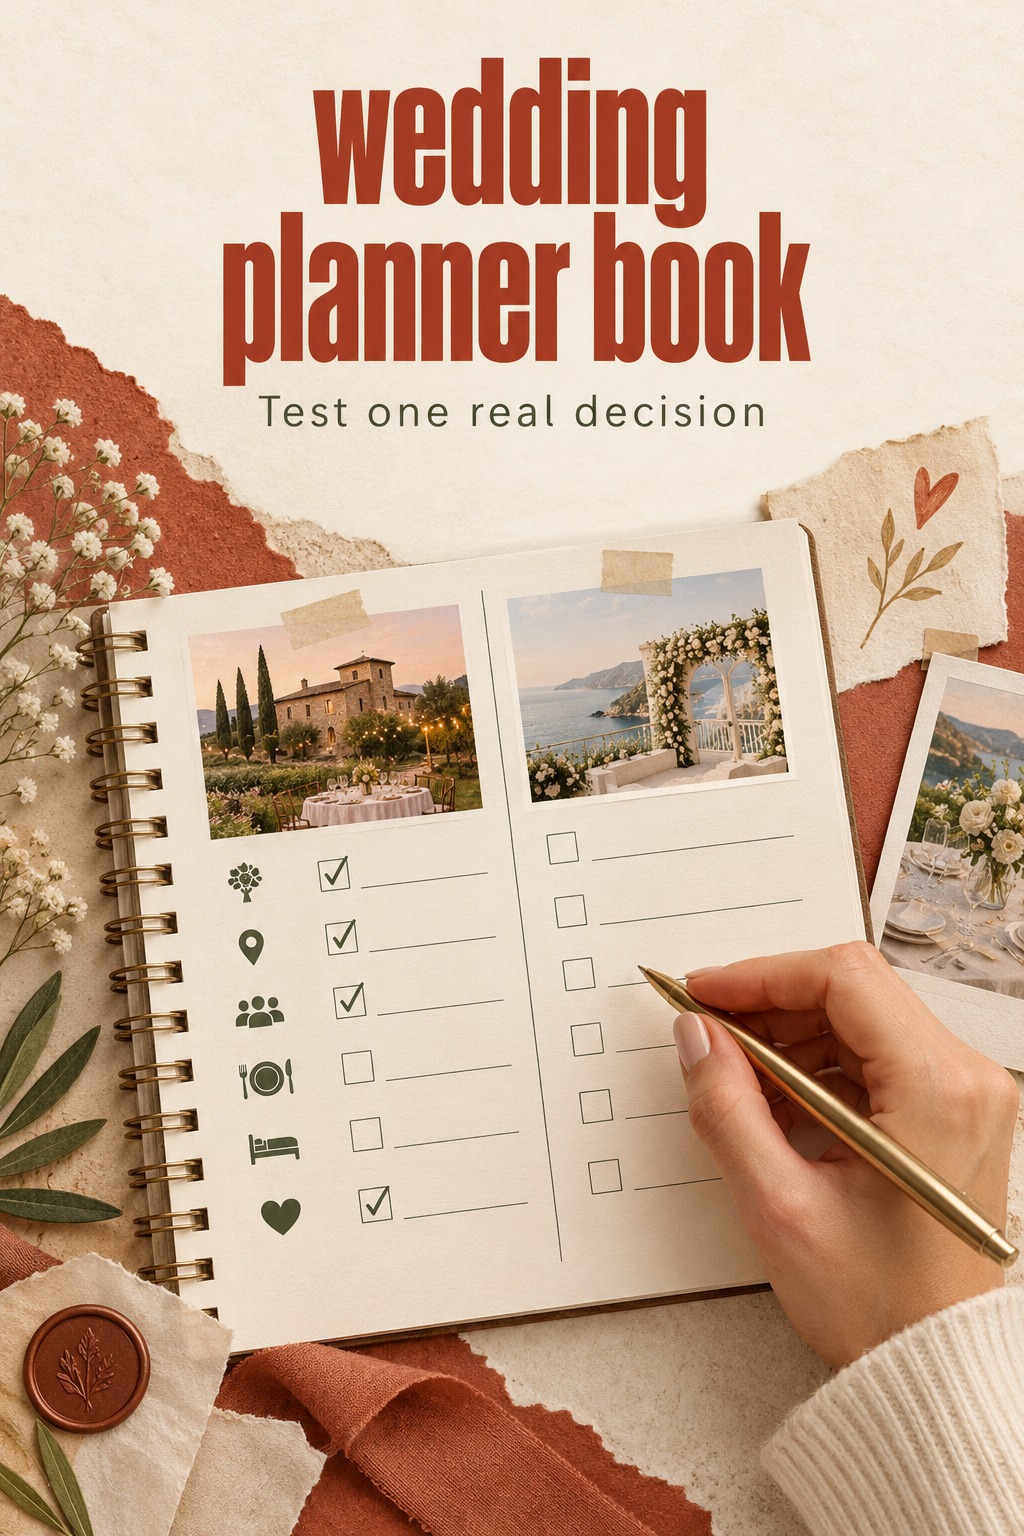
    Before choosing a wedding planner book, decide what job you want it to do. Then spend ten minutes testing a few sample pages against one real decision, such as comparing venues or deciding what kind of help you need from a vendor. This small test can tell you more than a long product description because it lets you see how the book works when it meets your plans.

    wedding planner book sample pages compared by an engaged couple
    Test the pages against the way you actually plan.

    Decide What You Want the Wedding Planner Book to Do

    Start with a sentence, not a shopping list: “I want this book to help us ______.” The answer may be to understand the process, make decisions, keep track of tasks, or save ideas and memories. A book can support more than one job, but it helps to know which one matters most. Otherwise, it is easy to choose a planner with many pages that look useful while missing the pages you would return to each week.

    If you need instruction

    A reference guide explains terms, choices, and the order in which decisions may affect one another. This can suit couples who are new to planning and want context before they fill anything in. Look for advice that gives you a reason behind a prompt, so you can adapt it when your event does not follow a standard timeline. A reference book can answer “What should we think about?” without necessarily becoming your active tracking tool.

    That difference matters. You may enjoy reading an inspiring chapter but still need a separate place for current deadlines, confirmed appointments, or vendor details. Decide whether you want the book to teach you, to hold working information, or to do both. If the book tries to do both, check whether the practical pages are easy to find after you have read the guidance.

    If you need prompts to make decisions

    A guided workbook asks questions and gives you a sequence for thinking through a choice. This can be useful when you know a decision is coming but do not know where to begin. A strong prompt helps you name the options, compare what matters, and capture the next question. A weak prompt may simply leave a blank line under a broad heading such as “dream wedding,” which may not help you turn a feeling into a practical choice.

    Look for prompts that allow uncertainty. At the beginning, you may have a guest range, an approximate budget, or several possible dates rather than one final answer. A planner that assumes every detail is already decided can make normal early planning feel like a failure. You should be able to write “still deciding” and continue using the page.

    If you need to track tasks

    A task focused planner gives you places to note deadlines, appointments, payments, or responsibilities. It is most useful when you can quickly see what is due and what action follows. Check whether its pages make room for the wedding date you have, not just the timeline the publisher assumes. Some books use a month-by-month sequence. Others use undated spreads you fill in yourself.

    A dated timeline can create helpful structure if its pace resembles your engagement. It can feel awkward if you are planning on a shorter schedule or if the book starts at a point you have already passed. For example, the publisher describes one compact guide built around a twelve-month countdown that can be adjusted. Treat any printed schedule as a proposed route, then check whether the book lets you adapt that route comfortably.

    If you want a journal or keepsake

    A journal gives you space to record ideas, reactions, notes, or memories. That can be meaningful if writing helps you notice what you want from the celebration. It may not be enough if you expect it to remind you about appointments or show which tasks are unfinished. A journal and a task tracker are different tools, even when both have “planner” in the title.
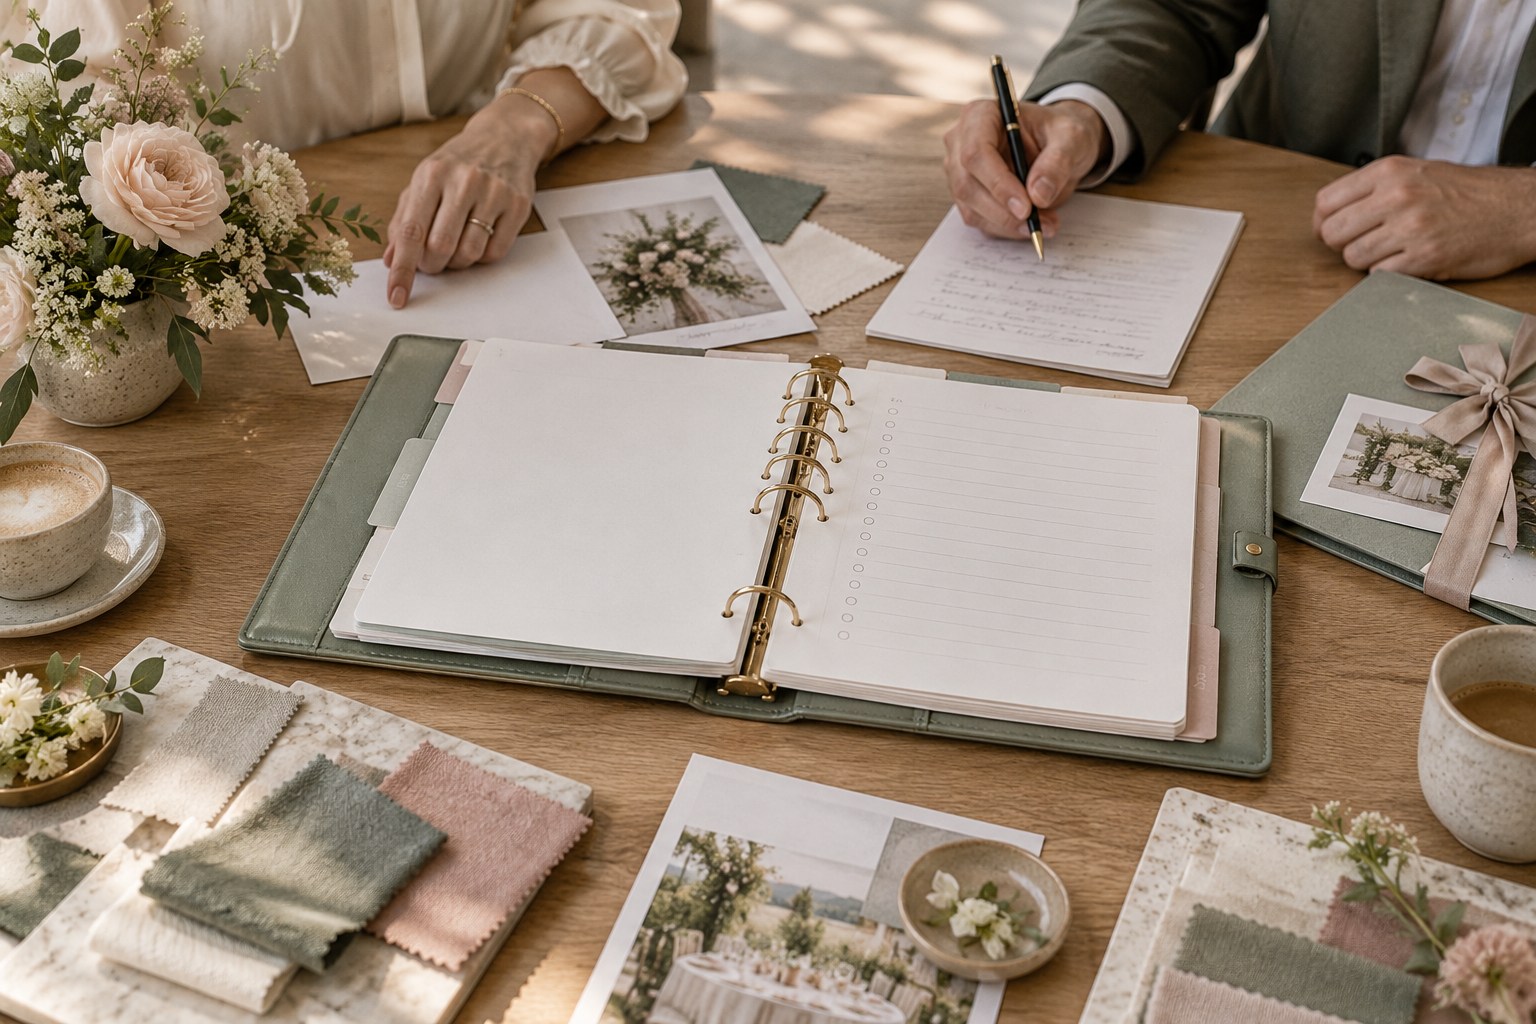
    Some wedding books combine instruction, worksheets, checklists, and inspiration. That variety can be useful, but more content is not automatically better. The Knot’s overview of wedding planner books shows how wide the range is, from hands-on workbooks to books that focus more on inspiration. Use that variety as a reason to inspect the pages, rather than assuming that a larger book will cover your needs.

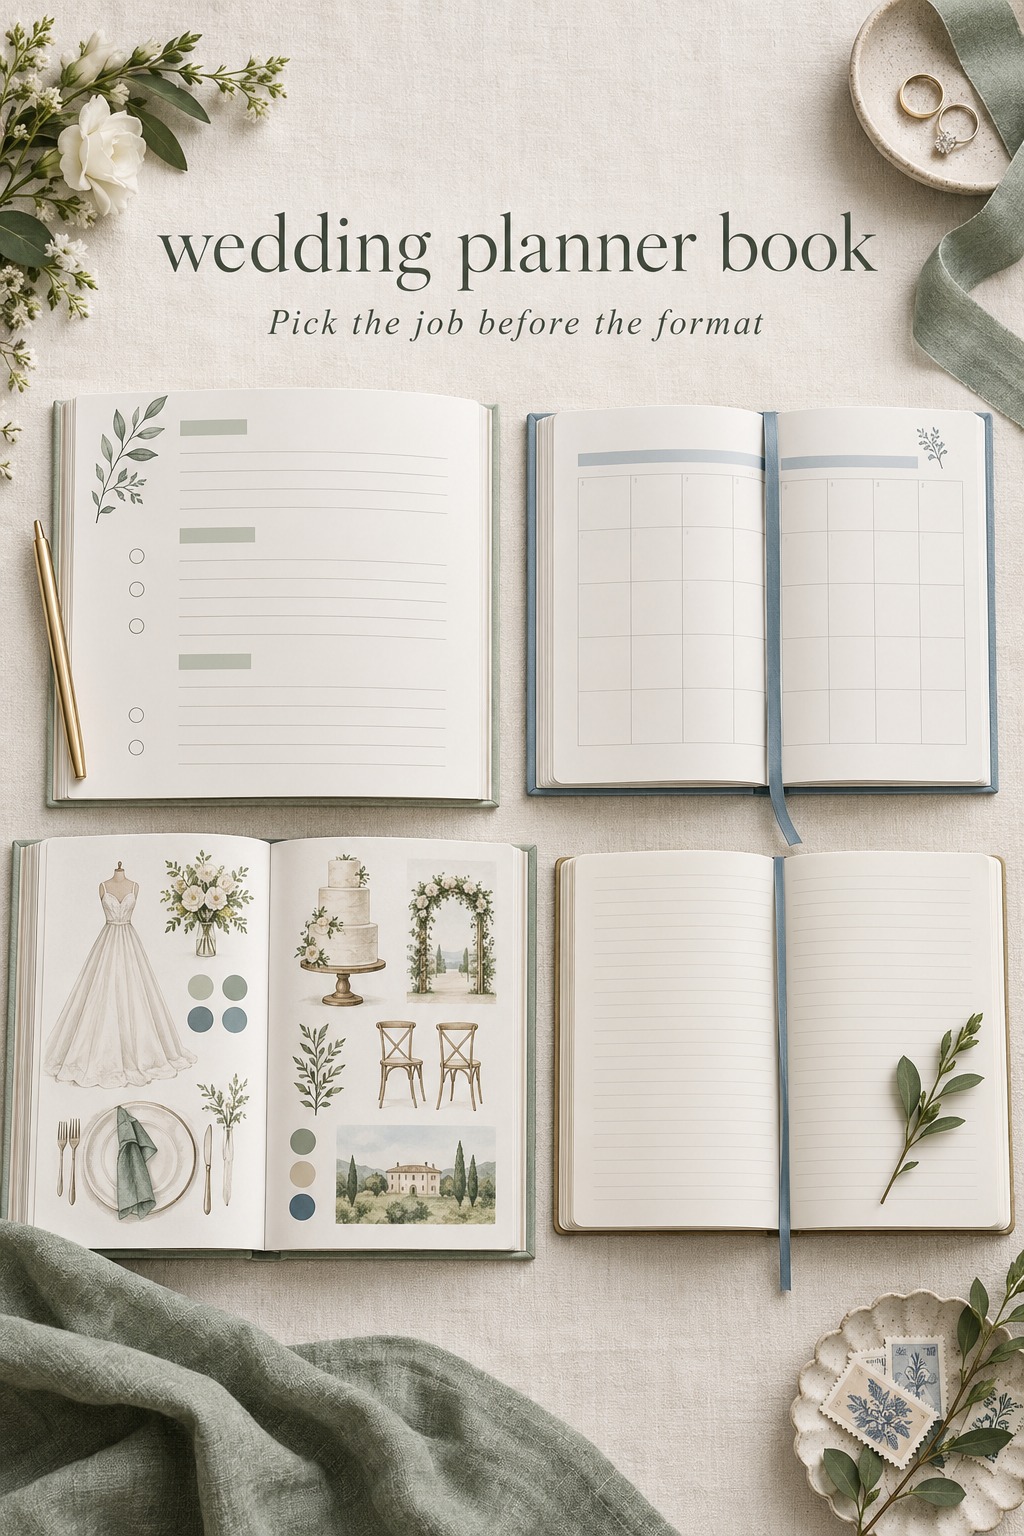
    wedding planner book formats including workbook, journal, and planner
    Choose a book for the kind of planning work you need.

    Compare the Main Types of Wedding Planner Books

    Once you know the main job, compare formats by the work they ask you to do. This quick guide is about the role of each format, not a ranking of specific products.

    • Guided workbook: best when questions and structured exercises help you clarify priorities. Check that the questions fit your choices and that you can write in ranges or add your own prompts.
    • Undated planner: useful when your timing is uncertain or you want to choose your own pace. Check whether the pages still provide enough guidance to help you get started.
    • Dated planner: useful when you like a ready-made schedule and its timeline matches your engagement. Check where the schedule begins, how it handles missed dates, and whether you can move tasks without losing the sequence.
    • Reference book: useful when you want explanations or inspiration. Check whether it includes practical exercises if you expect it to help you make decisions.
    • Journal: useful when you want room to think, record ideas, or keep a personal account. Check whether you need another tool for deadlines and confirmed details.
    • Printable or fillable book: useful when you want to type, print selected pages, or replace a page after a decision changes. Check what software and printing steps the seller requires before you buy.

    It is fine to choose one primary book and use a small supporting tool for a different job. For example, a guided book can help you think through decisions while your calendar holds appointment times. The aim is to give each tool a clear purpose. If the same deadline, total, and guest count need to be updated in several places, the arrangement may create more work than it removes.

    wedding planner book tested with a venue comparison worksheet
    Try a sample page with a real choice before committing to a book.

    Run a Ten-Minute Sample-Page Test

    When a product page offers previews, use them. If you can browse a physical copy, flip through it before deciding. Choose one real planning question and follow the book’s pages as if you were using it today. Comparing two venues is a useful example because it involves facts, preferences, unknowns, and a next step. You can use another decision if that is more relevant to where you are.

    Test the sequence, not just the page design

    Begin at the first page connected to your decision. Can you see what to do first, what information to gather, and what the next page is for? A workbook may have attractive worksheets but leave you unsure how one connects to another. A clear sequence lets you move from a question to a comparison to a decision, without hunting through the book for the next instruction.

    Imagine that you are comparing a city venue with a garden venue. The first page should help you identify what matters for your celebration, such as travel, guest comfort, available dates, or the atmosphere you want. The next step should help you collect comparable information. If you cannot tell which facts matter or where to record them, the book may be better as a source of inspiration than as your main working planner.

    Check whether the prompts allow honest answers

    Can you write a range when you do not know an exact number? Is there room for a note about a condition, such as “available only if transportation works”? Are you allowed to leave an answer open without making the rest of the page unusable? Real planning includes estimates and questions. A book should make those visible instead of pushing you to fill every box with a guess.

    For the venue example, the couple might know that they want a comfortable indoor option but still be unsure about the guest count. The book should let them record that uncertainty and identify what would clarify it. If the page only accepts a final guest number and a fixed budget, it may fit better later in planning than it does now.

    Measure the writing space with a realistic note

    Preview pages can appear roomy on a screen. Think about what you would actually need to write. A vendor conversation might produce a price, a restriction, a question, and a reminder to follow up. A tiny blank line may be enough for a short label, but it will not hold a useful comparison. If you write by hand, consider whether the spaces are comfortable for your normal handwriting and whether the paper feels suitable for your preferred pen.

    Also look for room to add context. “Venue B” is not a useful note by itself several months later. A short explanation such as “better guest access, but date is not confirmed” preserves the reason you are still considering it. You do not need pages of prose. You need enough space to understand your own notes when you return to them.

    Follow the page through to a next action

    After the comparison, what does the book help you do? Can you record a decision, the reason behind it, and the next task? Does the layout leave you with a natural point to pause? If the book gives you a place to list features but no way to mark a follow-up, you may need a calendar reminder or another simple tool. Notice the gap before you purchase so you know what the book will and will not handle.

    Use the test on one page for each major job you expect the book to do. If it is a task planner, preview a schedule page. If it is a workbook, try a decision exercise. If it is a journal, check whether the page invites the kind of reflection you want. Ten focused minutes can help you avoid buying a book because one appealing section distracts from the pages you will use most often.

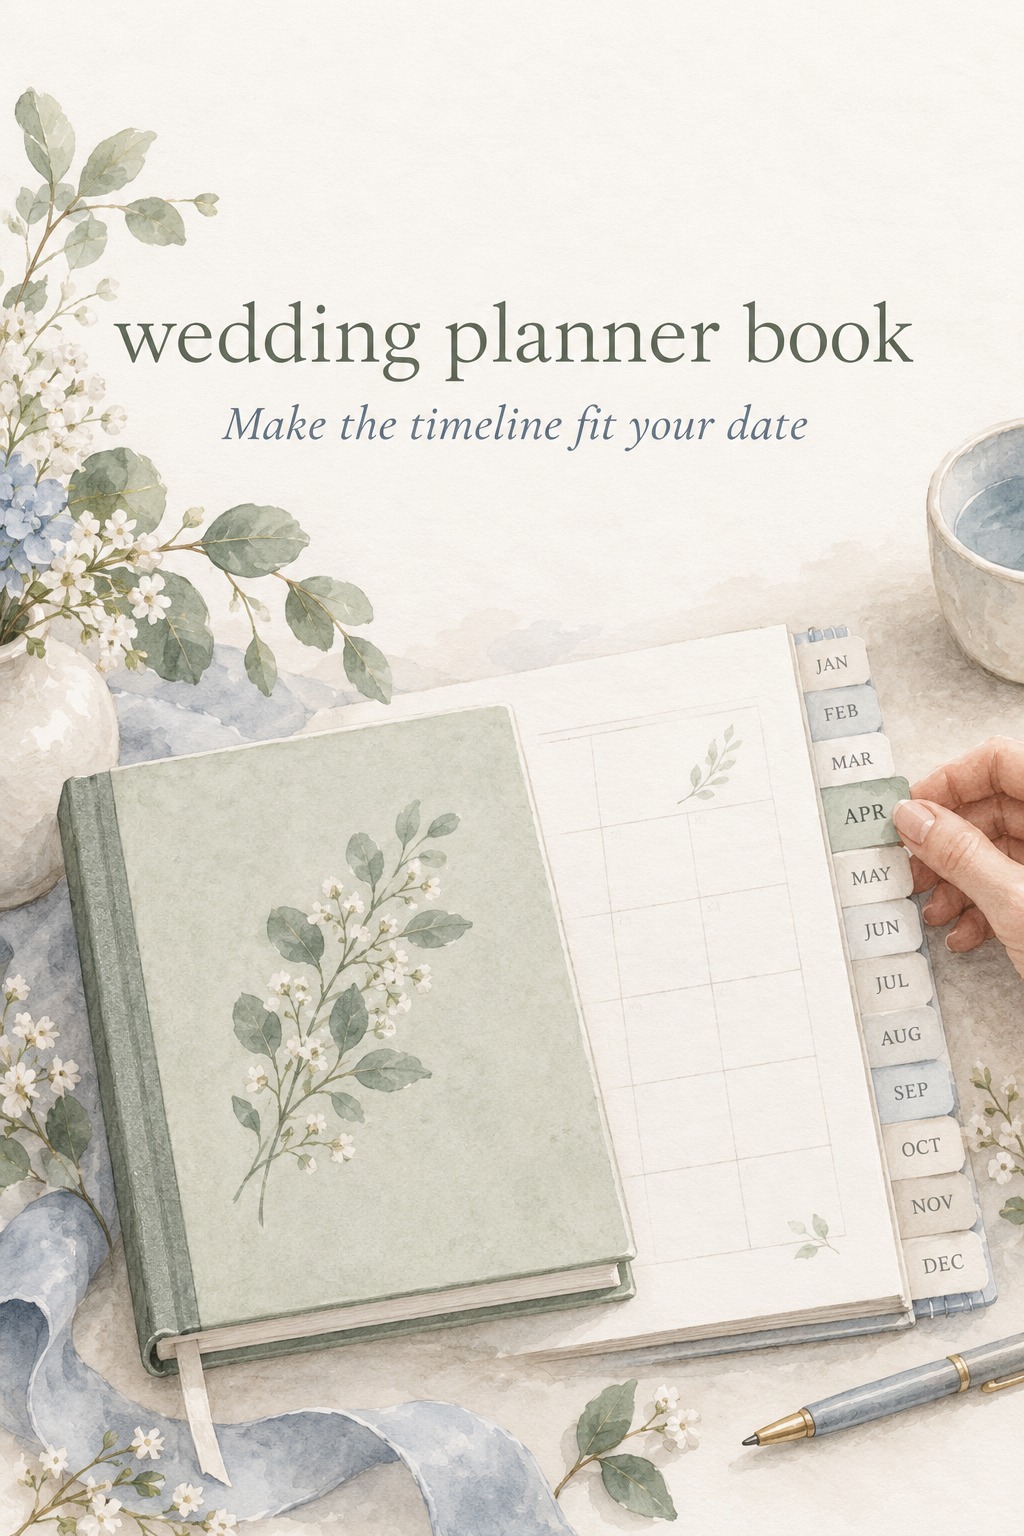
    wedding planner book with a flexible month-by-month calendar
    Check whether the printed schedule fits your actual planning window.

    Check the Timeline and Physical Format

    A planner’s format affects when and where you can use it. Check the month or week structure, page size, binding, paper, printability, and whether the pages can be removed or copied. These details are practical, but they only matter in relation to your habits. A large workbook can be comfortable on a desk and cumbersome to carry to an appointment. A compact book can fit in a bag but leave too little room for notes.

    • Timeline: Does the book count backward from a fixed date, use calendar months, or let you create your own order? Can you adjust if your engagement is shorter or longer than the printed schedule?
    • Writing space: Are the boxes large enough for actual notes, not just one-word answers? Can you add a page or continue a note without losing its context?
    • Readability: Are the labels and instructions easy to scan? Do colors, icons, or decorative elements make it easier to find a section, or do they compete with the writing?
    • Portability: Will you use it at home, at appointments, or both? Consider whether it can lie open on a table and whether loose papers will stay with it.
    • Format: Is it a printed book, a fillable PDF, a printable file, or a combination? Confirm whether typing, printing, or downloading is supported before purchase.

    Do not assume a book’s “twelve-month plan” means you must follow each month exactly. Treat a printed schedule as a prompt to ask what decisions come next. If you already have a venue or a photographer, mark those steps as complete and move on. If a task depends on a decision you have not made, write the dependency beside it so you can see why the timing may shift.

    For a digital file, check the practical steps as well as the content. Can you save a copy and find it later? Can you print only the pages you want? Are instructions available for completing the file on your device? A fillable PDF may suit a couple who likes typing and selectively printing, while a bound notebook may suit people who want one physical place to write. Each option can work if its everyday use matches yours.

    Choose a Book That Can Handle Change

    A wedding planner book is used while decisions are still changing. A date may move, a guest estimate may grow, or a venue may not offer the room you expected. Inspect how the book handles a crossed-out answer, a postponed choice, or a new question. If every page assumes a final decision, the book may feel outdated as soon as reality changes.

    Look for a simple way to show status. You might mark a choice as researching, waiting, decided, or booked. The exact words do not matter as much as the distinction between an idea and a commitment. If a printed planner has no status field, see whether there is a margin or notes area where you could add one. A flexible page is easier to keep useful than one that makes every entry look equally final.

    Try a small change during the sample-page test. Pretend you preferred Venue A but learned that your date is unavailable. Can you cross out the option and record what the new information changed? Can you keep the useful comparison without rewriting the entire section? This helps you see whether the layout supports thinking, or whether it only looks tidy when every plan goes exactly as expected.

    Some books include pockets for receipts or business cards, while others use tabs, removable pages, or blank notes. These features are helpful only if they match what you already carry and use. If you will scan contracts and keep them digitally, pockets may matter less than a clear place to write a vendor’s name and the date of a conversation. If you prefer paper at appointments, a folder or pocket may be convenient. Choose based on a real habit rather than on the number of extras listed.

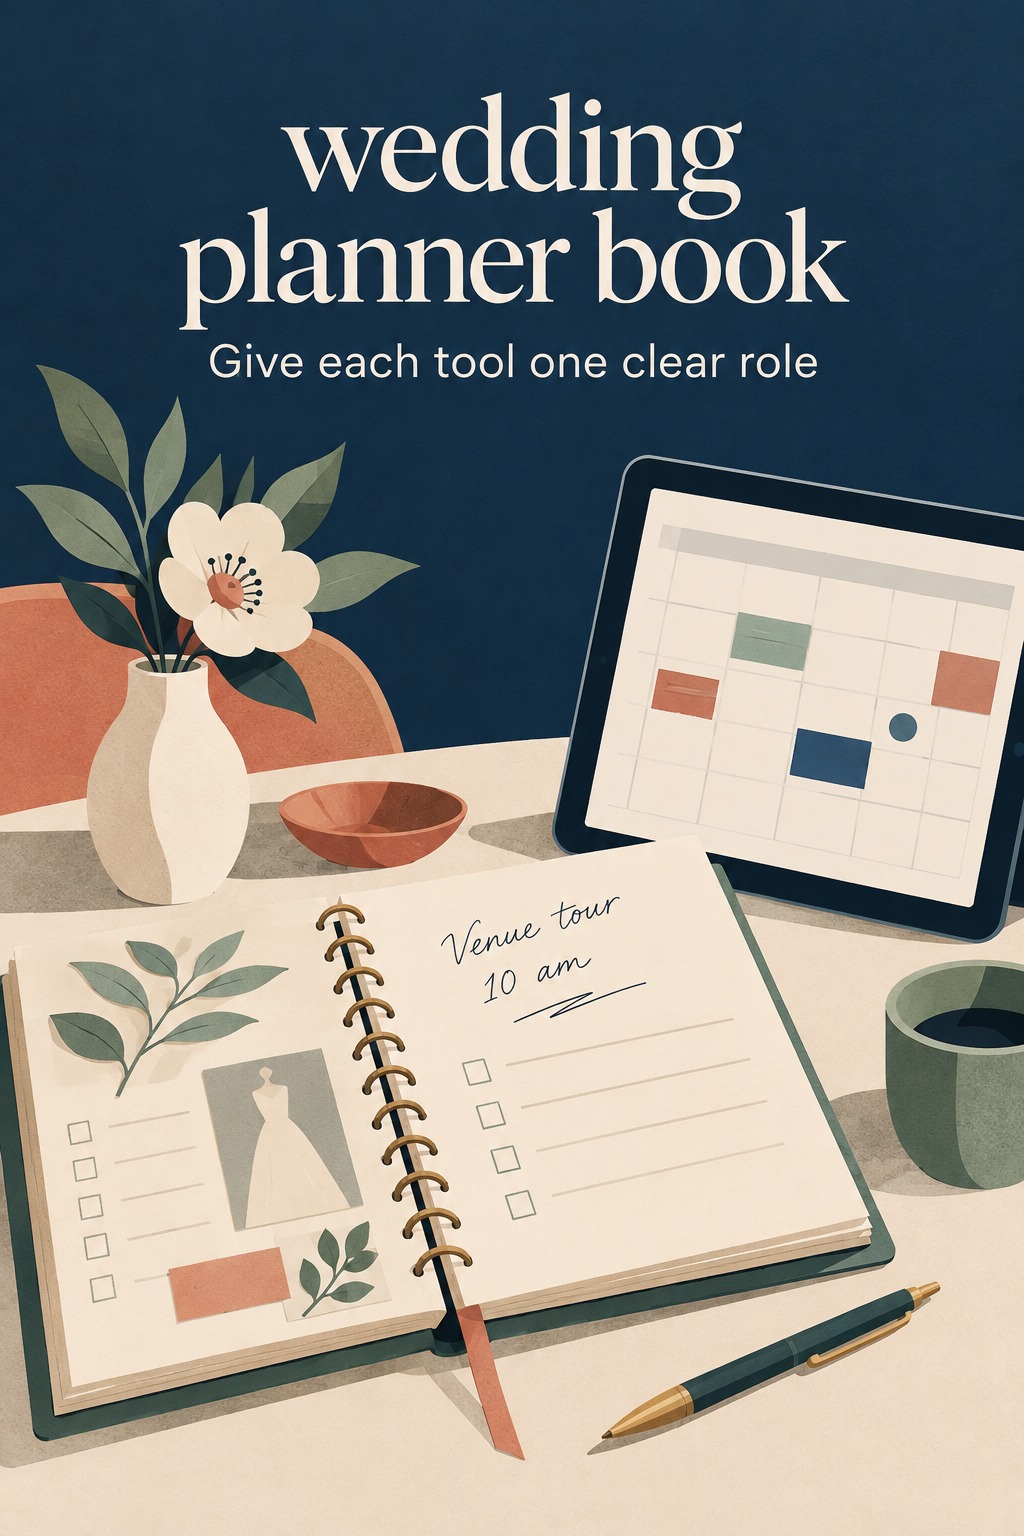
    Give the Book One Clear Role Beside Digital Tools

    A paper book can be valuable even if you also use a calendar, shared file, or planning service. Decide what belongs in the book and what should live in the current digital record. For instance, you might use the book to reflect on priorities and take notes during an appointment, then transfer a confirmed date or payment deadline to the place you already check. This keeps the book useful without making it a second copy of every detail.

    For each kind of information, choose one current home. If you write a venue quote in the book and later update a spreadsheet or app, label the book note as a meeting note rather than the final price record. If you decide to change the date, update the place where you expect to look before making other plans from the old date. A book is easier to trust when it is clear whether an entry is a thought, a question, or a confirmed detail.

    Keep this arrangement small. You do not need to build a complex filing system just because you bought a planner. A short note such as “appointment notes, transfer confirmed details to calendar” may be enough. The right book should reduce friction in the way you already plan, not create a weekly chore of copying every line into another tool.

    Avoid Common Wedding Planner Book Mismatches

    Choosing by cover alone: A cover can make a book pleasant to carry, but it cannot show whether the prompts are useful. Inspect the pages before deciding, especially the sections connected to your main planning job.

    Buying a workbook when you want a reference guide: Worksheets ask you to do something. If you want explanations and examples first, choose a guide with enough context to make the exercises meaningful.

    Buying a journal when you need reminders: Open writing space can be lovely for reflection, but it may not show what is due. Check whether task tracking is a main goal and use a calendar for deadlines if the book does not support that job.

    Assuming more pages mean better support: A large planner may include many categories that do not apply to your event. A smaller book can be a better fit if you can find the useful pages quickly and write enough to make them meaningful.

    Ignoring the schedule: A beautiful dated planner can be frustrating if its assumed timeline does not resemble yours. Check how easy it is to skip, move, or relabel tasks before you decide.

    Expecting one book to be the only source for everything: If you have a paper book, a calendar, and a shared digital tool, give each one a job. Put the current deadline where you will actually check it and use the book for the work it handles well.

    After the sample-page test, write down the two features you need and one feature you can happily skip. That short list will help you compare options without getting pulled toward decorative extras. If no book passes the test, it is reasonable to wait, choose a simpler notebook, or use a printable sample before committing to a larger planner.

    Sources and Methodology

    This article was informed by a review of ten US search results about wedding planner books, including publisher descriptions, wedding planning publications, and planning resources. The sources show a mix of guided workbooks, timelines, journals, and digital or printable formats. Recommendations here are a practical selection method, not a product endorsement. Check the current listing for the exact format, page previews, and timeline before purchasing.

    wedding planner book beside a digital calendar with separate roles
    Let the book and any digital calendar handle different jobs.

    FAQ

    What should I look for in a wedding planner book?

    Start with the job you want it to do, such as explain planning, prompt decisions, track tasks, or preserve ideas. Then inspect sample pages for a useful sequence, enough writing space, a timeline that fits, and room to show when a detail is still uncertain.

    Is a wedding planner book worth buying?

    It can be worth buying if the pages help you think or keep information in a way you will actually use. A book is less useful when it duplicates a tool you already maintain or includes prompts that do not fit your planning stage. Previewing pages before you buy can help you judge the difference.

    What is the difference between a wedding planner book and a journal?

    A planner book often includes instructions, worksheets, timelines, or task pages. A journal usually gives you open space to record thoughts, ideas, and memories. Some books combine both. Check the sample pages to see whether the format supports the practical job you need.

    Should I choose a dated or undated wedding planner?

    A dated planner can help when its schedule matches your engagement and you like a ready-made pace. An undated planner gives you more control over when to begin and how quickly to move. Check whether either format lets you adjust if a decision takes longer than expected.

    How can I tell if a wedding planner book has enough writing space?

    Use a sample page and imagine a real note, not just a label. A venue conversation may need a price, a restriction, an open question, and a next action. If the page cannot hold that information clearly, see whether it provides a notes area or a way to add a page.

    Can I use a wedding planner book with a digital planning tool?

    Yes. Give the book a distinct purpose, such as appointment notes or guided exercises, and keep confirmed dates or current totals in the digital tool you already check. This reduces the chance that you will maintain two conflicting versions of the same detail.

    What if the wedding planner book I bought does not fit my wedding?

    Use the pages that are useful and mark prompts that do not apply as skipped. Add a short note or removable page where you need more room. Keep the book’s role narrow, and move time-sensitive confirmed information to the place you use as your current record.

  • The Wedding Planner: Make the First Meeting Count

    The Wedding Planner: Make the First Meeting Count

    A first meeting with a wedding planner can feel like an audition. You might wonder whether to arrive with a color palette, a full guest list, a finished budget, and answers to every question. You do not need a finished wedding to have a useful conversation. You need a clear picture of what you know, what is still open, and what matters enough to protect.

    That small distinction changes the meeting. Instead of trying to impress a planner with a polished vision, you can show the real starting point and see how the planner helps you think. A one-page brief, a few meaningful references, and a short set of questions are usually more useful than a large folder of ideas.

    the wedding planner consultation brief prepared by an engaged couple
    Bring a short brief that gives your first conversation a useful starting point.

    The First Meeting Works Better as a Shared Working Session

    A consultation has two purposes. The planner learns enough about the event to understand the scope and respond thoughtfully. You learn enough about the planner’s communication, process, and way of thinking to decide whether a working relationship could fit. It is a conversation between people considering a partnership, not a test you pass by knowing wedding vocabulary.

    Compare two ways to prepare:

    • Bring a finished-looking pitch: many images, a fixed style label, and decisions presented as final even when you are unsure. The planner may respond to the surface details while missing the experience or constraint underneath them.
    • Bring an honest starting brief: the things you know, the questions you want help with, and the details that cannot change. The planner can respond to the actual planning problem and identify what should happen next.

    The second approach is helpful whether you are meeting a full-service planner, someone offering partial support, or a coordinator for a later stage. The exact services vary, so the aim is not to decide in advance what the planner should do. It is to explain your situation clearly enough that both sides can discuss fit and scope.

    For example, “We want a relaxed celebration” gives a broad feeling, but it does not show what you are choosing between. “We want guests to have time to talk, and we are deciding between a seated dinner and a more flexible meal” gives the planner something concrete to explore. A good starting brief turns a preference into a decision without pretending the answer is settled.

    Both partners should have a voice in the conversation when possible. That does not require complete agreement on every detail. It does help the planner hear the different priorities directly, notice where they overlap, and ask useful follow-up questions before a proposal is shaped around only one person’s assumptions.

    the wedding planner brief with known, open, and fixed details
    Separate confirmed details from open questions before the consultation.

    Build a One-Page Brief With Three Lanes

    Before the consultation, open one shared note or sheet and divide it into three headings: known, open, and fixed. Keep it to one page if you can. The goal is not to document the entire wedding. It is to help the planner see the decisions that matter now and the information that may affect a recommendation.

    Known: what is true today?

    List the date or date range, approximate guest-count range, location or venue status, estimated budget comfort range, and any vendors already booked. Add a short note about what has already been paid or promised if that affects the next steps. Use ranges when the exact number is not known. “About 80 to 100 guests” is more honest than an exact count that is still changing.

    Label the status of each item. “Venue booked” is different from “venue on hold,” and “photographer selected” is different from “we like their work.” These small labels help a planner avoid treating research as a commitment or revisiting a decision you have already made.

    Budget language deserves the same care. If you have a range, share the range and clarify what it includes. If you have not agreed on a number, write that down. The first meeting can help you understand which planning questions depend on the budget, but neither partner should feel pressured to invent certainty just to keep the conversation moving.

    Open: where would help be valuable?

    Write down the decisions you are not ready to make. Perhaps the ceremony location is undecided, you are unsure whether to host a welcome gathering, or you are not sure how much planning support you need. Add one sentence about what makes each question difficult. It could depend on venue availability, family input, cost, travel, or simply not knowing the options.

    Choose two or three open questions for the meeting. An exhaustive question list can turn the hour into a quiz and leave little room for the planner to understand your priorities. A short list lets you see how the planner reasons through your actual choices. You can always ask for clarification about an answer or request more details in a follow-up.

    Fixed: what should the plan protect?

    Use this section for non-negotiables and real constraints. These might include a cultural or religious element, an accessibility need, a family member who must be included, a date that cannot move, a booked venue, or a spending boundary. Separate a true requirement from a strong preference. The planner can help you explore alternatives only if they know which details have flexibility.

    Give each fixed item a plain explanation. “We need an indoor backup” is more useful when you add that the ceremony is planned outdoors and a key guest has limited mobility. Share only personal information that is relevant to the planning decision, and ask how sensitive details will be handled if you are unsure.

    The three lanes also make differences between partners easier to discuss. One person may care most about a small guest experience, while the other is focused on keeping the date flexible. Put both priorities on the page without forcing a quick ranking. Ask the planner to help you understand the trade-offs before you decide which one leads.

    If you already use The Wedding Command Center to organize wedding decisions, the brief can serve as a concise conversation starting point. A simple shared note works just as well. Keep this page focused on the consultation rather than copying every detail from your planning space.

    the wedding planner reviews annotated wedding inspiration images
    Add a note about the feeling or detail you want to carry forward from each reference.

    Bring Inspiration That Explains, Not Decides

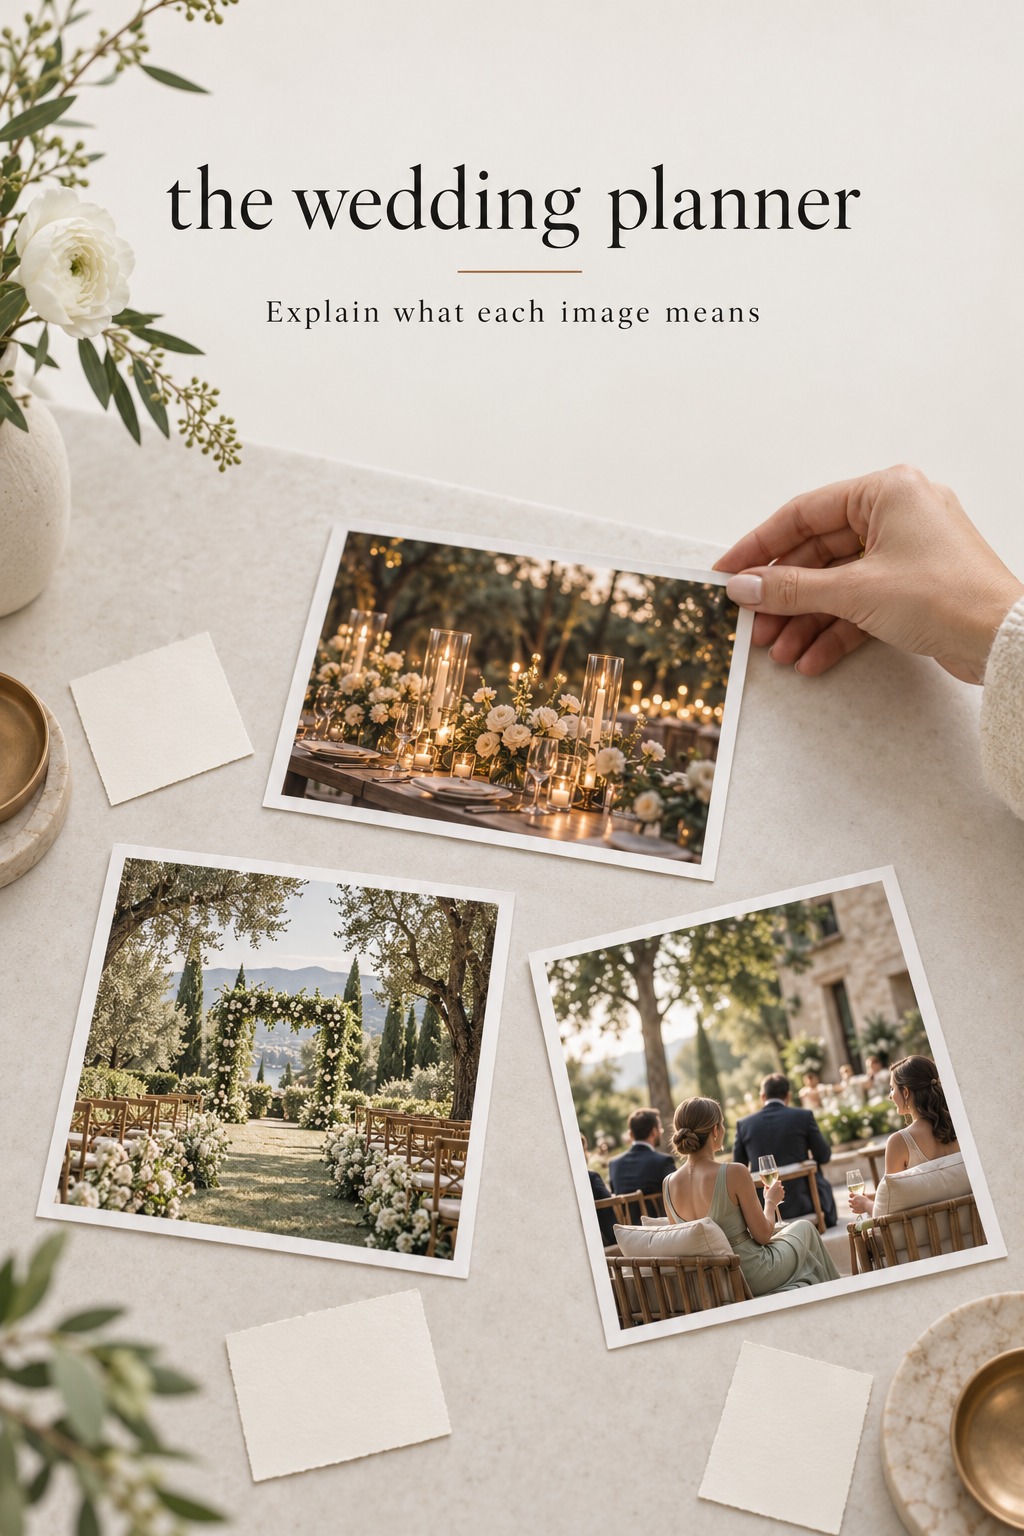
    Visual references can help a planner understand the mood you are describing, but a large image board can be difficult to interpret. Select a few examples that show different things you care about, such as the room feeling, guest experience, floral shape, or level of formality. Add one short note under each image: what appeals to you and what you would change.

    Try prompts like these:

    • “We like the long-table conversation and candlelight, but we would prefer a brighter room.”
    • “We saved this ceremony because it feels personal, not because we need the same flowers.”
    • “We like how the schedule leaves room to talk, but the event itself can be more formal.”
    • “We dislike a crowded transition between ceremony and dinner, so guest movement matters to us.”

    This makes inspiration easier to discuss as information rather than instruction. Two photographs can look similar and support different priorities. One may be about the way guests are seated. Another may be about the color, lighting, or pace. Naming the part that matters gives the planner room to suggest an option that fits your venue, budget, and guest needs.

    You do not need to settle a visual direction before the first meeting. You can bring a handful of saved references, a few words about the atmosphere you want, or no images at all. The key is to separate what you are drawn to from what you have already chosen. If an image is a fixed commitment because you have booked a designer or florist, identify that separately.

    Existing decisions belong in the known lane. If you have already booked a venue, list it and note what is included or still under discussion. If a photographer or caterer is confirmed, include their name and the service you have contracted. That context helps a planner respond to the actual team and avoids treating an existing agreement as an open suggestion.

    Many standard consultation guides recommend sharing broad event details and asking questions. The planner-meeting guidance from The Knot also encourages couples to attend together and be ready to discuss their general budget, guest count, location, and style. Use your brief to gather those details into a shared starting point instead of memorizing a long list.

    the wedding planner and couple having a two-way consultation
    Use the meeting to learn how both sides communicate and make decisions.

    Use the Consultation to Test Understanding and Working Fit

    A planner consultation is not only a chance to present information. It is also a chance to notice how the conversation works. Does the planner ask follow-up questions about your priorities? Can they explain their process in plain language? Do they distinguish what they know from what they would need to confirm? Do both of you have room to speak?

    There is no single correct consultation style. Some planners may begin with your event details. Others may first explain how they work or ask what brought you to the meeting. Keep the purpose in view: you are trying to understand whether the planner heard you and whether their proposed next step fits your needs.

    Use the one-page brief as a loose agenda:

    • Start with the known facts. Give the planner enough context about date, guest range, location, budget, and existing commitments.
    • Describe the experience you want. Use your own words and a few references, not a borrowed style label you do not understand.
    • Share the open questions. Explain where you would value guidance and what decision depends on the answer.
    • Name the fixed requirements. Make constraints visible early so the discussion stays realistic.
    • Ask about the working process. Clarify communication channels, update rhythm, how decisions are recorded, and what the next step would be if you move forward.

    When a planner offers an idea, ask what need it is responding to. This is especially helpful if the idea surprises you. It may address a logistical issue you had not considered, or it may simply be a suggestion to explore. You can say, “Can you explain which part of our brief led you to that recommendation?” The answer helps you understand both the idea and the planner’s way of thinking.

    You can also notice whether the conversation changes when both partners contribute. A planner does not need to agree with every preference to be a good fit. They should be able to reflect what they heard, explain their professional reasoning, and make space for the couple’s priorities. If one partner feels talked over, raise that before assuming it will resolve later.

    Communication expectations belong in the conversation too. Ask which channel is used for everyday questions, how urgent issues are handled, when you can generally expect a reply, and where final decisions are recorded. A wedding may involve several people, but you should understand how your planner intends to keep the main conversation clear and manageable.

    The consultation should not require you to decide on the spot. If you need time to compare proposals, discuss the options privately, or read the written terms, say so. A useful conversation can end with a clear proposal date or a list of information needed from you, rather than an immediate yes.

    For a real example of a consultation flow, Dantus & Co. Events recommends that both partners attend, share starting details such as date, guest count, venue, and budget, ask about the planner’s process, and agree on next steps. The specifics will vary by planner, but leaving with an understood next action is useful across different meeting formats.

    Close the Meeting With a Written Next-Step Recap

    Before the call or meeting ends, summarize what you think you heard. This can take two minutes. Name the main needs, the questions that remain open, and the next thing each side will do. Ask the planner whether they understood the brief correctly and whether anything important is missing.

    After the meeting, send a short recap with five points:

    • Understood: the event facts and priorities the planner repeated back.
    • Still open: the decisions that need more information or a conversation between partners.
    • Proposal: what services and timing the planner will put in writing, if that is the agreed next step.
    • Owner: who will provide each missing item or answer.
    • Decision point: when you expect to review the proposal or reconnect.

    Keep the recap factual and short. It is not a contract and should not be treated as a replacement for the planner’s written agreement. Its job is to show whether you and the planner left with the same understanding. If an important point is missing or phrased differently from what you meant, correct it before you review a proposal.

    When the proposal arrives, compare it with the brief and your notes. Check the services, meeting cadence, communication expectations, payment schedule, and any limits or exclusions. Ask the planner to clarify language you do not understand. If the proposal does not match the priorities discussed, request an explanation before signing or paying.

    The eventual contract should state the scope and other terms in writing. A consultation recap is useful because it makes your questions easier to ask, but it does not guarantee what a contract will say. Take time to review the agreement and confirm that the actual terms reflect what you want to hire.

    If you decide not to move forward, close the conversation politely. You can thank the planner, explain that you chose another direction, or let them know that you need more time. If you want to continue, ask what information they need and when the date or service will be confirmed. Clear next steps are kinder than leaving either side to guess.

    Adapt the Brief to the Stage You Are At

    Different couples arrive at a first meeting with different amounts of planning already done. The brief should reflect your actual stage. Do not add work merely to make it look complete.

    If you have not chosen a venue

    List the locations or venue types you are considering, how flexible the date is, and what you know about the guest range. Add the parts you are unsure how to compare, such as access, guest experience, or how one venue choice affects the rest of the plan. You do not need to bring a final layout or a complete vendor list.

    If you have already booked several vendors

    Share a concise list of who is booked, what they are providing, and which details remain open. Bring contract or proposal information only when it is relevant to the question. A planner needs enough context to understand commitments and gaps, not a full archive of every email you have received.

    If you and your partner are not aligned yet

    Write each partner’s top two priorities separately. Mark the overlap and the disagreement without labeling one person unreasonable. If you know the reason behind a preference, note it in a few words. The planner may help you understand the options, but the meeting should not force a private decision before you are ready.

    If the event includes several days or locations

    List each gathering, its likely location, and the people you expect to attend. Mark what is fixed and what may change. This helps the planner see that the consultation covers a connected set of events, while keeping the brief short enough to discuss the broad shape before each detail is planned.

    In every case, the brief is a starting snapshot. You can update it after you learn more. The first meeting is successful if you understand one another better and know what information or decision comes next, even if the wedding itself still has many open questions.

    Avoid Preparation That Makes the Conversation Less Useful

    Do not build a full design plan before you know the constraints. Inspiration can help explain a feeling, but a finished set of choices may cause the conversation to skip venue, budget, schedule, or guest needs. Keep early preferences open to revision unless you have already committed to them.

    Do not substitute an exact number for an honest range. If the guest list is a rough estimate, say so. If your budget has a firm ceiling or includes only certain expenses, explain that. The planner can respond more accurately when uncertainty is visible.

    Do not bring every image you have saved. A large board can make it difficult to know which details matter. Pick the few examples that explain your priorities and annotate them. Save the longer collection for later if the planner asks for it.

    Do not turn the meeting into a long interrogation. Ask questions connected to your situation and leave room for the planner to ask about you. A question list can help you remember the essentials, but the conversation should still respond to what you learn together.

    Do not assume silence means agreement. If a recommendation is unclear or one partner feels uncertain, say so before the meeting closes. You can ask for time, request a written explanation, or identify the question that needs to be answered next.

    The best preparation is small enough that you can review it together and flexible enough to change. A page with clear facts, open questions, and fixed needs gives the wedding planner a stronger starting point than a perfect presentation. It also lets you leave the first meeting with a shared sense of what happens next.

    Sources and Methodology

    This article was informed by a review of ten US search results about wedding planner consultations, including planner guidance, wedding industry resources, and contract information. Recommendations are framed as preparation ideas rather than universal rules because consultation formats and services vary by planner. Review the planner’s own written scope and agreement before deciding what to hire.

    the wedding planner recap with a clear next step
    A brief recap turns a good first meeting into a practical next move.

    FAQ

    What should we bring to a first meeting with the wedding planner?

    Bring a short shared brief with your date or date range, approximate guest count, venue status, budget comfort range, booked vendors, priorities, open questions, and non-negotiables. A few visual references with notes can help, but you do not need a finished design or an exact guest list.

    Should both partners attend the first wedding planner consultation?

    When possible, yes. Both partners can explain what matters to them and hear the same information directly. If one person cannot attend, agree in advance on the priorities and questions to bring, then share the written recap before making a decision.

    Do we need a firm wedding budget before meeting a planner?

    No. A realistic range or a clear statement that the budget is still being discussed is more useful than a number you do not believe. Explain what you expect the budget to cover and which costs are already committed, if you know.

    Do we need to have our wedding style decided?

    No. Bring a few words about how you want the celebration to feel, along with a small number of images if they help. Describe what you like about each reference rather than treating the image as a complete design instruction.

    What questions should we ask the wedding planner?

    Prioritize questions about services, communication, decision-making, proposal timing, and what the planner needs from you next. Add questions that relate to your open items, such as an existing venue or a multi-day event. Ask for written clarification when an answer affects the scope or fee.

    Should we sign a contract at the first meeting?

    You do not need to decide during the consultation unless you already have the written terms and feel ready. Take time to review the services, dates, payment schedule, cancellation terms, and responsibilities in the contract. Ask about anything that differs from what you discussed before signing.

    What should happen after the first consultation?

    Send or review a brief recap of what was understood, what remains open, who owns each next action, and when you will reconnect. If the planner is preparing a proposal, compare it with your priorities and clarify its scope before you accept.

  • Wedding Planner Printables: Choose Pages That Work

    Wedding Planner Printables: Choose Pages That Work

    A large download can look like a complete wedding plan. Then the pages arrive: another checklist, a second budget, three places to write guest names, and a timeline that does not match your venue contract. The most useful wedding planner printables are not necessarily the ones in the biggest bundle. They are the pages that help you make a real decision, record it clearly, or hand the right information to someone else.

    Choose a printable one task at a time. Ask what decision it supports, who will use it, how often its information changes, and whether paper makes that work easier. Then print a small sample before building a full set. This approach keeps the convenience of a paper worksheet without creating a second planning system that competes with your current notes.

    wedding planner printables selected by a couple at a planning table
    Choose pages for the decisions you need to make next.

    Start With the Next Decision, Not the Size of the Download

    Before you save a PDF, name the next decision you need to make. It might be choosing between two venues, confirming a working guest range, comparing florist proposals, or deciding what information a day-of helper needs. A printable earns its place when it gives that decision a clear space and a useful next step.

    Use a four-question test for each page:

    • What job does this page do? “Help compare venue proposals” is clearer than “wedding planning.”
    • Who will fill it in? Name one person to update it, even if several people contribute information.
    • When will it be used? A vendor comparison belongs before booking. A final schedule belongs near the handoff stage.
    • What happens after it is complete? The page should lead to a decision, confirmation, conversation, or clear record.

    If you cannot answer those questions, save the page for later instead of printing it now. Some forms are reference material, some collect active information, and some are only useful when a particular decision comes up. A list of possible pages is not a to-do list. You do not need to complete every worksheet just because a bundle includes it.

    Also look for duplicate jobs. A master checklist and a date-based timeline may both contain tasks. A budget overview and a vendor payment tracker may both show costs. That can be useful if one page summarizes and the other holds detail, but it becomes confusing when both are edited as independent records. Before printing, write a short note on the cover or first page explaining where the current answer lives.

    A printable collection can include dozens or even hundreds of pages across budgets, guests, contacts, fittings, flowers, and event-day details. That breadth can help you find a page for a specific task, but it does not tell you which pages your wedding needs. Treat the collection as a menu. Select the pages that fit your decisions and leave the rest unprinted.

    wedding planner printables for venue, budget, and guest tasks
    Match a worksheet to one clear planning job.

    Choose Printable, Editable, or Both by How Often the Information Changes

    Paper is especially useful when people need to think together, sketch options, take notes during a meeting, or review a clean summary without opening a device. A venue comparison sheet can help you capture impressions while touring. A blank ceremony-order page can make it easy to discuss sequence with family. A short vendor contact sheet can travel with the person coordinating arrivals.

    Other details change too often for a loose page to be the only record. Guest responses, meal choices, payment balances, vendor arrival times, and seating assignments can shift after a printable has been filled in. If you make updates in multiple places, the older copy may look authoritative even when it is no longer current.

    Use this simple distinction:

    • Print for thinking. Use paper for brainstorming, short-term comparisons, sketches, meeting notes, and a focused handoff.
    • Keep editable for changing facts. Use one current digital record for information that receives new names, replies, amounts, dates, or assignments.
    • Use both when they have different jobs. Let the editable file hold the current details. Print a dated snapshot when someone needs to review or act on a defined version.

    This is not a rule that every couple needs a spreadsheet. A notebook, shared folder, or planning platform can serve as the current record if both partners know where it is and how it is updated. The important distinction is between a temporary working page and the place you will check for the latest answer.

    Some wedding planning spreadsheets are printable, which can be helpful when a family member prefers paper but the couple still needs editable data. The The Knot spreadsheet guide shows a range of planning sections that can live in a workbook. Use a printed sheet as a view or meeting aid when that makes sense, then decide where changes to the underlying information will be recorded.

    If a more guided planning resource would support the way you organize decisions, The Wedding Command Center may be worth exploring alongside your selected printables. Keep the purpose of each tool clear: avoid entering the same changing detail in several places unless you have a simple process for keeping them aligned.

    wedding planner printables tested beside a printer and paper guide
    Check the page size and writing space with one sample first.

    Build a Small Starter Set Around the Next Planning Phase

    Instead of asking which pages belong in a complete planner, ask which pages will be used in the next few weeks. Your starter set can grow when the work changes. This keeps the pages close to the decisions in front of you and gives you a chance to learn what you actually use.

    When you are setting direction

    A short priorities worksheet can capture what matters most to you, the approximate guest range, possible locations, and questions that need discussion. A rough budget page may help you compare broad scenarios. Keep this early page light. It should help you talk through choices, not make an early estimate look like a final commitment.

    When you are comparing venues or vendors

    Choose a comparison sheet with the same fields for every option. Record the proposal date, what is included, what costs extra, payment timing, open questions, and the next action. Add a space for the source of each figure, such as a proposal or call note, so you can find context later. A notes area with enough room is more useful than a decorative score that hides the reason for your preference.

    When guest responses are arriving

    A guest and RSVP page can be handy when you are checking invitation wording, grouping households, or reviewing meal requirements together. If responses are still coming in, decide which record is authoritative and how often the page will be refreshed. A printed list can help at a meeting, but mark the date it was printed and use the current record for changes made afterward.
    When details are moving toward the wedding day

    A run-of-show or day-of schedule is useful when the start times, locations, arrivals, and responsibilities have been checked with the people involved. A generic timeline can be a starting point, but the final schedule should reflect the actual venue access, vendor agreements, ceremony plan, travel between locations, and the person responsible for each handoff. Keep an early draft visibly labeled as a draft.

    These examples are a starting point, not a required sequence. A small wedding may need only a budget decision page and a short day-of handoff. A multi-event celebration may need separate working pages for each location or gathering. Choose by the work you have, not by the number of sections in a download.

    The free pages on Grid and Paper, for example, are grouped by planning checklists, budget, guests and seating, and day-of details. That category structure is useful when you want to locate a page for one job. Before using any download, still check that its fields and timing fit your own plan.

    wedding planner printables kept in sync with a current planning file
    Keep a printed working page aligned with one current record.

    Pilot-Print a Few Pages Before Committing to a Full Set

    A printable can look clear on a screen and feel cramped once it is on paper. Run a small test with one page you will use soon. Choose a real task, fill in a few fields, and notice whether the page makes the work easier. If you are still hunting through notes to find the next action, the sheet may need fewer boxes or a different purpose.

    Use this pilot-print review:

    • Confirm the paper size. Check whether the file is designed for US Letter or A4, and select the matching page size in the print dialog.
    • Check scaling and margins. Make sure labels and writing areas remain readable and that nothing important is clipped.
    • Write with the tool you expect to use. Test a pen or pencil in the smallest fields. If the answer barely fits, choose a roomier page.
    • Try the page during the actual task. Bring it to the venue visit or vendor conversation it is meant to support.
    • Review it afterward. Did it capture information you could not easily retrieve elsewhere? Did it make the next decision clearer?
    • Check the handoff. Could another person understand the labels without an explanation from you?

    If the printable does not help, edit your selection before printing more. A blank note page might work better than a form designed for a different type of wedding. You can also write a few labels by hand or attach a separate notes page instead of searching for a perfect template.

    For pages you will reuse, test the number of copies too. A vendor comparison may need one page per candidate, while an overview may need only one current version. A seating sketch may be revised several times, so a working copy can be useful. For a final schedule, printing many copies before the last confirmations may create waste and confusion. Print the handoff version only when its recipients and details are settled.

    Some printable pages can be filled in on a device, while others are meant to be printed and completed by hand. Confirm that the file opens in a format you can use, and check whether any editable version preserves the same layout. Do not assume that a form advertised as printable will also be easy to adapt to your own fields.

    Keep Changing Information Consistent Across Paper and Digital Copies

    A printed page becomes risky when nobody can tell whether it is current. Give changing sheets a visible date, owner, and source note. For example: “Guest meal review, updated May 8, source: shared guest list.” The exact wording is up to you. The goal is to make the page’s status obvious to the next person who sees it.

    Use a short update routine whenever something changes:

    • Enter the change in the agreed current record.
    • Update or replace any paper page that someone will still use.
    • Mark a superseded page “old copy” or recycle it so it does not remain in circulation.
    • Tell the people who rely on the information where the current version lives.

    Not every change requires a new printout. If a guest corrects an email address, update the current guest record. If the seating plan is being discussed on paper, make the change on the working sketch and later transfer the chosen arrangement to the authoritative guest or seating record. Print a replacement only when someone needs the page to make a decision or carry out a task.

    For a handoff, think about who needs what rather than sending the entire collection. A venue contact may need the setup timeline and access details. A person helping with guest arrivals may need a contact list and transportation notes. A vendor may need their arrival time and the information relevant to their service. Keep private budget notes, personal addresses, or unrelated planning discussions off a page that does not need them.

    Before sharing, confirm that the document is final enough for its purpose, identify who can answer questions, and include a way to reach that person. A concise, current page is easier to act on than a thick packet of old planning material. If details are still being confirmed, label them as provisional and state when a final version is expected.

    When a new decision changes a page, keep a note of what changed and why if the context may matter later. A single sentence such as “Moved the ceremony start after confirming venue access” can explain why the schedule was revised. A short update note is often more useful than keeping every draft indefinitely.

    Common Printable Choices and What to Verify Before Using Them

    Planning checklists: Check whether the page is organized by months, milestones, or task categories. Treat generic date ranges as prompts, then compare them with your actual booking windows and agreements. Assign an owner to open tasks so the list does not become a collection of reminders with no next step.

    Budget worksheets: Look for room to distinguish estimates, quoted amounts, signed costs, payments, and balances. If the form has one cost box, add a note that explains what the figure represents. A worksheet that blurs a guess and a commitment may make a budget look more certain than it is.

    Guest and RSVP pages: Check how the form handles household invitations, plus-ones, reply status, meals, and seating. Use only fields that support a decision or service need. Decide where new replies will be entered, especially if more than one person is helping.

    Vendor comparison sheets: Make sure each candidate is judged with the same prompts. Include what is included, exclusions, open questions, decision date, and the source of the quote. A printable can organize a comparison, but the signed agreement remains the place to verify the contracted terms.

    Wedding-day timelines: Confirm the page includes time, location, task or event, responsible person, and relevant arrival or setup notes. Adapt the draft with your venue and vendors. A template is not confirmation that the timing will work for your particular day.

    Seating and layout pages: Check whether the page matches the room and table shapes you are planning. A useful sketch gives you enough room to revise names and table assignments. Keep the chosen arrangement connected to the latest guest count and any venue floor-plan requirements.

    Across every category, check legibility, page size, field labels, revision date, and who will use the finished sheet. If a page is not helping with a real task, you can leave it in the download folder. Your planning system should reflect your celebration, not the contents of a template bundle.

    Sources and Methodology

    This guide was informed by a review of ten US search results for wedding planner printables, including printable page libraries, wedding planning guides, downloadable templates, and worksheet examples. Template contents and file formats can change, so check the original download before relying on a particular page or feature.

    wedding planner printables for a clear venue handoff
    Share a concise, current page with the person handling the next step.

    FAQ

    What wedding planner printables should we use first?

    Start with one page for the next decision you need to make, such as a venue comparison or a short priorities worksheet. Add a budget, guest, vendor, or timeline page when that task becomes active. You do not need to print every page in a collection before you know how you will use it.

    Are wedding planner printables better than a spreadsheet?

    They do different jobs. Paper can be useful for discussion, sketches, meeting notes, and focused handoffs. An editable record is usually easier to maintain when names, dates, replies, or payments change. Use both if you decide which one holds the current information.

    How do we avoid printing duplicate information?

    For every page, identify the job it performs and the location of the current answer. If a checklist and timeline both mention the same task, decide which one is the active tracker and use the other as a summary or reference. Avoid updating two sheets independently unless one person is responsible for reconciling them.

    Should we print a wedding guest list?

    A printout can help during a focused review or discussion, especially when collaborators prefer paper. Date it and identify the current guest record, because replies and meal details may change. Use the latest record when you make a final count or hand information to a vendor.

    How can we check whether a printable will work for us?

    Print one sample and use it for the task it is meant to support. Check that the text is readable, the fields leave enough writing room, the page size is correct, and another person can understand the labels. Keep it only if it helps you decide, record, or hand off information more clearly.

    What should go on a wedding day printable?

    A focused day-of page may include time, activity, location, responsible person, vendor or participant, and arrival or setup notes. Share only the information each recipient needs, and verify timing and responsibilities with the people involved before labeling the page final.

    How do we keep a printed wedding plan up to date?

    Choose one current record for changing details. Date each printout, write where the current version lives, and replace or mark older copies when someone still relies on them. Print a new page when a person needs it to make a decision or complete a task, not after every minor edit.

  • Wedding Event Planner: Match the Role to the Work

    Wedding Event Planner: Match the Role to the Work

    A venue says its event coordinator will help on the wedding day. A planner’s proposal promises partial planning. The caterer will manage meal service, and the couple expects someone to keep the whole timeline moving. Everyone sounds involved, yet one practical question remains: who is actually responsible when a decision or task crosses between them?

    The phrase wedding event planner can suggest a broad role, but the title alone does not tell you which decisions, vendors, or hours are included. The most useful way to compare support is to list the work your celebration needs and assign each item a lead, a support person, an approver, and a place for the final confirmation. That map makes different service packages easier to compare and helps reveal gaps before the wedding week.

    wedding event planner reviewing responsibilities with a couple
    Clarify who leads each part of the wedding plan.

    This approach is useful whether you are hiring full planning, adding a coordinator to a mostly self-planned wedding, or deciding whether the venue’s included support covers enough. The goal is not to give every task to one person. It is to make sure every important task has a clear owner.

    The Wedding Event Planner Label Covers Different Starting Points

    Wedding planning professionals may describe their services through labels such as full-service planning, partial planning, month-of coordination, day-of coordination, design, or event management. These labels help you understand the general shape of an offer, but each business can package work differently. One planner may help source vendors; another may expect the couple to hire them. One coordinator may build a timeline; another may review a timeline the couple has already made.

    The Knot’s overview of wedding planner service types describes a range of planning and coordination approaches and advises couples to read the contract and package details. That is the useful principle to carry into any inquiry: compare the duties and the timing of the work, not just the name of the package.

    Begin by listing what you still need help with. You might want someone to shape the budget, compare venues, source vendors, review proposals, develop a design, build a timeline, coordinate a rehearsal, direct setup, cue the ceremony, manage guest movement, or close the event. You may already have completed some of those tasks. Others may matter only if your plan changes.

    Separate the work into stages so that “help with the wedding” becomes more concrete:

    • Early planning: budget framework, venue search, vendor research, and decisions about the overall event.
    • Design and production: visual direction, rentals, layouts, lighting, setup plans, and approval of samples or mock-ups.
    • Final planning: confirmations, timeline, floor plan, rehearsal details, and coordination across suppliers.
    • Event execution: access, setup, cues, guest flow, schedule changes, and breakdown responsibilities.

    A wedding event planner may cover many of these stages or only selected parts. A coordinator may concentrate on final planning and execution. An event designer may lead visual decisions without managing every logistics question. A venue coordinator may be responsible for the property and the services the venue has agreed to provide. These are helpful starting descriptions, not guarantees about a particular contract.

    Also identify who employs or contracts each professional. A venue coordinator usually works for the venue. An independent planner is hired by the couple. A vendor is responsible for the service in that vendor’s agreement. The difference matters when interests or responsibilities meet: a venue contact can clarify access rules, while a couple’s planner may coordinate the event’s wider schedule. Ask each person to describe their role in the actual event rather than inferring it from a title.

    This first step prevents a common comparison mistake. A broad label can sound like more help than the written scope provides, while a modest-sounding label can include the specific work you need. Write down the outcome you want, then check whether the proposed service names the work that produces it.

    wedding event planner folio with a responsibility map and venue plan
    Compare package duties with the work your wedding still needs.

    Why Role Boundaries Matter Once Venue and Vendor Agreements Are Involved

    Responsibilities often overlap at the edges. The venue may provide tables, but the planner may create the room layout. The caterer may manage dinner service, while the planner places dinner within the timeline. The photographer may request a portrait list, but the couple decides which family groupings matter. If nobody agrees who owns each step, a task can be assumed, repeated, or missed.

    Start with the contracts already in hand. For the venue, mark what is included, what is restricted, and what requires an outside supplier. For each vendor, note the deliverable, timing, access needs, and any information the couple must provide. For a planner, find the services, meeting schedule, communication method, hours on site, staffing, and exclusions. A proposal may summarize an offer, while the agreement contains the operative terms. Keep the distinction clear.

    A venue coordinator’s responsibilities are often tied to the building, house rules, venue staff, and services the property has promised. Zola’s guide to deciding whether to hire a wedding planner distinguishes the venue coordinator from an independent planner and notes that the venue contact is not automatically responsible for the couple’s outside vendors or personal logistics. Your own venue’s contract and written explanation are the sources to rely on for the specific scope.

    Look for work that crosses agreements. If the venue controls when suppliers can enter, the venue needs to provide the access window. The planner may collect that information and fit it into the timeline. Each supplier needs to know its own arrival time and setup requirements. The couple or authorized planner confirms the final schedule. Several people contribute, but one person should lead the coordination step.

    Use a simple four-part distinction:

    • Lead: owns making sure the task reaches completion and follows up if information is missing.
    • Support: supplies a specific input, service, or recommendation.
    • Approve: has authority to choose, spend, or accept a change.
    • Confirm: records the final answer in the current contract, schedule, email, or other agreed source.

    Do not assume the person who provides input also has authority to approve. A planner may collect options and recommend a florist, while the couple chooses and signs the vendor agreement. A venue may tell you that a decor installation needs approval, but the couple or designer may need to revise it. The map should show who makes the decision and who is simply helping it happen.

    This becomes especially useful when an event includes several locations, separate ceremony and reception teams, guest transportation, or more than one gathering. A wedding weekend might involve a welcome dinner, ceremony, reception, and farewell brunch. Some vendors may serve only one event, while the planner coordinates the shared schedule and guest experience. Ask explicitly whether the proposed scope covers each gathering, each address, setup, transitions, and the final handoff.

    If two contracts appear to assign the same work to different people, ask for a clarification before relying on either assumption. If no contract names the task, assign it to the couple or ask the planner whether the service can be added. A written scope is more useful than a reassuring phrase such as “we’ll handle everything,” because it tells all parties what “everything” includes.

    wedding event planner and venue coordinator reviewing a floor plan
    Coordinate venue and planner responsibilities around one current plan.

    Translate Each Package Into a Responsibility Map

    Make one page with five columns: task, lead, support, approver, and confirmation source. You can add a timing column if the work has a deadline. Keep the page focused on work that could affect cost, schedule, guest experience, access, or coordination. You do not need to inventory every decorative choice before deciding which professional to hire.

    For example, the map might show that the venue leads on providing its room access rules, the planner supports by collecting those rules, the couple approves a layout that affects guest experience, and the final floor plan is stored in the venue’s current event file. For transportation, the couple may select the service, the vendor supplies routes and timing, the planner coordinates pickup times with the schedule, and the confirmation lives in the transportation agreement or final itinerary.

    Use verbs that reveal what each person will actually do. “Venue logistics” is too broad to compare. “Venue manager sends the loading window and approved entrance to the planner” describes an action. “Planner” is not a task. “Planner assembles the vendor arrival schedule from confirmed access times” makes the responsibility clearer.

    As you read a planner’s proposal, sort each service line into the map. Put an “ask” beside anything vague, such as “vendor coordination,” “setup assistance,” or “event management.” Ask which vendors are included, when contact begins, who makes the calls, what is shared with vendors, and what happens if a supplier does not respond. For setup, ask whether the planner directs venue staff, places personal items, manages outside rental delivery, supervises teardown, or only checks that the room is ready.

    Review decision authority as carefully as task ownership. Can the planner approve an overtime charge, add a rental item, or change the schedule without reaching you? If so, what is the spending limit and how will the decision be reported? If the planner cannot approve changes, who will be available to decide during the event? Your map should identify the person to contact and the preferred route for urgent questions.

    Clarify the timeline for support. A coordinator who begins a few weeks before the wedding may still need time to review existing contracts, meet at the venue, contact vendors, and develop a working schedule. If you expect help selecting vendors or refining the design much earlier, check whether that work is included or whether the contract starts later. The calendar is part of the service scope.

    Count the people as well as the hours. Ask who will be on site, who the lead contact is, whether assistants are included, and how many event areas they can cover. If one person is expected to supervise setup in one location and cue the ceremony in another, ask how those responsibilities will be staffed. Do not infer staffing from the package title.

    Finally, include a confirmation source for every significant item. It could be a signed agreement, updated proposal, venue event order, approved timeline, floor plan, or email that records the final decision. The source does not have to be the same for every task, but it must be easy for the people involved to find the current answer.

    Once the map is filled, compare planners using the rows you care about most. One candidate may cover vendor research, while another focuses on design and execution. One may attend a rehearsal; another may charge separately. The best fit is the offer that clearly covers the work you need or makes its gaps easy to assign elsewhere.

    wedding event planner responsibility map for couple venue and vendors
    A clear lead turns overlapping roles into an actionable handoff.

    Match Support to the Actual Wedding Setup

    The right arrangement depends on the event you are planning and the tasks you want to hand off. These examples are starting points for the responsibility map, not fixed rules about what a planner or venue must provide.

    At an all-inclusive venue, the venue may provide catering, furniture, some rentals, and an event contact. Start with the venue’s written list of inclusions. Mark who manages house staff and in-house services, then list outside needs such as photography, personal decor, transportation, or guest instructions. If those outside tasks matter, ask whether the venue coordinator handles them or whether you need an independent planner or another named lead.

    Check that “included coordinator” is tied to specific outputs. Does that person coordinate only venue staff and meal service, or also contact outside vendors and manage the couple’s timeline? Are they present for the rehearsal? Who confirms the final setup and handles a schedule change? If the venue says the role varies, ask for a written summary for your booking.

    For a mostly self-planned wedding, you may have selected the venue and vendors but want professional support for the final weeks and event day. Map the work you have already completed separately from the work still open. Ask the coordinator when they begin, what they review, whether they contact vendors, who builds or approves the final timeline, and whether setup or breakdown is included. If your timeline or vendor agreements still need substantial development, ask whether the proposed package covers that work or whether you need partial planning.

    For a multi-event weekend, create one map for the full schedule and note which professional covers each gathering and location. The welcome event may use a different venue and caterer from the wedding reception. Transportation and guest communications can span more than one day. Ask who coordinates transitions, who receives updates, whether one lead planner is present throughout, and what additional staffing or travel work is included. A package defined only around the wedding day may leave other events outside its scope.

    For a design-heavy celebration, separate visual decisions from installation logistics. An event designer may develop the look, source decor, or prepare a layout. A florist, rental company, or production vendor may provide and install particular elements. The planner may coordinate timing and dependencies. The couple approves the direction and budget. Write who signs off on mock-ups, what the vendor will deliver, who handles setup, and who removes items after the event.

    For a destination wedding or multiple locations, include travel and guest movement in the scope conversation. Ask whether the planner supports accommodation coordination, transportation schedules, local vendor communication, and events around the ceremony. Clarify which party handles guest questions and where the most current itinerary will live. Do not assume that destination experience automatically includes every travel service.

    After walking through the relevant scenario, identify the three most important uncovered tasks. You may decide to add them to a planner’s scope, assign them to a trusted helper, simplify the event, or accept that the couple will own them. The map makes each choice visible before a task becomes a last-minute surprise.

    A planning resource such as The Wedding Command Center may be useful for coordinating the tasks you choose to keep with yourselves. If you use a shared planning tool, decide which person owns updates and where vendors will receive their final instructions. The tool can support your workflow, while responsibility for a decision still belongs to a named person.

    Keep Decisions, Approvals, and Handoffs Clear

    Before you sign, ask the planner or coordinator to confirm the map’s most important rows. Put scope, start date, meeting count, included events, on-site hours, staffing, travel, setup, teardown, vendor contact, and exclusions in writing where they apply. Ask how changes to the scope or schedule are approved and documented. If an answer is “it depends,” ask what information will determine the final answer and when you will know.

    Agree on one route for routine decisions and another for urgent event-day issues. Routine questions might go through email or a planning meeting. A time-sensitive issue during the event may need a direct phone number and an alternate contact. The agreement or final schedule should show who is allowed to contact the couple, who can approve a change, and who should be contacted first.

    Keep a short decision log. Record the choice, the approver, the date, and any contracts or plans that must be updated. If a vendor changes a delivery time, the planner may update the timeline, but the venue and affected vendors need the current version. If the couple changes the ceremony layout, the designer or rental company may need the new plan. One change can touch several responsibilities, so list everyone who needs to receive it.

    Before the event, compare the final timeline and vendor instructions with the responsibility map. Every task should have one lead, even when several people support it. Make sure the people who need to know receive the current version and can identify it by date. If a duty moved from the couple to the planner, tell the vendor who will now lead that communication.

    After the event, the planner may coordinate breakdown, return rentals, collect personal items, or close out vendor questions if those tasks are included. Confirm the handoff before the final day. Identify who retrieves cards, gifts, decor, or documents, who checks the venue, and who follows up on any remaining vendor matter. An end-of-event plan protects the work you assigned throughout planning.

    A clear wedding event planner arrangement does not require the planner to do every job. It requires the couple, planner, venue, and vendors to understand where their responsibilities begin and end. When the map, contract, and current schedule agree, everyone has a more reliable route from a decision to the finished event.

    Sources and Methodology

    This guide reviewed US wedding planning articles, venue coordination resources, and planner interview materials. The sources describe a range of service labels and point couples toward package and contract details. Because roles and inclusions differ by provider, the responsibility map here is a planning aid, not a universal definition or legal interpretation of any contract.

    wedding event planner folio for a multi-event wedding weekend
    Make sure the planner scope includes each gathering and location.

    FAQ

    What does a wedding event planner do?

    A wedding event planner may help with planning, design, vendor coordination, logistics, or event execution, depending on the service agreement. Review the specific package to see which tasks, dates, meetings, events, and on-site hours are included.

    Is a wedding event planner the same as a coordinator?

    The titles can be used differently by providers. A planner often supports a broader part of the planning process, while a coordinator may focus on final logistics and execution. Compare actual responsibilities, timing, and staffing in the proposed agreement.

    Does a venue coordinator replace an independent wedding planner?

    Not automatically. The venue coordinator may focus on the property, venue staff, house rules, and included services. An independent planner may cover the couple’s broader event plan. Ask the venue what its coordinator handles and assign any remaining work to a named person.

    What should I ask a wedding event planner before booking?

    Ask what tasks are included, when service begins, which events and locations are covered, who will attend, what authority the planner has, and what is excluded. Also ask who owns vendor communication, setup, teardown, and urgent decisions.

    How do I compare wedding planner packages?

    List the work you need, then mark who leads, supports, approves, and confirms each task under every proposal. Compare timing, staffing, meetings, event coverage, and exclusions. Ask providers to clarify vague terms before comparing offers.

    Should a wedding planner handle setup and breakdown?

    It depends on the agreement and staffing. Ask whether the planner directs venue staff, manages outside rentals, places personal decor, supervises cleanup, or only coordinates the schedule. Put the assigned responsibilities and time window in writing.

    Do I need a planner for a multi-day wedding?

    You may find broader planning support useful when several events, venues, vendor teams, or guest movements need coordination. Map each event and ask whether the planner’s package covers its schedule, staffing, travel, communications, and setup.

  • Wedding Planner Binder: Make Vendor Meetings Count

    Wedding Planner Binder: Make Vendor Meetings Count

    You leave a florist meeting with a handful of notes, a price range, and three beautiful ideas. A week later, you cannot remember whether the centerpiece was included in the quote, whether the candle option was approved, or who was supposed to ask the venue about open flames. The notes exist, but they have not yet become a plan.

    A wedding planner binder can do more than store contracts and checklists. Use it as a working record for vendor conversations: prepare what you need to decide, capture what was actually said, and turn the conversation into a named next step. That process helps couples and planners keep proposals, decisions, and written confirmations distinct, even when several vendors are involved.

    wedding planner binder with a couple preparing a vendor meeting brief
    Prepare a focused brief before you meet with a wedding vendor.

    The approach is intentionally narrower than a full binder setup. It does not ask you to print every email or copy your entire planning system onto paper. It gives each important conversation a clear beginning, middle, and follow-up so that a meeting can move the wedding forward.

    Why Vendor Meeting Notes Stop Being Useful

    Vendor conversations create several kinds of information at once. You may hear an estimate, ask whether a service is available, share a preference, discuss an option, or make a final choice. Those statements can sound similar in hurried notes. Later, a phrase such as “six tables, candles, delivery” may not tell you whether candles were priced, permitted, or simply mentioned as an idea.

    Notes also lose their context when they are separated from the meeting that produced them. A page may show a package total without saying which guest count it assumed. A reminder may say “send floor plan” without identifying who needs it or by when. A vendor’s verbal answer may be useful, but an important term still needs to be reflected in the proposal or agreement before you treat it as settled.

    This is why a wedding planner binder should distinguish four states. Discussed means someone raised the subject. Proposed means an option or price was offered. Decided means the couple or authorized planner chose a direction. Confirmed means the relevant detail appears in the appropriate written record, such as a revised proposal, contract, or email. A discussion can lead to a decision, but it is not the same as written confirmation.

    Keep a small key on the meeting page if that distinction is new to your planning team. You can mark a line D for discussed, P for proposed, A for approved, and C for confirmed. Use whichever labels are easiest to scan, then apply them consistently. The point is not to create another elaborate code. It is to stop a promising conversation from being mistaken for a final commitment.

    A paper record is especially useful when you are comparing two or three vendors, meeting away from your desk, or discussing a detail that affects other decisions. The Knot’s vendor checklist shows how many different service categories may enter a wedding plan. A shared meeting structure gives you a consistent record while leaving room for questions that are specific to the venue, caterer, photographer, or other professional.

    Before adding more pages, look at the notes you already have. If the main problem is that you cannot tell what is final, a new divider will not solve it. If your notes rarely include an owner or a due date, add those fields. If all the details are present but nobody knows where the final version lives, add a source reference. The binder works when it closes the gap you actually have.

    wedding planner binder open to a meeting page separating notes and decisions
    Keep vendor notes and approved decisions distinct on the meeting page.

    Prepare a One-Page Brief Before Each Vendor Meeting

    Give each meeting a single working page, even if the vendor already sent a polished proposal. Start with the basics: vendor name, service, meeting date, attendee names, wedding date, current planning stage, and the file or contract reference. Those details make the page understandable when you return to it months later or share it with your partner or planner.

    Next, write the reason for the meeting in one sentence. “Compare dinner service options for 90 guests” is clearer than “catering.” “Confirm what the floral proposal includes for ceremony and reception” is more useful than “flowers.” The sentence sets a boundary. It helps you decide which questions belong today and which can wait for another conversation.

    Add the constraints that could change the answer. Depending on the vendor, these might be the current guest-count range, budget limit for that service, venue rules, access window, preferred style, or a decision deadline. Mark estimates as estimates. If one figure is still changing, write its date or source beside it. That small reminder prevents a preliminary number from appearing more settled than it is.

    Choose three to five priority questions, rather than copying a long generic list onto every page. Ask what you need to compare the offer or make the next decision. For a venue, that could be access, included equipment, setup responsibilities, and overtime terms. For a caterer, it could be what the package includes, how the price changes with the menu, and when the final guest count is due. For a photographer, it might be coverage hours, delivery format, and who will be present.

    Leave space for the answer and for its status. A useful row can include: question, short answer, status, source to verify, and follow-up owner. Do not try to write a transcript. Capture the answer in plain language, then note where the exact term should appear. If the answer depends on a later count, revised floor plan, or venue approval, record that dependency right beside it.

    Bring only the papers needed for that conversation. A venue meeting may call for the floor plan, guest estimate, and relevant contract page. A design meeting may need a small set of selected references and the venue restrictions that affect them. A catering discussion may need the current guest range and a comparison of menu options. The printable pages on Grid and Paper’s wedding planner illustrate the range of planning references couples may keep on paper. Your meeting brief can point to the useful page without turning every appointment into a binder tour.

    At the bottom, include a short “not deciding today” line. This is helpful when a conversation produces attractive possibilities that still depend on cost, timing, or another person’s input. Write what needs to happen before the question returns. “Choose after venue confirms candle rules” is an actionable pause. “Think about candles” is an open loop with no clear owner.

    Prepare the page shortly before the meeting, not months in advance. Recheck the latest proposal, highlight anything that changed, and make sure the person attending has the same goal. If both partners cannot attend, agree on what the attendee may decide and what they should bring back for discussion. This keeps the meeting productive without asking one person to guess at the other’s preferences.

    wedding planner binder reviewed during a florist meeting
    Record answers and follow-up questions while vendor details are fresh.

    Capture Answers Without Turning Them Into Assumptions

    During the conversation, note the vendor’s answer separately from your reaction. For example: “Vendor says the standard package includes delivery within the listed service area” is a record of what you heard. “We like the package” is your response. “Ask for delivery location and fee in the revised proposal” is a follow-up. Keeping these lines distinct makes it easier to review the notes without treating interest as approval.

    Write down quantities, timing, and conditions whenever they shape the decision. “Setup included” may depend on a particular room, delivery window, staffing level, or item count. “Available” may mean available for the date, or simply offered as a service. “Starting at” is not the same as a total. If you are unsure, ask what the statement includes and what would change it.

    Use quotation marks only when you are recording wording you may need to verify exactly. Otherwise, summarize the answer and add a source line such as “proposal revision requested” or “see venue rules, page V-02.” Avoid recording sensitive payment details or private information that does not belong in a binder carried to appointments. If a note refers to an agreement, identify the file location rather than copying unnecessary confidential details.

    Leave blank space for questions that emerge during the meeting. An answer about setup may raise a question about who provides tables. A delivery time may affect a rental pickup. You do not have to solve every dependency in the room. Write the new question, identify who can answer it, and decide whether it blocks the current choice or can be handled later.

    At the end, pause for a two-minute verbal recap. State what you believe was agreed, what remains open, and who will take each next step. Invite the vendor to correct anything you misunderstood. This is a courtesy as well as a practical check. It lets both sides leave with the same picture of the conversation and makes follow-up easier to write.

    Keep promises and preferences in separate lines. “The couple prefers a late-afternoon ceremony” is helpful context. “Venue confirms access begins at 10:00 a.m.” is a specific answer to verify. Aesthetic inspiration may guide a vendor’s proposal, but it does not automatically define a deliverable. If an image or sample is part of the selected direction, label what you are approving: color, arrangement, material, or overall mood.

    When comparing vendors, use the same criteria for each conversation, but leave a space for category-specific details. One florist may quote delivery separately while another includes it. One venue may include tables, while another expects a rental order. Write the difference in the notes rather than trying to compress every offer into a single total. You can compare equivalent items after each proposal has been clarified.

    For a venue visit, keep a rough sketch or printed floor plan only if it helps you capture the answer. Label the date and identify whether the drawing is illustrative or approved. A handwritten layout is a planning note, not necessarily the final plan. If the venue confirms a restriction or service detail, note the exact question to send afterward. Here Comes The Guide’s venue question guide likewise encourages keeping visit answers organized and putting important terms in writing. Your binder can make that follow-through part of the same meeting record.

    wedding planner binder and notes arranged into vendor follow-up actions
    Turn open vendor questions into clear tasks with named owners.

    Turn the Conversation Into Decisions and Follow-Ups

    Within a day or two, review the meeting page while you still remember the context. You do not need a rigid deadline for every vendor, but a prompt review helps prevent a page of shorthand from becoming the only record. Circle anything that needs clarification, mark options that are still under consideration, and identify the written document that should contain each confirmed detail.

    Then make a compact decision record. It can be a box at the bottom of the meeting page or a separate decision log. Include the decision, date, people who approved it, reason if useful, and any other records that need updating. If there is no decision yet, say what evidence or conversation is needed. This is more reliable than writing “pending” with no explanation.

    Convert every open item into a next action with one owner and a due date or review point. “We need updated pricing” is a need, not an assignment. “Maya emails the caterer for a revised quote at 90 guests by Friday” is clear. “Check with venue” can become “Jordan asks the venue manager to confirm the candle policy before selecting centerpieces.” If the date is flexible, use a trigger such as “before signing the agreement.”

    Use a simple follow-up table: action, owner, due date, status, and where the answer will be saved. Keep it short. If you already have a task tracker, enter the action there and write its task title or location on the binder page. The binder should make the next step visible, not become a competing task list that someone must remember to maintain.

    Send a short recap to the vendor when a detail matters to the proposal or scope. Thank them, summarize the points you understood, and ask them to correct or confirm the items that need to appear in writing. Use a neutral tone. The aim is to create a shared record, not to turn informal notes into a contract. Save the reply or revised document in the agreed digital folder and note the file name or date on the binder page.

    Review a proposal against the notes before accepting it. Check that quantities, dates, locations, inclusions, exclusions, fees, payment timing, and responsibilities match the conversation where relevant. If something differs, ask the vendor to clarify. The Knot’s caterer planning guidance describes requesting a proposal with costs and inclusions, then reviewing the contract and confirming details in writing. The same habit is useful for other vendor categories, adjusted to the service being offered.

    Mark the meeting record as confirmed only when the written source supports the detail. If a contract is not the right place for an operational note, it may belong in a later schedule or email. Record the source type and date, not an assumption that “it was taken care of.” If the vendor is still revising a document, leave the status open and assign someone to check for the updated copy.

    After confirmation, transfer only the durable result to the active vendor summary: the booked service, the agreed scope, the key deadline, the contact, and the reference to the signed or final document. Keep the meeting notes as context if they will help explain how the decision was reached. Archive superseded proposals clearly or remove them from the active section so a stale option does not look current.
    A finished meeting page should answer five questions at a glance: What was the meeting for? What did we hear? What did we decide? What remains open? Where is the current written record? If it cannot, add the missing pointer or owner. This is a more useful quality check than counting how many pages you have filled.
    Adapt the Meeting Sheet to Different Vendors

    Keep the same core page for every vendor, then add a few fields that match the service. This makes it easier to compare conversations without pretending every professional provides the same kind of work. Use a common header and follow-up table, but tailor the questions to the decision in front of you.

    For a venue meeting, add the date options discussed, access and end times, spaces included, setup and cleanup responsibilities, restrictions, and any questions that need written answers. Bring only the floor plan version you are currently discussing and label it clearly. If a detail depends on a different guest count or room layout, write that condition. Afterward, record which items the venue must confirm and where their answer should appear.

    For a catering conversation, note the guest-count assumption, service style, menu options, included rentals or staffing, and what is excluded from the estimate. Add tasting or selection milestones only if they apply to your vendor’s process. Keep dietary and allergy information in the appropriate restricted planning record, not scattered on a general note sheet. When the proposal arrives, compare it with the questions and assumptions you recorded.
    For a photographer, florist, or other creative vendor, identify the deliverable or design decision you are discussing. A reference image should have a short note explaining the feature that matters, such as palette, shape, mood, or coverage preference. Record what is included, what remains an option, and which choices need approval later. Avoid writing “like photo” without saying what you want the vendor to take from it.
    For a planner or coordinator interview, record the service scope, communication rhythm, meeting expectations, who contacts vendors, and how decisions will be approved. Clarify which tasks belong to the couple and which belong to the planning professional. A question list can help you compare candidates, but your notes should capture the actual response and any follow-up document or reference you requested.

    Here is a simple example. You meet with a rental company about ceremony chairs and reception linens. Your brief says you need a quote for 100 guests and asks whether delivery, setup, and removal are included. During the meeting, you learn that setup depends on the venue’s access window and that a fabric swatch can be sent. Your notes mark the package as proposed, the access question as open, and the swatch as a follow-up. After the meeting, one partner asks the venue about access, the other requests the swatch, and you wait to compare the revised quote before approving. The page shows progress without implying that the rental order is already final.

    Do not make the examples into a fixed questionnaire. A vendor’s specialty and your wedding’s requirements will determine what matters. The binder’s repeated structure simply helps you remember to ask, record, distinguish, and follow up. If a field does not help you make or verify a decision, leave it off that vendor’s copy.

    Keep the Binder Current Without Rewriting Your Whole Plan

    Decide which record is authoritative for each changing detail. Your guest count might live in a shared spreadsheet, while the vendor agreement lives in a signed PDF. The binder can point to both and hold a dated summary for a meeting. Avoid printing a fresh copy of every changing list after each conversation. Keep the paper page only when it makes an appointment, review, or decision easier.

    At a short weekly review, look only at open vendor actions and newly received documents. Check whether someone owes an answer, a proposal has changed, or an approval needs to be recorded. Update the status on the meeting page and the digital tracker. If an item is done, write where the final evidence lives and close the task. This small routine keeps a useful binder from turning into a second inbox.

    Keep meeting notes separate from final day-of instructions. The notes may contain comparisons, questions, and superseded ideas. Vendors who need operational information later should receive a concise, approved brief or schedule prepared for that purpose. Do not hand over the whole planning binder as though every page were current or intended for distribution.

    The Wedding Command Center may be useful as a shared planning resource for coordinating tasks and decisions. If you use it with a paper binder, set a clear boundary: the digital workspace or tracker is the live home for changing actions, while the binder carries meeting briefs and references that help you talk through decisions. Choose one place for each type of information and link the two rather than duplicating entire records.

    Near the end of planning, review the confirmed vendor summaries and identify what belongs in the final schedule or coordinator packet. Transfer approved details only, then check them with the relevant vendors. The meeting pages remain useful as a record of how you reached the plan, but the day-of material should be concise, current, and designed for the people using it during the event.

    A wedding planner binder does not need a new section for every meeting. A few repeatable pages, clear status labels, and a dependable follow-up habit are enough to turn vendor conversations into usable planning records. The goal is not a perfect archive. It is leaving each conversation knowing what was learned, what is decided, and what must happen next.

    Sources and Methodology

    This guide reviewed US wedding binder, vendor checklist, planner interview, venue visit, and catering planning pages. The sources commonly provide section lists, category-specific questions, or printable templates. This article combines those needs into a meeting brief and follow-up workflow. The status labels and recordkeeping examples are practical editorial recommendations, not legal or contract advice.

    wedding planner binder with a vendor decision sheet and wedding samples
    Keep a useful paper summary of each confirmed vendor choice.

    FAQ

    What should go in a wedding planner binder for vendor meetings?

    Keep a one-page brief for each important conversation with the vendor, meeting purpose, key constraints, priority questions, answers, status, follow-up owner, and a reference to the current proposal or agreement. Add only the supporting pages needed for that specific meeting.

    How do I take useful notes during a vendor meeting?

    Separate what the vendor said from what you decided and what still needs confirmation. Capture quantities, conditions, and timing when they affect the offer. Before leaving, recap the open questions and next steps so both sides can correct misunderstandings.

    Should I put vendor contracts in my wedding planner binder?

    You can keep a clearly labeled copy or a reference to the secure digital file if that helps during meetings. Treat the current signed agreement as the authoritative version, and do not let handwritten meeting notes replace or silently alter contract terms.

    How do I compare wedding vendor proposals?

    Compare proposals against the same decision criteria, such as scope, quantities, timing, included items, exclusions, and payment schedule where relevant. First clarify assumptions so the offers describe comparable services. Record the source and date of each version.

    What is the difference between a wedding planning binder and a day-of binder?

    A planning binder can contain meeting notes, open questions, comparisons, and decision history. A day-of binder or packet should contain concise, approved information that its users need to carry out the event. Select and verify the final details before transferring them.

    How often should I update vendor meeting notes?

    Review a page soon after the conversation, while its context is fresh, and again when a proposal or written confirmation arrives. During a brief weekly planning review, update open actions and mark which details have become confirmed.

    Can a digital wedding planner replace a paper binder?

    Yes, if it lets your planning team capture meeting briefs, decisions, owners, due dates, and links to the authoritative documents in a way everyone will use. Paper can still help during in-person conversations. Choose the format that makes the workflow easiest to maintain.

  • Wedding Planner Ideas: A Guest Message Station

    Wedding Planner Ideas: A Guest Message Station

    A guest book table can look finished before it has given anyone a reason to stop. The album is centered, the pens are lined up, and a framed sign says “Welcome.” Guests walk by on their way to find a seat. If the couple hoped to keep stories, advice, or voices from the people they love, the setup has done its job as decor but not yet as an invitation.

    One useful wedding planner idea is to design a guest-message station around the keepsake the couple actually wants to revisit. Start with the end result, choose one easy way for guests to contribute, give them a clear prompt, and plan where every message will go after the celebration. That simple sequence connects the look of the station to the experience guests have and the memories the couple receives.

    wedding planner ideas for a wedding guest message station with book and cards
    A message station works best when its keepsake and guest activity fit together.

    This can be a classic book, a photo album with notes, a set of cards, an audio recording point, or a combination that stays simple. The point is not to collect several activities. It is to make one meaningful idea feel natural in the room and easy to carry into the couple’s life afterward.

    Choose the keepsake before the activity

    Many lists of wedding planner ideas begin with objects: a globe, a puzzle, a phone, a print, a jar, or a pile of cards. It is easy to choose something that looks charming in a photograph and harder to decide what will happen to it once the chairs are cleared. Reverse that order. Ask the couple what they would like to keep, where it might live, and how they would like to encounter it again.

    If the answer is “we want something to read together,” a book or a small set of written cards might make sense. If they want to see who was present, a photo-and-message album can keep names and images together. If they would rather hear familiar voices, an audio station may be a better fit. If they want a piece to display in their home, a signed illustration or framed print can turn the messages into an object that belongs on a wall. None of these options is automatically better. They serve different kinds of memories.

    Then define the guest contribution in one sentence. “Write one memory you share with us.” “Take a photo together and add a note.” “Leave us a voice message for a future anniversary.” The sentence is the design brief for the rest of the station. It determines whether you need a page, a card, a camera, a recorder, a sign, or someone who can help guests start.

    A good keepsake also has a realistic place to go. Before ordering or making anything, decide whether it will be read, displayed, played, assembled, or stored. A large object that has no spot at home may become hard to enjoy. Loose cards need an envelope or box that can close. A physical album needs enough room for messages as well as names. A digital file needs a clear storage plan and a second copy if it contains irreplaceable recordings.

    The couple can use three questions to narrow the possibilities:

    • What do we want to remember? The names of guests, their faces, their handwriting, their voices, a story, a wish, or a piece of advice?
    • How will we revisit it? Read it over dinner, turn pages on an anniversary, hang it at home, play recordings, or add entries to a digital archive?
    • What can we care for after the event? Consider who will collect, transport, assemble, and safely store the contributions.

    When the answers are unclear, choose a modest version first. A small bound book with a prompt page may be more useful than a custom object that needs special display space. One album with photos and short notes may suit the couple better than separate photo, video, and audio activities. The easiest keepsake to enjoy is often the one that fits the way the couple already remembers important occasions.

    The Knot’s roundup of wedding guest book alternatives includes formats such as signed pieces, photo options, and paper messages. That range shows how the contribution itself can change while the purpose remains: keep a trace of the people who were there. Use inspiration photos to notice possibilities, then judge each one by the couple’s desired keepsake and the work guests will be asked to do.

    wedding planner ideas with a couple choosing guest message formats
    Choose a message format that feels natural for the couple and their guests.

    Match the format to the way guests want to contribute

    Once the couple knows what they want to keep, choose the action that creates it. The format can be quiet and personal or quick and playful, but guests should understand it at a glance. It can help to think in four families: written messages, photos with captions, recorded voices, and a mixed format that offers one main choice with one alternative.

    Written messages suit couples who want handwriting, practical advice, or notes they can open later. A bound book works when guests can sit or stand comfortably to write. Individual cards work when the couple wants to sort or open messages by milestone. A jar or box can make the interaction brief, though loose notes should have an envelope or container ready before anyone arrives. Give guests a specific question so the page does not begin as a blank assignment.

    For example, invite each person to share one favorite memory with the couple, one small ritual that keeps a relationship close, or a place they hope the couple visits together. One optional prompt is usually enough. Several questions compete for attention and may make the activity feel like a survey. If the couple wants a broad range of messages, place two prompts on separate cards and let a guest choose either one.

    Photos with captions can capture faces and handwriting in the same keepsake. A station might offer a camera and a small album, or printed images with space for notes. Consider the steps involved: take a picture, wait for it to appear, attach it, and write. That is more work than adding a signature. The album needs enough blank space, a writing surface, a pen that works on the page, and a safe place to put photos that have not yet been attached.

    A photo format can be made easier by letting guests choose whether to add an image. Avoid requiring every person to pose or handle equipment. A guest may prefer a simple note, and some guests may not wish to be photographed. Make sure the station still produces a complete keepsake if a visitor leaves only a message or only a signature.

    Recorded voices give guests a different way to leave a story or wish. The setup could use a dedicated audio guestbook service, a recorder managed by a trusted person, or a phone-based method. Capabilities vary, so confirm how recording starts, where files are stored, who can access them, and how the couple can download or keep copies. If the recording method relies on a QR code or personal device, tell guests what will open and what they need to do before they commit to using it.

    Some guests will be more comfortable speaking than writing. Others may prefer a note they can leave quickly without hearing their own voice. Offer one primary format and a low-effort alternative only when both can be managed well. A short audio prompt alongside a paper card can work if someone is responsible for both. A menu of four unrelated activities can turn one thoughtful idea into a confusing set of instructions.

    A mixed station can pair formats that share the same purpose. A photo album with handwritten captions combines faces and text. A guest map with one memory prompt combines a visual keepsake and a short message. An audio station with one printed sign combines voice and a clear instruction. Keep the physical setup to a coherent visual area, and explain the connection in one warm sentence.

    Before deciding, consider the people who will be invited to contribute. Is there somewhere stable to write? Can a guest reach the supplies while seated? Is there enough time during the event to take part? Does the activity require a smartphone, a camera, or a longer conversation? The goal is not to design for an imaginary average guest. It is to offer an easy choice that respects different preferences and does not make participation a condition of belonging.

    Audio-sign guidance from Gathmo’s wedding guestbook prompt examples recommends giving guests a clear action, a reason, and an optional prompt. That sequence is useful beyond audio: tell people what they can do, why the couple would value it, and what they might say if they are unsure. Keep the invitation friendly and optional.

    wedding planner ideas with audio phone and written guest book
    A written book and optional audio phone offer guests different ways to contribute.

    Build a station that is easy to notice and use

    A guest-message idea depends on more than the keepsake. It needs a place, a clear instruction, the materials to complete the action, and someone who can keep the station ready. These are the practical building blocks that make a creative format possible without turning it into another performance for the couple.

    Start with placement. Put the station where guests can notice it without blocking the entrance, bar, seating, or service routes. The first moments after arrival may be busy with greetings, coats, seating, or ceremony directions. If a message takes more than a few seconds, an area where people naturally pause may work better than a narrow doorway. Ask the venue or planner whether the table can stay there throughout the event and who can move it if the room changes.

    Give the sign one clear job. A welcoming headline can set the tone, but the instructions should make the next step obvious. For a written book, the sign might say, “Choose a prompt and leave us a note for our first anniversary.” For a photo album, it might say, “Add a photo, then write the memory you want us to keep.” For audio, it might say, “Pick up the receiver and leave us a short voice message.” Keep the prompt concrete and easy to answer without revealing private information.

    Include an example when the format needs explaining. A sample card, completed page, or small demonstration photo can show the length and style of an entry. Avoid displaying an example that looks like a required script. Guests should be able to understand the task and then express themselves in their own way.

    Test the materials before the wedding. Use the exact pen on the actual paper, surface, wood, or photo backing. Check that pages turn easily and that the book stays open. Try the camera or recorder in the room where it will be placed. If there is a digital step, ask someone unfamiliar with the setup to follow the instructions once. A test is especially useful when a handmade or coated surface may not work with ordinary ink.

    Prepare a small backup kit that matches the chosen format. It might contain extra pens, blank cards, tape or photo corners, a second sign, a charger, a power bank, or a box for finished contributions. Keep the backup near the station, but out of the way. Make one person responsible for checking whether the main supplies remain usable. That person does not have to supervise guests. They can simply answer the first question, replace a pen, and protect the keepsake from spills or relocation.

    Ask the couple what they want to share and what should remain private. A message station does not need to ask about sensitive subjects or invite guests to post personal information publicly. If contributions will be photographed or shared digitally, explain where they will go. For a private keepsake, use a format and collection process that help the couple keep the messages together and limit accidental exposure.

    Decide how the station will close. A book can be placed in a labeled bag or given to a named person. Loose cards can be counted into a closed box. Photo strips can be gathered before the display comes down. An audio recorder can be returned, charged, and transferred to the person responsible for saving the files. Write this task into the day-of handoff so the keepsake is not left behind when vendors clear the room.

    wedding planner ideas for a clear prompt and tidy message table
    One clear instruction helps guests understand how to leave a message.

    Give the messages a destination after the wedding

    The final building block is what happens after guests have contributed. Design the destination while choosing the format, not months later when someone discovers a box of cards. The couple might want a book on a shelf, an illustration on a wall, a shared audio collection, or a set of letters to open over time. Each choice needs a small amount of care to move from a wedding activity into a lasting keepsake.

    For written contributions, label the container before the event and choose a person who will bring it home. If the cards are meant for different anniversaries, separate them only if the guests can understand the instruction easily. Keep the prompt and the delivery method together so the couple can remember what the notes are for. If the messages contain personal advice, avoid leaving them unattended in a public area after the event.

    For photos, choose an album or archive plan that does not depend on assembling everything during the reception. The couple can invite guests to place prints in a temporary box and add them to pages later, or assign a helper to insert them as the event goes on. If the photos include written captions, keep the notes attached to the correct image. A photo without a name may still be meaningful, but the couple should know whether identification matters to them.

    For audio, decide who will collect the device, transfer the recordings, create a backup, and let the couple know where the files are stored. Test playback and file naming before the celebration if using a new recording method. Choose a private place to share or listen to personal messages. A voice recording can be a lovely way to remember a guest, but it should not be treated as an automatic replacement for a written note from anyone who prefers not to record.

    A digital contribution can be helpful for guests who are not attending, but it should still feel connected to the event. Tell remote contributors what they are being invited to send and when the collection will close. Keep a copy of the instructions with the archive. If there are two separate collections, such as a public photo gallery and a private advice page, label them clearly so the couple can find each later.

    Adapt the station to the size and rhythm of the celebration. At a small gathering, a prompt that invites a longer memory may fit the pace. At a large reception, a quick card, signature, or photo caption may be easier for guests to complete. During a short cocktail hour, avoid an activity that requires a queue or a lengthy recording. At a multi-day celebration, a simple written keepsake might be available at more than one gathering, while one person keeps contributions together between events.

    For a seated dinner, a small prompt card at each table can remind guests of an optional activity without drawing them away from conversation. For an open reception, a station on a visible side table may be easier to approach at a natural pause. For an outdoor event, use a container or surface that can be closed and moved if weather changes. The couple and planner can choose the least complicated setup that fits the actual space and schedule.

    Before finalizing, read the sign as a guest who has just arrived. Can you tell what to do in a few seconds? Do you know how much to write or how long to record? Is the activity optional? Can you complete it without asking the couple for help? Can the result be kept safely? If the answer to one of these questions is unclear, simplify a step or revise the prompt.

    A memorable wedding planner idea does not need an elaborate installation. It needs a clear reason to exist, a contribution guests can comfortably make, and a destination for what they leave behind. When those pieces fit together, the station can feel personal while staying easy to use and easy to care for.

    Sources and methodology

    This article reviewed wedding publication, photo-book, stationery, and guestbook-provider pages for examples of written, photo, and audio contributions. The Knot supports the range of guestbook alternatives. Gathmo supports a simple instruction-and-prompt structure for an audio-message sign. The keepsake-first selection sequence and planning checks here are editorial recommendations, not claims that one activity works for every couple or guest list.

    wedding planner ideas for preserving handwritten guest messages
    A planned destination helps the couple revisit the messages after the wedding.

    FAQ

    What are some wedding planner ideas for guest participation?

    Try one guest-message station with a format that fits the couple: a prompted book, a photo album with captions, a card box, or an audio guestbook. Make the invitation optional, give a clear prompt, and decide how the contributions will be collected after the celebration.

    How do we choose a wedding guest book alternative?

    Start with what you want to keep and how you might revisit it. Choose a book or cards for written messages, a photo format for faces and captions, audio for spoken memories, or a display piece for signatures. Then check how guests will use it and where it will live afterward.

    What should we write on a wedding guest book sign?

    Use one action, a short reason, and an optional prompt. For example: “Leave us a note for our first anniversary. What is one memory from today you hope we remember?” Adjust the wording to match the format and keep the request easy to understand.

    Where should we put a guest-message station?

    Choose a visible place where guests naturally pause, while keeping entrances, service paths, and seating clear. Ask the venue or planner whether the location can remain available through the event and name a person who can move or collect the station if needed.

    How can we make a guest book easier for guests to use?

    Keep the instructions short, add one specific prompt, provide tested materials, and show an example if the task is unfamiliar. Let guests choose a simpler option when possible, and do not require anyone to be photographed or recorded.

    Who should collect the guest book at the end of the wedding?

    Assign one trusted person before the event and include collection in the day-of handoff. Tell them where the book, cards, photos, or recorder should go. For digital messages, name the person responsible for transferring and backing up the files.

    Can we offer both a physical and digital guest book?

    You can, if each option has a clear purpose and someone can maintain it. Consider whether guests might be confused by two separate instructions. One main format with a simple alternative can be easier to explain, manage, and revisit.

  • Wedding Preparations: Plan a Useful Venue Walkthrough

    Wedding Preparations: Plan a Useful Venue Walkthrough

    A wedding can look settled on a screen and still feel uncertain once you stand in the actual rooms. The ceremony layout is in a document, the vendor list is current, and everyone has a rough schedule. Then someone asks which door the florist should use, where guests will wait between spaces, or who is confirming the final room setup. Those questions are easier to answer while the venue team and the plan are in front of you.

    That is the purpose of a useful venue walkthrough. It turns wedding preparations from a collection of decisions into a plan connected to real entrances, routes, rooms, setup windows, and people. The visit is not another opportunity to redesign everything. It is a chance to identify what still needs confirmation, agree who will get it, and share the answer with the team.

    wedding preparations with a couple and planner reviewing a venue floor plan
    A floor plan and an on-site review connect wedding plans to the real venue.

    Think of the review as a short rehearsal of the place, rather than a tour of its prettiest features. The couple can leave with a clear route from arrival through the ceremony and reception, plus a short list of open items with named owners. That record will be more useful on the wedding day than a long set of photos without notes.

    Give each venue visit a different job

    Venue visits often get treated as interchangeable. A couple may revisit the property several times, but each visit can answer a different question. Early on, the main question is whether the venue fits the celebration at all. Later, a design or production visit can test a specific plan with the people who need to build it. Near the event, the final review can confirm that the current documents match the actual space and that someone owns every remaining decision.

    This distinction keeps a visit from becoming an unstructured discussion about every wedding detail. Before scheduling, write one sentence that describes what the meeting needs to resolve. For an early tour, it might be: “Can this venue support the guest experience and event format we want?” For a production visit, it might be: “Can the ceremony layout, rental plan, and room transition work in this space?” For a final review, it might be: “Are the route, access, setup responsibilities, and open confirmations clear enough for the day-of team?”

    The participants should follow that purpose. A first visit may only require the couple and a venue representative. A production review may benefit from the planner, coordinator, florist, rental partner, or caterer if the decisions affect their work. A final venue meeting usually needs the couple or an authorized decision-maker, the venue contact who understands the event operations, and the planner or coordinator who will carry the plan on the day. Invite only the people who can answer, approve, or act on the questions at hand.

    A wedding coordinator’s venue walkthrough questions distinguish what couples may need to learn on an initial tour from what should be revisited later, including access times, a possible room flip, rehearsal logistics, and what the venue supplies. A final walkthrough guide from WeddingWire also recommends checking arrival and vendor access against the event plan and signed details. Use these as prompts, then confirm the answers for your own venue and contract.

    It helps to bring a small packet instead of trying to remember every version of the plan. Include the current floor plan, event sequence, vendor contacts, venue agreement, and a list of unresolved questions. Label each document with its date. If people arrive with different floor plans or an old timeline, pause and agree which file is current before debating the room.

    Not every wedding needs three formal visits. A single venue may provide a thorough final meeting, while a private property or multi-space event may need separate technical checks. Treat the stages as a way to assign purpose, not a required number of appointments. The useful test is whether a visit is likely to resolve a real decision that cannot be settled by email, a diagram, or a short call.

    wedding preparations at a venue tour with the couple and manager
    Give each venue visit a clear purpose, from evaluation to final confirmation.

    Walk the day in the order people will experience it

    Once the group is together, resist the temptation to start with the reception room because it is the most decorated space. Begin where the first person will arrive and follow the sequence of the day. That makes gaps easier to spot. Ask the venue representative to show the route, rather than describing it from a floor plan. Pause wherever two groups, tasks, or room uses meet.

    Start with vendor arrival and setup. Confirm which entrance each vendor should use, where unloading can happen, and who will let a crew into a room. Check how the route works for equipment that is larger than a tote bag: rental pieces, floral containers, audio gear, instruments, or catering supplies. If a path includes a shared hall, narrow doorway, elevator, stairs, or a second event space, record the detail and ask who will coordinate access. Keep the plan tied to written venue rules rather than assuming that a route used on the tour will be available during the event.

    Then follow the guest’s arrival. Where will a car or shuttle stop? Which entrance should a guest see first? Is the sign visible before a person reaches a confusing fork in the path? Walk from parking or drop-off to the ceremony area at the pace of a guest who has never been there. Consider where someone might wait if they arrive early, where coats or personal items belong if the venue offers a place, and which contact can answer a question without sending the couple a message.

    Move to the ceremony setup. Stand where the couple expects to stand and look toward the seats. Then choose a few representative guest viewpoints, including a seat farther back and any place with a different angle. Notice doors, columns, service areas, speaker locations, and routes that could enter the visual field or interrupt movement. If a musician, photographer, reader, or attendant needs a position, identify it on the floor plan and confirm whether that location changes a guest route.

    Next, trace the transition after the ceremony. Where do guests go while the room changes or the wedding party takes portraits? Is the same room being reset, or does the group move to a different area? Who directs people, and what sign or verbal cue will tell them where to go? A room diagram may show that two spaces connect, but a short route rehearsal can reveal a doorway that becomes crowded or a stopping point where guests have no clear next step.

    Finish the route at the end of the celebration. Confirm the guest exit, the vendor strike route, where rented items wait for collection, and which personal items need to leave with the couple or a trusted person. The room-clear time may differ from the last guest departure, so capture each time separately if the venue gives separate instructions. Do not rely on someone remembering a verbal note made during a busy meeting.

    Walk the vendor path separately from the guest path. A route that feels obvious to the couple may send a crew through a guest entrance or across a ceremony setup. Ask the venue contact to describe the normal setup and breakdown process, then confirm any exception that applies to your event. You do not have to solve every technical issue at the site. You do need to learn which vendor or venue contact will resolve it and by when.

    As you move, take a few reference photos from consistent places and attach short captions. “View from the back row toward the ceremony” is more useful than an unlabeled image among dozens of camera-roll pictures. Photograph the location of a planned item, not guests or venue staff without permission. A floor plan should remain the reference for dimensions and placement. Photos help people recognize the location, but they do not replace a measured plan or the venue’s written approval.

    wedding preparations as a couple and planner walk the event route
    Walk the route guests and vendors will use instead of relying on a diagram alone.

    Turn what you notice into decisions someone can confirm

    A walkthrough produces observations, but an observation by itself does not change the plan. “The entrance is around the side” is not enough for a vendor arriving with equipment. “We might move the guests after the ceremony” is not a cue that a coordinator can use. Convert each observation into a question with an answer, an owner, and a next step.

    Use a simple decision record with five fields: the location or topic, what is currently known, what still needs an answer, the person responsible for confirming it, and the date or event that should prompt a follow-up. Add the source of confirmation when the answer matters, such as the venue contact, a contract clause, the caterer, or the planner. This makes it easier to distinguish a confirmed rule from a convenient assumption.

    • Location: name the room, entrance, route, or event moment.
    • Current understanding: state what the group believes is true.
    • Open question: write the exact uncertainty in plain language.
    • Owner: assign one person to obtain the answer. Others may help, but one person should close the loop.
    • Proof and due date: record where the answer will be confirmed and when the planning team needs it.

    For example, “The florist can unload near the garden” becomes: “Confirm whether the garden service door is available for floral delivery during our access window. The florist needs the door location and unloading instructions. The planner will ask the venue contact and add the written reply to the vendor packet before the final schedule is shared.” This avoids inventing an answer while still making the next action clear.

    Use the same method for decisions about a ceremony-to-reception transition, a room reset, a weather alternative, a power request, or a delivery. State which person has authority to approve the change. A couple can choose the preferred layout, for example, while the venue confirms that the layout meets its rules and the rental company confirms the equipment. Responsibility should follow the person who can actually provide the answer.

    Keep decisions and tasks separate. “Ceremony chairs face the garden” is a decision. “Venue team places the chairs by the approved plan” is a task. “Planner receives a photo after setup” is a verification step. When all three are compressed into one vague note, the team may agree on the design but still miss the setup or confirmation.

    When an answer changes the plan, update the floor plan, timeline, and vendor instructions together. Avoid sending one person a revised text while everyone else keeps the old document. Mark the revised file clearly and tell each affected owner what changed. The goal is not to create paperwork for its own sake. It is to make sure the same decision reaches the people who need it before they arrive.

    Some questions will remain open because a vendor has not been booked, a final guest count is not known, or the venue cannot confirm a staffing detail yet. Keep those questions visible and state what information would resolve them. If the answer depends on a later milestone, name that milestone instead of assigning an unrealistic date. For example, revisit the seating layout when the confirmed guest count arrives, then ask the venue to approve the clearances.

    wedding preparations with a planner and venue representative reviewing a plan
    Assign one person to confirm each open venue question.

    Close the visit with a clear handoff

    Before anyone leaves, read the open-item list out loud. This is the moment to catch a question that sounded answered but still belongs to nobody. Ask the venue contact to confirm the items that are within the venue’s control, and ask each vendor to confirm the part that belongs to their service. The couple should not become the default courier for every conversation.

    Write a short summary with three sections: decisions made, items still waiting, and who receives the next update. Include the date of the meeting, the people who attended, the current plan file, and the preferred contact channel. A useful summary can fit on one page. If the visit produces many photos, put the meaningful ones next to the relevant location or question rather than sending an unexplained folder.

    Send the summary while the details are still easy to remember. Invite each owner to correct anything that was recorded incorrectly and to reply with confirmation or a clear next step. Store that response with the event plan. Whether you use a shared document, a wedding planning binder, or The Wedding Command Center as one part of your planning system, make sure the current answer is easy for the responsible people to find.

    Close the loop by updating the files the team will actually use. The floor plan should show approved arrangements. The event schedule should show confirmed access and transition cues. The vendor contact sheet should identify who answers questions on site. If the venue uses its own event order or production document, compare it with the couple’s version and resolve differences before the wedding week.

    Agree on a trigger for another review. A substantial change in the guest count, a new vendor, a change in ceremony or reception location, a weather decision, or a venue staffing change may affect earlier answers. The trigger should identify who notices the change and who schedules the follow-up. A new visit is not always needed. Sometimes one updated diagram and a written confirmation will do. The point is to notice when a decision made on site no longer matches the plan.

    It can be tempting to end a venue meeting with “everything looks good.” Replace that phrase with a quick recap: these choices are final, these questions remain open, these people own them, and this is where the current version lives. Wedding preparations become more reliable when the team can tell the difference between a lovely idea, a venue-approved setup, and an action that still needs doing.

    Sources and methodology

    This article draws on wedding coordinator, venue, and event-planning guidance reviewed for venue tours, final walkthroughs, event routes, access, and team responsibilities. The coordinator resources inform the distinction between early questions and final confirmation. The WeddingWire guide informs the need to verify vendor arrival and venue flow against the current plan. The route rehearsal and five-field decision record are original practical frameworks, not a universal venue rule. Confirm timing, access, and room arrangements with your own venue and vendors.

    wedding preparations with a couple and planner confirming site visit notes
    A concise written recap helps the whole team use the same plan.

    FAQ

    What is the purpose of a final wedding venue walkthrough?

    It is an opportunity to check that the current event plan fits the real rooms, access rules, and people responsible for carrying it out. Use the visit to confirm open questions, test important guest and vendor routes, and assign any follow-up work.

    Who should attend the final venue walkthrough?

    Invite the couple or a decision-maker, the venue contact who can confirm operations, and the planner or coordinator who will manage the day. Add a vendor only when that person’s setup, equipment, or schedule is part of a decision that needs their input.

    When should we schedule a final walkthrough?

    Ask your venue and planner when a final review will be most useful for your event. The right point depends on when the venue can confirm operations and when your vendors need an approved layout or access plan. Do not treat a generic online date range as a rule for every contract.

    What should we bring to a wedding venue walkthrough?

    Bring the current floor plan, event sequence, vendor contact list, relevant venue agreement, and a short list of open questions. Label documents with their revision date so attendees can tell which version is current. Take reference photos only where they help explain a location or route.

    What should we check during a venue site visit?

    Follow the day from vendor arrival and guest entry through the ceremony, room transitions, reception, and exit. Check the routes, wait points, access instructions, and person responsible for each unresolved venue detail. Confirm measurements and venue rules with the appropriate professional.

    How do we keep venue walkthrough notes useful?

    For every open item, record the location, the exact question, one owner, the required confirmation, and a due date or milestone. After the meeting, share the notes with the people who need to act and update the relevant plan when an answer changes.

    Do we need to revisit the venue after the final walkthrough?

    Not automatically. Revisit or request a new confirmation when a meaningful change affects the agreed layout, access, vendor requirements, staffing, or weather plan. Some updates can be handled with a revised document and written approval instead of another site meeting.

  • Wedding Preparations Ideas for a Calmer Morning

    Wedding Preparations Ideas for a Calmer Morning

    The best wedding preparations ideas are the ones that make the hours before the ceremony feel like yours. Some couples want a lively room with their whole wedding party. Others would rather get ready with two or three close people, keep partners in separate spaces until a planned reveal, or begin the day quietly together. None of those choices is more correct. The useful starting point is to decide what you want the morning to feel like, then build a practical plan around that preference.

    It is easy to copy a sample timeline or focus on making the room photo-ready before asking who you want there. A wedding morning has beauty appointments, outfit changes, family visits, vendor arrivals, and a departure time, but it also has small moments you may want to protect. A shared breakfast, a private note, a short walk, or a few quiet minutes can matter more than another scheduled activity.

    wedding preparations ideas in a calm suite for a personal morning
    Choose a morning setting that reflects how you want the day to begin.

    Start with three questions: Who helps you feel at ease? How much conversation do you want while getting ready? Which one moment would you be disappointed to miss? Your answers will help you choose a format and make the day easier to plan without filling every quiet space with another task.

    Start with the feeling you want from your wedding morning

    Take five minutes with your partner to picture the morning from the first arrival to the trip to the ceremony. Do not begin with a detailed schedule. Imagine the room, the people nearby, and the amount of activity around you. Do you picture music and conversation? A small circle of familiar faces? Time alone before everyone joins? A few separate places where different parts of the wedding party can get ready at their own pace?

    Each answer affects practical decisions. A big shared group may need more than one place to sit, enough space for getting dressed, and a clear quiet corner for someone who needs a break. A small group may make a hotel room workable where a larger party would feel crowded. Separate preparation spaces require a communication plan and a realistic way to get everyone where they need to be. A quiet start may mean postponing visitors or asking one person to handle routine messages.

    Write down a few words that describe the mood you want, such as “lively but unhurried,” “small and familiar,” or “quiet first, social later.” Then name one priority and one limit. A priority might be sharing breakfast with a parent. A limit could be no unplanned visitors before a certain point. This short note gives you a standard for considering ideas. If a suggestion adds work but does not support the mood or priority, you can leave it out.

    This conversation should include both partners. It is common for one person to receive more attention in photos and preparation advice, while the other side of the wedding day is treated as an afterthought. Each partner can choose their own format. You might prefer a full suite with friends while your partner wants a calm room with one sibling. The two plans do not need to match, but they should fit the same departure and ceremony schedule.

    Keep the decision visible with your planning notes. The Wedding Command Center can be a natural place to keep your chosen format, a short version of the schedule, and the names of the people who are helping. Keep it simple enough to share. The aim is to help everyone understand the morning you have chosen, not to create another complicated plan.

    wedding preparations ideas for a bride and two close loved ones
    A small circle can make space for relaxed conversation and practical help.

    Choose a preparation format that fits your people and place

    The full-group suite

    Choose a shared suite if having friends and family close is part of what you are looking forward to. A lively group can make the morning feel like a celebration from the start. It can also give attendants a comfortable place to gather while different people take turns with hair, makeup, or final outfit details. Before you commit, confirm how many people can be in the room comfortably, what time you can enter, and whether there is a separate area for changing or storing coats and bags.

    The tradeoff is that a full room can make private conversations and quiet pauses harder. Decide whether every person needs to stay for the entire preparation period. You may invite the group for breakfast, then let some guests leave while you dress, or keep one adjoining room open as a place to sit away from the styling activity. A shared morning does not require constant group activity.

    The small-circle start

    Prepare with a few people whose presence feels supportive, such as a sibling, parent, close friend, or chosen attendant. This format suits couples who value conversation but do not want to manage a crowded room. The smaller group may also make it easier to move between stations, enjoy a snack, or take a short pause without turning the room into a waiting area.

    Let other friends and relatives know how they can join the day later. You could see them at the venue, include them in a planned photo, or meet them during a pre-ceremony gathering. Explain the arrangement with warmth and early notice so no one is left guessing about the morning. A smaller preparation group can still be hospitable and meaningful.

    Separate spaces with a planned meeting point

    Separate rooms can help each partner keep a preferred routine, reduce crowding, or preserve a first look. They can also be practical when the couple has different preparation needs or their wedding party members are staying in different places. Decide where each group will get ready, when each person must be dressed, and how the couple or wedding party will travel to the next location. Share the plan with the photographer or coordinator if those professionals are helping manage the sequence.

    The main tradeoff is coordination between spaces. If one group is ready early, give them a comfortable place to wait that does not interrupt the other group. Choose one person to communicate routine updates, rather than asking the couple to answer messages while getting dressed. If you want a first look or a shared moment before the ceremony, decide on its place and general window in advance, then confirm the details with your photo team.

    A quieter, couple-centered morning

    Some couples would rather spend part of the preparation time together or keep the guest list especially small. If that is your preference, ask the venue or photographer what arrangements are possible and which moments need to happen separately. A couple can share breakfast, exchange letters, or spend a quiet stretch together before getting dressed, while still keeping any private reveal they want later. If both partners get ready in one place, agree on wardrobe privacy, changing areas, and the point when helpers arrive.

    A quieter plan may still have a busy stretch when hair, makeup, dressing, or vendor arrivals happen. Decide which friends or family members you want nearby for that portion and when the room should become private again. The goal is not to keep the day silent. It is to decide which parts you want to share and which parts you want to experience on your own terms.

    wedding preparations ideas for partners getting ready in separate spaces
    Separate preparation rooms can suit couples who prefer distinct spaces.

    Build the room and activities around that choice

    Once you have chosen a format, use the space you have in a way that supports it. A room does not need elaborate decor to feel personal. A clear surface for personal details, a comfortable chair for someone who is waiting, a place for bags away from the main activity, and a simple food and drink station can make the room more usable. If your venue has multiple preparation spaces, ask to see them at a similar time of day to your planned use.

    Think about movement through the room. People may arrive, sit for a service, change clothes, step out, and return. Keep a direct path to the bathroom and exit. Put coats, overnight bags, and extra shoes in one agreed area rather than spreading them across the room. If vendors need access to outlets, mirrors, or a particular corner, ask what they need before assigning that space to a different activity.

    Give the activities a similar edit. Choose one or two moments that help create the morning you pictured. These might be a relaxed breakfast, a short toast, a note exchange, a playlist chosen by a friend, a brief photo window, or a few minutes outside. You do not need to include every tradition, gift exchange, group photo, and posed moment that appears in someone else’s schedule. Choose the parts that matter to you and leave room for transitions.

    If photographs matter to you, tell your photographer what you want documented and what you prefer to experience privately. You might want a few natural moments with family but no long sequence of posed preparation images. You might want the detail photographs taken while you are in another room. Or you might want the morning to stay off camera until you are fully ready. Your photographer can help you find a coverage plan that fits. A preparation guide from Nydam Photography highlights light, a brief window for details, and a small tidy-up as practical considerations, but your preferences set the scope.

    Food and drink should fit the people, room, and time you actually have. Choose something easy to serve and eat while others are getting ready, and ask a helper to set it out. If you do not want a group meal, a few individual options may be simpler. No one has to recreate a brunch spread from a photograph to host a thoughtful morning.

    Plan where phones go and who will answer ordinary questions. A trusted helper can respond to “where do I park?” or “when should I arrive?” while you focus on getting ready. Let vendors know the best contact for the morning. If you want to look at messages at a particular time, choose that window; if you want your phone put away, ask someone to hold it. These small boundaries help the social experience stay close to what you intended.

    Keep the two partners’ plans connected without forcing them to be identical. Compare departure times, access instructions, photo arrangements, and the ceremony arrival point. If one partner’s plan includes a gathering and the other’s is private, make sure helpers on both sides know who is available and who should be contacted if something changes.

    wedding preparations ideas in an airy organized preparation room
    Clear activity zones help a getting-ready room feel easier to use.

    Give the morning a flexible shape and a simple backup

    Use the ceremony arrival time as an anchor. Work backward with your beauty team, photographer, transportation provider, and venue contact to place the activities that have real dependencies. Then protect a small buffer before departure. A sample schedule can be useful for getting started, but published timelines are examples rather than rules. The Knot’s sample morning timeline uses a particular ceremony time and invites couples to adjust it. Your team can help fit your schedule to your ceremony, travel, group size, and chosen moments.

    Write the sequence in plain language. For example: “Arrivals and breakfast, styling and conversation, private pause, final dressing and chosen photos, everyone ready, leave for ceremony.” Add times where a vendor, transport, or venue needs one. You do not need to assign an exact minute to every conversation or cup of coffee. Let the plan tell people what matters and where to be, while leaving some open space for the parts you cannot predict.

    Mark the moments that are optional. If there is not enough time, would you drop a group toast, shorten the photo list, or move a gift exchange to another day? Decide this in advance. The answer gives your helper permission to simplify the plan without asking you to make a fresh decision while getting dressed.

    Name a point person for each preparation space. That person can welcome arrivals, direct routine vendor questions, and tell the other group when it is time to leave. They should know which activities are important, which can move, and how you prefer to be contacted. Avoid giving a long list of unrelated jobs to one friend who is also trying to get ready.

    Choose one realistic backup for a room or timing change. If your room is not available when expected, know whether another booked room or a nearby private space can work. If travel runs late, know which optional moment will be shortened. If you planned a quiet start and visitors arrive early, ask the point person to greet them elsewhere until the time you agreed. Keep the backup focused on preserving the part of the morning that matters most.

    Share a short version with the people involved a few days beforehand. Include the address, arrival window, what to bring, where to put personal belongings, how you will travel, and who will answer questions. If the plan changes, send one clear update from a designated helper. A simple message is easier to follow than several overlapping reminders.

    Finally, reconsider the plan after the venue walk-through or the final timeline discussion. Does the room fit the number of people you invited? Is there a place to wait without interrupting styling or dressing? Can you get to the ceremony without turning the last part of the morning into a rush? If not, reduce the group, change the room, or simplify an activity. The preparation plan is successful when it supports the experience you chose and gets you to the ceremony ready to begin.

    Sources and methodology

    This article synthesizes wedding-planning, venue, and photography guidance reviewed for morning schedules, room use, and getting-ready preferences. The Knot’s adaptable sample morning timeline informs the distinction between fixed dependencies and optional activities. Nydam Photography’s getting-ready guide informs the optional photo considerations. Schedules and room access vary, so confirm timing, space, and vendor needs with your own team. The article does not prescribe a universal start time or a required social format.

    wedding preparations ideas for a quiet pause before the ceremony
    A quiet pause can be part of the plan before the ceremony.

    FAQ

    What should we do first when planning wedding preparations?

    Decide what you want the morning to feel like and who you want with you. Then check the available rooms, vendor needs, and departure time. Those choices will shape the schedule and the amount of preparation space you need.

    How do we make the wedding morning feel more personal?

    Choose one or two moments that matter to you, such as breakfast with a parent, a note exchange, a favorite playlist, or a quiet pause. Keep the rest of the morning simple enough to enjoy those moments without rushing between activities.

    Should the whole wedding party get ready together?

    Only if a shared room fits your preference and the available space. You can invite a smaller group, have people join later, or use separate rooms. Let everyone know the plan early so they understand when and where they are welcome.

    How can we include quiet time in the morning?

    Set aside a short period with no visitors or scheduled photos, and ask a trusted person to handle messages and routine questions. Tell the people helping you when the room should be private and when the next activity begins.

    What if we do not have a bridal suite?

    Consider a hotel room, private residence, salon for styling, or another space already available to you. Compare access time, changing privacy, the number of people, travel, and where you will get dressed. Confirm that any alternate location fits your schedule.

    How detailed should our wedding morning timeline be?

    Give times to vendor arrivals, appointments, photos you have chosen, and travel or venue access. Keep meals, conversation, and personal pauses flexible. Build the schedule backward from the ceremony with the professionals involved, then note which activities can be shortened.

    Who should answer questions while we are getting ready?

    Name a point person for each space or group. Share the timeline, arrival instructions, and vendor contacts with them beforehand. This lets helpers answer routine questions and update the other group without making the couple the main contact.